FREE 1 to 3-Day Delivery on Orders $149+ Details

How to Install Teraflex Performance Leveling Kit on your 07-18 Jeep Wrangler JK 4 Door; 2018 Jeep Wrangler JL 4 Door
Installation Time
4 hours
Tools Required
- 10mm, 15mm, 18mm, 19mm, and 21mm sockets and/or wrenches
- Torque wrench (ft. lbs.)
- Floor jack + jack stands
- Flathead screwdriver or plastic clip release tool
- Breaker bar, impact wrench, air tools (optional but helpful)
- Drill and ½” drill bit (Rubicon models ONLY)

Shop Parts in this Guide
Note: The kit comes with new sway bar links for the front only. You will use the existing factory sway bar links on the rear.
FRONT
Step One: Remove Track Bar Bolts (Front and Rear)
“A”: With the vehicle on a level surface, remove one side bolt from the front track bar (21mm).
“B”: Remove one side bolt from the rear track bar (21mm).
*These bolts will be the very last items re-installed after completing the installation of the leveling kit.
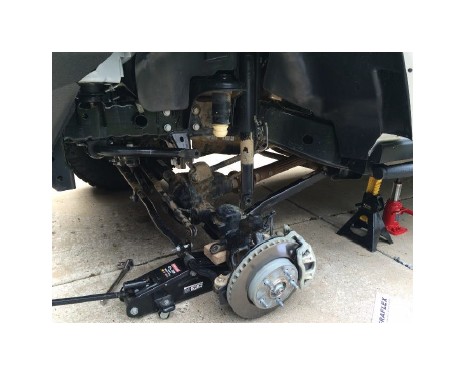
Step Two: Raise Jeep and Remove Wheel
“A”: Chock the wheels which will not be lifted and break loose the wheel lug nuts for the tire that will be lifted. Raise the vehicle along the side frame using a floor jack, and place a jack stand beneath it for support.
“B”: Place a floor jack beneath the axle for support. Unscrew the lug nuts completely and remove the wheel.
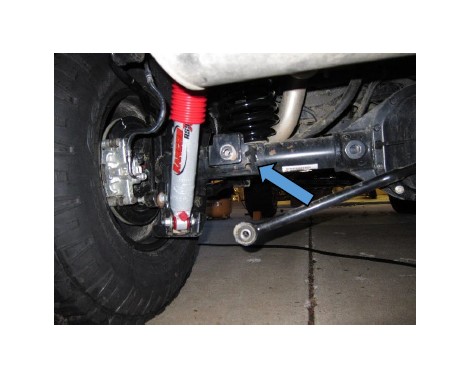
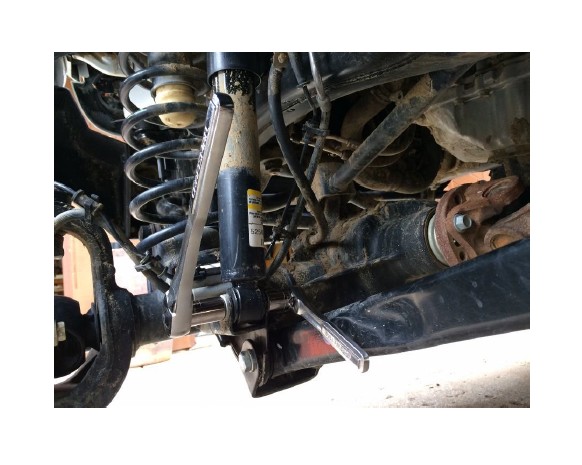
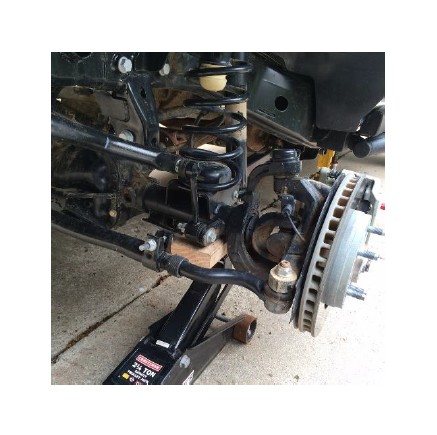
Step Three: Remove Lower Shock Bolt
Remove the lower shock bolt (18mm). *The axle will begin to drop slightly. You will use the floor jack that you placed to raise and lower the axle in order to remove/install the new components. At the same time, the jack stand that was placed earlier will be used to support the weight of the vehicle itself.
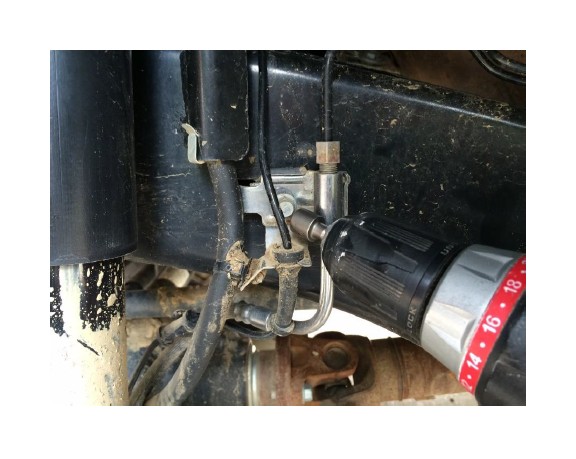
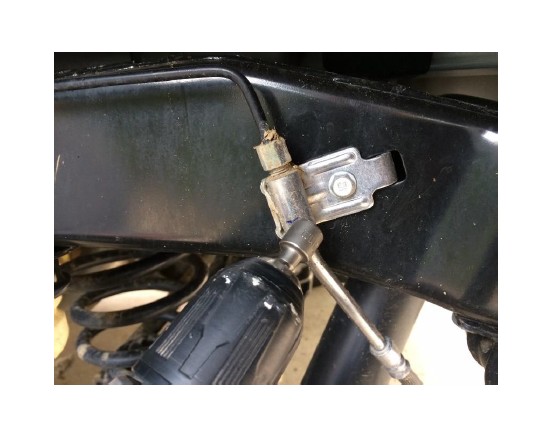
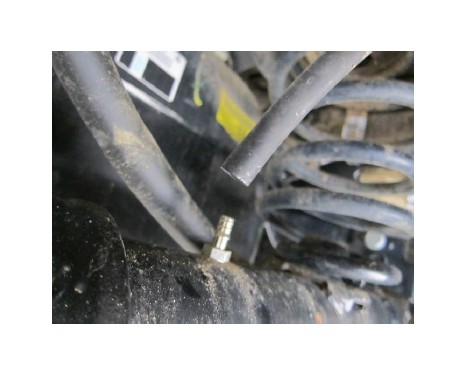
Step Four: Release Brake Line Bracket (2012 Models)
Remove the 10mm bolt allowing the brake line bracket to hang free.
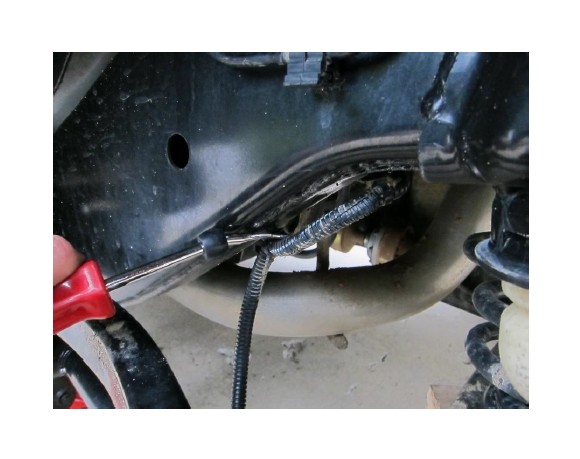
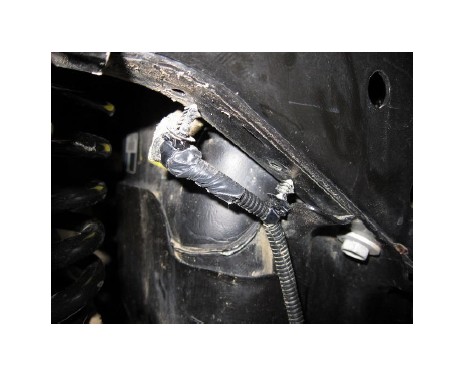
Step Five: Pop out Wiring Harness Retainers
Using a flathead screwdriver or plastic clip release tool, pop loose the plastic clips holding down the wiring harness.
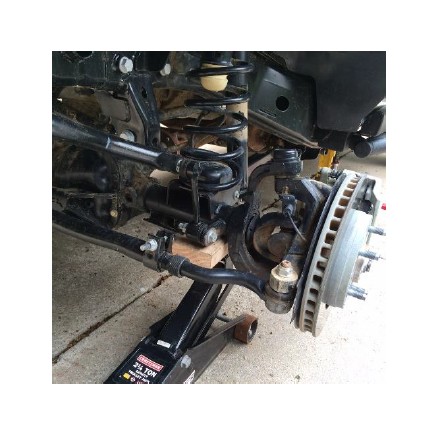
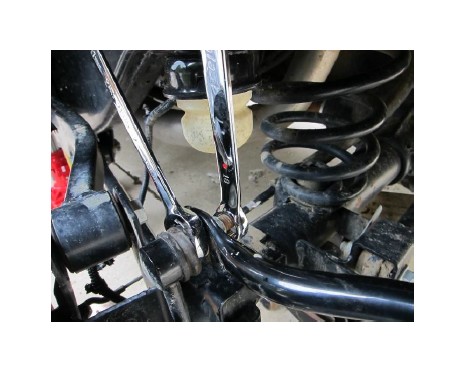
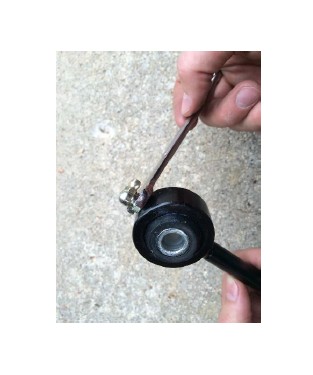
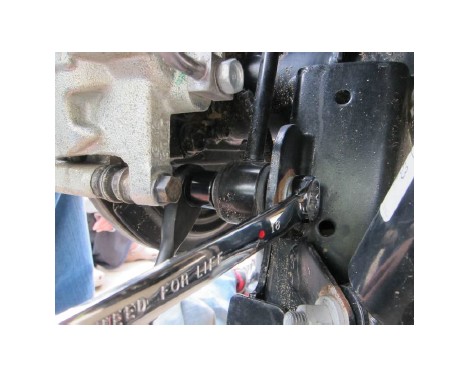
Step Six: Remove Sway Bar Link
“A”: Remove lower sway bar link bolt (18mm).

“B”: Remove upper sway bar link bolt. You will use a 19mm wrench to hold the bolt while using an 18mm wrench to remove the nut.
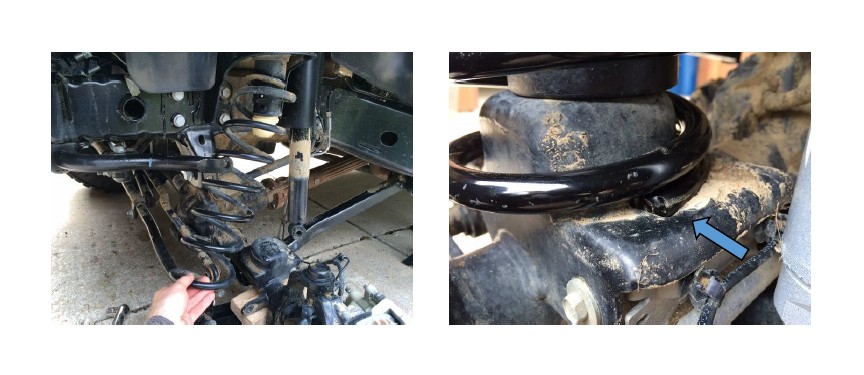
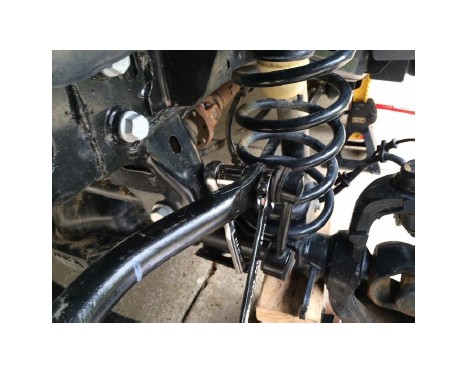
Step Seven: Remove / Replace Spring
Lower the axle using the floor jack that was placed beneath it for support, until the spring can be pulled out by hand. Replace with new Teraflex spring making sure the bottom of the spring is seated against the base plate groove, and raise the axle until the bolt holes line up for the sway bar links / lower shock bolt. *While working on the springs, be careful not to allow the brake rotor to rest on the ground. The axle should always be supported by the floor jack.
Step Eight: Reinstall Sway Bar Links
“A”: The new front sway bar links come with bushings and grease fittings loose in the parts bag. Install the bushings.
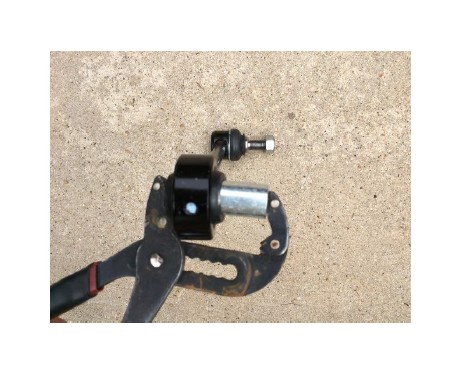
“B”: Screw on the grease fittings.
“C”: Reinstall the sway bar links. Torque to 75 ft. lbs.
NOTE: Rubicon model owners need to drill out the factory sway bar link holes to ½” in order to fit the Teraflex provided sway bar links.
Step Nine: Reinstall Brake Line Bracket / Shock Bolt / Wiring Harness
“A”: Reinstall brake line bracket (10mm). Torque to 16 ft. lbs.
“B”: Reinstall lower shock bolt (18mm). Torque to 56 ft. lbs.
“C”: Push in the wiring harness clips.
*START AT STEP 2 AND REPEAT ALL STEPS FOR THE OPPOSITE SIDE FRONT SPRING*
REAR
Step One: Raise Jeep and Remove Wheel
“A”: Chock the wheels which will not be lifted and break loose the wheel lug nuts for the tire that will be lifted. Raise the vehicle along the side frame using a floor jack, and place a jack stand beneath it for support.
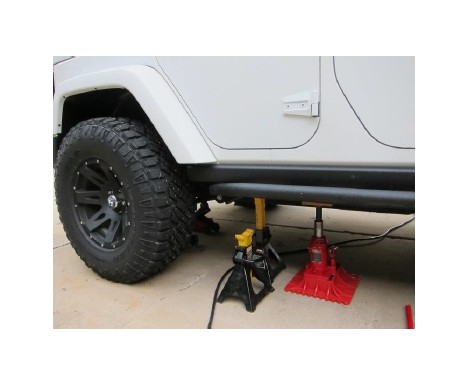
“B”: Place a floor jack beneath the axle for support. Unscrew the lug nuts completely and remove the wheel.
Step Two: Remove Shock Bolt
Remove the lower shock bolt (18mm). *The axle will begin to drop. You will use the floor jack that you placed to raise and lower the axle in order to remove/install the new components. At the same time, the jack stand that was placed earlier will be used to support the weight of the vehicle itself.
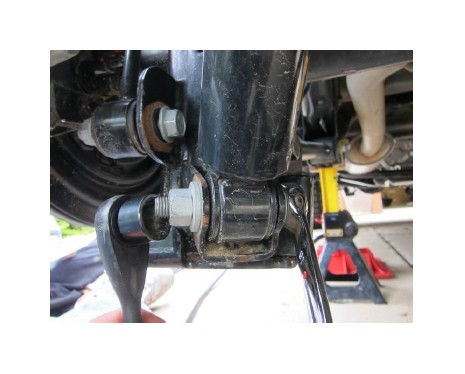
Step Three: Loosen / Remove Sway Bar Link Bolts
“A”: Loosen / Remove Lower Sway Bar Bolt
Remove the lower sway bar link bolt (18mm). *Although the manufacturer recommends that loosening this bolt is all that is required, we found it easier to work on the remainder of the install if we actually removed this lower bolt.
B”: Loosen Upper Sway Bar Bolt
Loosen, but leave connected, the upper sway bar link bolt. You will use a 19mm wrench to hold the bolt while using and 18mm socket to remove the nut.
Step Four: Release Brake Line Bracket
Remove the 10mm bolt allowing the brake line bracket to hang free.
Step Five: Loosen ABS Wiring Harness Clips
Using a screwdriver or plastic clip release tool, pop loose the plastic clips holding the ABS wiring harness.
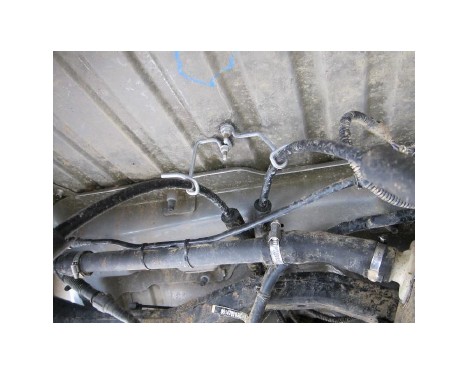
Step Six: Release Axle Breather Tube
Pull /pry up, and remove the axle breather tube from its nipple.
Step Seven: Remove Parking Brake Line Retainer
Remove the two 10 mm nuts holding the parking brake line retainer in place.
Step Eight: Remove / Replace Spring
Lower the axle using the floor jack that was placed beneath it for support, until the spring can be pulled out by hand. Replace with new Teraflex spring (using the same rubber factory spring isolator located on top of the spring), and raise the axle until the bolt holes line up for the sway bar links and lower shock bolt. *While working on the springs, be careful not to allow the brake rotor to rest on the ground. The axle should always be supported by the floor jack.
Step Nine: Reinstall Brake Line Bracket / Shock Bolt / Sway Bar Link / Wiring Harness
“A”: Reinstall brake line bracket (10mm). Torque to 16 ft. lbs.
“B”: Reinstall lower shock bolt (18mm). Torque to 56 ft. lbs.
“C”: Reinstall sway bar link. Torque to 75 ft. lbs.
“D”: Push in the wiring harness clips.
“E”: Reinstall tire, lower the Jeep. Torque lug nuts to 95-115 ft. lbs.
*START AT STEP 2 AND REPEAT ALL STEPS FOR THE OPPOSITE SIDE REAR SPRING. AFTER BOTH REARS HAVE BEEN COMPLETED, PROCEED TO STEP TEN.*
Step Ten: Reinstall Park Brake Retainer / Breather Tube
“A”: Reinstall parking brake retainer bracket (10mm). Torque to 16 ft. lbs.
“B”: Reinstall breather tube onto nipple.
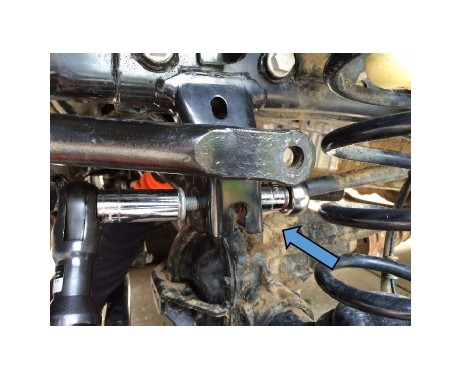
Step Eleven: Reinstall Track Bar Bolts
“A”: Turn the steering wheel until the front track bar lines up with the bolt holes. Torque to 125 ft. lbs.
“B”: Have a friend push on the side of the Jeep body. This will help line up the control arm in the rear with the bolt holes. Install bolt, and torque to 125 ft. lbs.
Step Twelve: Double Check Torque Specs
Because you are working with steering and suspension components, once the vehicle is on the ground and under its full weight, it is recommended to double check all connections for proper torque.
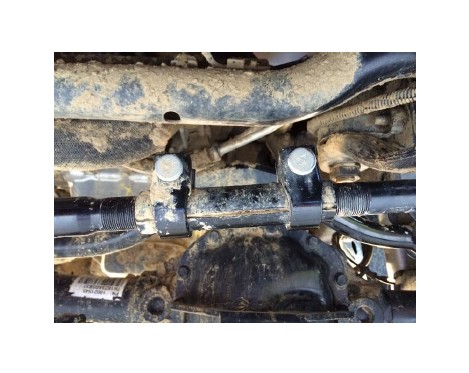
Step Thirteen: Correct Steering If Necessary
Changing tires, springs, shocks, etc. can negatively affect the centering of your steering wheel. If installing this kit has made the steering wheel off center, simply loosen the adjuster sleeve on the drag link (15mm) and turn the sleeve clockwise or counter-clockwise (depending on which direction your steering wheel is off).
Tighten and torque to 45 ft. lbs. Take the vehicle for a test drive, and if necessary, repeat step thirteen until the steering wheel is centered.
CAUTION: As with all steering and suspension components. After driving for a few hundred miles, be sure to re-inspect bolts, and re-torque to specs if necessary.