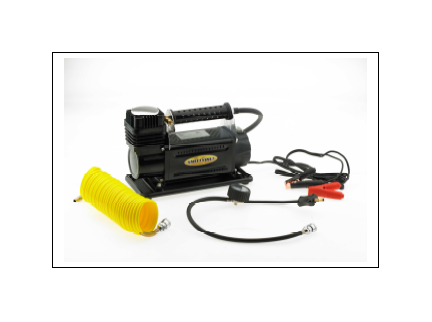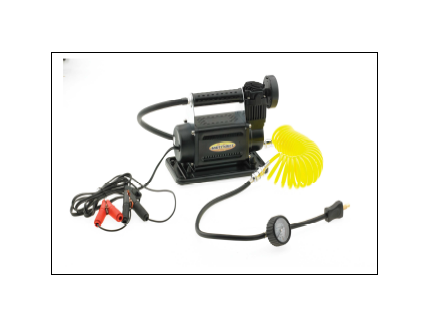

How to Install Smittybilt High Performance Air Compressor 2.54 CFM/ 72 LPM on your 87-13 Wrangler

Shop Parts in this Guide
Note: It is essential that the operator of this product read and understand the contents of this manual before installing and using this product.
SAVE THIS MANUAL FOR FUTURE REFERENCE
P/N: 2781
SPECIFICATIONS
Maximum Voltage: 13.8 volt
Maximum Amperage Draw: 45 amp
Maximum Restart Pressure: 150Psi
Maximum Air Flow: 160 L/min

P/N: 2780
SPECIFICATIONS
Maximum Voltage: 13.8 volt
Maximum Amperage Draw: 30 amp
Maximum Restart Pressure: 150Psi
Maximum Air Flow: 72 L/min

Overheating Protection Circuit:
The unit is equipped with an automatic protection device. In the event the unit reaches an unsafe operating temperature, a protection circuit will cut power to prevent damage to the unit. If the protection circuit activates, immediately disconnect the unit from the power source and allow it to cool.
The unit will cool in approximately 15 minutes, depending on environmental conditions. The protection circuit will automatically reset itself when the temperature returns to a safe operating level.
High altitude and certain air temperatures can negatively affect the unit’s performance.
WARNING:
READ ALL INSTRUCTIONS before operating product. Failure to follow all instructions below may result in electrical shock, fire and serious injury or death.
Always wear approved safety glasses with side shields when operating. Compressed air and particulate matter can cause eye and soft tissue damage. Keep air stream away from skin and eyes.
RISK OF BURNS:
Always wear gloves. Some exposed parts may become hot during use.
RISK TO BREATHING: This compressor is not designed for and never should be used as a source of breathable air.
RISK OF ELECTRIAL SHOCK: This compressor is for use in dry conditions only.
RISK OF FALLING: This compressor will produce vibrations and can “walk”. Only operate at ground level.
RISK OF FIRE: This compressor will become hot during operation. Allow to cool before storing.
RISK OF BURSTING: Use only accessories rated for 120 psi. Always follow tire manufacturer’s recommended inflation instructions. In most cases they can be located on the side wall of the tire. If you are unsure, contact the manufacturer.
DO NOT MODIFY: Never drill, modify or attempt to repair the compressor. There are no user serviceable parts inside.
SAFE HANDELING: Never carry the compressor by the hose or power cord.
PAY ATTETION: Do not leave the compressor running unattended.
HARD MOUNTING:
This compressor may be hard mounted in a dry location. Be sure to use proper size wiring for your application. When using this unit with an air tank, you must install a back-flow preventing device to prevent damage to the cylinder head air valve.
EXTRA CAUTION:
Small items will inflate quickly and can easily be damaged. Pay special attention to bicycle tires. They inflate very fast and can rupture. Be prepared to stop the unit quickly when manufacturer’s recommended inflation pressure is reached.
OPERATING WARNING:
When operating the compressor, be sure to be in a safe location off of the roadway and away from traffic.
Unpack the compressor and inspect for damage. Fully un-wrap the power cord.
Place the compressor on a dry level surface. Attach the air filter to the front of the unit and finger tighten.(2780)
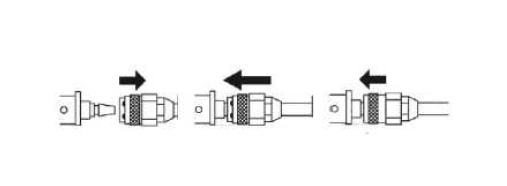
Connect the air supply hose to the compressor using the quick connect fitting.
1. Slide retaining snap ring back.
2. Slide the fittings together firmly.
3. While holding fittings together firmly slide the outer ring forward to lock

Connect the RED power clip to a POSIVITE 12 volt source. Connect the BLACK power clip to a NEGATIVE ground point.
Test the connections by switching the compressor to “on”. Air will begin to flow.
Connect the air hose by screwing the brass inflator onto the tire valve stem. Only finger tighten the inflator. Do valve stem.
Watch the gauge closely, switch the unit off or remove the inflator from the tire when the manufacturer’s recommended pressure has been achieved.
We recommend that you use a second tire pressure gauge to verify your tires are inflated to the proper pressure.
Stopping and restarting: at high pressure can overload and blow the in-line fuse (Part #2780). At higher inflation pressures, start the compressor and then attach to the filler to the tire valve stem. If you stop the unit and need to resume inflation, remove the inflator tip from the tire valve, start the unit and reattach with the unit running.
Allow the compressor to cool and place neatly in the carry bag with the clips securely fastened to the loops on the carry bag. To prevent damage to the unit during storage repack in the original styrofoam and color box.
Store the unit in a dry location.
Remember to replace the valve cover on the stem.
Operating Hints
Turn the compressor on before connecting to the tire in order to reduce stress on the motor.
We recommend an on / off cycle time of 20 minutes rest / off for every 40 minutes of run time
To prevent damage to the air hose fitting, remove the inflator from the tire before disconnecting the hose from the compressor.
Trouble shooting
If the compressor stops during operation:
1. Check the battery condition. Low voltage can trip the circuit breaker or trigger the protection feature.
2. Check the circuit breaker reset if necessary.
3. The compressor is equipped with an automatic protection device. In the event the unit reaches an unsafe operating temperature, a protection circuit will cut power to prevent damage to the compressor. If the protection circuit activates, immediately disconnect the unit from the power source and allow it to cool.
Resetting Circuit Breaker: (Part #2781)
The circuit breaker is located next to the on / off switch on the top of the rear housing. During normal operation it remains in the down position almost even with the base. In the event of and overload it will popup. If this happens, turn the power switch to off, disconnect the air hose and power cord. Push the breaker down to reset and resume operation.

