FREE 1 to 3-Day Delivery on Orders $149+ Details

How to Install Rugged Ridge Winch Mount Modular XHD Front Bumper, Textured Black on your 07-18 Wrangler JK; 2018 Wrangler JL

Shop Parts in this Guide
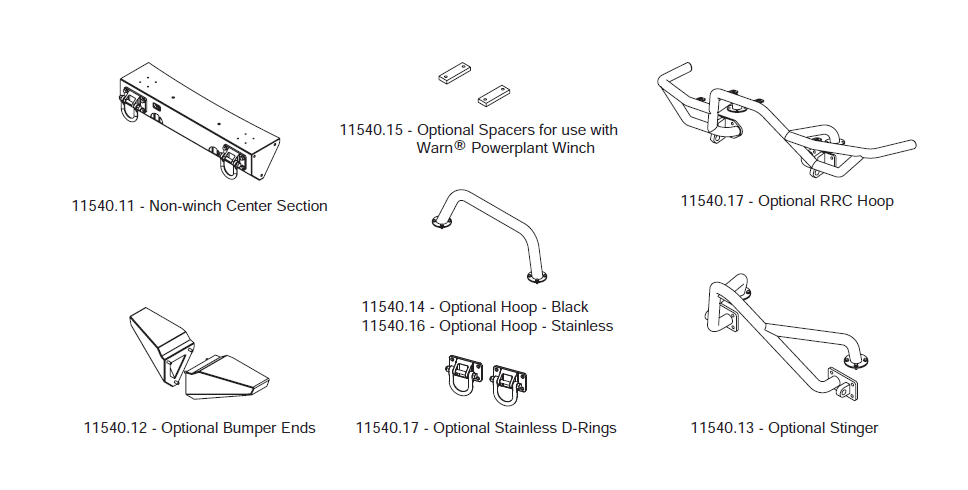
* Note - These components are only used when installing top mounted add-on pieces.
1. Disconnect fog lights by twisting the plug in the rear of them. Remove 4 nuts per frame horn that hold the original front bumper to the vehicle. Remove original bumper.
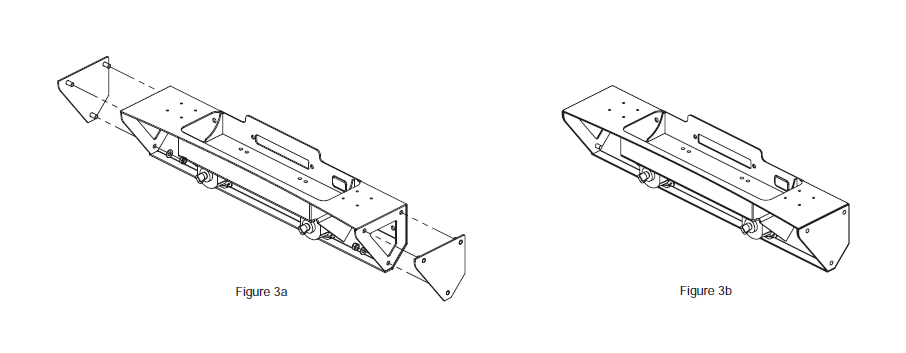
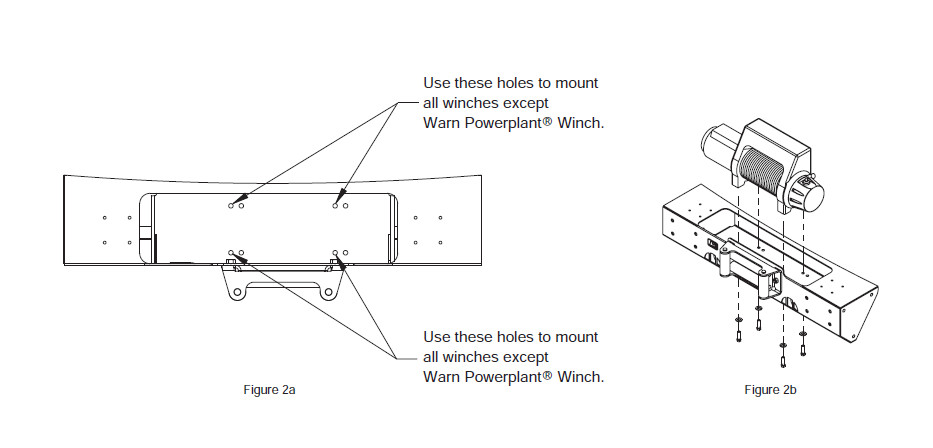
2. Install the original fog lights into the Center Section from the back (Figure 2a). Use the (8) M3 lock nuts and M3 washers to secure them (Figure 2b).
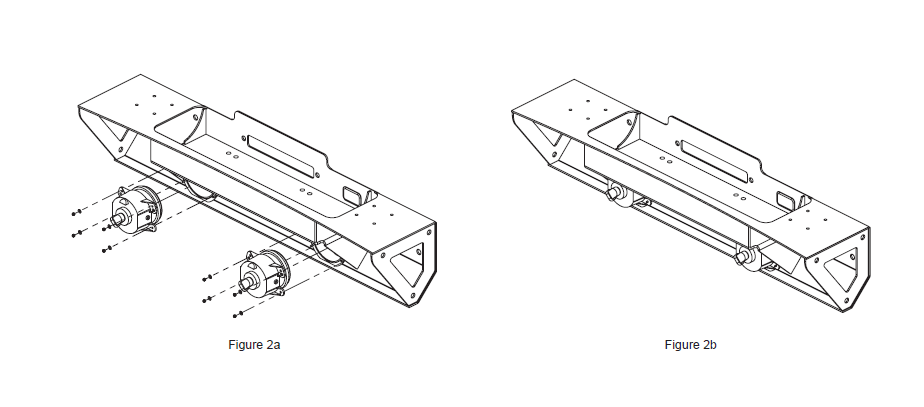
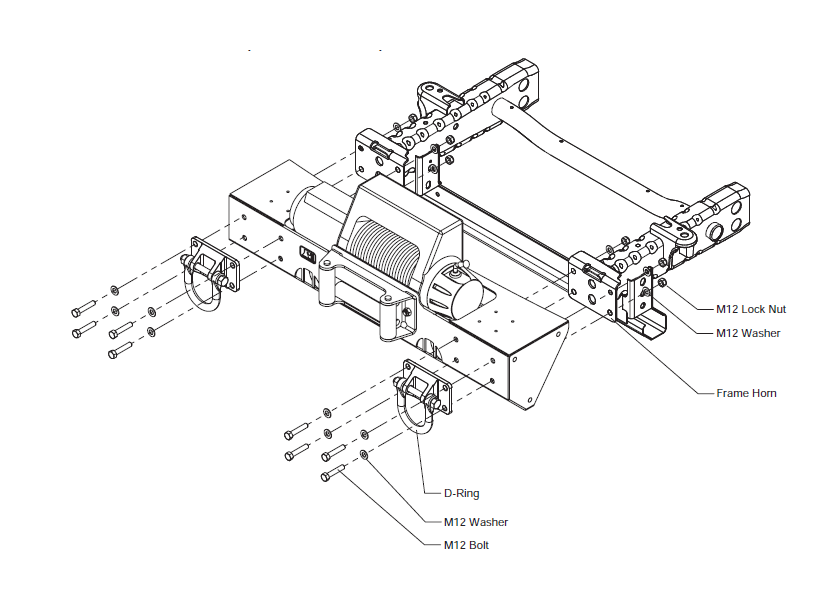
3. Install Ends using (3) 12mm washers and (3) 12mm lock nuts per side (Figure 3a). Once all nuts have been started, tighten them (Figure 3b).
Note - if installing optional ends, substitute them for the Stubby Ends shown.
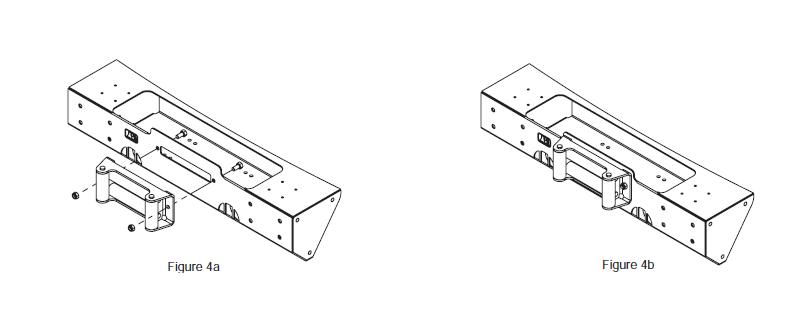
4. Install Fairlead (not included) to Bumper. Note - bolts for Fairlead (supplied with it) should pass from inside the Winch cavity, with the nut being installed on the outside (Figure 4a). Tighten Fairlead bolts (Figure 4b).
5. If a Warn® Powerplant Winch is to be installed, Part Number 11540.15 Spacers will be needed. Installation of the Warn® Powerplant Winch is detail in the instructions for 11540.15. For all other winches, proceed to step 6.
6. Prepare winch and vehicle for installation as specified in winch installation instructions. Align holes in bumper as shown below (Figure 2a) with winch mounting holes (Figure 2b). It may be helpful to thread winch cable through fairlead before bolting it in place.
7. Once all 4 Winch bolts have been started, tighten them.

8. Place Center Section of Bumper onto the frame rails and then install the 12mm bolts (8), 12mm washers (8), D-Rings (2), more 12mm washers (8), and 12mm Lock Nuts. Don't tighten any of the fasteners yet. When installing D-Rings, note that the holes that are further apart should be on top. Note - If installing Stinger (11540.13) or RRC Hoop (11540.18) D-Rings will not be used. See instructions for those products at this point.
9. Tighten (8) bolts that were installed in Step 8.
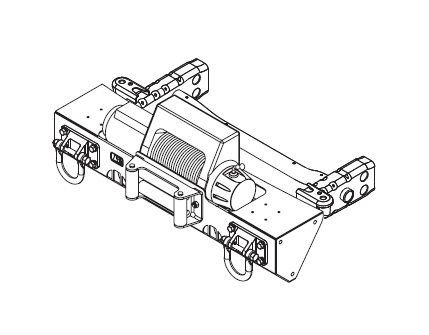
10. Installation of the Bumper is now complete! You may now install any hoops, auxilary lighting, etc. Note: When used for vehicle recovery, only the D-Rings are to be used. Hoops are not to be used for towing or vehicle recovery.
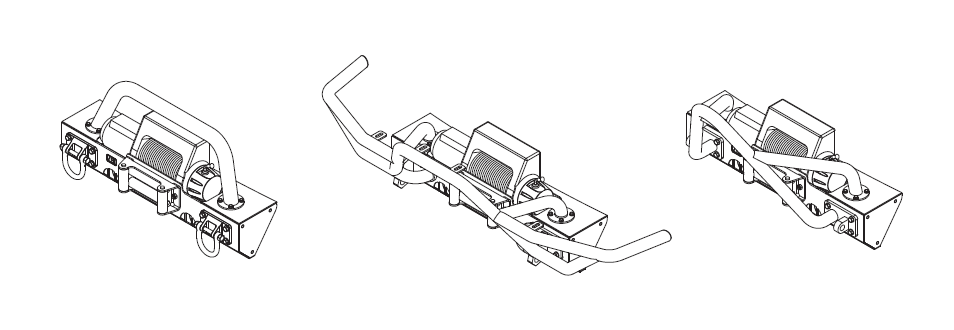
Congratulations on the purchase and installation of a quality Rugged Ridge product! Ask your retailer about the following additional accessories to the JK Modular HD Bumper:
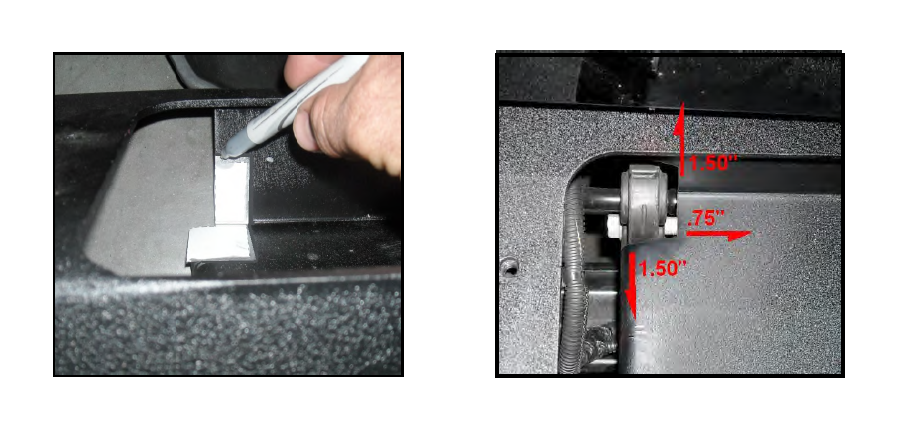
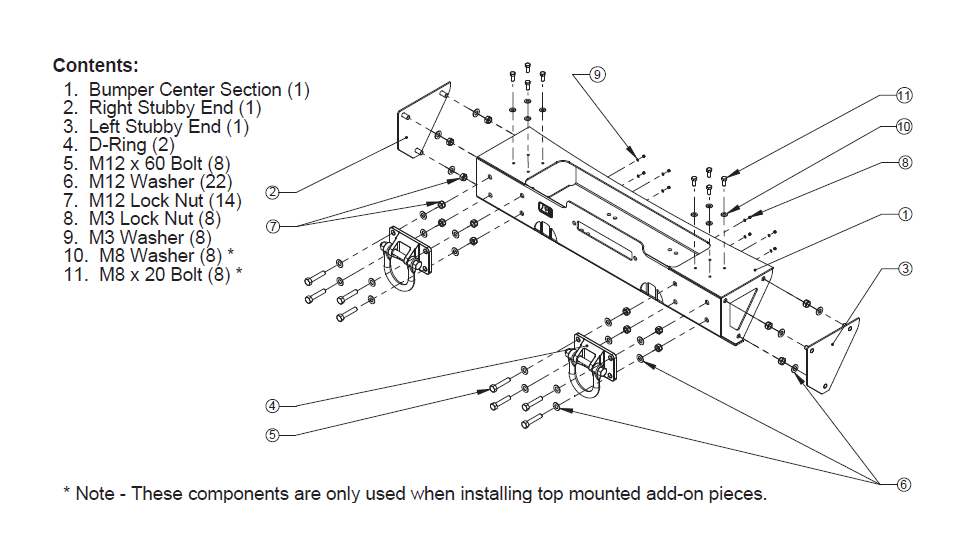
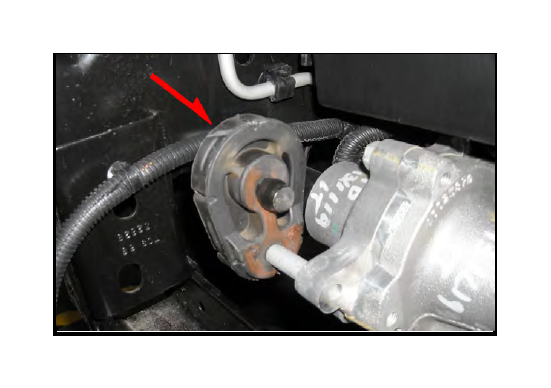
NOTICE: Production changes to the rubber isolator used to secure the electronic sway-bar disconnect may cause interference with XHD bumper during installation. Modification to the winch plate will be needed to allow bumper to fit correctly. Jeep models requiring modification are some 2009 - 2010 JK Rubicons (2dr & 4dr) and optional kits installed by MOPAR dealers during the 2009 and 2010 model year.
1. With plastic front bumper removed place XHD bumper onto frame and note location of electronic sway-bars upper isolator. If isolator makes contact with XHD bumper modified will be needed to allow larger isolator to clear lower section of winch mounting plate.
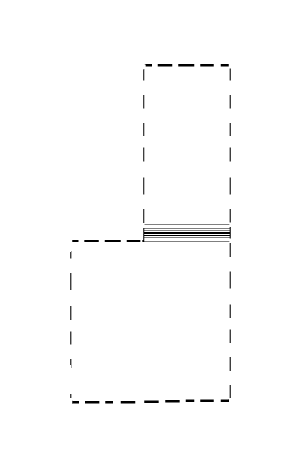
2. If correction is needed mark lower left corner of winch plate using cutout template provided above. Template cut lines should be .75" inbound from outer edge and 1.50" up and forward of the bend. After cutting marked area away test fit to frame and confirm bumper does not make contact with isolator. Sand and smooth cut surface. Apply flat black paint to all exposed metal and allow to dry before reinstalling bumper. XHD should be installed following instructions supplied with bumper. .