 FREE 1 to 3-Day Delivery on Orders $149+ Details

How to Install a Rugged Ridge Winch Mount Modular XHD Front Bumper, Textured Black 07-18 Jeep Wrangler JK; 2018 Jeep Wrangler JL
Installation Time
1.5 hours
Tools Required
- 10mm, 15mm, 18mm, and 3⁄4” sockets and/or wrenches
- Socket wrench extension
- Drill, 1⁄4” drill bit, phillips bit
- Metal cutting device of choice (i.e. grinder, Sawzall, etc.)

Shop Parts in this Guide
NOTE:
For 2007 to 2011 model JK’s, the bumper install consists of simply removing the factory bumper, and installing with the RR XHD bumper in its place. However, on 2012 JK models, the location of the factory vacuum pump sits in the way of the RR XHD bumper, and must be cut away and relocated for the bumper to fit.
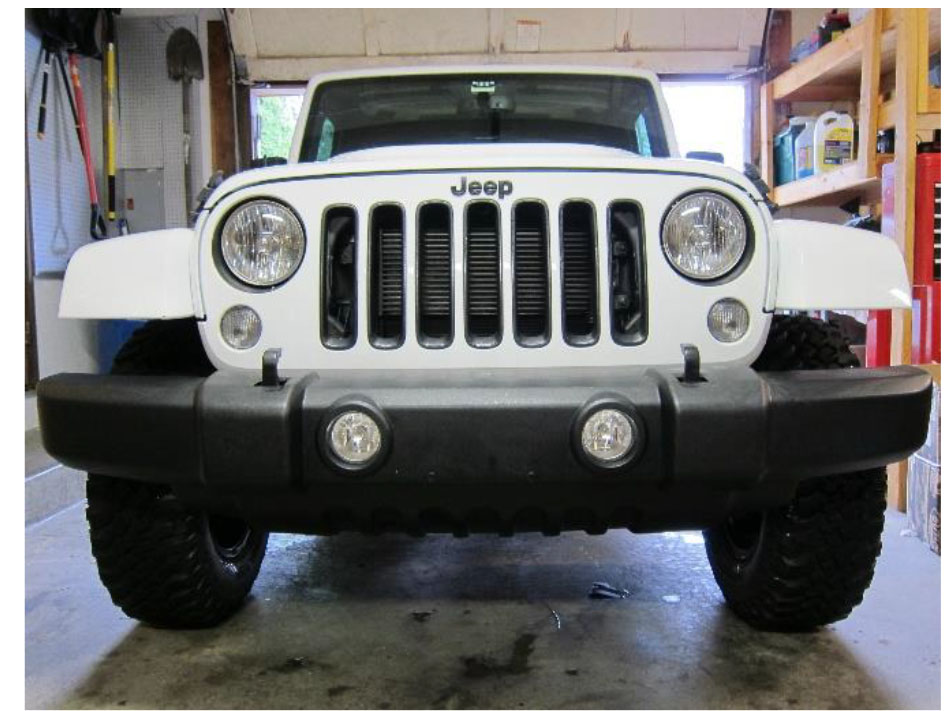
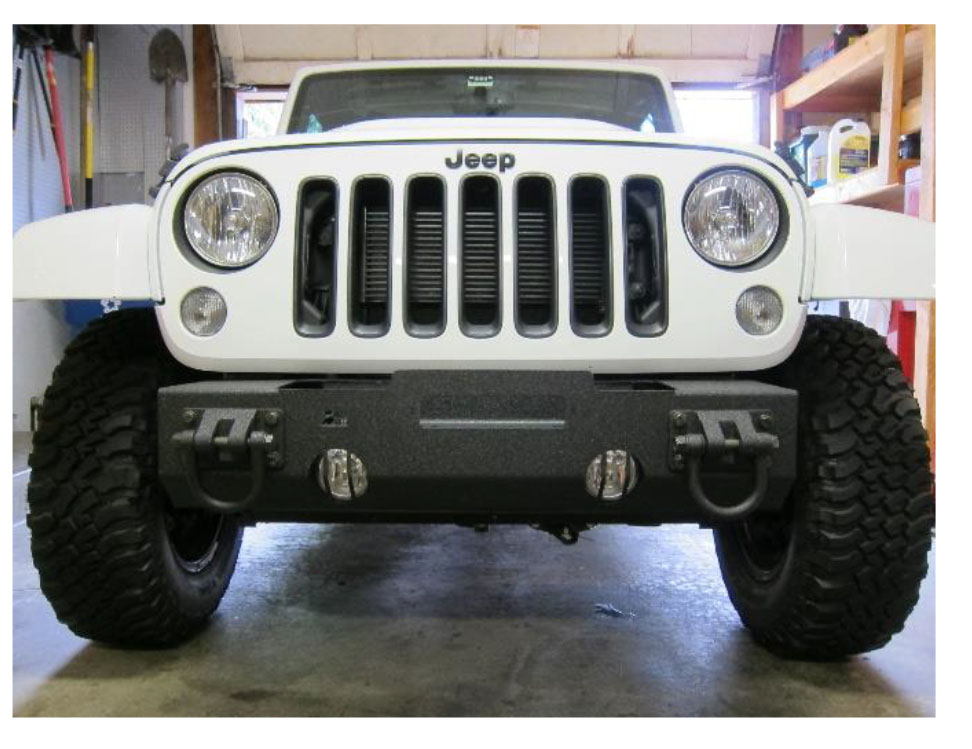
BEFORE
Part One: Remove Top Bumper Gap Cover
There are 2 plastics tabs located on top of the cover. Unscrew gently, and pop each plastic retainer upwards. Then slide the bumper gap cover along the bumper and out of the front driver wheel opening.
Part Two: Remove Factory Air Dam
There are 4 plastic clips on the bottom of the air dam that need to be removed. Simply pry them out. Additionally, there are 2 plastic clips inside/behind the air dam attaching it to the back side of the steel bumper reinforcement.
Part Three: Remove Factory Bumper
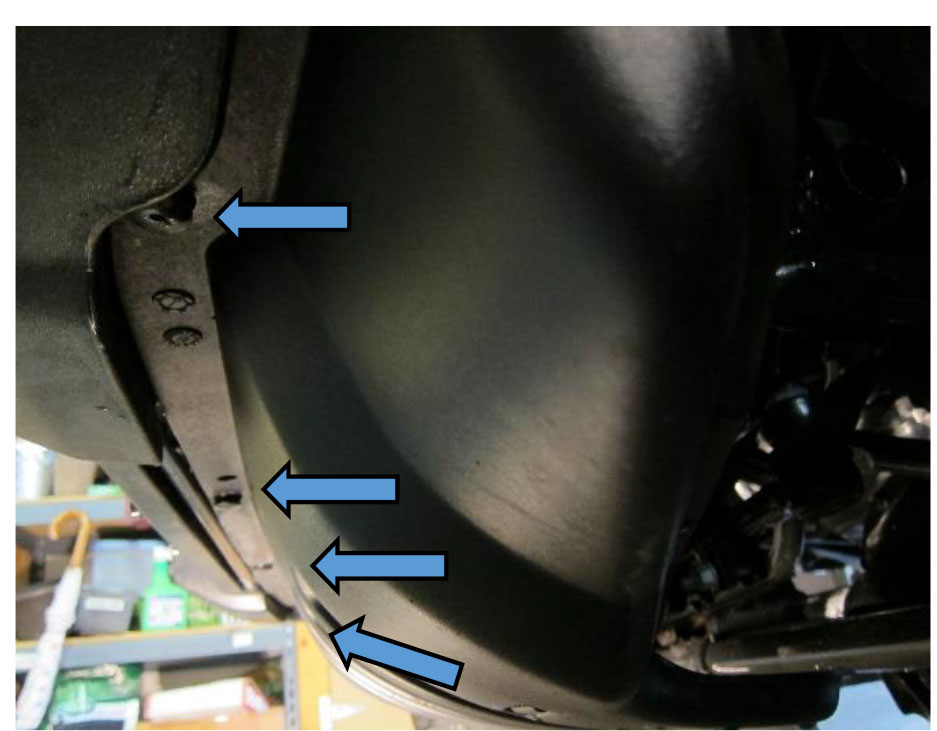
Step One: Remove Bolts
There are 12 bolts holding the factory bumper to the steel bumper reinforcement. There are 6 bolts to each side (6 driver side / 6 passenger side). Behind the steel bumper reinforcement, on each side, you will find 4 of the bolts (2 of which are 3⁄4” and 2 of which are 15mm). These bolts are best accessed from below the bumper. The remaining 2 bolts on each side are 3⁄4”, and located behind the steel reinforcement immediately next to the back side of the fog light housing. These 2 bolts are best accessed from above the bumper.

Step Two: Unclip Fog Light Wiring Harnesses
Unclip the fog lights from the bumper by squeezing the plastic clip and pulling out.
Step Three: Unclip Full Wiring Harness from Bumper
The full wiring harness runs the width of the Jeep and is clipped in place with 4 plastic push clips. Pull these from the steel bumper reinforcement.

Step Four: Remove Factory Bumper
Once the bolts are removed, fog lights unclipped, and wiring harness unclipped, the bumper slides toward you and right off.
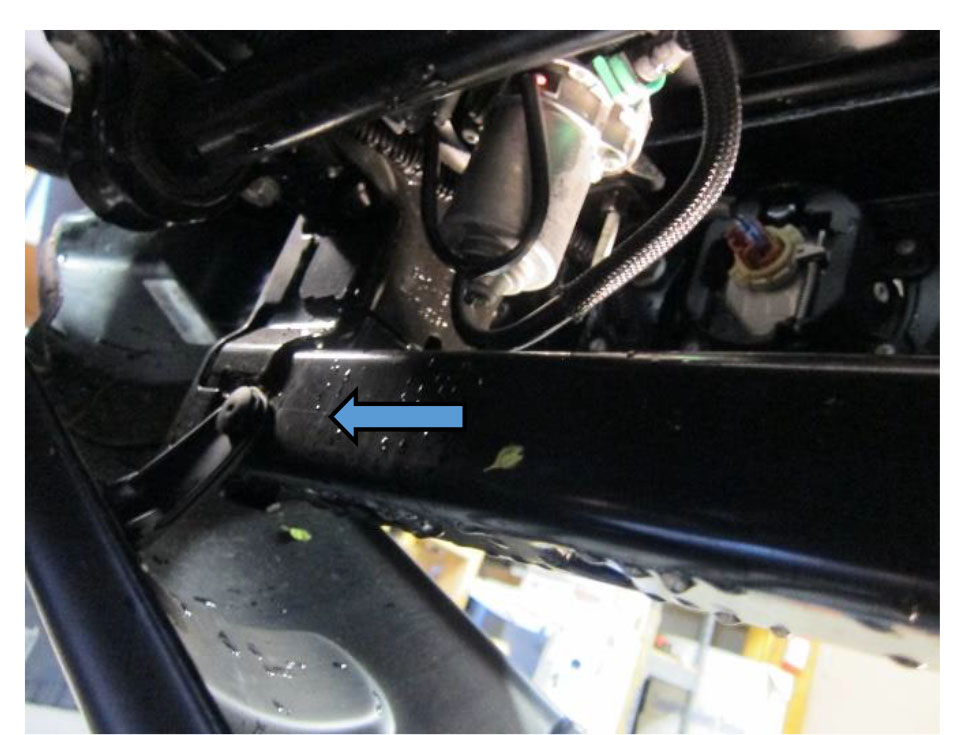
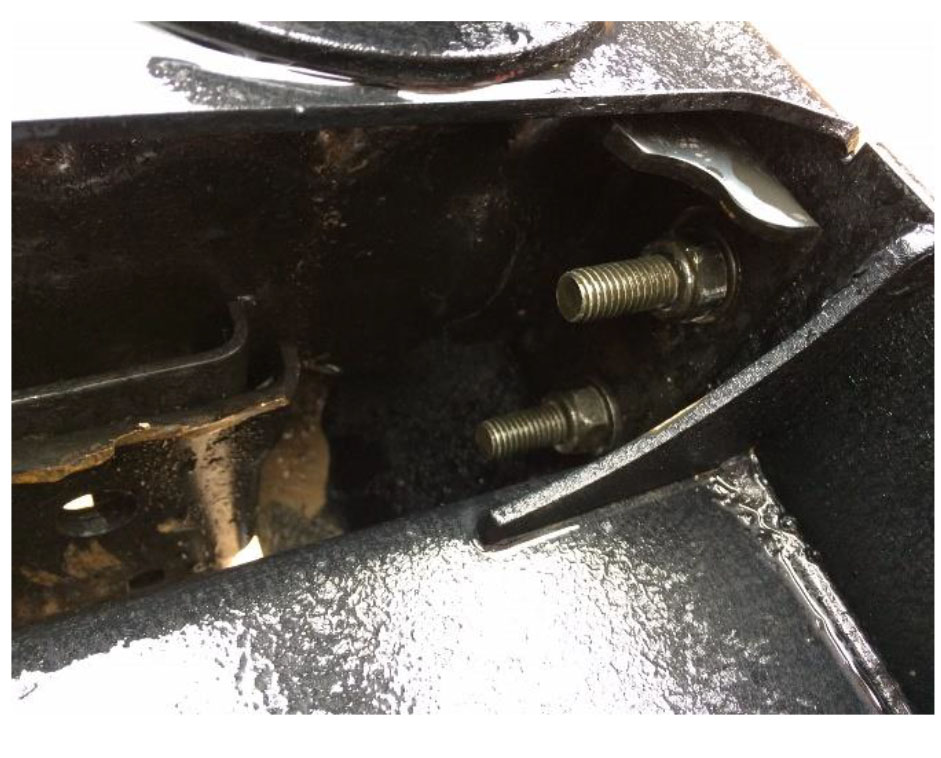
Part Four: Relocate Vacuum Pump
On certain model JK’s, the factory water pump placement interferes with the XHD bumper, and must be relocated. The bumper comes with 2 brackets for this purpose.
Step One: Remove Vacuum Pump
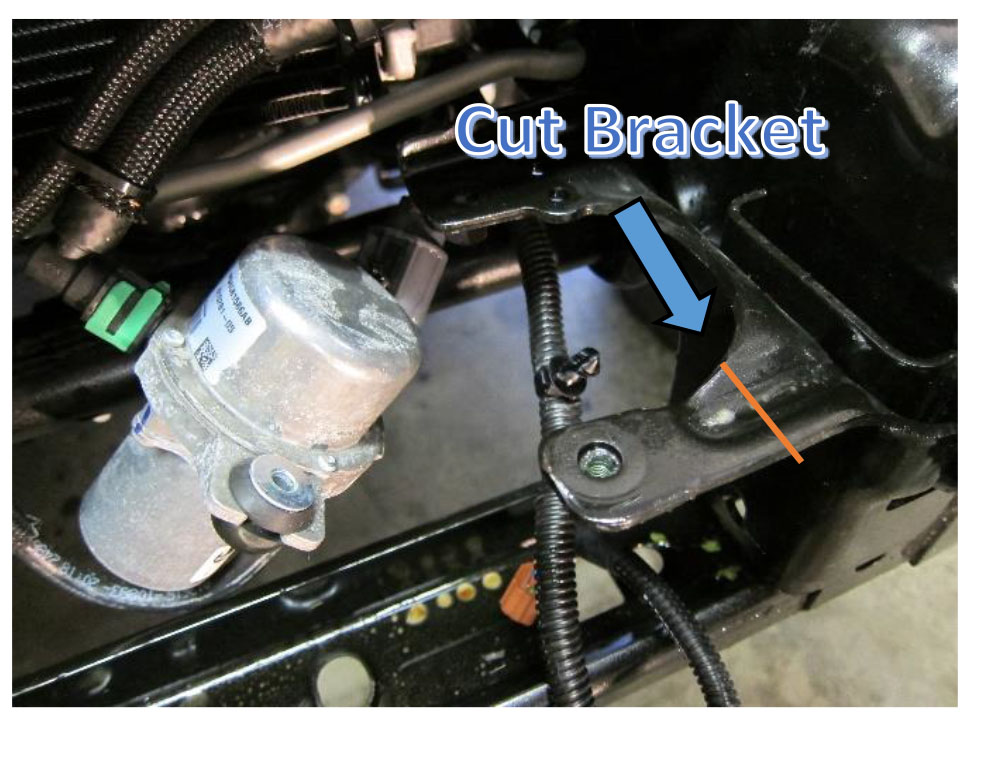
Remove the two 10mm bolts securing the pump, and remove the pump from its bracket. Move the pump off to the side for the time being. *This picture illustrates where the new bumper interferes with the vacuum pump.
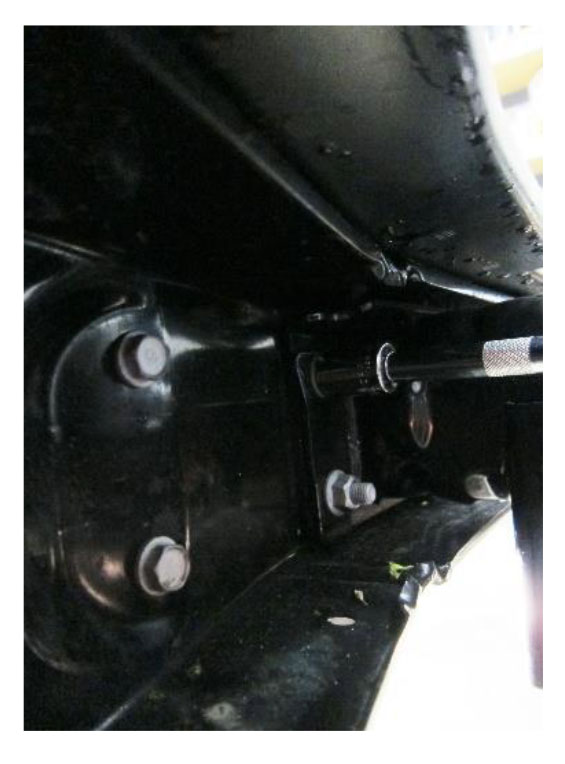
Step Two: Cut Away Bracket
Cut away the vacuum pump bracket portion closest to the bumper. You can use any metal cutting tool to do this job (grinder, Sawzall, etc.).
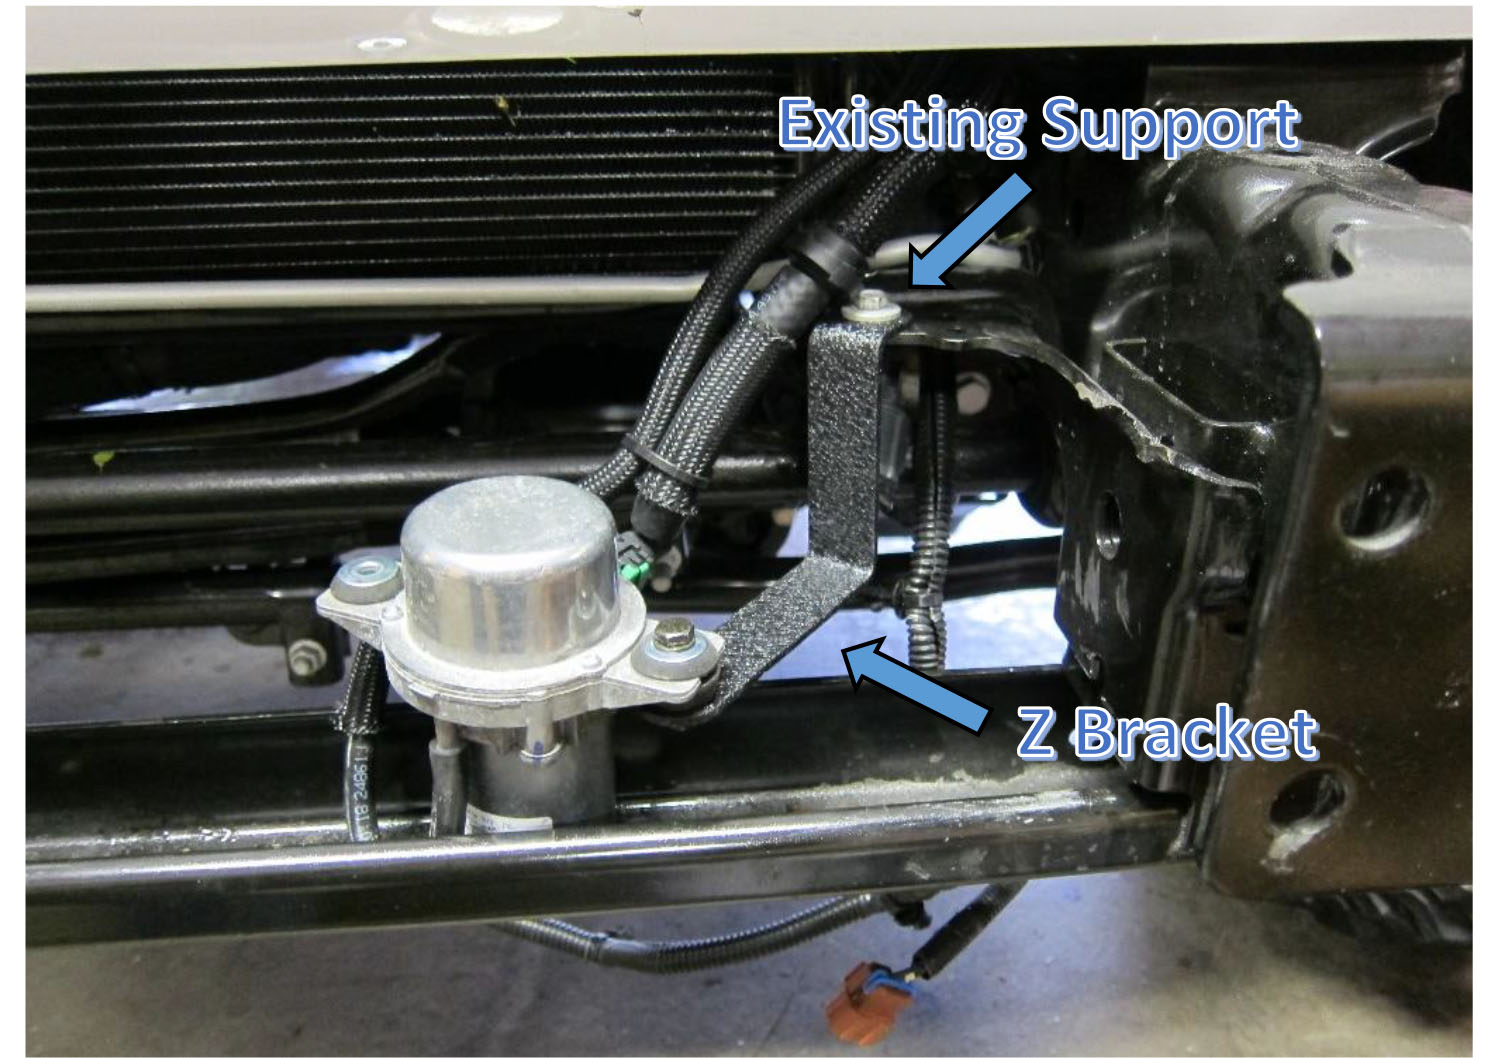
Step Three: Attach the Z Shaped Bracket
The Z shaped relocation bracket will use one of the existing vacuum pump support mounting locations (the one you didn’t cut away). Attach one end of the bracket to the vacuum pump (newly supplied 10mm bolt and nut), and the other end to the existing vacuum pump support (factory 10mm bolt).
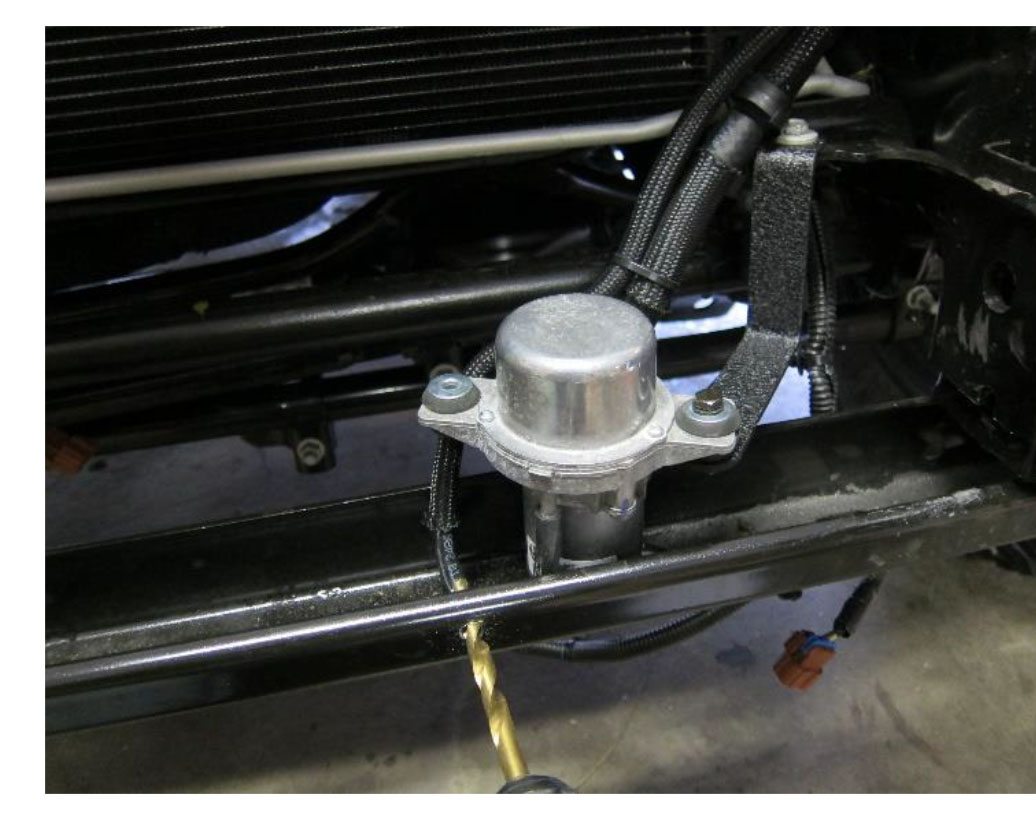
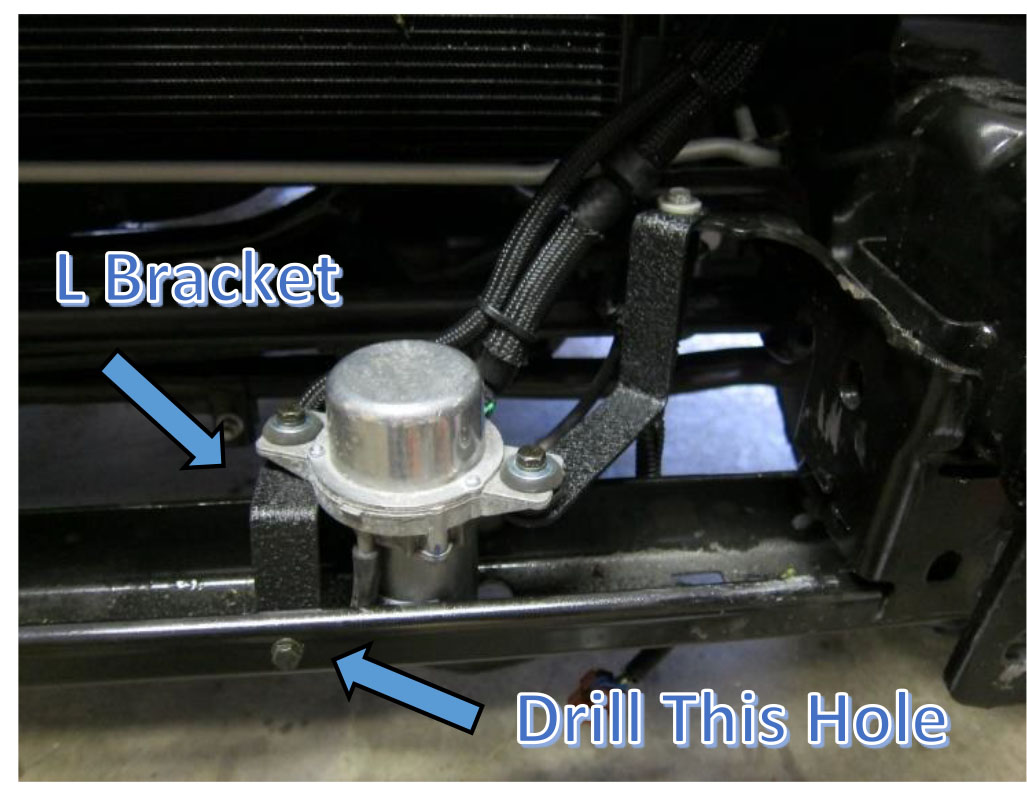
Step Four: Drill New Hole for L Mounting Bracket Attachment
Using a 1⁄4” drill bit, make a hole through the front of the cross member. This hole will be used as an attachment point for the L shaped bracket. Attach one end of the bracket to the cross member (newly supplied 10 mm bolt and nut), and attach the other end of the bracket to the vacuum pump (newly supplied 10mm bolt and nut).
*Drill through your cross member at your own risk.
Part 5: Install Rugged Ridge XHD Bumper
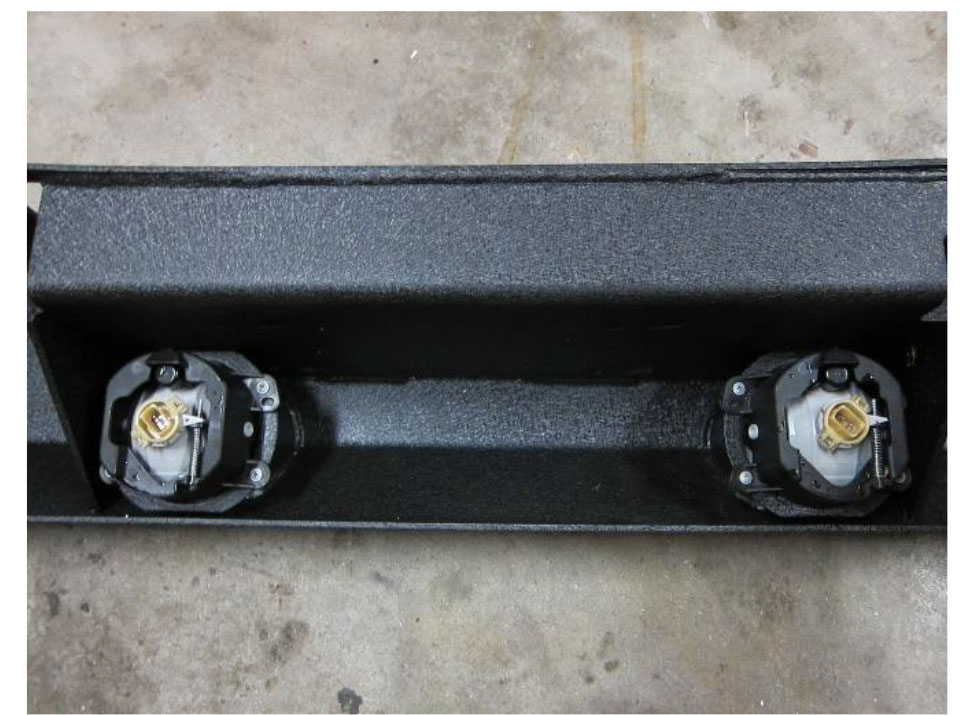
Step One: Install Fog Lights
Remove the 4 Phillips screws holding each fog light to the factory bumper, remove the fog lights, and install them into the new XHD bumper using the 4 new Phillips screws provided with the bumper.
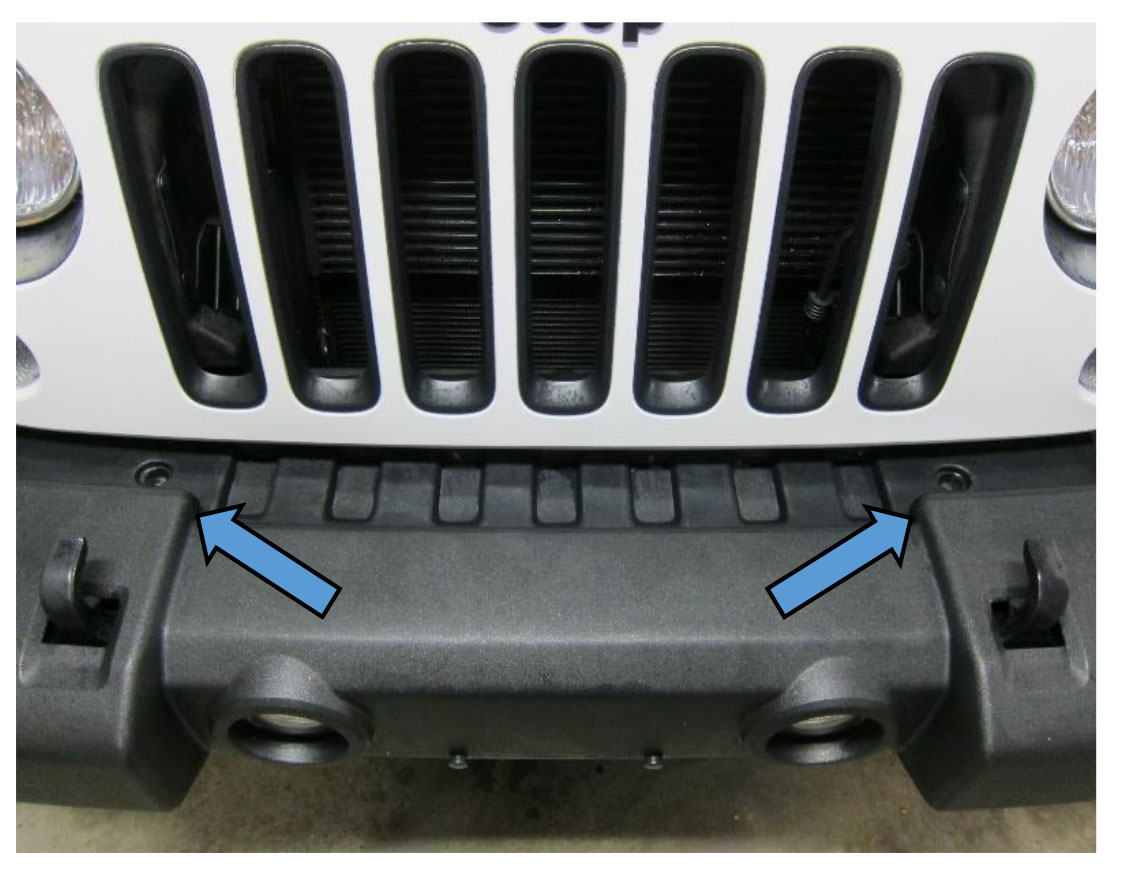
Step Two: Install Bumper onto Jeep
Slide the new bumper onto the steel bumper support of the Jeep. Using the provided bolts/washers/nuts, slide 4 bolts through washers then each of the D-ring brackets, securing the new bumper to the steel bumper support, and then locking in place with washers and nuts (18mm). The bolts going through the D-rings, into the steel Jeep support, are what secure the bumper to the Jeep. *The D-rings do have a TOP and BOTTOM side. The TOP side bolt holes are spaced slightly wider apart than the BOTTOM bolt holes.

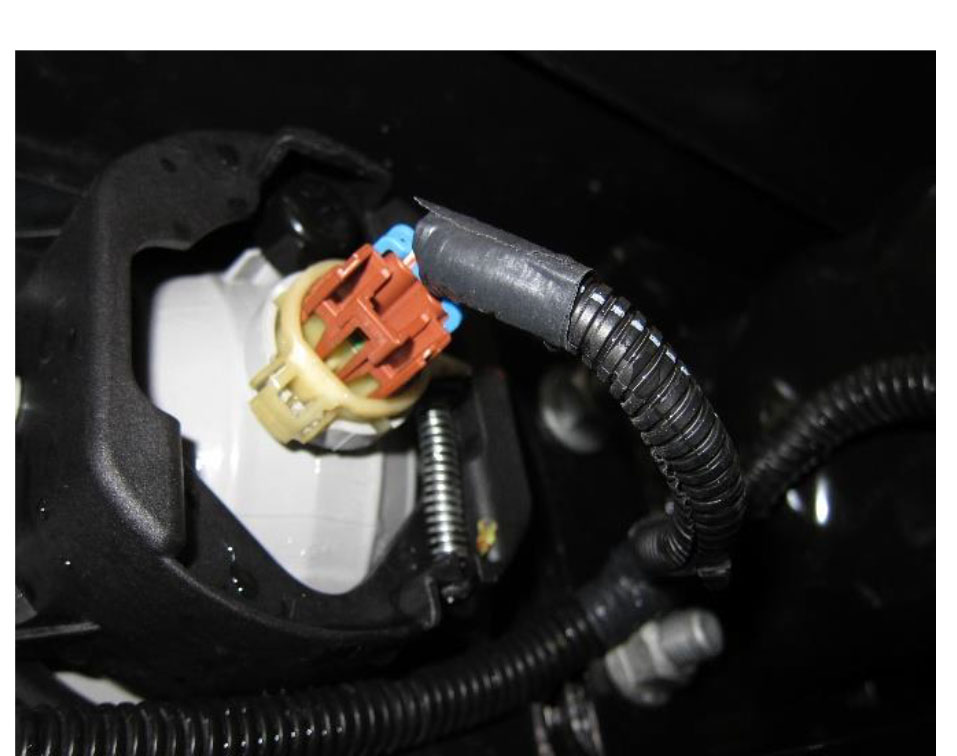
Step Three: Plug In Fog Lights Zip Tie Full Harness
With the bumper securely installed, don’t forget to plug in the fog light harness to the back of the fog lights. Additionally, the full harness that was unclipped from the factory bumper earlier will not have anywhere to re-clip in onto the new bumper. Secure this harness with zip ties at several locations along the front bumper support.
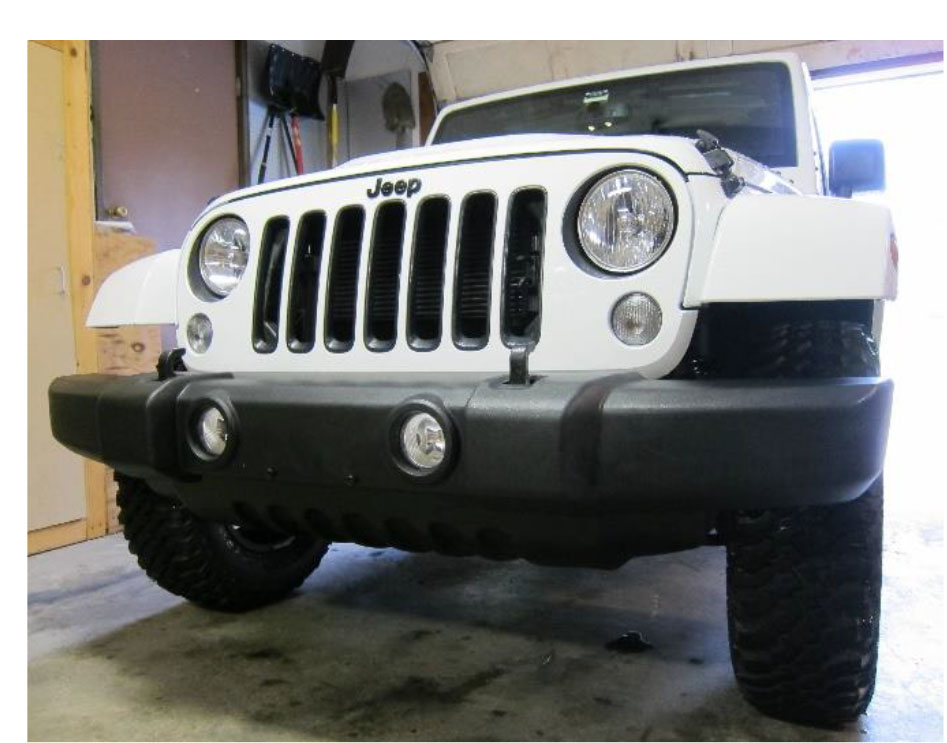
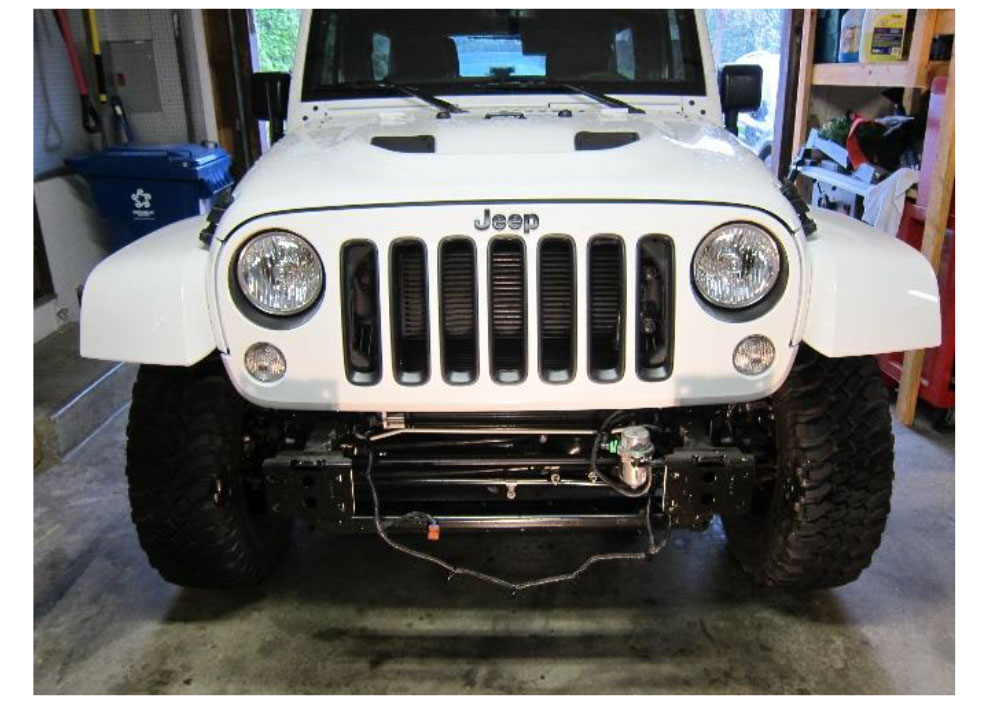
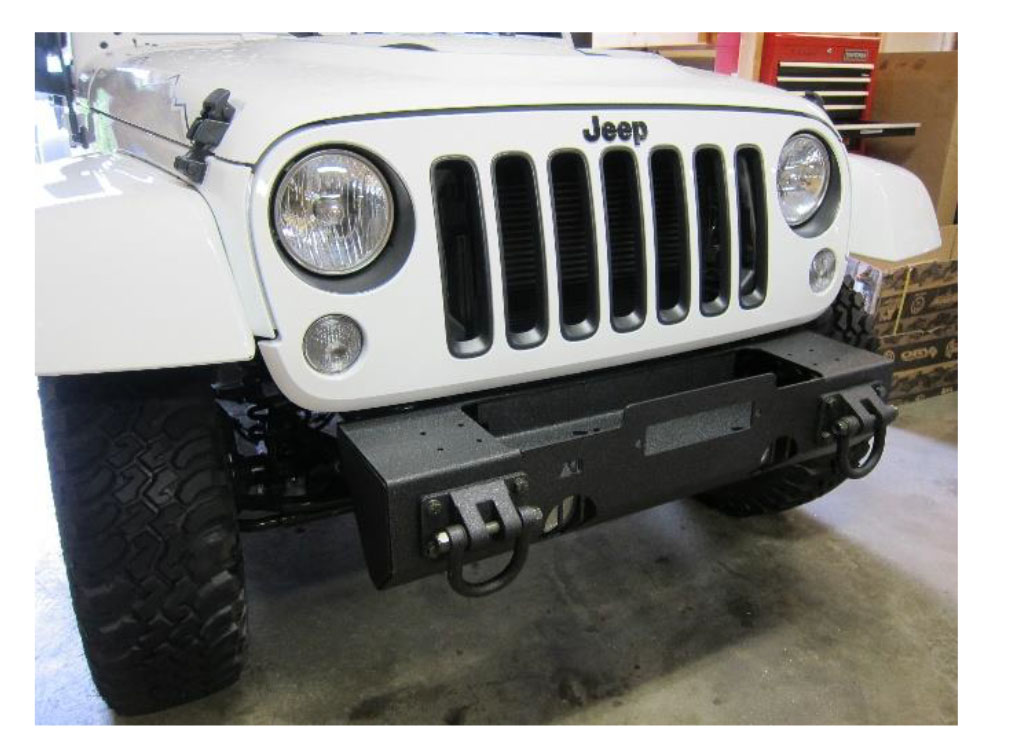
AFTER
NOTE: If installing Rugged Ridge bumper ends to this modular bumper, do so before installing the bumper to the Jeep.
