 FREE 1 to 3-Day Delivery on Orders $149+ Details

How to Install Rugged Ridge Stainless Steel Exhaust Header on your 2007-2013 Wrangler
Tools Required
- 1. 10 mm wrench
- 2. 10mm socket
- 3. 13mm socket
- 4. 16mm socket
- 5. 10 " 3/8" drive extension
- 6. 3/8" drive ratchet
- 7. 3/8" drive swivel
- 8. Flat blade screwdriver
- 9. Gasket Scraper

Shop Parts in this Guide
Contents:
1. Left Exhaust Header (1)
2. Right exhaust header (1)
3. Exhaust manifold gaskets (2)
4. Exhaust manifold bolts (12)
5. Rubber Coated Clamp (1)
6. Spark Plug Wire Boots, Short (5)
7. Spark Plug Wire Boots, Long (1)
8. M8 bolt and nut (1)
9. M8 Washer(2)

IMPORTANT! Please read all instructions completely before installing exhaust headers.
Step 1. Disconnect the battery terminals from the battery and move aside. Remove the battery hold down clamp. Remove the battery.
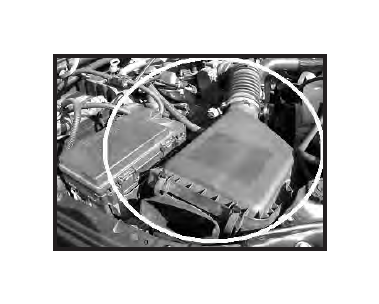
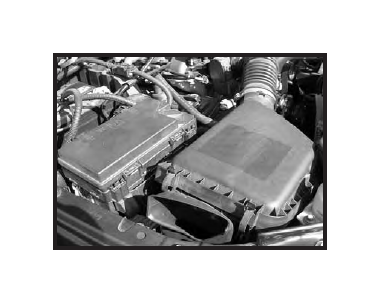
Step 2. Remove the PCV hose from the filter box. Remove the air filter cover by unclamping the cover and removing the hose clamp on the throttle body. Remove the air filter, and housing. The housing is held in by three rubber grommets on the bottom of the box. A rocking motion may be needed for removal of the air box.
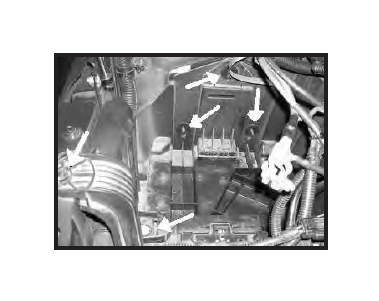
Step 3. Remove the three nuts and two bolts in the battery section of the tray.
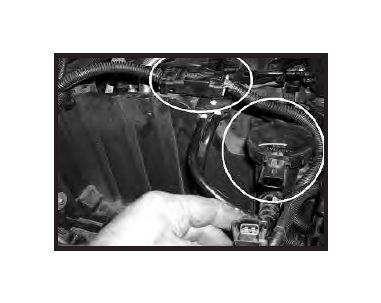
Step 4. Remove the EVAP solenoid connector and power junction connector. The red slide tab will have to be pulled out slightly to remove connectors. Remove the EVAP solenoid from the holder by sliding it up off of the tab and set aside. Remove the junction connector from the tray and set aside.
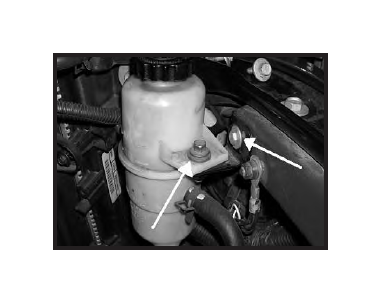
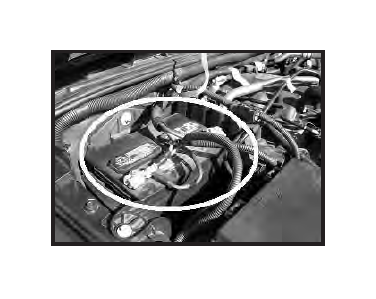
Step 5. Remove the power steering reservoir bolt and move the reservoir to the side. Remove the reservoir mounting bracket and set aside.
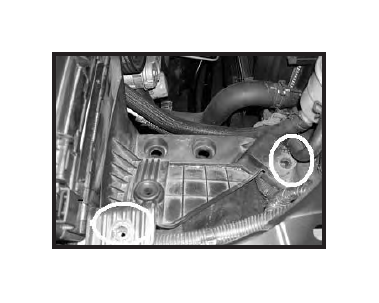
Step 6. Remove the two front tray mounting bolts.
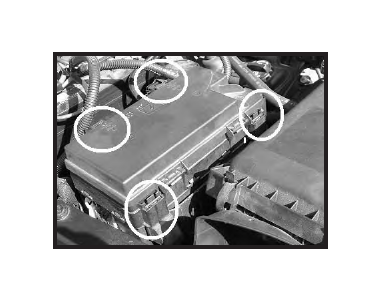
Step 7. Remove the fuse box by pressing the four release tabs located on each corner of the fuse box.
Step 8. Once the fuse box tabs have been released, lift the box up and lay it over the side of the fender. Remove the large plastic tray and set aside. Remove the spark plugs wires from the plugs only and label each wire.
Step 9. Remove the passenger and driver side heat shield bolts. Remove both heat shields. Do not discard the passenger side, it will be reused later. A bolt penetrating spray may be needed.
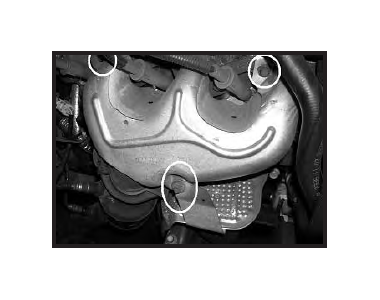
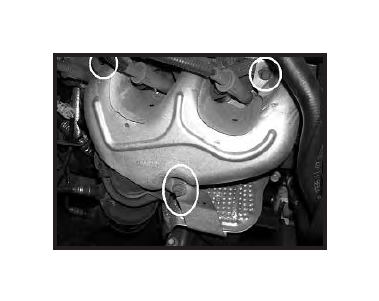
Step 10. Remove the two down pipe flange bolts on each manifold. Remove the remaining bolts holding on each manifold. Remove both manifolds and set aside. Remove any remains of the old gasket material that is left on the head. Be careful not to gouge the aluminum cylinder head.
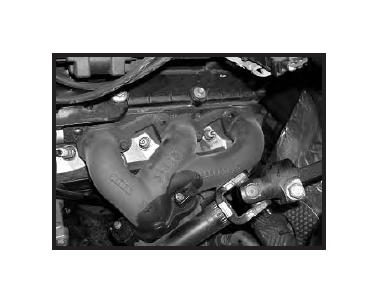
Step 11. Install the driver side header, and gasket. The header will have to be angled down when installing. Install the upper flange bolts with a small amount of thread locker applied. Use caution installing the manifold bolts into the aluminum head. Torque bolts to 20 ft-lbs.
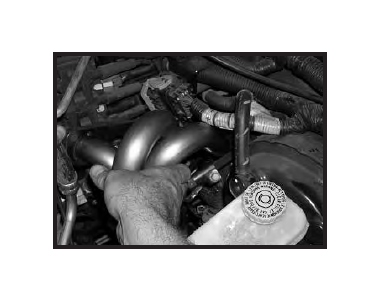
Step 12. Install the passenger side header, and gasket. Install the upper flange bolts with the exception of the top left and right bolts. These bolts will be used to hold the factory heat shield in place. Install the down pipe flange bolts on each side
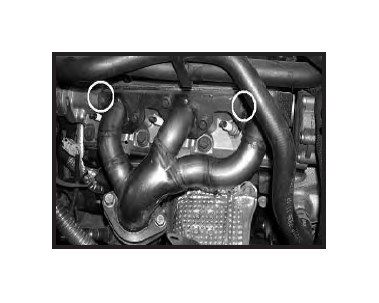
Step 13. Install the passenger side heat shield using the remaining two flange bolts and heat shield brace bolt.

Step 14. Install the heat shield boots on all of the plug wires. The longer boot goes on the #6 driver side rear plug wire. Reinstall all the spark plug wires on the spark plugs.
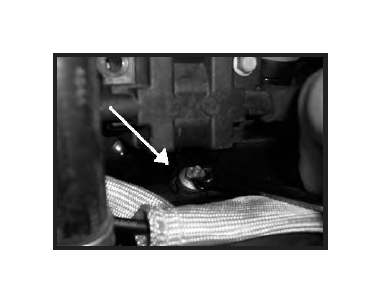
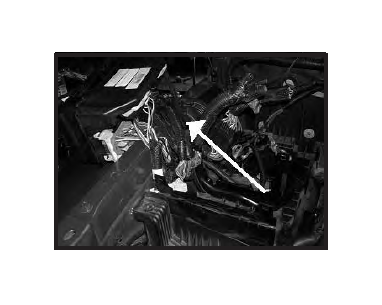
Step 15. Remove the second valve cover stud nut from the front on the driver side. Place the supplied clamp around the rear driver side plug wire. Secure the clamp on the valve cover stud.
Step 16. Reinstall the battery tray, battery, power fuse box, steering reservoir and bracket, and air box. Start motor and check for exhaust leaks.


