 FREE 1 to 3-Day Delivery on Orders $149+ Details

How to Install Rugged Ridge Dual Battery Tray on your 2007-2013 Wrangler

Shop Parts in this Guide
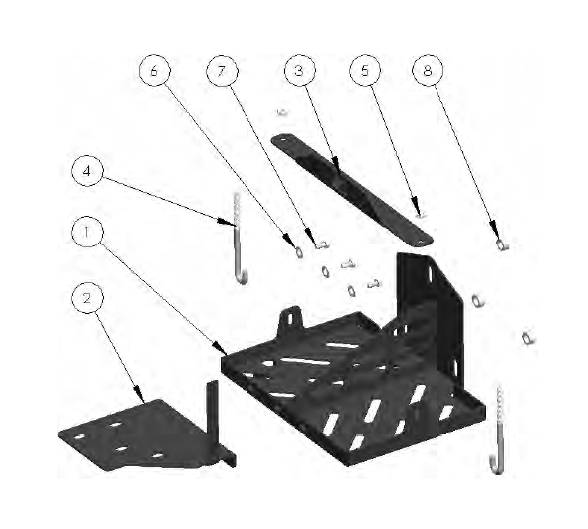
Contents:
1. Dual Battery Tray (1)
2. Fuse Box Bracket (1)
3. Battery Strap (1)
4. J-Bolt (2)
5. Nut (2)
6. Flat Washer (3)
7. Bolt (3)
8. Spacer (3)
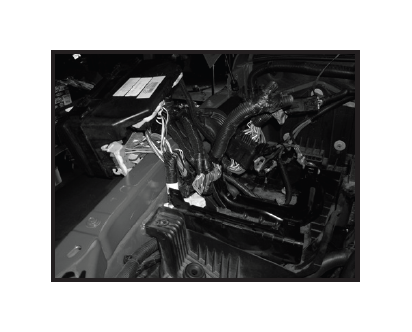
1. Disconnect battery by removing the NEG (-) cable first and than the POS ( ) cable. Remove ground from the stud on the inner fender.
2. Remove the PVC hose from the filter box. Remove the air filter cover by unclamping the cover and removing the hose clamp on the throttle body. Remove the air filter and housing. The housing is held in by three rubber grommets on the bottom of the box. A rocking motion may be needed for removal of air box.

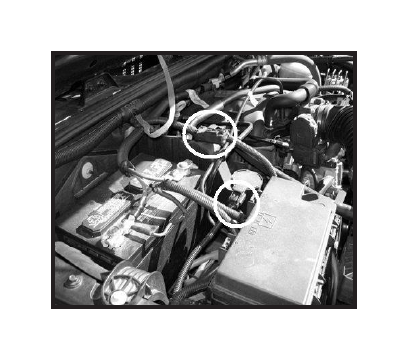
3. Remove the EVAP solenoid connector and the power junction connector. Slide the EVAP solenoid off the tab and move to the side.
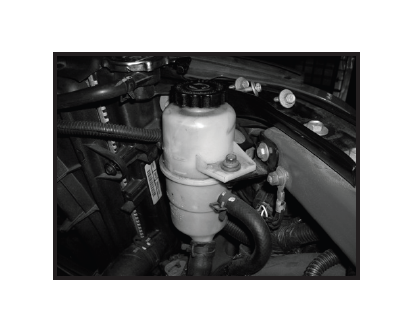
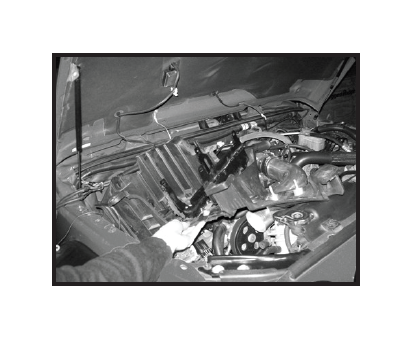
4. Remove the power steering reservoir bolt and move the reservoir to the side. Remove the reservoir mounting bracket and set aside.
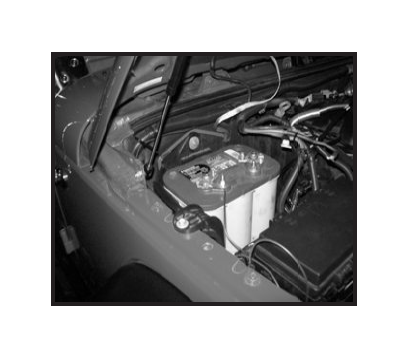
5. Release tabs that secure fuse box to hinged bracket and pull fuse box upward. Lay fuse box over the side of the fender. Loosen the bolt at the bottom of the battery that secures the battery to the factory tray. Remove battery from vehicle.
6. Remove factory battery box by removing the 3 nuts that secure the box to the fire wall and 4 bolts securing the box in the engine compartment. Save this hardware. It will be used to install the dual battery tray.
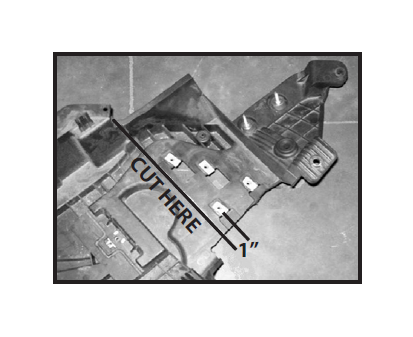
7. After removing your factory battery box, mark a line about 1” past the fuse box mounting holes toward the battery compartment. Cut the box along this line and set the side that mounts the fuse box aside to be reinstalled later.
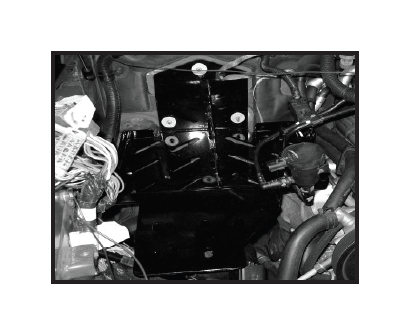
8. Install the provided spacers onto the three mounting studs on the fire wall and mount the Dual Battery Tray using the 3 factory nuts and 1 factory bolt removed in step 5.

9. Install the front section of the factory battery box that was cut in step 6 using factory hardware. Then install the Fuse Box Bracket included with the Dual Battery Tray using the 3 Bolts and Flat Washers. The hinged factory fuse box bracket can then be installed on top of the Fuse Box Bracket included with the Dual Battery Tray. Reconnect all connectors to the fuse box and snap it back into position.
10. Check for clearance around the base of the Dual Battery Tray. Install both batteries onto tray and secure into position using supplied J-bolts and Battery strap. Slide EVAP solenoid over tab on Fuse Box Bracket. Reinstall air filter box to its original location.

11. The drawings below show how batteries may be connected for use with or without extra relay:

