 FREE 1 to 3-Day Delivery on Orders $149+ Details

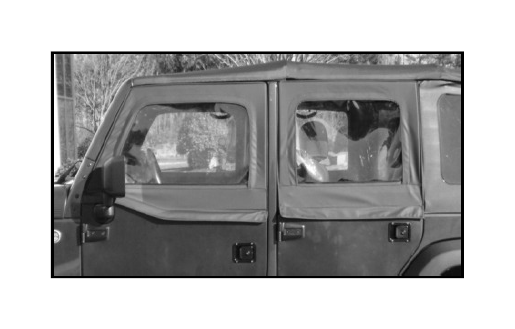
How to Install Rugged Ridge Black Rear Upper Soft Doors - Pair on your 2007-2013 Wrangler

Shop Parts in this Guide
| Front Door Content: 13711.15 (2dr/4dr) | Quantity: |
|---|---|
| 1. Soft Upper Door frame with Cover | 2 |
| 2. Adjustment Collar | 4 |
| 3. Allen Wrench | 1 |
| 4. Velcro Strip (38” ) | 2 |
| Rear Door Content: 13712.15 (4dr) | Quantity: |
|---|---|
| 1. Soft Upper Door Frame with Cover | 2 |
| 2. Adjustment Collar | 4 |
| 3. Allen Wrench | 1 |
| 4. Velcro Strip (30”) | 2 |
WARNING: This product is intended to provide added “off-road” convenience and utility to your vehicle. This product is not intended to provide occupant containment or protection in the event of an accident or rollover. Further, “on road” use may involve increased risk of serious injury in the event of side-impact accidents. To reduce risk from these types of injuries: Always wear seat belt and shoulder harness for all vehicle occupants. Keep arms and body inside vehicle. Drive safely, read and understand all manufacturers warnings and product instructions before installation.
NOTICE: The Rugged Ridge soft upper doors when used in conjunction with the Rugged Ridge Half Doors are designed to provide the best possible protection from the elements; however, due to the nature and intended use of this product, extreme conditions such as driving rains, high wind gusts, automated car washes, etc. may cause leaking to occur.
Front 1/2 Door Installation
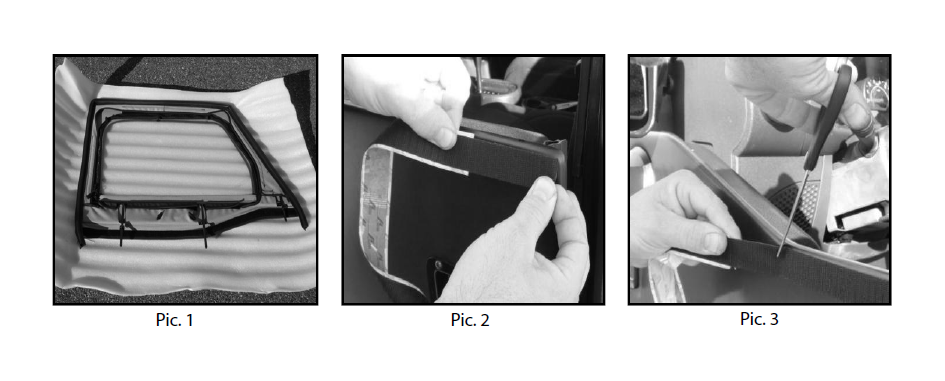
1. Lower 1/2 doors will need to be cleaned using isoproply (rubbing) alcohol. Clean the 2” along the top edge where Velcro is to be installed. Installation should be performed between (65F-110F).
2. Apply Velcro to outer edge of front lower 1/2 door. With 2” of backing tape removed position Velcro 1/8” below top edge of door (Pic. 2). Working forward from rear of door slowly apply Velcro to door maintaining 1/8” spacing from top edge. For front doors cut a “V” shaped notch 3/4 through Velcro at each bend. This will allow the Velcro to follow the door line without bunching (Pic. 3). Press Velcro firmly in place to ensure good adhesion.
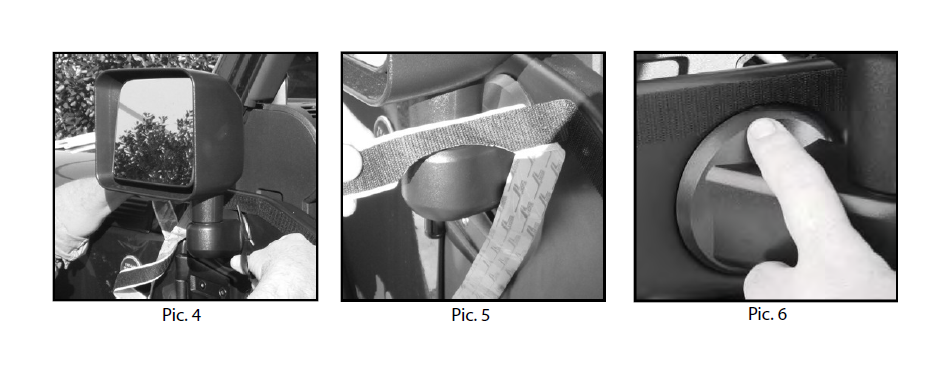
3. For front doors drape Velcro over the top of the mirror mounting base (Pic. 4). Make a small cut where the mirror base begins and where it ends. Pull the Velcro back and cut out the shape of the mirror mounting base (Pic. 5). With Velcro mounted to doors trim edges and press firmly into place (Pic. 6).
Installation of upper door frames to lower 1/2 door.
Please Note: Each upper door frame will need adjustments to achieve the best possible fit. Upper door fitment is directly related to the alignment of the lower 1/2 doors. Several attempts may be needed to achieve proper fitment for each door. Read instructions completely prior to installing.
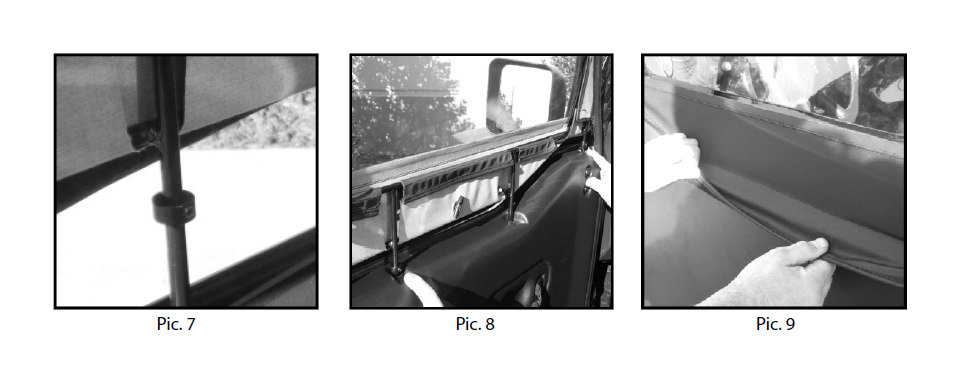
4. Slide (1) of the supplied adjustment collars onto each of the support legs (Pic. 7). No collar is required on the middle support leg of front upper doors. Tighten set screw just enough to keep in place but also allow up and down movement.
5. Place upper doors into lower 1/2 doors (Pic. 8). NOTE: Upper doors frames will have a tight fit and is considered normal. The tight fit reduces upper door buffeting at highway speeds. Powder coating thickness can vary and may affect the fit. If this occurs it will be necessary to remove some powder coating on leg supports. Using sandpaper remove only what is needed to allow upper frame to fit.
6. With upper door installed allow door to rest into lower 1/2 door and secure Velcro (Pic. 9).
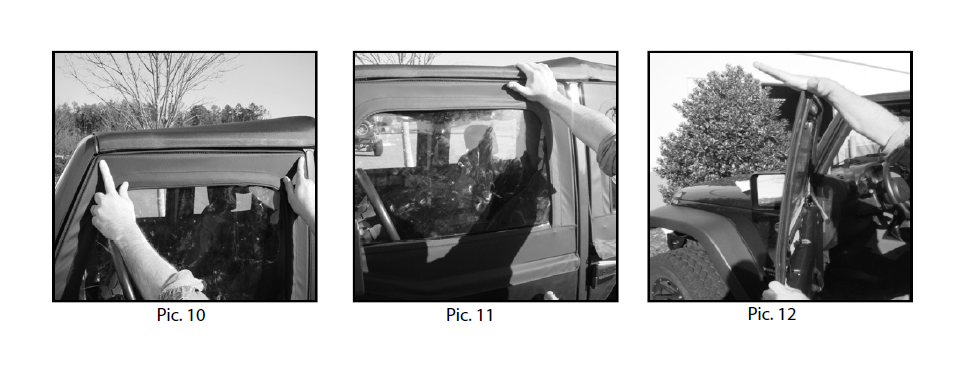
7. With door closed a 1/8” gap should be visible at top corners (Pic. 10). If there is more or less than a 1/8” gap at top corners further adjustment will be needed.
8. To adjust corners up place palm of hand on top corner of upper door. Push up slightly to raise frame (Pic. 11).
9. To adjust down place palm on top corner of upper door. Tap down to lower frame (Pic. 12)
10. With upper door centered and a 1/8” gap at top corners tighten collar set screws with supplied allen wrench (Pic. 13). Do not over tighten.
11. Pull and reposition Velcro to lower door (Pic. 14). Inspect side corners, and top of upper door for tight seal to door frame (Pic. 15). From inside vehicle look at upper door and inspect for visible light. If light is visible then further adjustment will be needed.
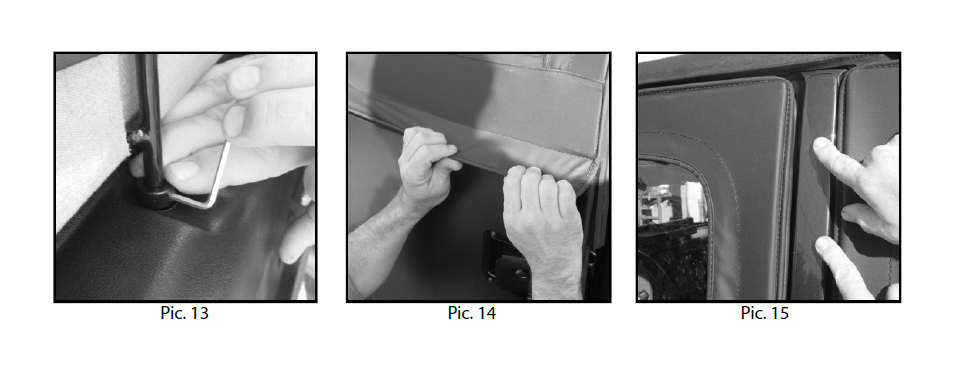
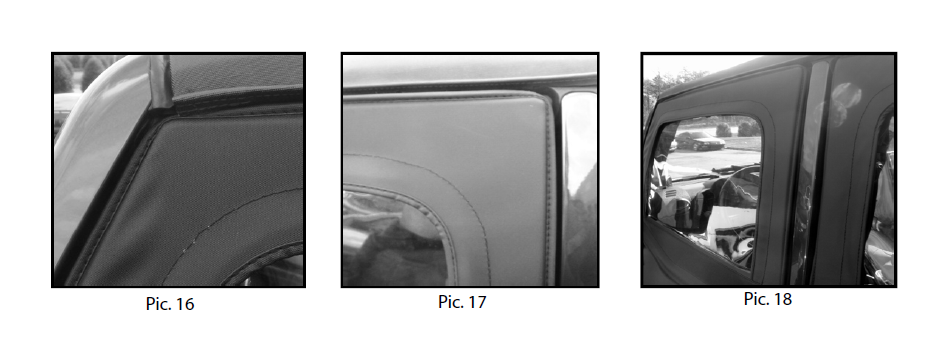
12. Pictures 16, 17, and 18 show how upper door frames should look installed. If light can be seen from inside vehicle follow instructions on page 4 explaining how to obtain a proper seal to vehicle door frame.
Door Seal Adjustment Procedures (Front Doors)
13. From inside of vehicle inspect upper door frames for visible light entering around the door seal. If light is visible frames will need to be bent slightly inward (towards vehicle) to eliminate gaps.
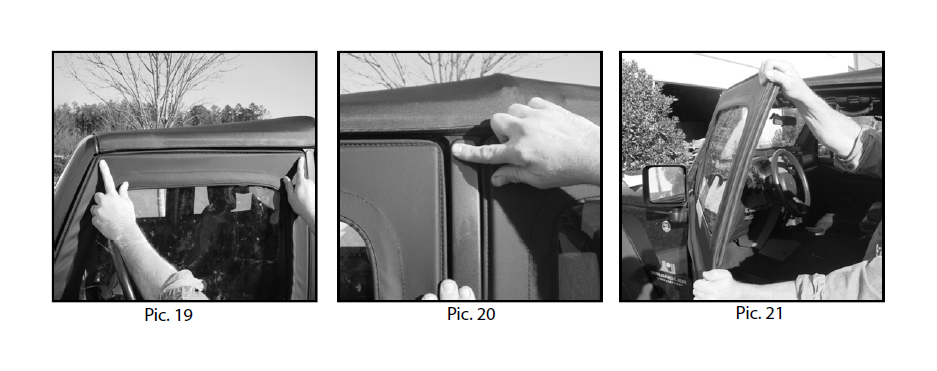
14. Before proceeding make sure steps (4 - 12) have been followed correctly. Upper door frames must be centered within door frame and a 1/8” gap visible at top corners (Pic. 19). Failure to align upper doors correctly may result in leaks around seals.
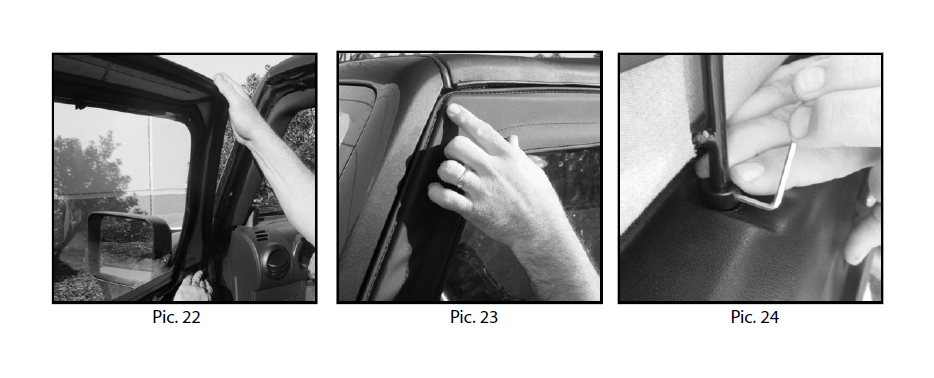
15. Upper door frame corners will need to be adjusted independently. Start with upper corner that appears to have the largest visible gap (Pic. 20). Open door and grab the base of frame and top corner. Pull frame back from the top (Pic. 21). Small adjustments should be made (DO NOT OVER BEND). Close door and inspect for visible light. Continue to make small adjustments to achieve best fit.
16. Inspect opposite corner for gap. Some adjustment is suggested even if no light is visible. This will ensure a tight seal. Open door and grab the base of frame and top corner. Pull frame back from the top (Pic. 22). Small adjustments should be made (DO NOT OVER BEND). Close door and inspect for visible light. Continue to make small adjustments until a tight seal is made around door opening.
17. Open and close front door several times. Upper door front corner should just make contact with windshield frame as the door is closed. If upper door is bent too far inward the door will not close correctly and the upper door will need to be bent back out. To bend outward grab the base of frame and top corner. Hold base and push outward on frame. Small adjustments should be made (DO NOT OVER BEND). Open and close door between each bend until slight contact is made as door is closed (Pic. 23).
18. For final inspection close door and check door alignment one more time. If upper door is not centered and or has more than a 1/8” gap at top corners the frame will need to be readjusted using adjustment collars. Adjust lowest corner first. Loosen set screw in adjustment collar (Pic. 24). Repeat steps (6-18) as needed. When door is positioned correctly tighten collar set screws.
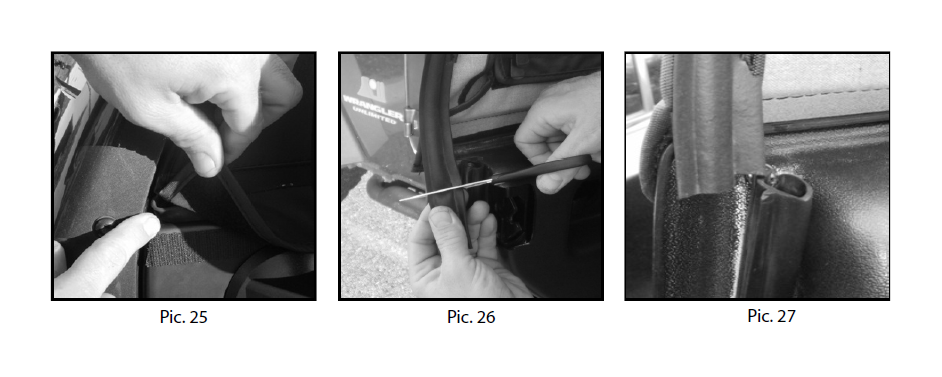
19. Open half door and grab the excess weather-stripping closest to the Windshield frame. Place the weather stripping behind the post of the soft upper frame (Pic. 25). Adjust as needed to fill gap between windshield frame and upper door .
20. Trim rear weather-stripping so that it slightly overlaps the weather-stripping of the half door (Pic. 26 -27).
Door Seal Adjustment Procedures (Rear Doors)
16. Rear upper door frames are installed using the same procedures and techniques discribed in steps (2-19).
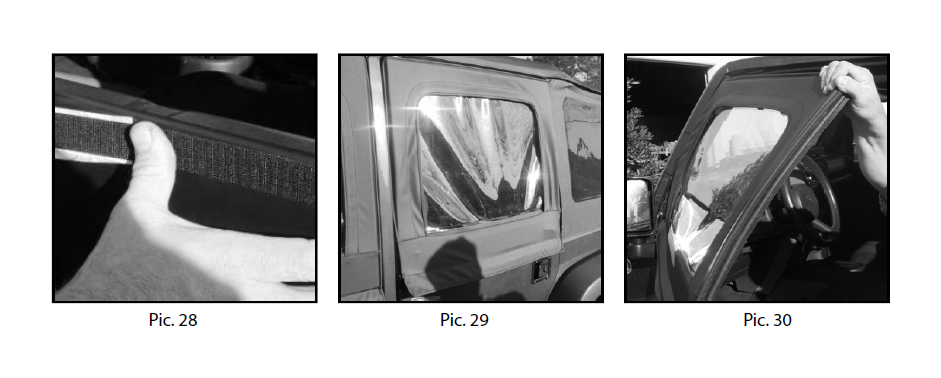
17. Apply Velcro to lower doors as described in step (2). Velcro should be positioned 1/8” from the top of lower 1/2 door. Press Velcro firmly into place to ensure good adhesion (Pic. 28).
18. Position rear upper frames onto lower doors. Top corners should have a 1/8” gap between the top of upper door and soft top (Pic. 29). Adjustment of rear upper doors will be the same as fronts. See steps (4-12) for proper alignment procedures.
19. After upper doors have been positioned correctly with 1/8” gaps check for visible light from inside vehicle. If light is visible rear upper doors should be adjusted in the same manner as the fronts (Pic.30). See steps (14-19) for proper alignment procedures.
20. When bending frames small adjustment should be made. (DO NOT OVER BEND) Continue to make small adjustments until a tight seal has been made around door opening.
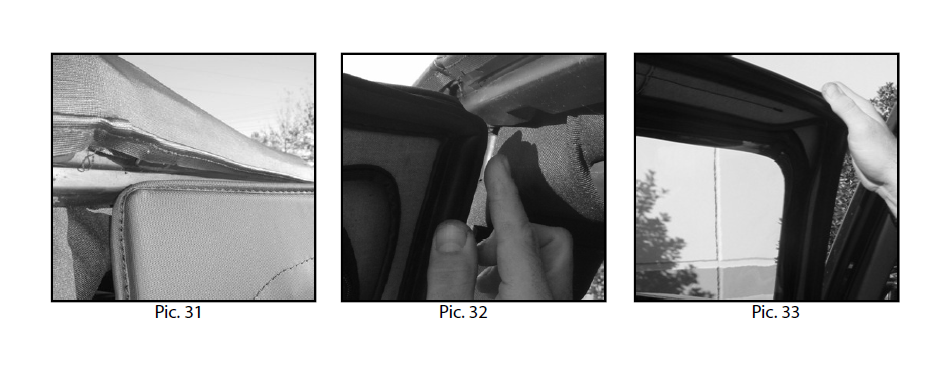
26. With rear doors aligned open and close doors several times. As the rear door closes the upper door front corner should rest on door frame and slide into place (Pic. 31). This contact with rear door frame insures a weather tight seal and is considered normal.
27. If upper door falls below plastic surround or binds as door closes (Pic. 32) the upper door will need to be bent back away from vehicle ( Pic. 33). (DO NOT OVER BEND) Small adjustments should be made until proper contact with door frame is achieved.
28. With door closed inspect outside alignment. If upper door is not centered and/or has more than a 1/8” gap at the top corners the frame will need to be readjusted using adjustment collars starting with lowest corner first.
29. With door centered tighten set screws and readjust Velcro to door. Check for visible light from inside vehicle. If light is present repeat steps (22-29).
30. Trim weather stip as discribed in step (21).
Features and Functions of Soft Upper Doors
Rugged Ridge upper door windows can be set in 3 new distinct positions. By unzipping the window and sliding plastic dowels through the elastic straps the door can be configured as shown.
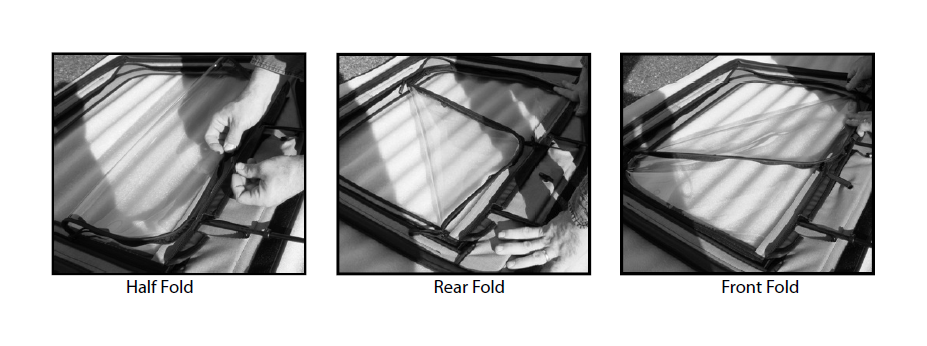
This feature will allow air flow to be tailored as needed and will prolong the life of the upper door fabric, zipper and plastic window.

