 FREE 1 to 3-Day Delivery on Orders $149+ Details

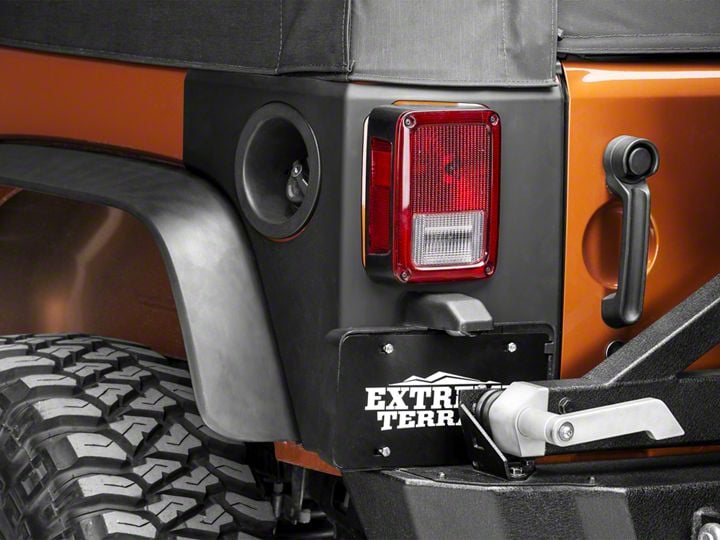
How to Install Rugged Ridge Rear Corner Kit, Body Armor, Matte Black, 2-Door on your Wrangler
Installation Time
20 minutes
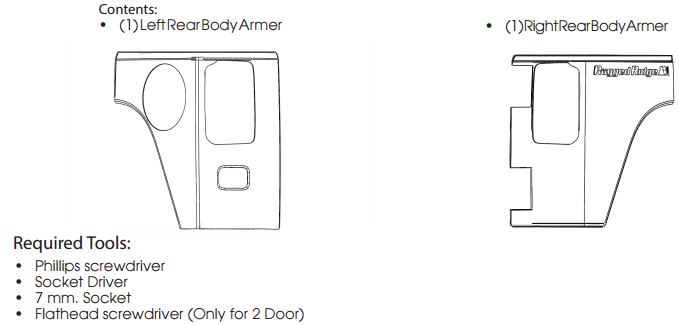
Tools Required
- Phillips screwdriver
- Socket Driver
- 7 mm. Socket
- Flathead screwdriver (Only for 2 Door)
Shop Parts in this Guide
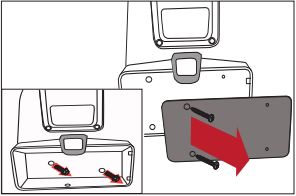
1. Remove the licence plate using phillips screwdriver. (For 2 Door using a Flathead screwdriver)
2. Remove the licence plate holder using a socket driver and 7 mm. socket.
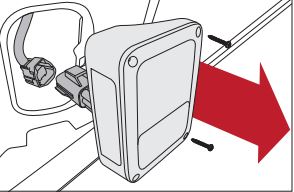
3. Remove the driver side and passenger side tail light using a phillips screwdriver.
4. Clean surface with isopropyl alcohol (rubbing alcohol).
5. Apply 3M© Adhesive Promoter 06396 to mounting surface. Avoid areas that tape will not contact. Allow 90 seconds for Adhesive Promoter to dry before proceeding.
Note: For best results, install within 10 minutes of installing Adhesive Promoter.

6. Test fit Body Armor to the vehicle before removing plastic liner from mounting tape. This will aid in aligning the item before adhesion.
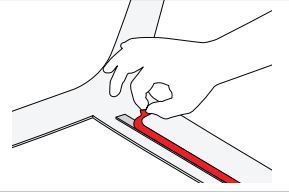
7. Remove only enough plastic liner to be easily gripped when item is installed.
Note: The plastic liner of the shorter tape sections may need to be fully removed before installing.
8. Install item in proper mounting position while keeping partially removed liner ends accessible.

9. Firmly hold the Body Armors in proper mounting position while pulling the exposed plastic liner to completely remove. Maintain pressure on installed item for 30 seconds to ensure proper contact. Full adhesion occurs within 24 hours of application.
NOTICE. Areas where promoter may be visible can be cleaned with acetone solvents or methylethyl keytone (MEK). See promotor manufacturer for further detail.
CAUTION. Solvents can cause cosmetic damage to plastic surfaces. See promoter manufacturer for further detail.
10. Reinstall the licence holder, licence plate and tailgate lights.
