 FREE 1 to 3-Day Delivery on Orders $149+ Details

How to install a Rugged Ridge 1.75 Inch Spacer Lift Kit without Shocks on your 2007-2015 Wrangler

Shop Parts in this Guide
1. Park vehicle on flat, level ground and set emergency brake.
2. Raise front of vehicle and support frame rails using jack stands. Using a floor jack, support center of front axle, remove both wheels.
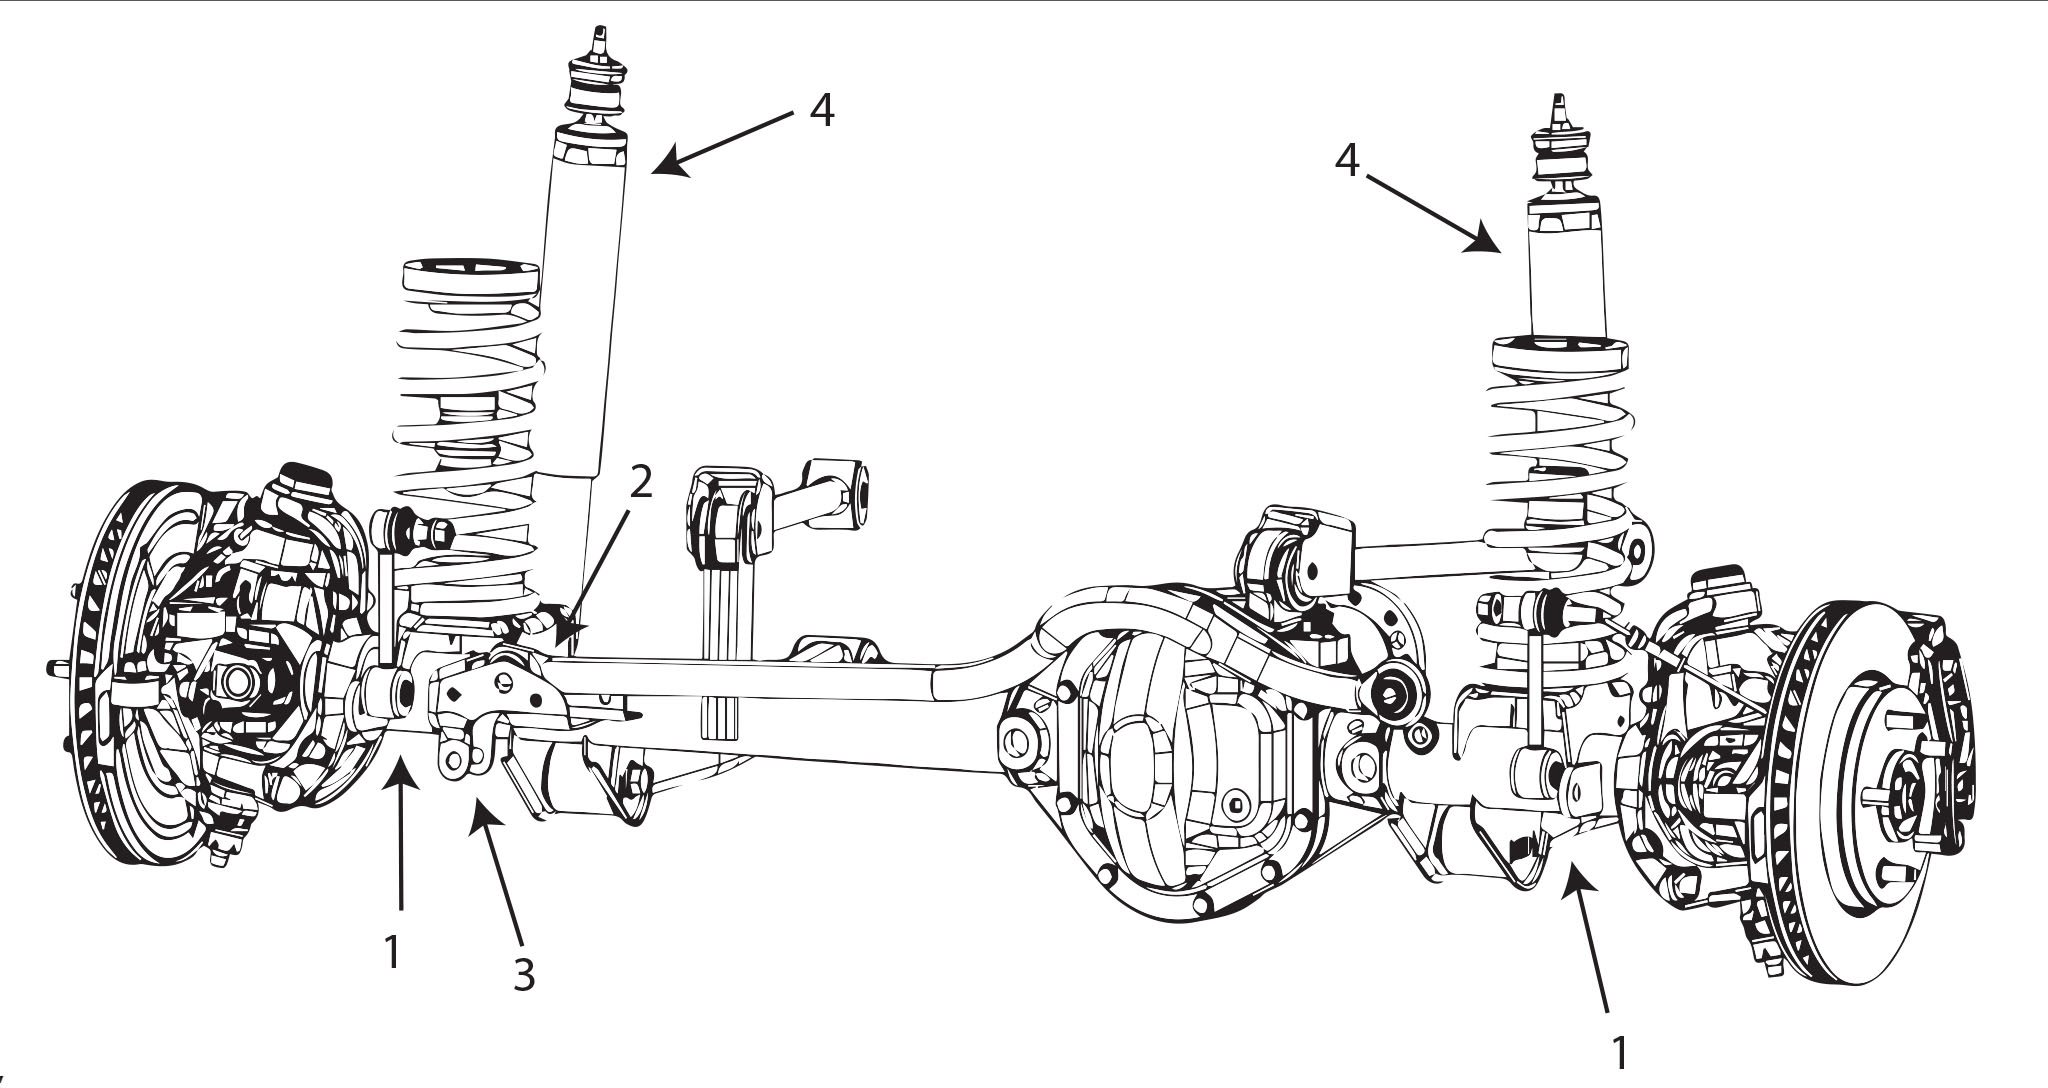
3. Disconnect the front sway bar end links using a 18mm socket. (see 1A) Disconnect the front track bar from the axle using a 21mm socket. (see 2A)
4. If installing Rugged Ridge Steering Stabilizer, remove factory steering stabilizer using 18mm socket. (see 3A)
5. Disconnect front shocks using an 18mm socket. (see 4A) Unbolt the front rubber brake hose retainers from the frame.
6. Remove the ABS line from the retainer bracket on each axle spindle.
7. Unbolt the front brake lines from the frame.
NOTE: On newer model vehicles the brake line bracket by the lower control arm will need to be loosened also.
UPDATE NOTICE: For JK wranglers with center fixed mount bracket brake lines. A relocation bracket is supplied to relocate the brake line.
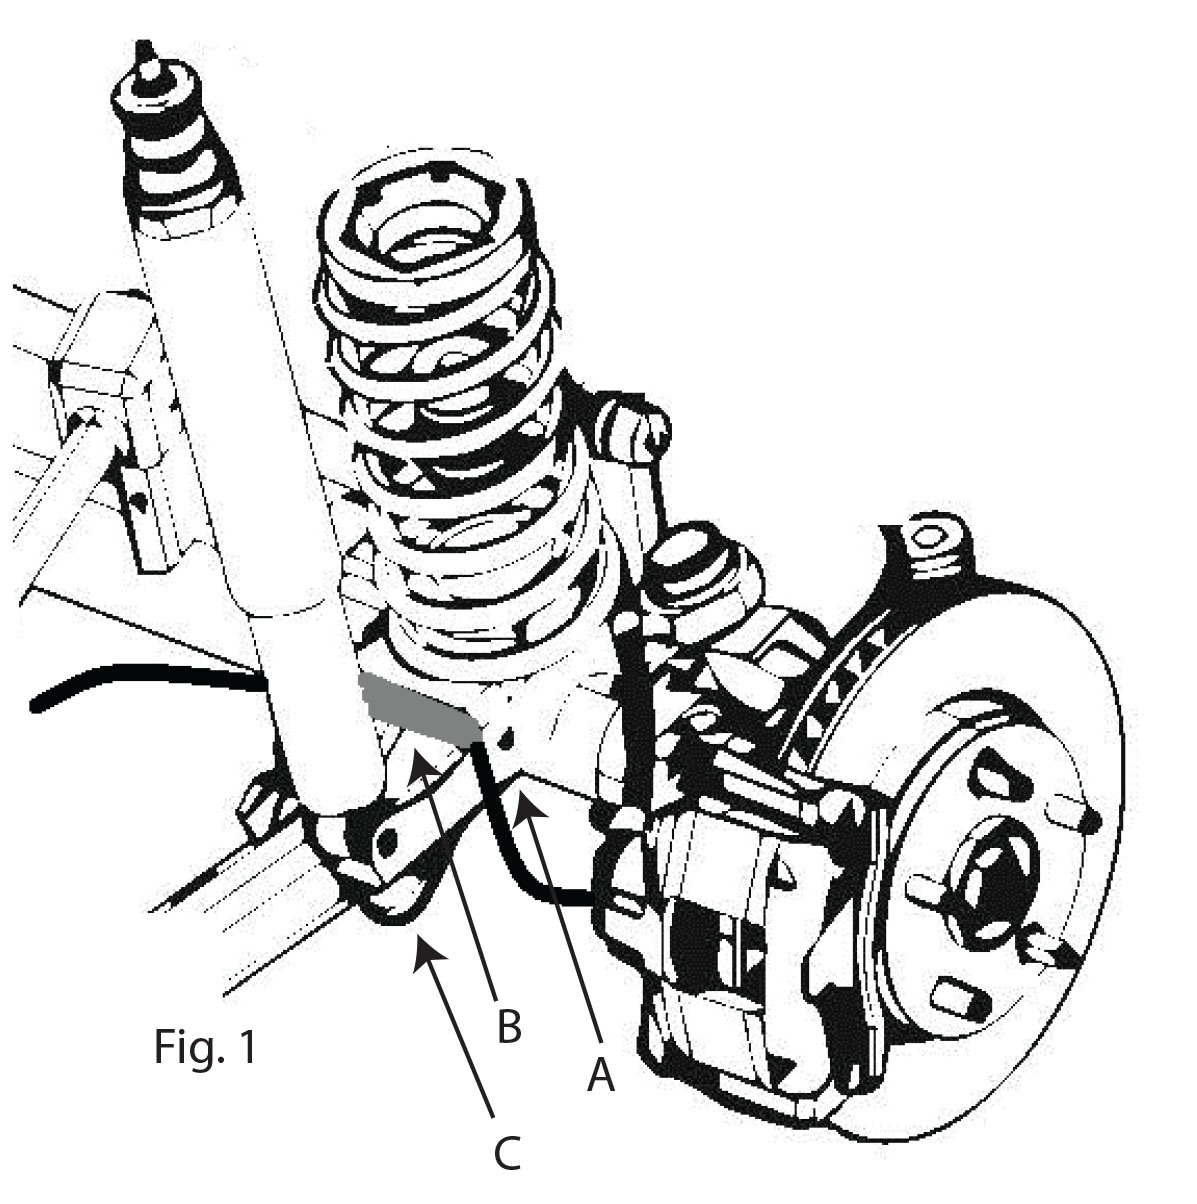
Step 2A. Remove the brake line brake bracket from the coil spring mount. (See fig. 1B)
Step 3A. Remove the lower shock mount bolt. (See fig. 1C)
Step 4A. Compress the lower shock and move the brake line to the outside of the shock. Step 5A. Reattach shock and tighten.
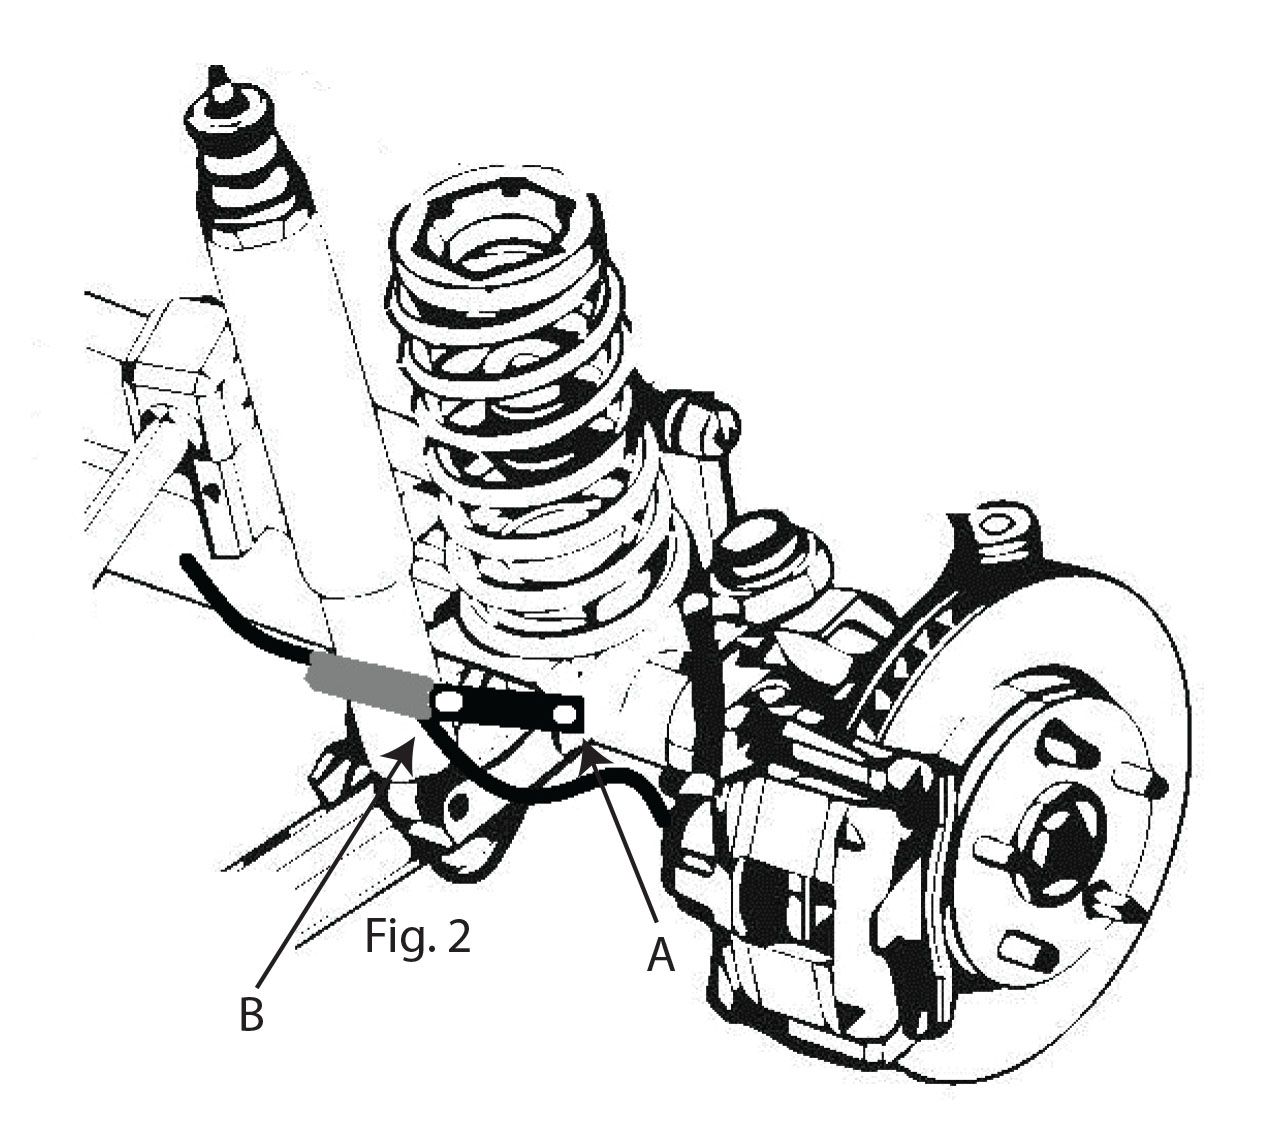
Step 5A. Using the supplied brake line relocation bracket, mount to the existing hole in the coil spring mount. Mount bracket on the outside of the coil spring mount at a 45 deg. angle upward. (See fig. 2A)
Step 6A. Attach the factory brake line to the relocation bracket using the factory bolt. (See fig. 2B)
Step 7A. Bend bracket slightly outward away from shock.
8. Lower the front axle. Remove both front coil springs.
NOTICE: Inspect coil springs, coil spring isolators, and mounting areas for any cracks, broken or worn parts. Replace or repair any affected areas before you continue.
NOTE: Use of a thread locking liquid is recommended during reassemble of vehicle.
9. Install the new coil spring spacers onto the upper coil spring mount between the factory spring isolator and the coil spring. Reinstall the coil spring.
10. Let the weight of the frame down on to the new coils. Re-Attach front drive shaft, end links, track bar, etc. NOTE: The rear sway bar links will be used in the front suspension.
11. Install shocks, steering stabilizer. Install tires/wheels.
12. Torque all nuts and bolts to factory specifications. Re-check after 100 miles.
Installation: Rear Suspension
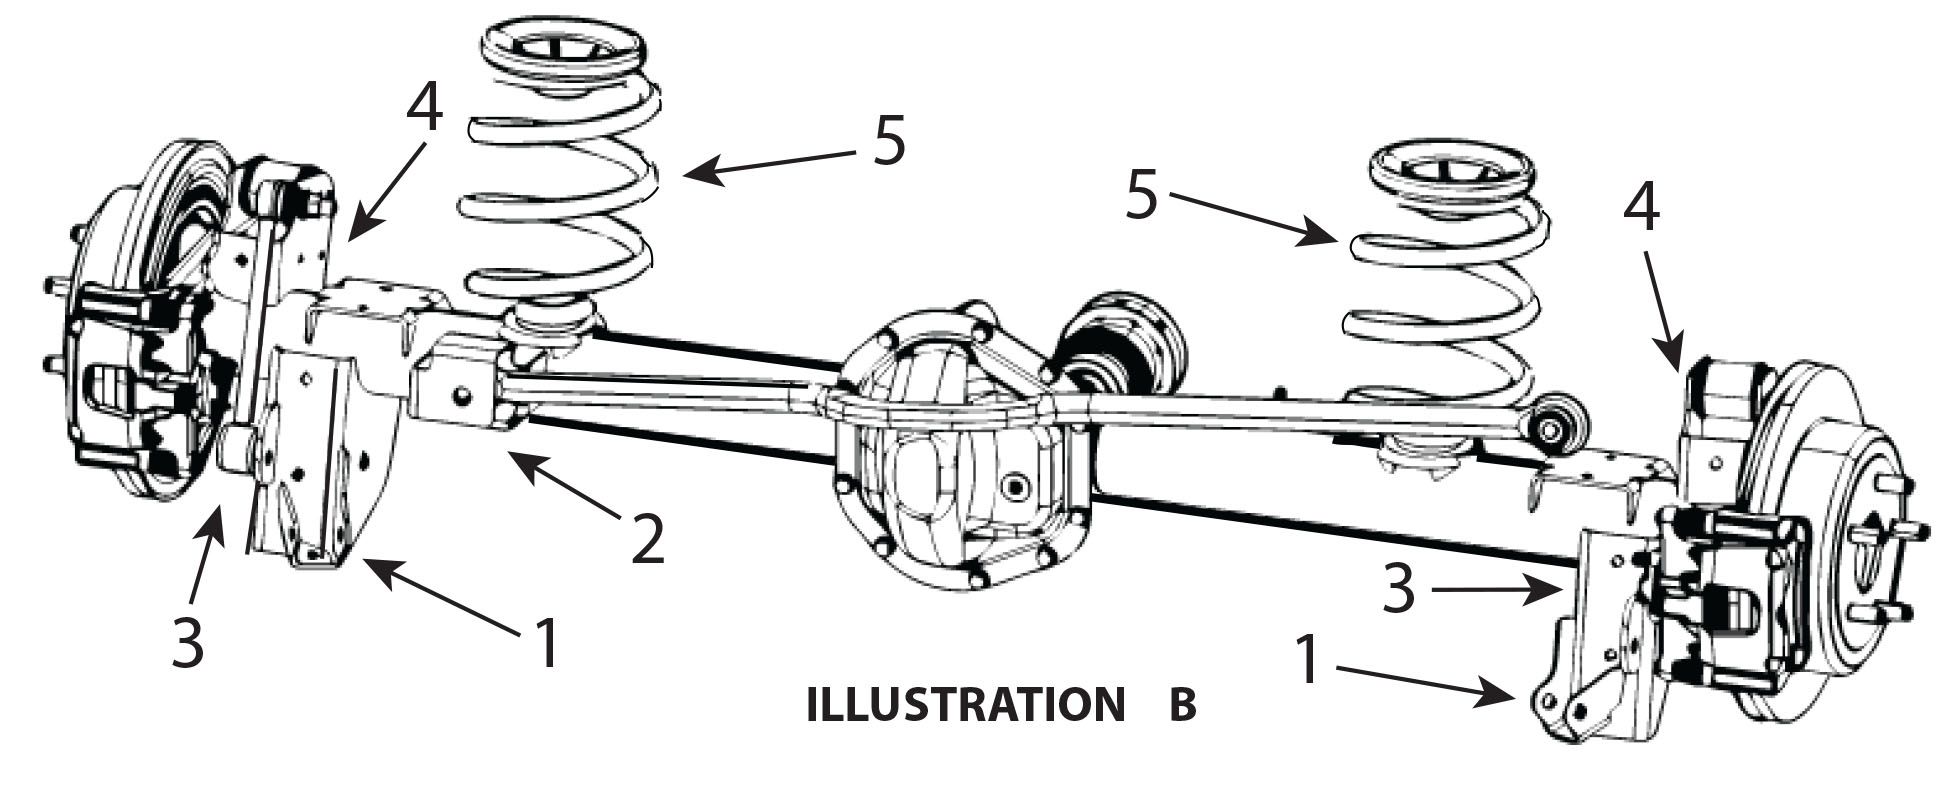
1. Raise the rear of the vehicle and properly support frame rails using jack stands. Using a floor jack, support the rear axle to relieve tension on the shocks and remove wheels. Disconnect both rear shocks using 16mm socket. (See #1B)
2. Disconnect rear track bar from the axle using 21mm socket. (See #2B). Remove both rear sway bar end links using 18mm socket. (See #3B).
3. Disconnect ABS sensor wire fasteners from frame and upper control arm bracket on both sides (See #4B) and disconnect the brake line bracket from frame. Unbolt the emergency brake line retainer from the bottom of the tub above the axle. Lower the axle down and remove factory rear coils. (See #5B)
4. Install new rear coil spring spacers on top of the factory springs. Be sure to re-use the upper OE Rubber isolator pad on top of the spacer. Torque all fasteners.
5. Install the rear brake line extension brackets.
6. Install the emergency brake cable relocation bracket.
7. Install the new extended rear sway bar links.
8. Let weight down on coil springs and install the new extended rear sway bar links.
9. Re-attach the ABS lines, shocks, sway bar, etc..
10. Install tires/wheels and lower vehicle to the ground.

