 FREE 1 to 3-Day Delivery on Orders $149+ Details

How to Install a RedRock 4x4 Hitch on your 1987-2006 Jeep Wrangler YJ or TJ
Installation Time
30 minutes
Tools Required
- 18mm socket
- 5/8” socket
- 18mm wrench
- 5/8” wrench
- T-30 Torx Bit

Shop Parts in this Guide
Contents:
(1) - hitch
(4) - large bolts
(8) - large washers
(4) - large lock washers
(4) - large nuts
(16) - washers
(8) - nuts
(8) - bolts
(8) - lock washers
It is recommended that you have an additional person available to help during this installation, parts can be awkward to hold and support by yourself. Block wheels and set parking brake before beginning work.
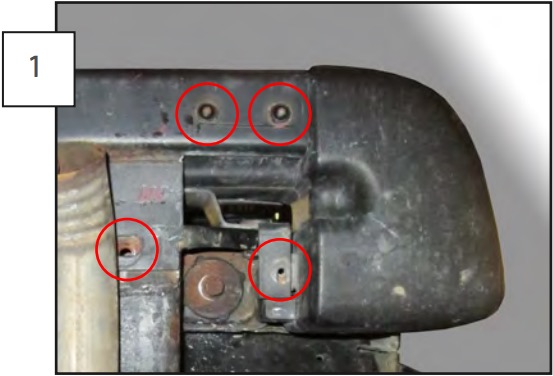
Remove the (3) T30 screws from the bottom of the bumper end cap. Also remove the (1) bumper to frame bolt above the exhaust pipe. Repeat on the opposite side. (For bumperette equipped vehicles, simply remove the bumperettes and continue to step 2.
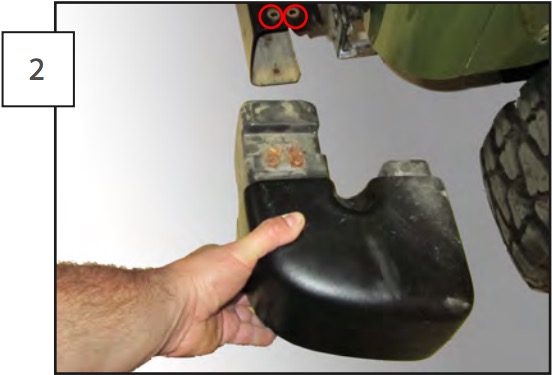
Remove the (2) T30 screws from the top of the bumper end cap. Remove the bumper end cap, by pulling it away from the bumper. Repeat on the opposite side.
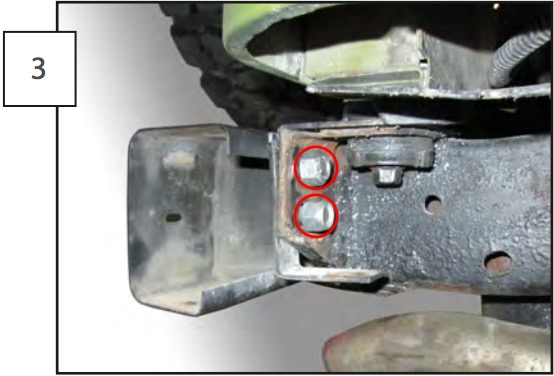
Remove the (2) rear bumper to frame nuts. Repeat on the opposite side.

Install the hitch to the frame with 4 of the bolts included with the hitch. use a washer on both the bolt head side and the nut side. Install a lock washer on the nut side, then tighten each connection. The large hardware and two hole plates are for installation of a tube bumper to the hitch if desired.
