Talk to a Bronco Sales Tech
1-877-870-8556
M-F 8:30A-11P, Sat-Sun 8:30A-9P
Logo Image
$20K Sweeps! 10 Chances to Win! Enter Daily >

ReadyLIFT High-Clearance Anti-Intrustion Beams (21-24 Bronco)

Item FB18384
Verify parts fit and get product recommendations.
Bronco Sales Techs: Connect Now M-F 8:30A-11P, Sat-Sun 8:30A-9P
$0.00
Our Price

$159.95 (set of 4)

FREE Shipping Market Price $183.99 You Save 13% ($24.04) Up to 10% off for Military & First Responders! See Details

Will this fit your Vehicle?

Select a different vehicle Help?
Update or Change Vehicle
Ship to: Ashburn - 20149
Sorry, please enter a valid US or CA postal code
We're sorry, zip can't be updated at this time.
    Create a list
    Add to New List

    Saved - View your saved items

    We're sorry. We couldn't save this product at this time.

    or use

      Product Videos

      Justin: Hey, everybody. Justin with extremeterrain.com here. Today, we're taking a closer look at the ReadyLIFT High-Clearance Crash Bar Kit, available for all 2021 and newer Broncos. Long story short, you should be considering the ReadyLIFT options here for your two- or four-door rig if you've upgraded the tire size, maybe went with a more aggressive offset or even a combination of both, and are making contact with the factory anti-intrusion beams, aka crash bars. Now, these affordable options from ReadyLIFT will install in place of your factory crash bars and offer impact protection in the event of a crash, as opposed to completely removing the bars altogether.So this really is a great product from the gang over at ReadyLIFT who saw an opportunity to improve, let's just say, a less than ideal scenario. You guys all know the deal, right? You go to install a brand new set of larger wheels and tires on your Bronco only to get that dreaded rubbing on the factory crash bars while turning. Now, a lot of owners at this point will simply just remove the bars altogether for added clearance but that's not exactly ideal as, of course, they do serve a purpose. And that purpose is to help manage collision energy in a frontal or that overlap kind of impact. So ReadyLIFT to the rescue here again with their intrusion bar kit, aka better known as crash bars. Now, these guys will still allow Bronco owners to leave those crash bars installed, of course, while at the same time still clearing their larger wheels and tires or more aggressive offsets.Now, the bars themselves have been manufactured using heavy-duty laser-cut and robot-welded steel and then finished off in a satin black powder coat. And get this, guys, have been engineered and tested to meet the specifications and, more importantly, the strength of the factory crash bar, very important stuff. Now, the kit from ReadyLIFT will include four total pieces here. You're looking at the entire kit on the table. You got two fronts, two rears for both the passenger and driver-side wheel wells. These guys are just simply going to install in place of your factory crash bars. There's no crazy modification or anything like that needed.Now, I'm sure everyone is asking just how big of a tire can I run and what's the most aggressive offset I can get away with with the crash bars installed. Well, unfortunately, ReadyLIFT says because of the numerous variables at play here between wheel size, offset, tire size, you go on and on, lift size, they can't really guarantee a certain fitment because of all of the variables I just listed. So in the words of ReadyLIFT, just make sure you test your wheel and tire combo first in conjunction with the bars themselves here just to make sure everything's going to work properly.Price point for the ReadyLIFT options will land them in the high $100 to low $200 ballpark, and that's gonna make them one of the most affordable, high-clearance options currently on the site at the time of this video, undercutting the ICON options by about 100 bucks. Now, at the end of the day, we're talking safety here. It's really hard to put a price on safety, and that's why I think this kit really is a bargain at that price point.But now we wanna shift gears and talk a little bit more about the install. And the site's gonna call this pretty solid one out of three wrenches on the difficulty meter, taking you a couple of hours, at absolute most, to complete from start to finish. Now, depending on your bumper situation with your Bronco, you may have to remove the front bumper completely to gain access to those front crash bars. And that's mainly going to apply to all of my base bumper owners out there. Those of you with the modular bumpers, you can remove the caps, gain better access to these things. But if you have that plastic base bumper, chances are it's just a lot easier to remove that first to get better access to everything you need to. Regardless, a basic socket set really is all you need here to get this particular job done. But now we're gonna throw it to an XT customer to walk you through the job. Check it out.Man: So for the install, I used a DeWalt impact driver with a 15-millimeter socket. You don't necessarily need to use a DeWalt one, that's just the one I had. Additionally, I used a Snap-on torque wrench. Any torque wrench would likely do, I just used a Snap-on one. I also used two Craftsman socket wrenches using a 15-millimeter socket. Again, any brand will work for this, however, I did use two different sizes because sometimes the clearance within the wheel wells and other parts of this install make it difficult to use larger ones. So I also used a smaller version.Additionally, I also used a mallet. And then finally, I also used a screwdriver, which also had the option of using a Phillips and flathead tip. One of which, the flathead tip was used for the removal of the license plate attachment frame, which is not necessarily on all cars, but I needed to use it. Additionally, the Phillips head was used to remove the fender liner clip.This is what the first part of the tutorial looks like. You have to take this piece off the front here. It's real easy, as you can see, that's what the final product looks like. But all you have to do is just pull and it comes out. You just got to be careful. You don't want to break any of these clips. Just like that. And then you want to remove these bolts to loosen it because on the side here you're going to want to remove these crash bars obviously, but there's not enough clearance with the stock bumper.So take your impact. Sometimes they might be a little tight. So what we had to do today was take this and use a mallet because we didn't have a breaker bar to basically hit it off and break it off. I've already done it here so. But then take your impact, and there you go, you see, start loosening them. You don't need to take it out all the way necessarily. You can remove the full bumper if you want to just bypass everything. But yeah.So sometimes these bolts won't be able to come off with an impact. So you might need like a breaker bar. In this case, we don't have a breaker bar. So we're using a mallet to then loosen them. So you can see now it's got enough play there where I can start the impact. We'll then start bringing it off. And then you just continue the process for the other ones.So now you have those bolts loosened, you're actually gonna wanna remove the front bumper. There's a bit deep for the other side. There's your front bumper. And we have that. So in our case, in order to remove the front bumper, we have to remove the license plate bracket because that is holding us up. So we have a flathead screwdriver here that we just need to remove it with. There you go, your full bumper is off.Now that you have your front bumper off, you also need to do these, because these are on pretty tight. Those are on there pretty good. Like that. Your impact is not really going to fit in there so you're just going to have to do it by hand. There we go. Now, we'll loosen up where you can just kind of hand it. We're gonna repeat for this one. So now that you have your two bolts removed, simple as that, removing it. And then take your new part and, see, that's the difference in the two. Pretty crazy. Then just slide it in there like so. And then use your stock hardware which you had just removed and then you tighten it and what's nice is the bolts on the bottom are welded from factory so you don't have to worry about keeping those on. They'll just stay there for you and then make sure these are threaded.Yep, and then I'm gonna take this again and then go the opposite way obviously. You can fit it in there. All right, so now that you still have your front bumper removed, look to the other side. You're going to want to take this, use a mallet because these are some tight bolts and you can't fit an impact in there. So you're going to start hitting these over, this one, and just getting them loose. If you have a breaker bar, that's fine. Here we're using a mallet. So we just get them turning.There we go. Let's see now. Slowly getting to the point where I can now do it by hand and you're gonna wanna do this eventually. This is not going to be able to fit as the clearance will. You'll just have to start doing it by hand. But I will show you eventually once I get them to that point. So now that you have these loose enough, this is going to start having trouble with clearance getting it all the way out. So you can just loosen it with your hand at this point. You can see it will just pull right out. Do that for both sides.Now that both of those are removed, this will just slide right out as so. See? And then you're gonna wanna grab your aftermarket one. So in this case, it is this one. And easy enough, you're going to want to just slide that in, line it up with the factory holes, and then you can just use the factory hardware and just thread the bolts in as you can, like that, and then the side do the same. Once you have them screwed in pretty good, you can start using this and then obviously make sure you're going the right direction. Start ratcheting these down.Now, you're gonna want to make sure you're down at 60 foot-pounds on these stock bolts here into the crash bar. That's the specs that we're looking to do. So yeah, from now on I'm just gonna be tightening these and getting them down to 60 foot-pounds. So now that you have your bolts on, you're gonna want to make sure they're torqued to spec. Set this down to 60 foot-pounds. There you go, 60 foot-pounds.We're going to repeat the same process for this side. So just torque them down to 60 as recommended. Again, you can just use the factory hardware for this. There you go. Just like that. So now you're gonna wanna switch that flathead you used on the license plate over to a Phillips. So, easy enough. Then you're gonna wanna go in here and there's this fender liner which is gonna get in the way of you. So, you're gonna wanna unscrew that. It's not very tight, obviously you can just use your hand. Just do it with my fingers so it doesn't fall and I lose it.So yeah, this is just all that comes out. So a little fender liner pin. And then now that gives you play when you wanna remove these two bolts right here. As you can tell, this part was gonna be too tall in order to get to the bolt. So we had to switch over to a different one, still using the 15 size for the bolt. And slide that on there. And these aren't really torqued down as much. You can just kinda pull it and it'll come right off. So if repeat the rest of this process, you're gonna wanna remove these. Cover it like that. Yeah, so you're just gonna want to remove these in order to slide off your rear crash bar.All right, so now that we have our bolts loose, we just have to pull them out and remove the factory crash bar here. Then you're gonna want to take your new one and just slide it in there where your old one was. This part is kind of a tight fit, so we're going to take your mallet. You're gonna want to just start hitting it in basically. It's just an extremely tight fit in terms of dimensions. Now that you have this malleted in place, you can slide the bolts in as so. So now that you have your bolts all tightened in there, you wanna make sure they're torqued down to the correct 60 foot-pounds. So you're gonna wanna put your torque wrench in there. It is pretty tight, so fortunately, I think I'm actually good. It's locked there. This one, it's pretty tight as I mentioned, but as you can hear that click, that means I'm good.So now that I've torqued it down, put in my fender liner clips, you just push that in there and you take your bolt, put the anchors in. Kind of put it in there, but I like to use it obviously a screwdriver for this because it is a Phillips head and there you go. It is in. You just push it. It's real easy.All right, so now you're gonna put your front bumper on once you've completed both front crash bars. It should just kind of slide it on. So now that you've gotten both your front crash bars reinstalled and also the rears, you can put on your front bumper. So I've already actually seated it because it was kind of difficult for me to do while also on camera, but basically while you have this seated then you're just gonna want to thread the bolts in. Gotta be careful with this. Just gotta go like that and then thread it in. Initially, you can just hand tighten them to get it started so you know your bumper is sitting in the right place and then you can tighten them with tools.Now let's repeat this for the other side. All right, so now that you've hand-threaded them, you want to hold it up like that so then you have them all tight. All right so also when you're tightening those down with the impact you want to make sure the gapping is good on each side of your bumper too. Then once you've ensured that, then you want to make sure these are torqued to about 60 foot-pounds as earlier. There we go, that's 60 on that one. Sixty. Sixty. And then finally this one. Then you're gonna wanna slide this one back off. It is easy. I personally prefer to start with this end and push it in as you go. And you do the same for this side. So you thread this one in, make sure that one's in. There you have it, now your bumper is fully reassembled and also you can put back on your license plate frame again if you have one.Justin: So if you've installed bigger tires and wanna keep the crash bars and minimize the rubbing, be sure to check out these affordable options from the gang at ReadyLIFT right here at extremeterrain.com.

      Product Information

      Features, Description, Reviews, Q&A, Specs & Installation
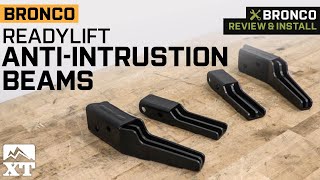
      Features

      • For Accommodation of Larger Tires without Hitting the Crash Bars
      • Can Handle Up to 285/70R17 with Leveling Kit and Wheels
      • Easy to Install with Minor Trimming and Disassembly
      • Made with Stout Black Powdered Finished Steel
      • Delivers Safety and Security
      • Notched Design
      • Works with all 2021-2024 Ford Broncos

      Description

      Product to Look For. A fantastic addition to accommodating wider wheels and tires is now available with ReadyLIFT High-Clearance Anti-Intrusion Beams. If you want to run a larger tire without bumping into the factory offset intrusion beams, this is the product you should be looking for. These anti-intrusion beams will help prevent collisions on the crash bars.

      Precisely Engineered. With these beams, you can run up to a real 33 inches tall tire with these high-clearance beams, which is a larger size tire than with the factory beams. Moreover, these new ReadyLIFT High-Clearance Anti-Intrusion Beams have been precisely engineered, fabricated, and robot-welded using heavy-duty black powder-finished steel. Finite Element Analysis has been used to confirm that they meet the engineering requirements of the factory anti-intrusion beams.

      Installation. Putting these Anti-Intrusion Beams on your ride is easy and requires no drilling. However, minor trimming and disassembly may be needed.

      Warranty. There is a limited lifetime warranty on this product.

      Application. These ReadyLIFT High-Clearance Anti-Intrusion Beams work with all 2021-2024 Ford Broncos.

      Fitment:

      • 2021 Ford Bronco
      • 2022 Ford Bronco
      • 2023 Ford Bronco
      • 2024 Ford Bronco

      ReadyLIFT 67-21200

      CA Residents: WARNING: Cancer and Reproductive Harm - www.P65Warnings.ca.gov

      Installation & What's in the Box

      Installation Info

      What's in the Box

      • (4) High-Clearance Anti-Intrusion Beams
      4.5

      Customer Reviews (6)

        Brand Image

        Reviews of ReadyLIFT Suspension products have an average rating of 4.7 out of 5

          Questions & Answers

          10 More Questions