FREE 1 to 3-Day Delivery on Orders $149+ Details

How to Install a Rugged Ridge Powering Steering Drop Pitman Arm for 3.5-6 in. Lift on your 2007-2017 Jeep Wrangler JK

Shop Parts in this Guide
Contents:
(1) 18006.55 Drop Pitman Arm
READ INSTRUCTIONS BEFORE INSTALLING. The 2007 - UP JK is equipped with stability control. Steering wheel must be properly aligned after installation. INSPECT ALL MOUNTING NUTS AFTER 100 MILES. TIGHTEN IF NEEDED.
Step 1: Place vehicle in gear or park and set emergency brake. Turn steering wheel straight .
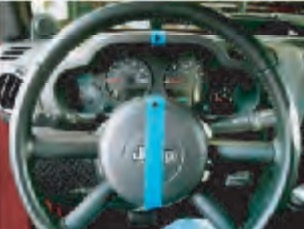
Step 2: Place masking tape on dash and steering wheel (Fig.1).
Step 3: Loosen drag-link tie-rod end from the stock pitman arm. Tie-rod puller may be needed. Refer to owners manual for proper procedure.
Step 4: Remove stock pitman arm. A pitman arm puller is recommended. Track bar may need to be removed to allow access (Fig.2).
Step 5: Install new drop pitman arm. Install in the same orientation as the stock arm. The pitman arm is keyed to allow it to be installed in only one direction. Tighten pitman arm nut to 190 ft-lbs.
Step 6: Reinstall tie-rod end and drag link to new pitman arm. Tighten to 35 ft-lbs.
Step 7: Inspect steering wheel. If centering tape has moved then the drag link will need to be adjusted (Fig.3). Loosen the two drag link coupler nuts (Fig.4-5). Rotate coupler 1/4 turn, inspecting steering wheel between turns. When tape is aligned, tighten drag link coupler nuts to 35 ft-lbs.
NOTE: Turning coupler counter clockwise turns the steering wheel counter clockwise. Turning the coupler clockwise turns the steering wheel clockwise.
Step 8: Before driving vehicle inspect all mounting nuts and double check tightness. With masking tape still in place test drive vehicle. Note if steering wheel is straight. If further adjustment is needed repeat step 7 until steering wheel is straight (Fig.6).
Fig. 1
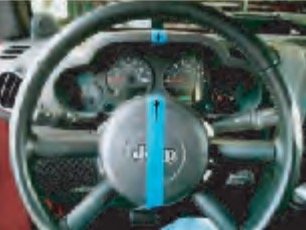
Fig. 2
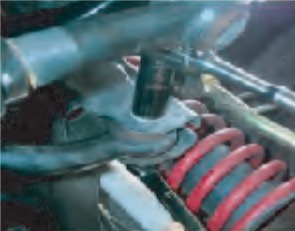
Fig. 3
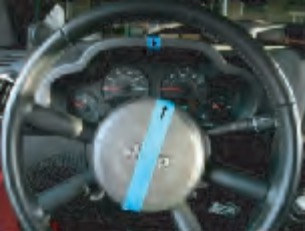
Fig. 4
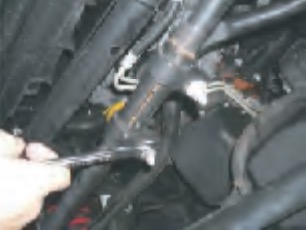
Fig. 5
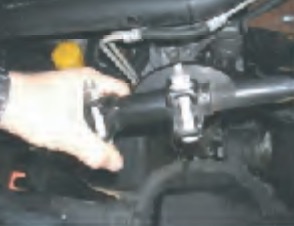
Fig. 6