 FREE 1 to 3-Day Delivery on Orders $149+ Details

How to Install KC HiLiTES 7 in. Gravity LED Headlights (07-18 Wrangler JK) on your Jeep Wrangler

Shop Parts in this Guide
At the center of KC’s new Gravity® LED 7” Headlight is our patented Gravity GRD™ (Gravity Reflective Diode) technology, which is engineered to maximize every lumen emitted from the LED. By directing the LEDs back into the optical reflectors at the most ideal angles we achieve maximum light output at a fraction of the wattage. This proprietary technology provides a highly functional beam shape with extraordinary beam distance.
• Patented Gravity Reflective Diode (GRD) Technology
• Precision die-cast aluminum housing with machined polished reflector optics, engineered to improve distance, visibility and clarity
• Easy Plug-n-Play for 07-16 Jeep JK/JKU Wrangler
• DOT Compliant Low Beam, High Beam and Daytime Running Lights
• Hard coated Polycarbonate lens for optical clarity and maximum light output
The Gravity LED Pro 7” headlight uses KC’s patented Gravity Projector Optics (GPO). Utilizing this proprietary projector optics technology in addition to the GRD optics, KC engineers were able to deliver a more controlled beam pattern while setting new industry standards in light shape, clarity and output.
• Patented Gravity® Projector Optic (GPO)
• Precision Die-Cast Aluminum Housing w/ Hard Coated Polycarbonate Lens
• KC Engineered Polished Reflector Optics
• Full Plug-n-Play for 07-16 Jeep JK/JKU Wrangler
• DOT Compliant Low Beam, High Beam and Daytime Running Lights
• Hard coated Polycarbonate lens for optical clarity and maximum light output
SAFETY WARNING
KC takes extreme measures to engineer lighting products with the most advanced features available in the industry. All of our products are fully tested in rigorous conditions and with proper care and installation that will last you a lifetime.
WARNING: The OEM H13 connectors are fragile, break often and need to be handled with care. Defective, damaged or even dirty OEM H13 connectors can cause connectivity issues that will resemble flickering or worse, no light at all coming from the headlights. If your OEM H13 connectors are damaged or not working, please have them replaced by an authorized dealer or professional using MOPAR H13 Rebuild Kit Part #68064997-AA.
PRODUCT REGISTRATION
Thank you for becoming part of the KC HiLiTES family and purchasing one of our premium KC products! With over 45 years of history in the auxiliary lighting market, you have become a part of our ever growing family, and we encourage you to register your product online at HTTP://REGISTER.KCHILITES.COM to ensure you get all the benefits of owning a KC HiLiTES product.
• Receive a unique serial number certifying your purchase
• Fast and Easy Returns and Warranties
• Special offers and promotions
• Exclusive access to industry events
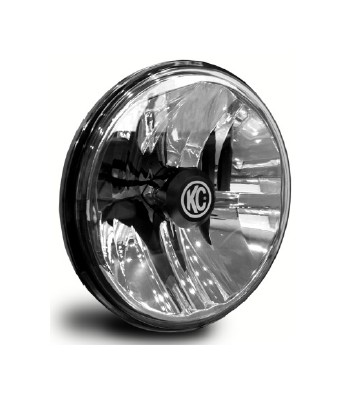
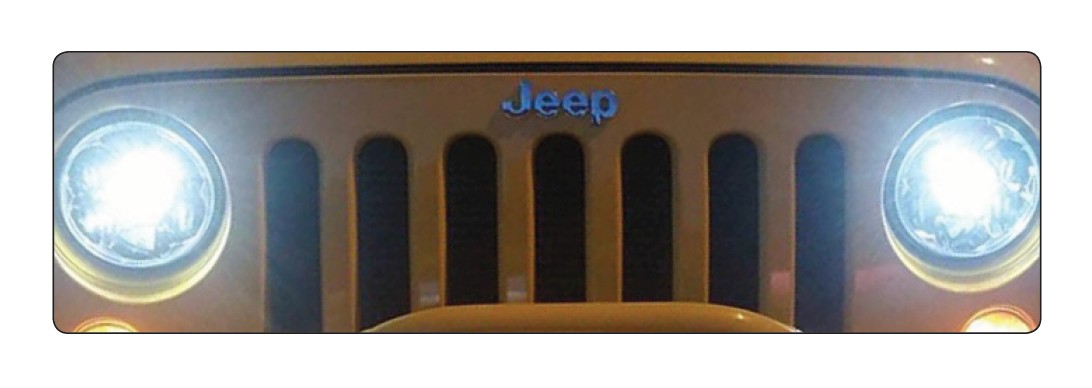
GRAVITY LED 7” HEADLIGHT OVERVIEW
The all-new Gravity® LED 7” Headlight for Jeep JK/JKU’s is DOT compliant and features patented GRD LED technology, High/Low beams with built-in DRL, and built-in anti-flicker capacitors. KC’s patented optics produce visibility and clarity second to none.
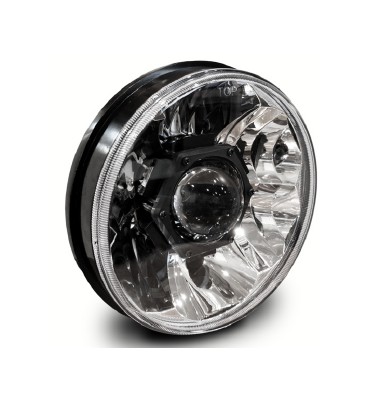
KC’s Gravity LED Pro 7” Headlight for Jeep JK/JKU’s features an additional Projector Optic in addition to the GRD Reflector Optics. The Projector Optics offers enhanced beam shape and optical clarity.
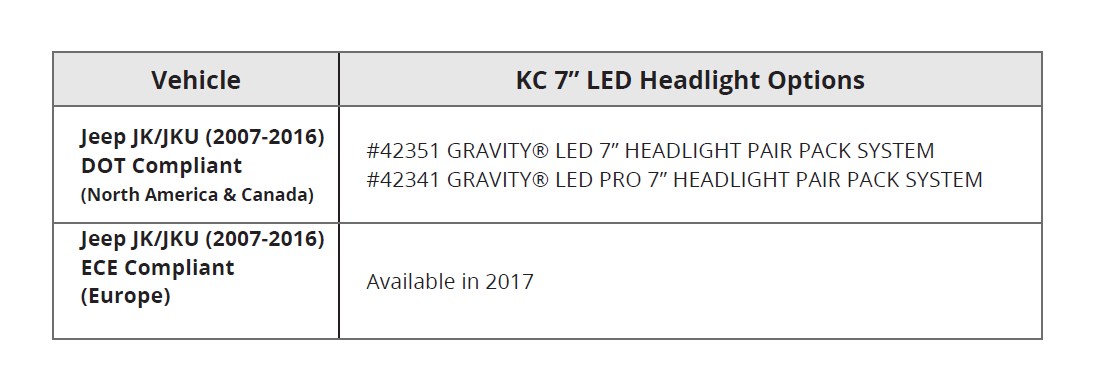
APPLICATION TABLE
Vehicle Specific Applications
KC’s Gravity LED Headlights are designed to fit Jeep JK/JKU’s using plug-n-play cables that connect directly to your OEM connectors. From fit to function our 7” Headlights have been thoroughly road tested and produce the best optical beam output, shape and clarity.
GRAVITY LED 7” HEADLIGHT INSTALLATION
INSTALLING THE 7” LED HEADLIGHT TO YOUR VEHICLE
1. Open your hood
Release the two latches on the front of your hood, raise the hood up and secure in place with the hood prop.
2. Locate turn signal connectors
Locate the Turn Signal Wire Harness behind the grill through the wheel well and unlock the connector by pulling out the red locking tab.
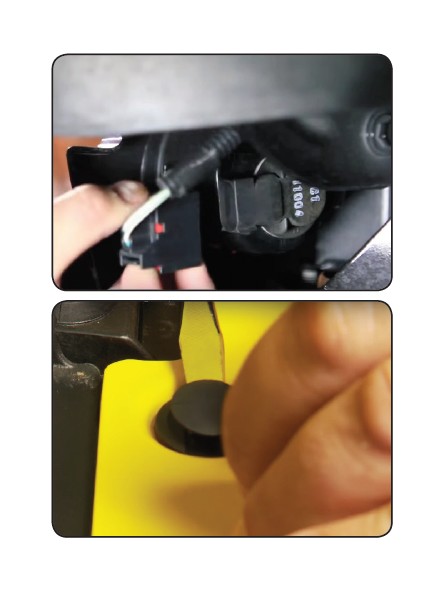
3. Disconnect turn signals
Unplug the connector by pressing and holding the release tab down while you pull it out. Repeat steps 2-3 for other side.
4. Remove plastic screws
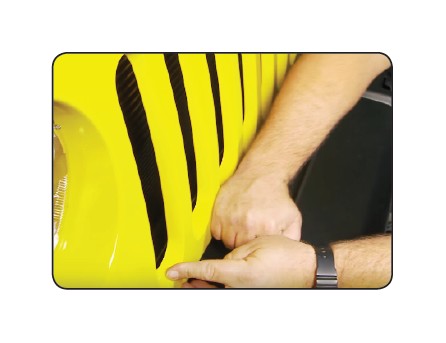
Using the Flathead Screwdriver, remove the (6) Plastic Retainer Screws located along the top of the grill by lifting the plastic pins and gently prying the tabs out. (For older model JKs, it will require using a Philips Screwdriver to unscrew.)

5. Remove Jeep grille
Remove the Jeep Wrangler Grille by firmly pulling on the lower part of the grille until the retainer clips break free of the chassis. Tip: There are (6) retainer clips. (1) Located above each L/R turn signal and (5) located along the bottom of the lower radiator support.
6. Remove retaining ring screws
Using the T15 Torx Driver: Remove the (4) retaining ring screws holding the headlight assembly in place.
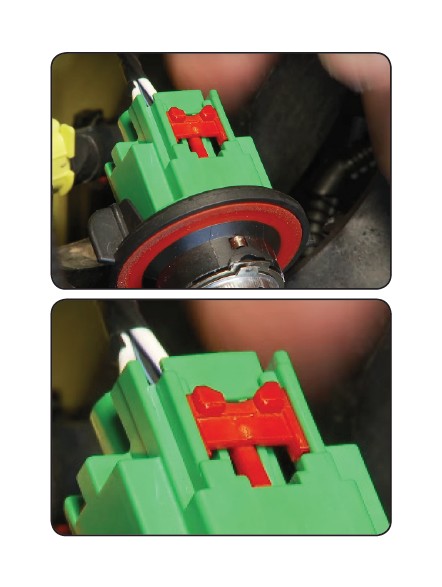
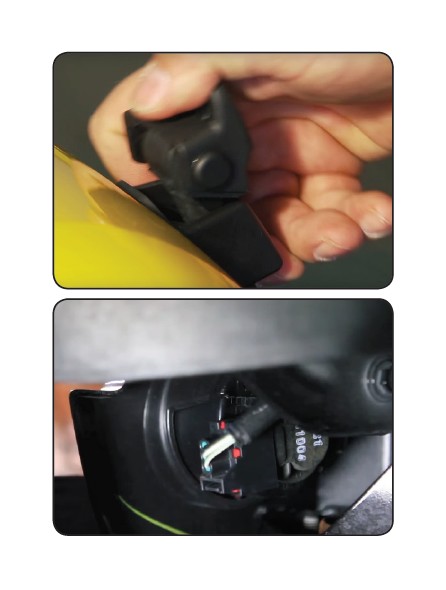
7. Disconnect OEM H13 connector
Pull headlight assembly out to expose the wire harness with connector. Unplug the headlight by unlocking the connector by sliding out the red locking tab, press and hold the release tab and disconnect the connector.
7.1 Use Caution!
To reiterate (to keep any damage from happening to the OEM connector), you need to release/slide the red locking tab in order for the connector to be able to disconnect.
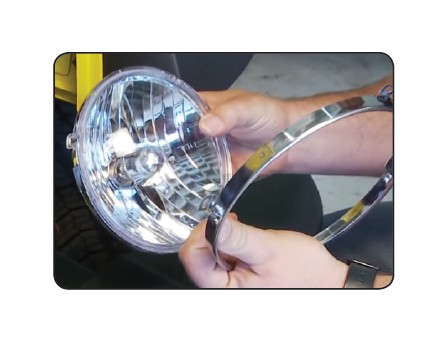
8. Remove retaining ring
Separate the Retainer Ring from the OEM Headlight and discard OEM Headlight.
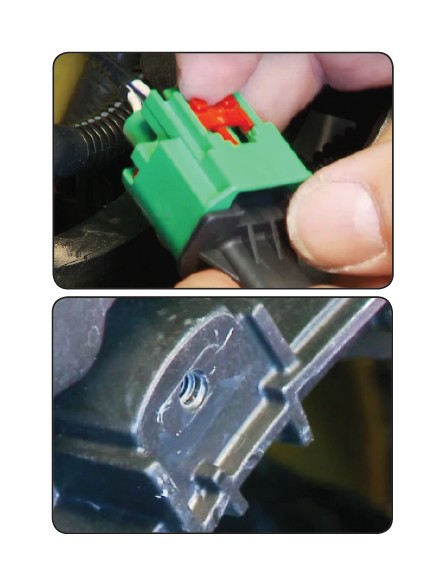
9. Connect new headlights
Take the KC Gravity Headlight and Connect it to the OEM H13 connector.
10. Align and secure
The KC Gravity LED Headlight is indexed to align with the Jeep Wrangler Headlight Housing. Make sure the indexed tabs are properly aligned before screwing the retainer ring back into place using the original T15 Retainer Ring Screws.
11. Reassemble
Re-install the Jeep Wrangler Grille by following Steps (1-7) in reverse order.
12. Power on and test
Turn your vehicle on and check the low beam and high beam functions before entering public roadways.

