 FREE 1 to 3-Day Delivery on Orders $149+ Details

How to Install JLT V3.0 Satin Oil Separator - Driver Side on your Wrangler
Installation Time
15 minutes
Tools Required
- Philips head screwdriver
- Ratchet
- 8mm socket

Shop Parts in this Guide
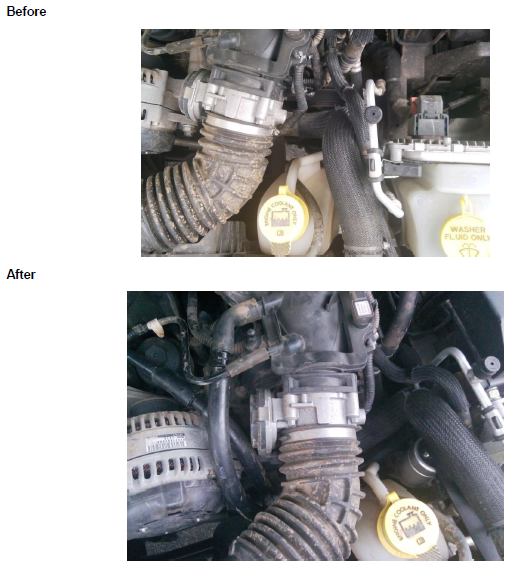
This guide is for installing the JLT V3.0 Satin Oil Separator on a 2007 – 2017 Jeep Wrangler. The images are from a 2012 Wrangler, but the installation process should be the same for all. Read all instructions before starting.
Installation Instructions:
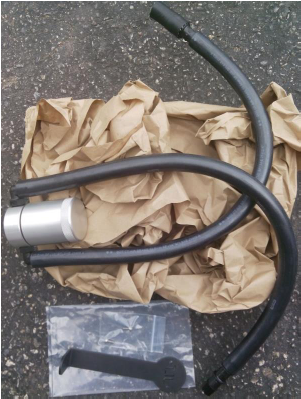
1. Lay out the contents of the box to make sure all parts are present. There should be an oil separator with tubes, an installation bracket, and two screws.
2. Remove engine cover by pulling straight up and forward.
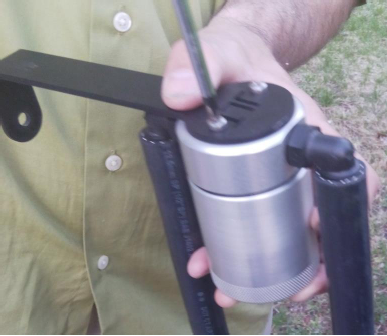
3. Using a Philips head screwdriver, attach the mounting bracket to the top of the oil separator using the two included Philips screws.
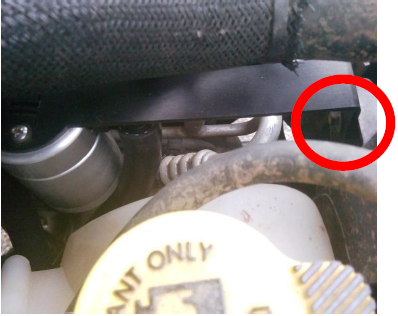
4. Locate the 8mm bolt indicated below and remove, using the ratchet and 8mm socket.
5. Install the bracket (with oil separator already attached) to the hole, and fasten back together with the removed 8mm bolt.
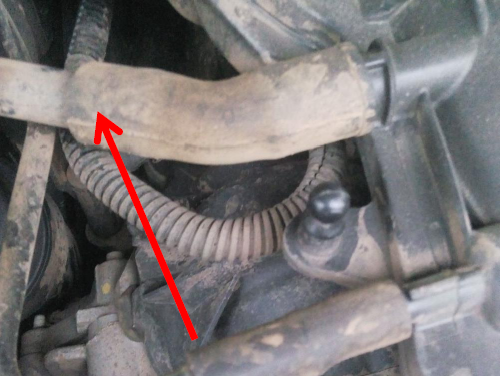
6. Remove rubber angled connection from PCV tubing on the passenger side.
7. Feed the JLT oil separator tubing under the air intake and to the right of the alternator.
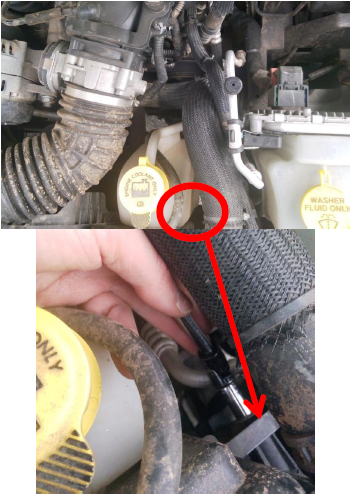
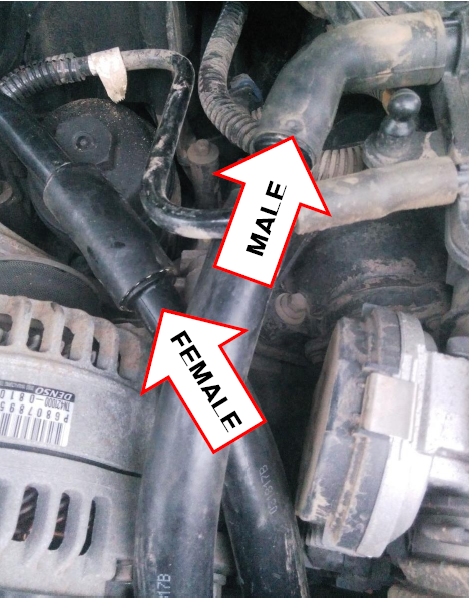
8. Reconnect with JLT tubing line with the male end fitting into the rubber angled connection and the rubber female to the factory hard line as shown below:
9. Ensure that nothing installed is touching any moving parts in the engine compartment, and that all connections are secure. Installation is now complete.
10. Clean the filter in the oil separator every 10,000 miles by unscrewing it from the top on the bracket and spraying a degreaser or solvent (such as carb cleaner) through it and letting it air dry.
