FREE 2 or 3-Day Delivery on 10,000+ Items. Details

Talk to a Tacoma Enthusiast
1-877-870-8556
M-F 8:30A-11P, Sat-Sun 8:30A-9P
Logo Image
$12k Summer Sweepstakes! Enter Daily >

Eibach Pro-Truck Lift System; Stage 1 (16-23 Tacoma)

Item TT1130
Call a Tacoma Enthusiast at 1-877-870-8556
M-F 8:30A-11P, Sat-Sun 8:30A-9P
$0.00
Our Price

$761.00 (kit)

FREE Shipping Market Price $889.99 You Save 14% ($128.99)

Will this fit your Vehicle?

Select a different vehicle Help?
Update or Change Vehicle
Ship to: Ashburn - 20149
Sorry, please enter a valid US or CA postal code
We're sorry, zip can't be updated at this time.
    Create a list
    Add to New List

    Saved - View your saved items

    We're sorry. We couldn't save this product at this time.

    or use

      Video Review & Installation

      Hey, guys. Joe from ExtremeTerrain and today I'm gonna be reviewing and showing you how to install the Eibach Pro-Truck Lift System Stage 1, fitting all '16 and newer Tacomas. Something like this is going to be perfect for the Tacoma owner that's looking to get a little bit more serious with their off-roading time and wants a kit that is going to give you that off-road performance without the sacrifice of ride quality. This kit features the Pro-Truck Sport shocks. They have a 46-millimeter nitro carbide steel piston rod and overall, their design is perfect to cope with the abuse when doing some serious off-roading. Their monotube in their design which is going to be great for balance, something like that is going to be perfect for the Tacoma that's daily driven. It's going to give you that nice tradeoff between dampening off-road, ride quality on-road, and resisting fade in all situations. And, obviously, this comes as a set of four so you get two rear shocks, two front struts. If your factory stuff is a little bit worn, this is going to be the perfect kit to replace and upgrade at the same time.We also have a set of front springs that are designed with a spring rate to accommodate a lift like this one. So, again, we're getting that ride quality on-road and that suspension travel when off-road. Now, these are just a little bit bigger. The kit includes some sway bar relocation brackets just so that everything clears. So, all in all, these shocks and struts in combination with the springs are good for about two and a half to three inches in the front and zero to one inch in the back. Now, the fronts are adjustable with this snap ring here, so if you have any extra weight in the front like a heavy duty off-road bumper, even with a winch, you can move that snap ring up and it'll change the spring perch just to give you a little bit of extra accommodation for that weight.As far as tire sizing goes, we threw on our stock 30s and, obviously, those clear in all situations. We also put on a pair of 33s and in my opinion, they were just a little bit too big, but nothing that can't be remedied if you're willing to make a couple of cuts to the plastic trim inside the wheel well. In my opinion, I would stick to a 32 as the upper limit on something like this.So, another great thing about this kit is it's going to correct that factory rig. Now, all Tacomas and all trucks, for that matter, come out of the factory with a little bit of what's called rake, meaning the front sits lower than the rear. Now, the idea there is to accommodate for any extra weight added in the bed or if you're towing something, it would then level out. But if you're not doing either of those two things often, it's more of a looks thing. This is going to correct that and make the truck sit level as well as lift it. Now, if you feel like this might be a little bit too much for your Tacoma, Eibach also offers these struts and shocks as a Stage 0 which is designed for factory ride height as well.Pricing for this kit is gonna come in at around 600 bucks, which, in my opinion, is perfect. This kit is designed for that middle ground off-roader. It's a step up from the spacer lift, but a step down from that full on suspension lift. Six hundred bucks reflects that perfectly as it lands right in between the two. Now, if you still weren't sold on this, Eibach also includes in that $600 price tag a million-mile warranty.Install for this is going to be pretty difficult. We're going to be seriously digging into the suspension components of our Tacoma here. We also will need a spring compressor, but this definitely is something that can be accomplished by the weekend warrior. With that being said, I'm gonna give it a three out of three wrenches on our difficulty meter, should take you about five, six hours to get this hooked up to your truck. So, without any further ado, let me show you how it's done.Tools we used for this install are going to be an impact, safety glasses, extension, hammer, needle nose pliers, flathead screwdriver, PB B'laster, Channellocks, U-joint, pry bar, a basic socket set ranging from 21 millimeters all the way down to 12 millimeters. Six-millimeter Allen key, 17-millimeter wrench, 19-millimeter wrench, 14-millimeter ratcheting wrench, 17-millimeter ratcheting wrench, small pry bar, ratchet, vise grips, and not pictured in this shot is going to be the spring compressor. The first thing we're gonna work on today are the sway bar relocation blocks. Now, in order to get at that a little bit better, we're gonna drop the skid plate here that's held on with a couple 12-millimeter bolts. Now, all this is going to do is move that sway bar forward about an inch or two just to clear our new oversized brakes.Now, the front of the skid plate has a hook right here for it to rest on. So, you wanna start with the front and then get the back two bolts. Also, on this side, you can see this tab right here is folded over the bolt. I'm just gonna pry that back with a pry bar. Not all Tacomas will be like that, obviously, but if you've used your skid plate before, chances are that's probably folded over. This is the last one, so support it. It should rest on those hooks up front and then you can remove this. Then you could drop it down, remove it from the hooks, take it off the truck.So, with that skid plate out of the way, we have a clear shot at our sway bar bracket right here. It's held by two 14-millimeter bolts. We're going to remove those. That'll allow us to drop the sway bar out of the way enough to install our relocation block. And with that, we could put that relocation block up there and secure it back into the frame with that 14-millimeter hardware. So, I'm gonna pull this sway bar forward a little bit and get the new 17-millimeter bolt started, then we can put our bracket in place. You wanna make sure the channel is at the back, obviously. Then we're gonna do the same thing for the other side of the bracket. Now, I'm gonna do the other side. Now that I have this finger tight, I want this wiggle room just a little bit just to make the other side that much easier. And once you have that done, you can come back here and tighten down those bolts with a 17-millimeter socket.So, that's it for the sway bar relocation. I'm just gonna throw the skid plate back in place and secure it with those 12-millimeter factory bolts. So, you wanna get that sway bar out of the way early. That's gonna pay dividends later on when we need to get that sway bar out of the way in order to get our new strut on the truck. So, next, we can move on to getting that strut in the truck and we need to start with some disassembly. First up, is going to be the brake line and ABS line brackets. For the brake lines it's a 12 and for the ABS lines it's a 10. And just to keep those handy, I usually thread them right back into the holes. And this is the ABS line bracket. That's a 10-millimeter. We're also gonna loosen this bracket right here on the upper control arm with a pair of needle nose pliers. There's a plastic clip behind the brake rotor as well. While we have the pliers, I'm gonna release that too. Next, we're gonna work on the tie rod here. Now, there's a couple of things to get this off. Obviously, there's a cotter pin right there, so we're gonna use the needle nose pliers to remove that. The castle nut is a 19-millimeter. So, we're gonna back that off. Not all the way, though. I'm gonna leave it on the thread just to protect it because we're gonna have to tap this collar here in order to release the ball joint. If you need a little bit more wind up, you could get in the truck and turn the wheel. That'll bring the ball joint out past the fender here and allow you to really hammer on it to get that out. But once it's free, you can grab that castle nut, remove it, and drop out the tie rod.Next up, we're going to work on the sway bar end link right here. That nut is a 17-millimeter. We're gonna try to crack that off with socket first. Now, if that ball joint does end up free spinning on you, you could take a 6-millimeter Allen key and put it in the stud here and then use a 17-millimeter wrench to work on the nut. Also, as a preemptive measure, I'm just gonna hit that with a rust penetrant before we get started. And you can see what I mean, it's spinning on me, so I'm gonna hop over to the Allen key and wrench. So, with the sway bar loose, we can now remove our end link and move on to this upper ball joint right here. First off, we need to get that cotter pin out of the way. And then we could back that castle nut off with a 19-millimeter socket. Now, just like the tie rod, we're not gonna take this all the way off, we're gonna leave it threaded on just a little bit, not only to protect the threads from the hammer because we are gonna be hitting this collar as well, but also it's going to catch our upper control arm once that ball joint breaks free. Now, with that broken loose, we could pull down on the upper control arm and take that castle nut off. I'm just gonna let that drop and then catch the rotor.So, with that castle nut removed, all the weight is now resting on our lower control. Now, there's a couple of things you wanna watch. Your brake and ABS lines, you wanna make sure that those stay nice and loose. Ours looked pretty good. And also, these actual boots here, if those look stressed at all, you wanna make sure you grab a bungee cord and just bungee that up like that as to relieve some stress on that rubber. Now, also at this point, you wanna catch the other side up to exactly where we are right here and that gives me a great opportunity to show off why we did the sway bar first. With the other side caught up, as you could see, you could pull on the sway bar and that inch we moved it forward gives it just enough clearance to go past that boot and out of the way so we can have easy access to the strut assembly. So, now that that is out of the way, we're going to remove the three 14-millimeter nuts on top and the bottom is a 19, we're gonna remove that with a socket and a wrench.All that's left for us to do is pull out that factory strut assembly. With that out of the truck, we can now move to the spring compressor and, obviously, this is a very dangerous tool, you wanna be very careful and slow when using this. You also only wanna go as far as you need to release this spring from the bottom perch here. Once that's done, we're gonna hit this with some PB B'laster, make sure it rotates nice and smoothly, then we're gonna use a 17-millimeter socket to remove this nut and if we need we're gonna grab the stud with a pair of vise grips. Once that nut is loose, you can unthread it the rest of the way, drop out your strut, and release pressure on this spring.So, once we have the spring out of the compressor, we could then claim this top hat. We are going to be reusing that on our Eibach but there's a little bit of work we have to do on it first and it's mainly regarding that bushing in there which is glued in place. So, I'm gonna peel that out with the needle nose pliers and get rid of it. Eibach does give us a new bottom bushing here, so we're gonna be using that one instead. Now, once that is peeled out, I'm gonna scrape away any adhesive with a flathead screwdriver. Now, if this adhesive is giving you trouble, some heat or solvent might help. And also, if you do scrape a little bit of the paint away on the bottom here, it would probably be a good idea to hit that with some black spray paint. So, once you have that all cleaned up, you can put it on top of the spring. Now, before you compress this, you wanna make sure it's all lined up just like they were from the factory. This rubber isolator here should line up with the end of the top of this last coil here. Once you have this all secured in the spring compressor, you could start to bring it together so we can put our strut in place.So, we have our spring compressed and we're almost ready to put our strut inside. But before we do, there's a couple of things we have to take care of. Firstly, I wanted to point out this snap ring right here, we don't have anything like that on our truck, so we're going to go for the two and a half inch lift, which is going to be the bottom position. Once that's secured, you can put your perch around the strut and make sure it's seated properly on that snap ring. Now, when we feed this up through the spring, again, just like the top, you wanna make sure that last coil ends right here. I'm also going to remove this bushing cup and then we could feed this up through our spring. Once you have everything vaguely lined up, you can now take the impact, extension, U-joint, and 19-millimeter socket and tighten down that nyloc nut. Once you have that nut tightened, you can then slowly release the pressure on the spring. And, again, while you do that, make sure you keep an eye on this perch here and that it lines up with that last coil. And then do the same thing for the other side.Our front strut is just about ready to go on our Tacoma, but before we do, I just wanted to put it next to the factory strut and point out some of the key differences here. This factory Bilstein is pretty nice and it's even part of the upgraded TRD Pro package, but the Eibach is even better. Starting with this spring here, we're changing up the spring rate just a little bit to accommodate for a lift of this size. That's going to help add to the ride comfort. Also, we're bumping up the size of this piston rod right here. Again, 46-millimeter nitro carbide steel. Gonna help up the durability, make sure this thing can really take a beating when you're off-roading. Now, also bumping up the durability a little bit is going to be the strut body itself, which is increased in diameter over this factory strut. Not only is that going to give you durability, but it also increases the volume inside of the strut which helps it resist shock fade. Now, obviously, the biggest benefit here with this new Eibach strut is going to be the added length and that's what's going to contribute to our lift. And as just an added bonus, like you saw earlier, that snap ring is adjustable so if you have any weight in the front you can still get this to ride and function properly. So, now we're ready to put this on. Let's grab a 14-millimeter ratcheting wrench, head back to the truck, and get this in place.So, first, we have to get this in place. I'm just gonna drop this past the lower control arm here, work around that sway bar and come up past our upper control arm and get those studs seated. And pull down on the lower control arm to get it into place. So, now that's in place, we're gonna hop up top. We're going to secure it with the factory 14-millimeter nuts. I'm gonna use a ratcheting wrench for that. We're gonna put that factory 19-millimeter hardware back at the bottom of the strut. If that fights you a little bit, I'm just gonna use a small pry bar on the axle here to push that all the way through. Then I'm gonna get the nut and washer started on the front-facing side and tighten that down with a 19-millimeter socket and 19-millimeter wrench.For the next step, I'm going to grab a bigger pry bar because we're gonna focus on our upper ball joint here. Just gonna pull the control arm down enough to get the pry bar started, then lift up the knuckle and get that factory castle nut started. Now we're going to stick to the 19-millimeter socket. Just add a U-joint, get that ball joint tightened down, then we can move over to the tie rod. After we secure that with a cotter pin. Gonna move the rotor back, get that tie rod in place, then secure it with the factory 19-millimeter castle nut. And we're gonna do the same thing, tighten that down and run a cotter pin. And we're gonna pull that over with the needle nose and tap it in place with a hammer.Next up is going to be the sway bar end link which goes through that hole there and gets secured with the factory 17-millimeter nut. Now, again, if this ball joint does spin on you like it did when we took this apart, you can put that 6-millimeter Allen key in the end of that stud, grab a wrench and tighten this down. Next up is going to be the sway bar. Now, if you haven't started on the other side, get it caught up to this point and save the sway bar for last, that way you can move it up and down and out of the way while you're working on that side. But once that's in place, you can run the end link through this hole here, tighten down this 17-millimeter nut.With all those suspension components tightened down, our new Eibach kit is almost done in the front. All that's left for us to do is hit some ABS and brake line brackets. Again, that's a 10 and 12-millimeter socket for those. We're going use Channellocks to hit this crimp for the ABS line up top and that clip behind the brake rotor is what we're going to hit first. Right behind that is the ABS line. And for this ABS line, hop back to the 10 and then we'll hit the 12 up top.So, that is going to be it for the front. As you can see, our struts look great. We got the Eibach logo facing toward the front. Same thing on the springs. Everything looks good. We're gonna get the other side tightened up, then we can move to the back. The first tools we're gonna need back there are the 17-millimeter wrench and 17-millimeter socket. Those tools are gonna be for the bottom shock bolt, which we're gonna pull out right now. With that nut removed, you can pull up on the axle and remove that bolt. For the nut up top, you wanna use a 14-millimeter ratcheting wrench and then a pair of vise grips to hold that still. Then you can remove your rear shock.So, with the factory shock off the truck, I just wanted to put it next to our new Eibach which we're about ready to install and point out some of the key differences here. And with these two next to each other on the table, the biggest and most obvious difference between the two is that they're reversed. The Eibach has the body at the top and the piston rod at the bottom, while this Bilstein has the body at the bottom and the piston rod at the top. Now, the Eibach is the superior design here. Reason being is the body being at the top means the seal between it and the piston rod is at the bottom, which helps it stay lubricated. Now, also contributing to that a little bit is going to be this dust boot here which does seal a little bit better than the factory Bilstein. Dust and dirt can easily get inside these, which is especially a concern if you're planning on doing some serious dirty off-roading. Now, on top of that, we have our standard stuff. We're increasing the diameter of the body here, which is going to increase their durability as well as increase the volume of fluid inside helping prevent shock fade.So, now we're ready to install our Eibach. We're going to need a 17-millimeter for this nut up top and the factory hardware at the bottom was also 17 mil. So, we're gonna start at the top. Remove this nut as well as the bushing and cap. Get that fed through the upper mount, replace that bushing end cap and we're gonna get our nut just finger tight for now. That's gonna give us enough sag to get the bottom in place, so we're gonna jump over to that. Just like before, we're gonna push that in place, pull down on the axle a little bit. Get that bolt started on the other side, washer and nut, and secure this with the 17-millimeter socket and wrench. So, bouncing back up to the top, we're going to use a 17-millimeter ratcheting wrench and the vise grips from earlier and start to snug that down. And that's gonna be it for this side. We still have to get the other side, but after that's done all you'll have to do is take the truck for a good alignment.And that is going to do it for my review and install of the Eibach Pro-Truck Lift System Stage 1, fitting all '16 and newer Tacomas. Thank you for watching. I'm Joe. Make sure you subscribe for more videos like this one and all things Tacoma.

      Product Information

      Features, Description, Reviews, Q&A, Specs & Installation

      Features & Specs

      • Suspension Leveling Kit
      • Lifts Front by 2.50-3-Inches; Rear Lifts by 0-1-Inch
      • Enhances Off-Road Handling and Wheel Travel
      • Pro-Truck Sport Shocks, Front and Rear Included
      • Front Coil Springs
      • Direct Bolt-On Installation
      • Exclusive Million-Mile Warranty
      • Fits All 2016-2023 Toyota Tacoma Models

      Description

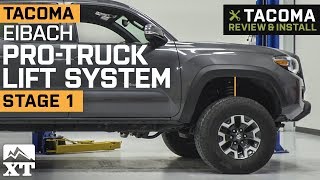
      Get The Most Out Of Your Truck. Give your Tacoma exceptional handling both on and off-road with the Eibach Stage 1 Pro-Truck Lift System. This lift system offers 2.50-3 inches lift up front and up to 1-inch lift at the rear. This range means you can give your truck moderate front and rear lift, or correct factory rake. This system is designed to enhance wheel travel, improving ride quality and handling for both on and off-road.

      Pro-Truck Sport Shocks. The Eibach Stage 1 Pro-Truck Lift System includes front and rear Pro-Truck Sport Shocks. These front and rear shock absorbers utilize a monotube design giving you balanced dampening, and a firmer ride quality without being uncomfortably stiff. These shocks feature 46mm nitro-carbide steel piston rods for excellent rigidity. Additionally, the front shocks can be adjusted to provide 2.50-3-inches of lift.

      Motorsport-Developed Coil Springs. The Stage 1 Pro-Truck Lift System uses Eibach’s famous coil springs. These coil springs were developed and constructed from experience gained via off-road motorsports. The result is a set of springs that enhances suspension travel without adding undue stress to your factory bushings.

      Trouble-Free No-Mod Install Procedure. Installing the Eibach Stage 1 Pro-Truck Lift System is a generally trouble-free install procedure as the system’s various components mount on factory locations. No modifications to your Tacoma are necessary.

      Comes with an Exclusive Million-Mile Warranty. The Eibach Stage 1 Pro-Truck Lift System comes with an exclusive million-mile warranty covering factory defects. Please visit the manufacturer’s website for more details.

      Application. The Eibach Stage 1 Pro-Truck Lift System fits all 2016-2023 Toyota Tacoma models.

      Fitment:

      Details

      Eibach E80-82-069-01-22

      CA Residents: WARNING: Cancer and Reproductive Harm - www.P65Warnings.ca.gov

      Installation & What's in the Box

      Installation Info

      What's in the Box

      • (2) Front Shock Absorbers
      • (2) Rear Shock Absorbers
      • (2) Front Coil Springs
      • (2) Spring Perches
      • (2) Rod Wipers
      • (2) External Snap Rings
      • (2) Dust Boots
      • (2) Bump Stop Caps
      • (2) Sleeves
      • (2) Rod End Assembly
      • (2) Zip Ties
      • (2) Lower Stem Washers
      • (4) Nylock Nuts
      • (2) Cup Washers
      • (12) Bushings
      4.9

      Customer Reviews (34)

        Questions & Answers

        10 More Questions

        Will It Fit My Tacoma