 FREE 1 to 3-Day Delivery on Orders $149+ Details

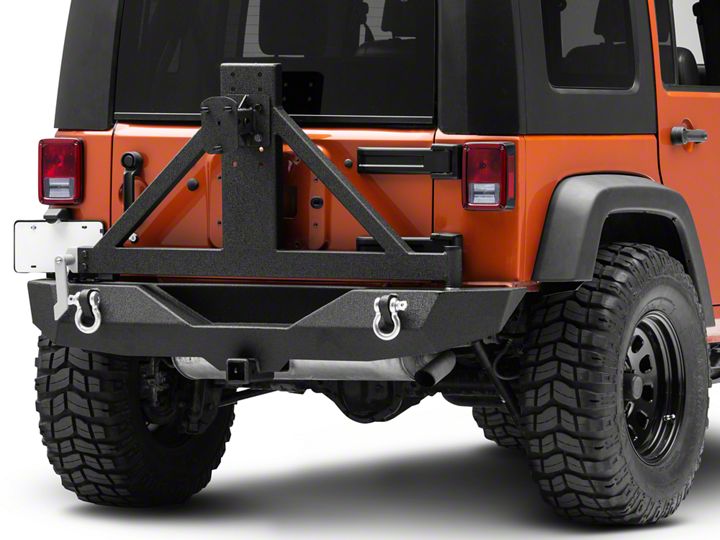
How To Install a Barricade Trail Force HD Rear Bumper w/ Tire Carrier on your 2007-2016 Wrangler JK
Installation Time
2 hours
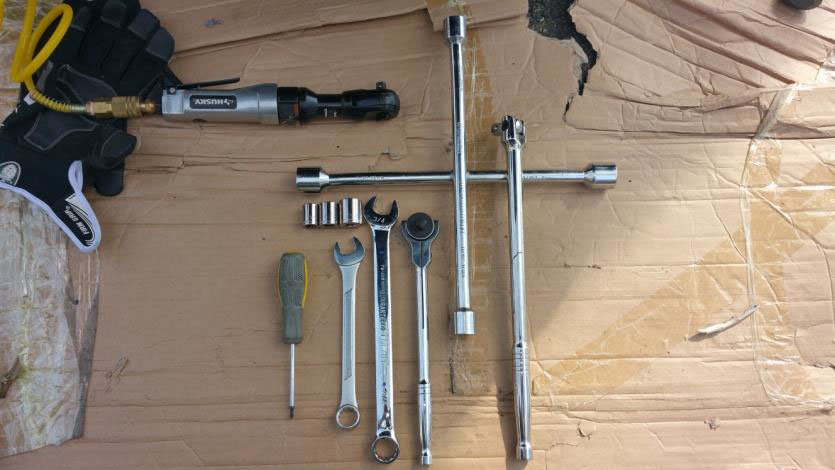
Tools Required
- Tire iron
- Ratcheting socket set (ratchet plus 13, 16, 19mm sockets)
- Open ended wrenches (13, 16, 19mm)
- Air compressor and air ratchet (optional)
- Floor jack or jack stands (to help support weight of bumper if working alone) (optional)
- Automotive grease (for tire carrier hinge) (optional)
- T20 Torx screwdriver (for 3rd brake light assy) (optional)
- PB Blaster or equivalent penetrating catalyst (in case any of the existing bolts are seized) (optional)
Shop Parts in this Guide

Installation Notes, Pre-Installation notes
1. Be sure to park the jeep on a level surface.
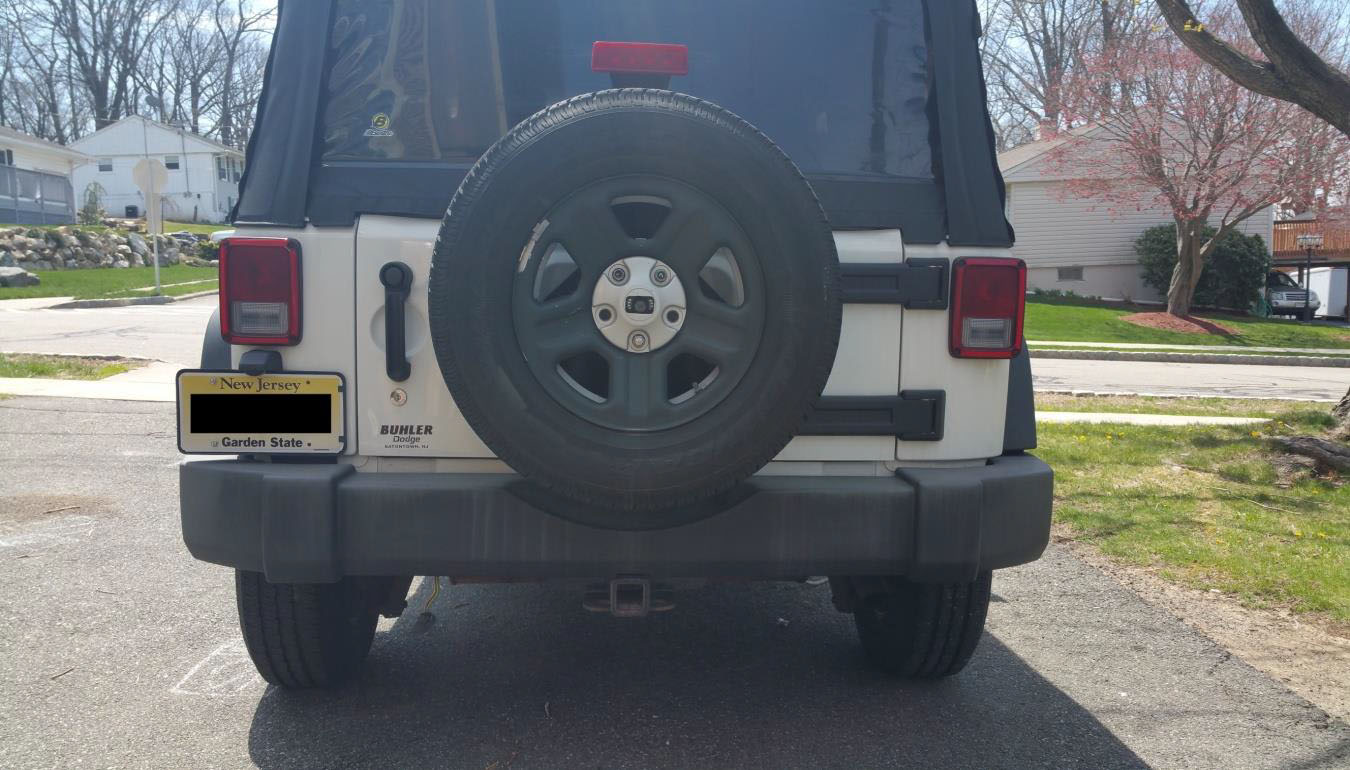
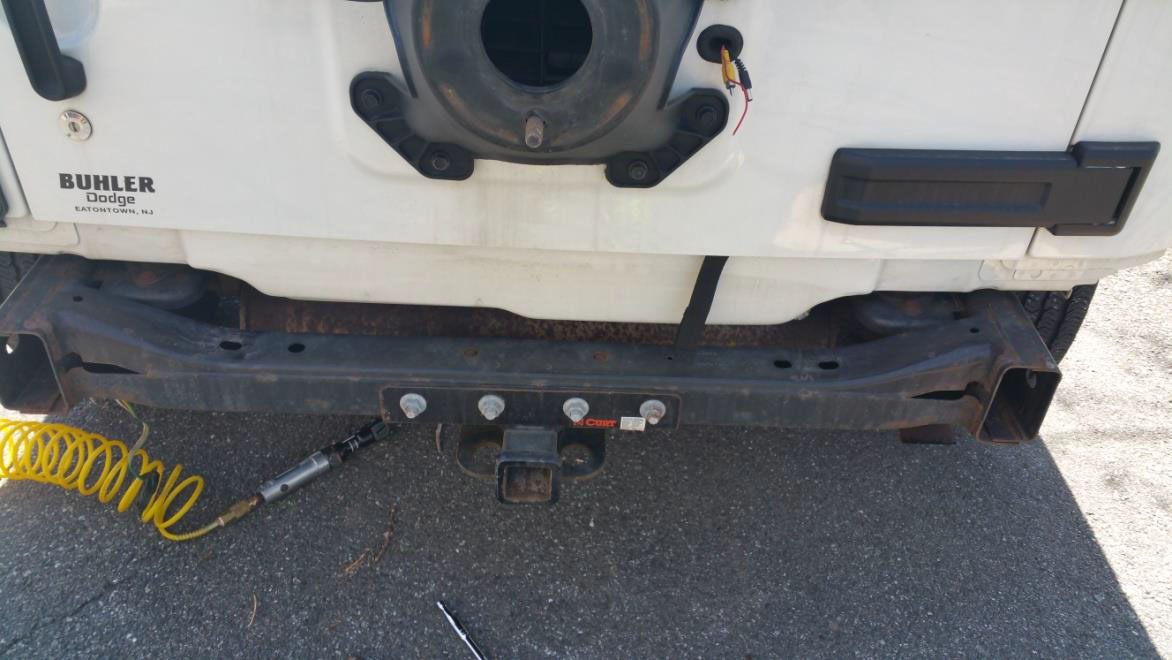
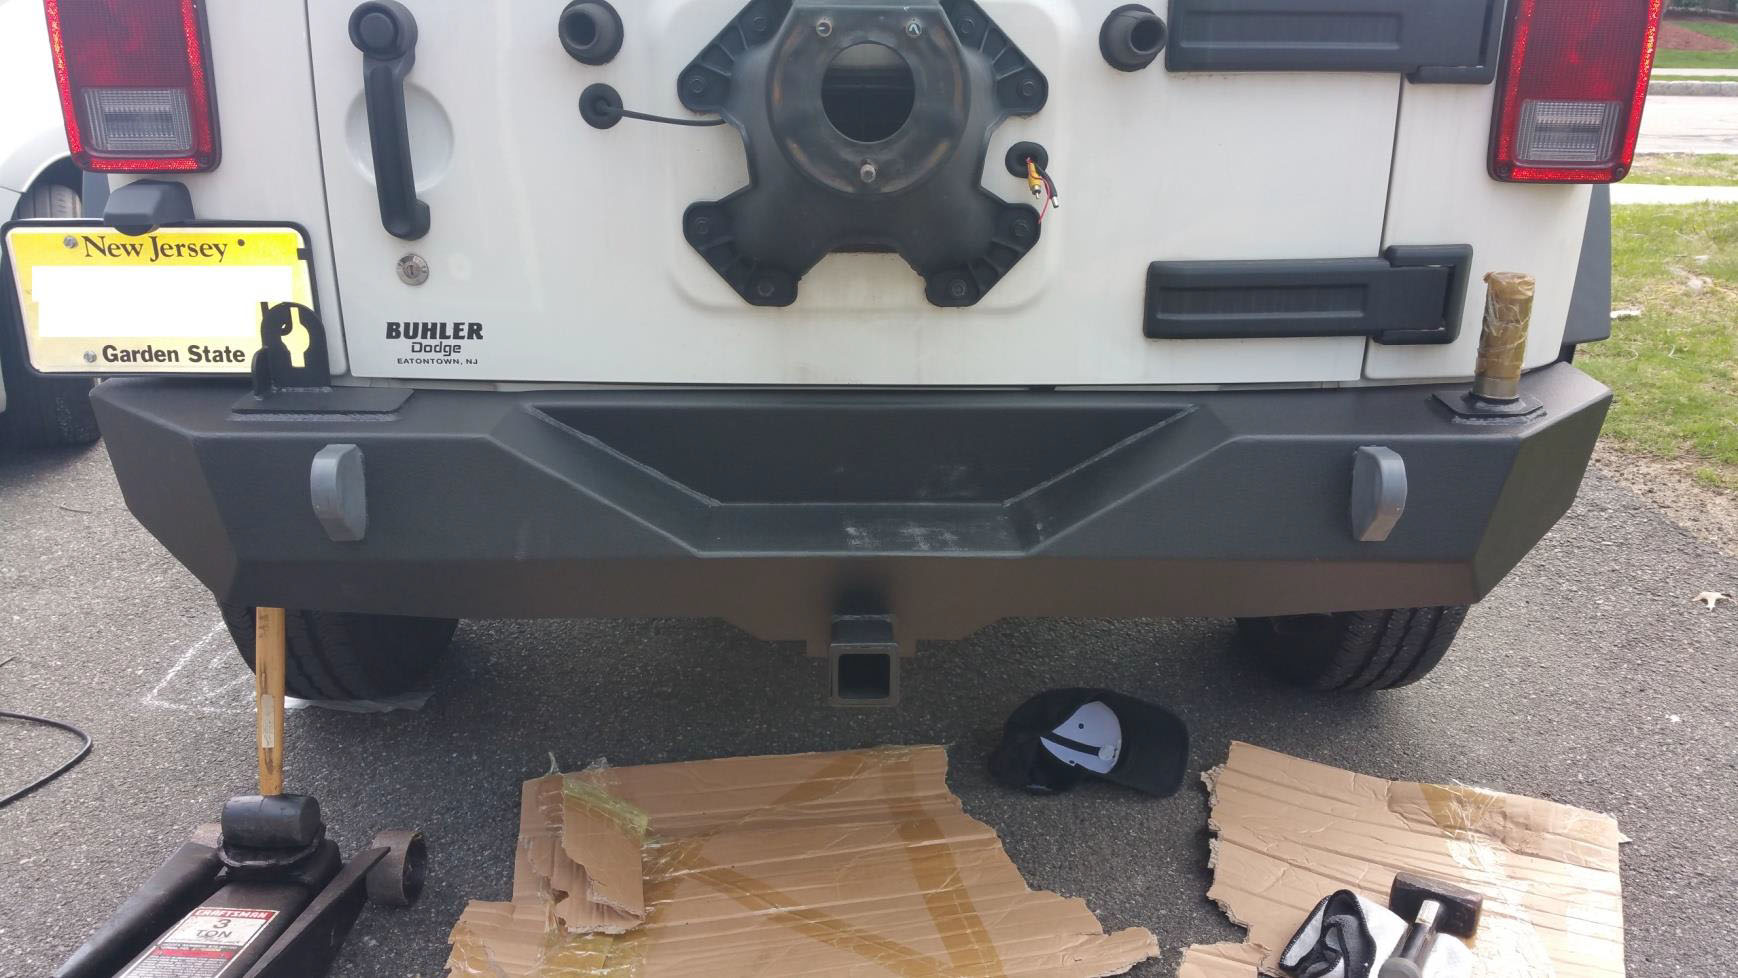
Here’s the 2008 JK X 2 door in it’s stock config before installation of the new bumper
Installation Instructions:
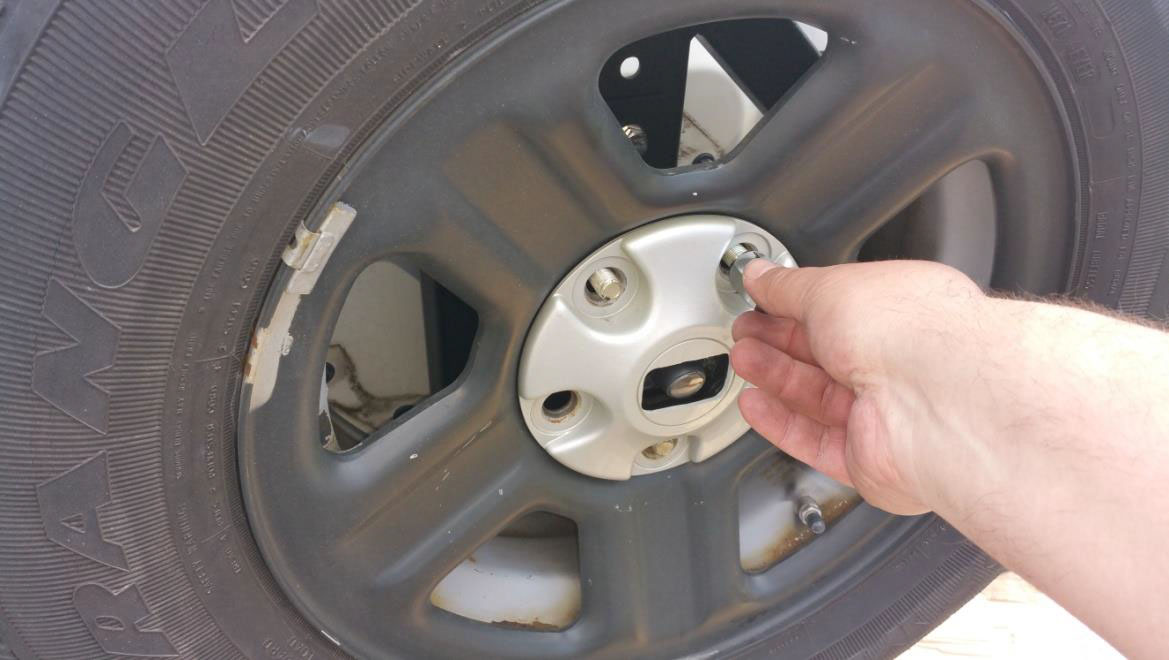
1. Start by removing your spare tire from the stock tire carrier mounted to the tailgate using your tire iron to remove the three lug nuts
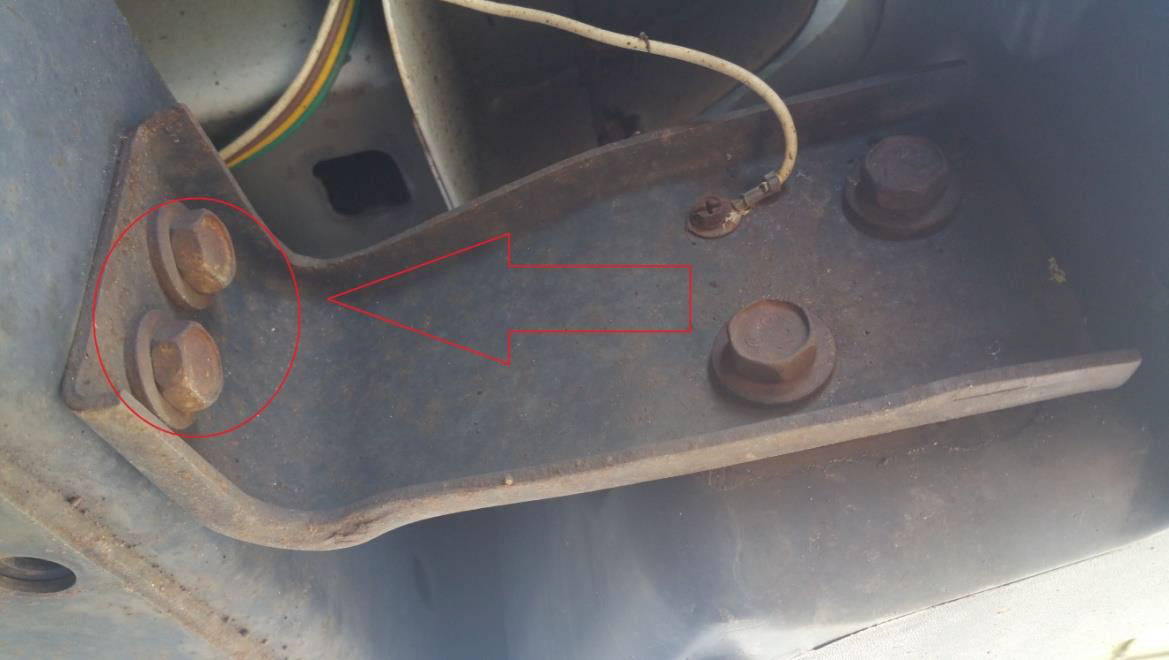
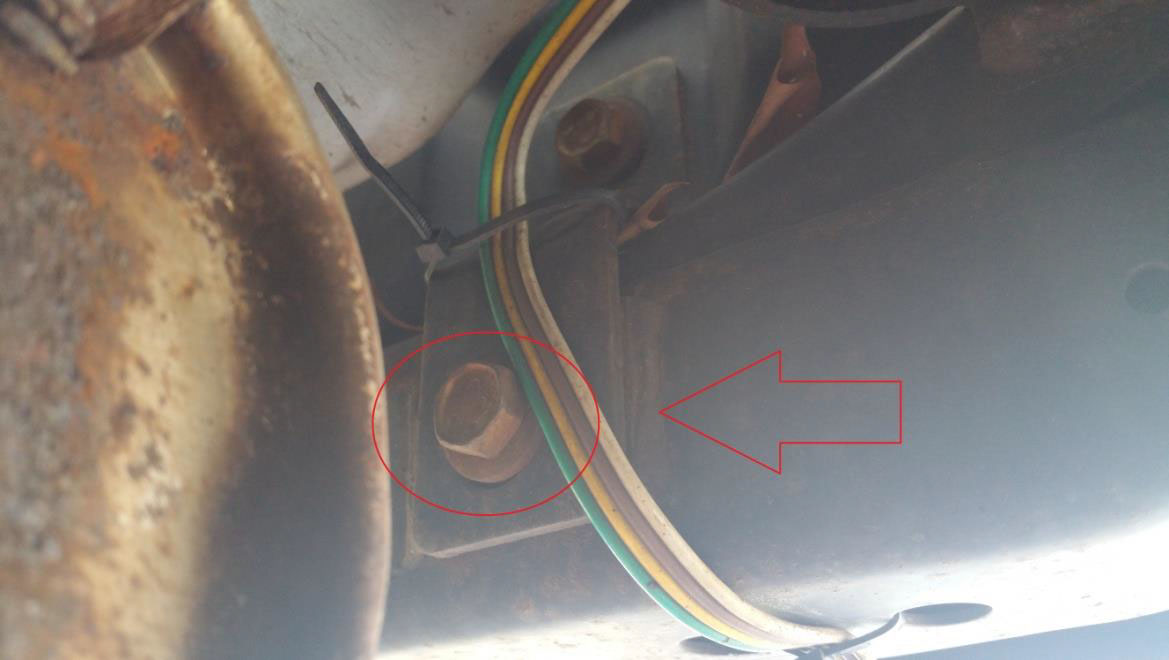
2. Underneath the existing bumper, identify the 6 bolts that need to be removed, to detach the stock bumper from the frame. Use your 16mm socket or open ended wrench to loosen and remove the bolts. The air wrench can be used to speed up the removal, once you start to loosen the bolts by hand.
a. Two bolts on the driver’s side in the rear of the frame
b. One bolt on the frame just to the right of the muffler
c. The same bolts are located in the same places on the passenger side of the frame. Remove these as well.
3. Remove the rear bumper assembly from the frame.
4. OPTIONAL STEP – If you do not have an existing receiver hitch on your Wrangler, please proceed to step 5.
a. Locate the 19mm bolts and nuts currently holding the receiver hitch to the frame.
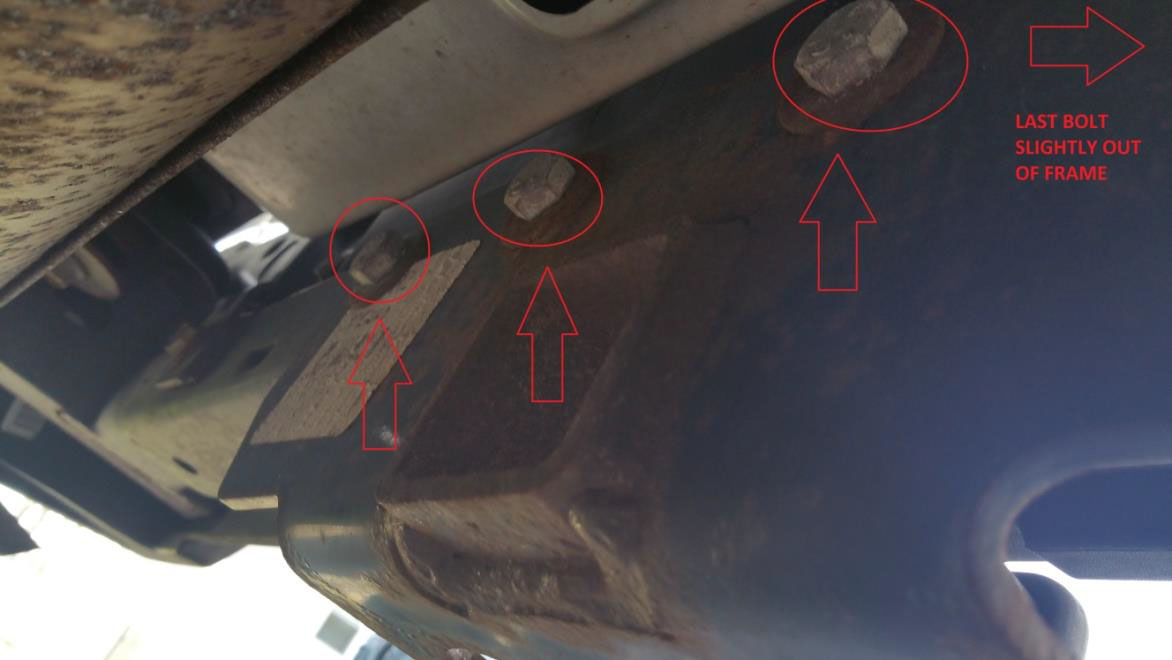
b. Use your open wrench to hold the lock nuts in place, as you loosen the bolts from the inside part of the frame as shown above
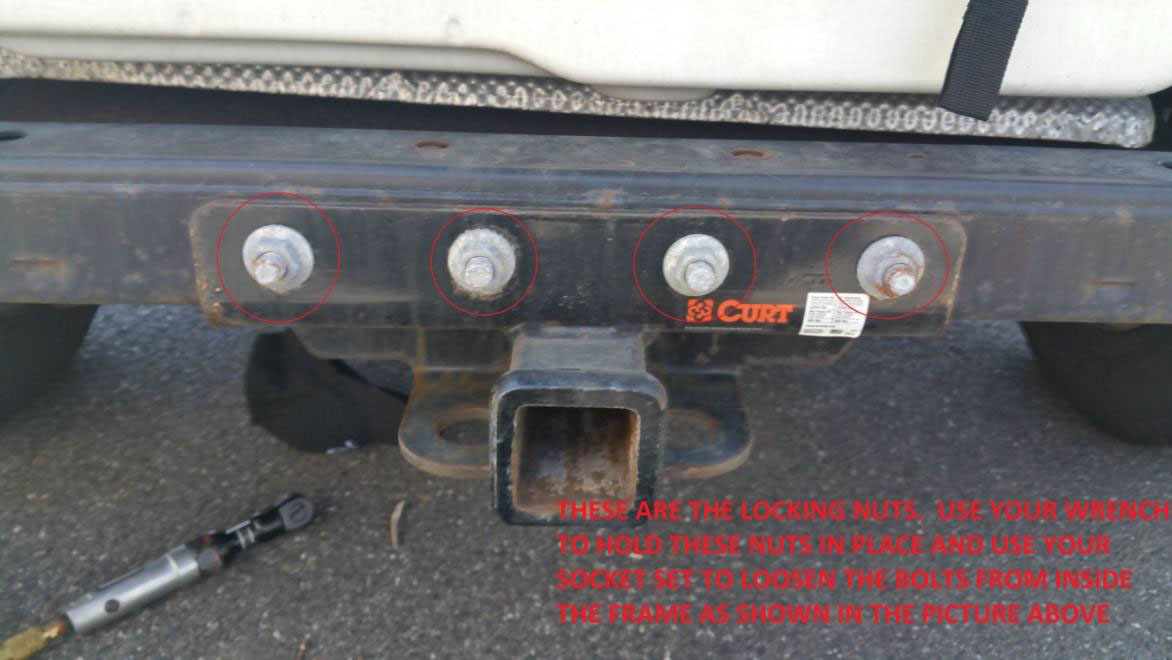
c. Once all four bolts are removed, simply pull the receiver hitch assembly straight down to remove it from the frame

5.
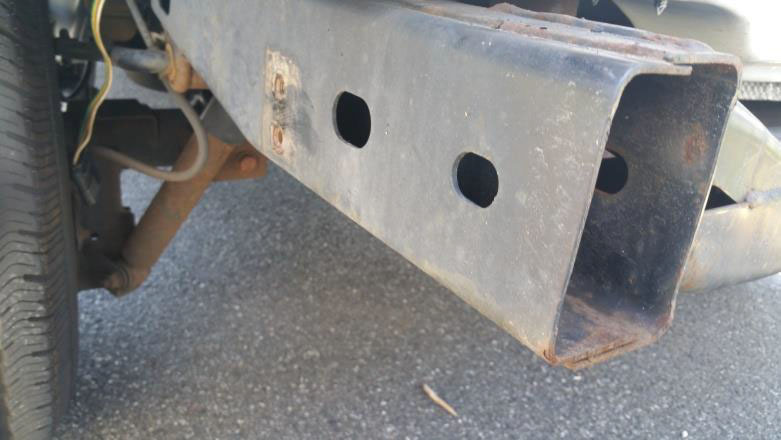
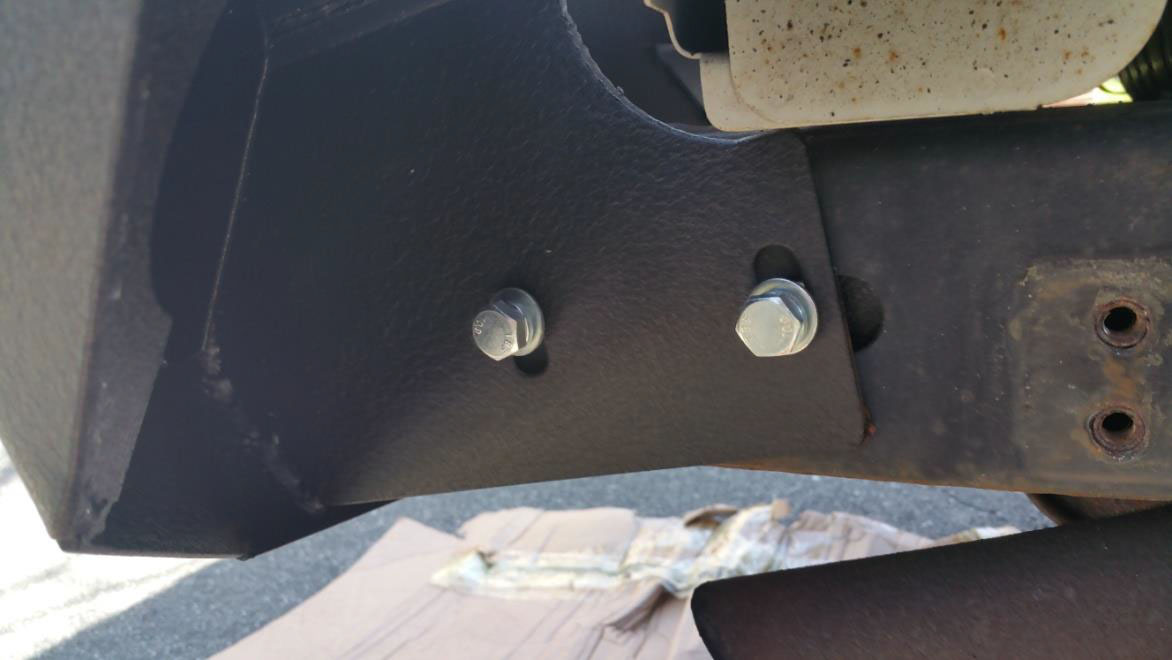
a. Identify the two bolt holes at the end of the frame rails (driver and passenger side) that you will use to mount the new Barricade bumper

b. Identify the two reinforcement brackets that will be inserted into the frame rails.
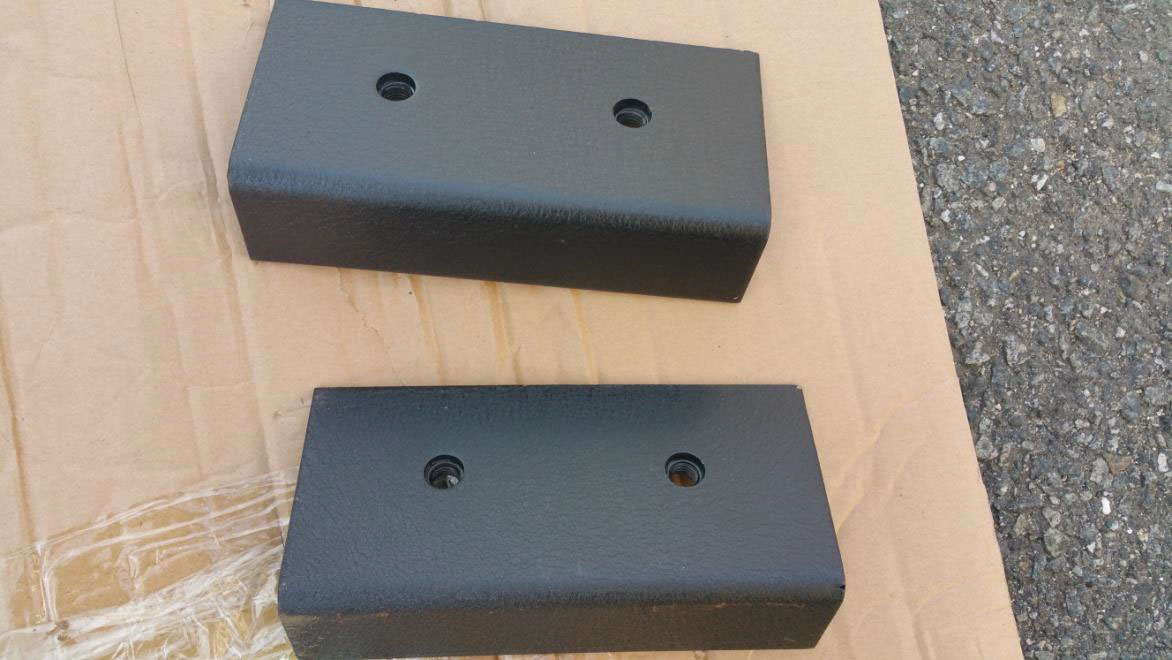
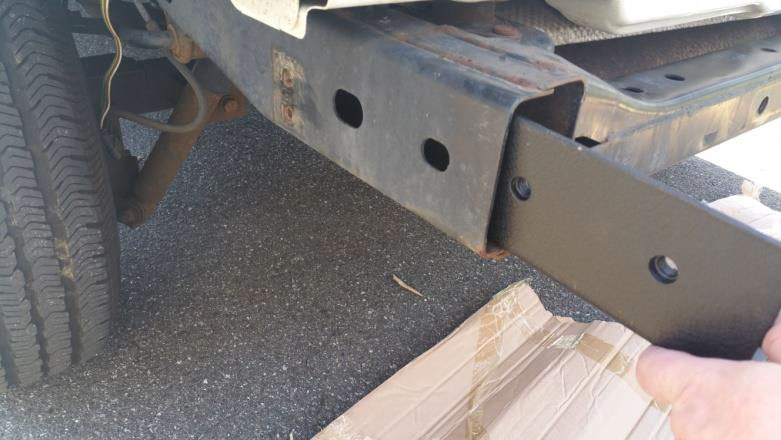
c. Insert the brackets into the frame rails. Be sure to insert the brackets with the flat sides facing outwards, and the nut side facing the middle of the car, and align the holes in the frame with the holes in the bracket

d. Now is the time to get another pair of hands, or get your floor jack or jack stands out.
6.
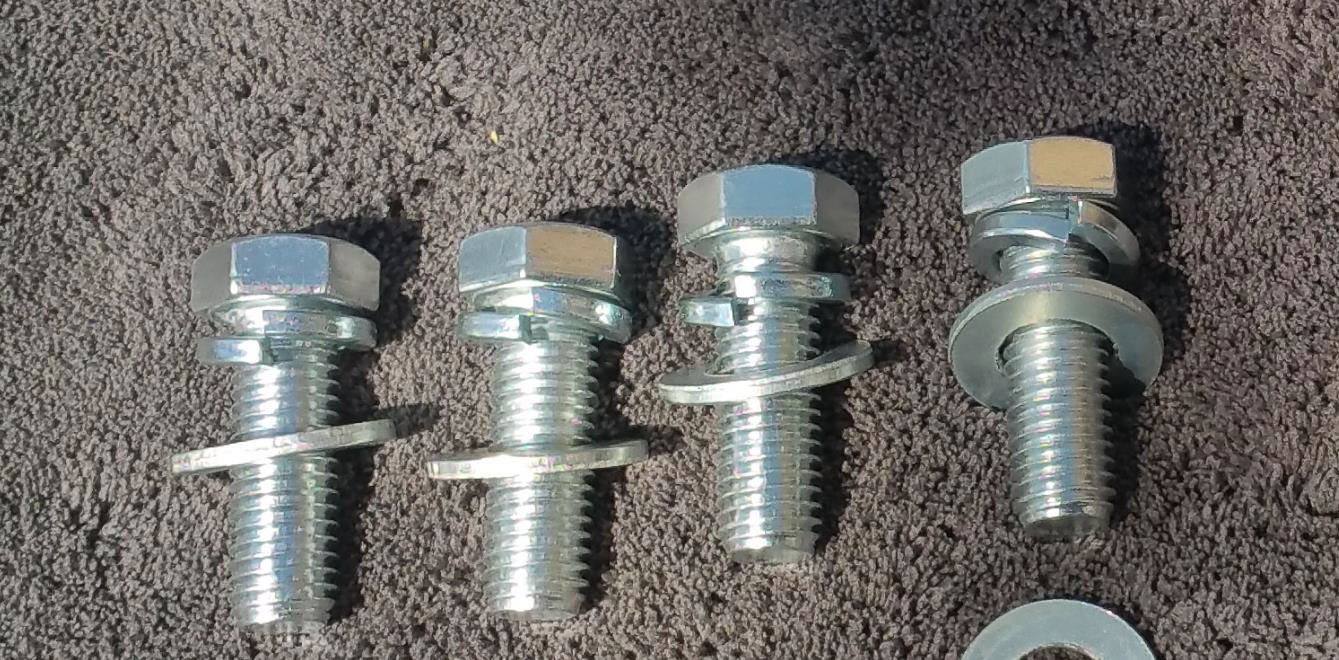
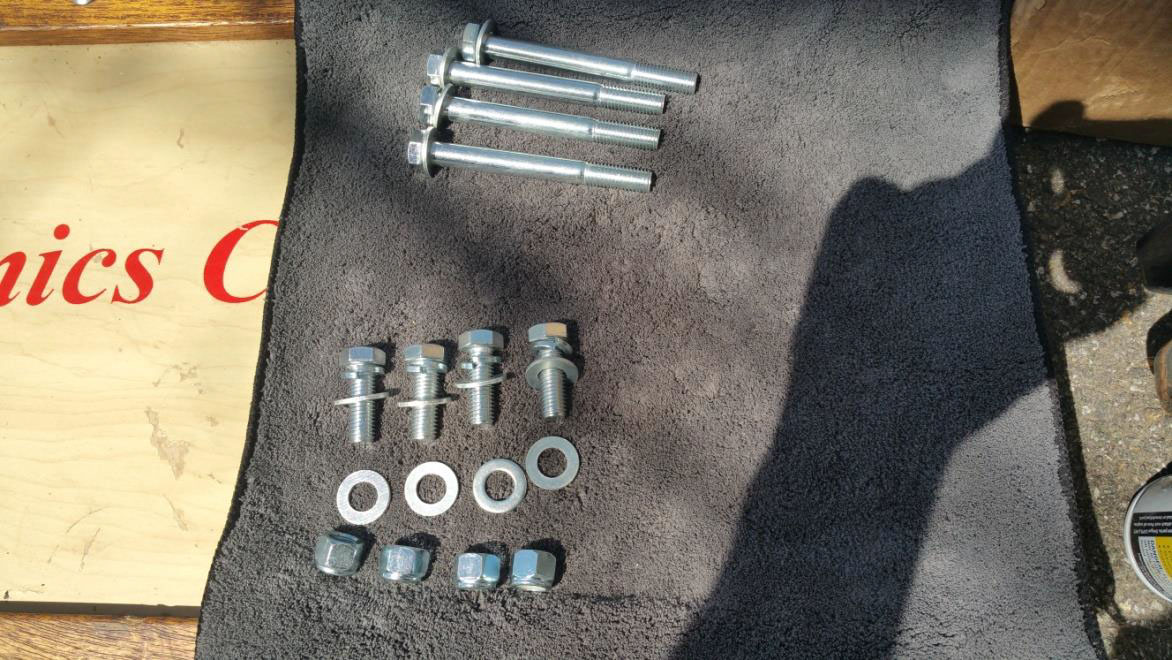
a. Identify your required hardware for the next step. For the reinforcement brackets in the frame rails we will be using the shorter 19mm bolts. Each bolt will have a split washer first, and then a flat washer.
b. Lift and hold the new bumper in place, so the bolt holes on the sides of the bumper frame line up with the holes (and reinforcement brackets) on the Jeep frame, and insert and loosely tighten the bolts into the frame. Start the bolts with your fingers to make sure they are threading in properly, and then loosely tighten with your ratchet or wrench. Do one side first and then do the other side.
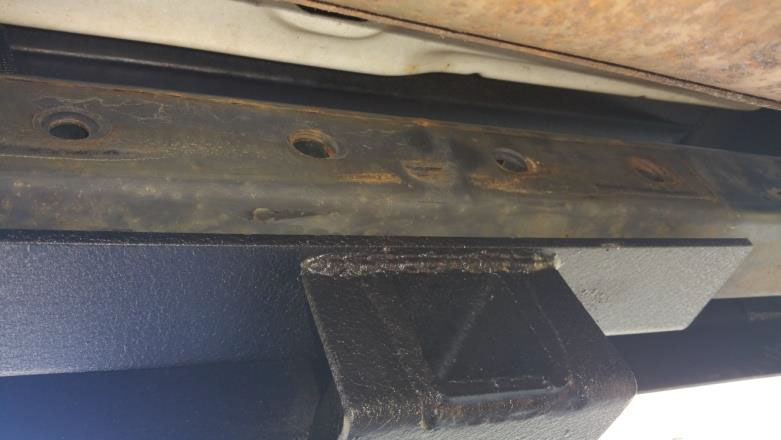
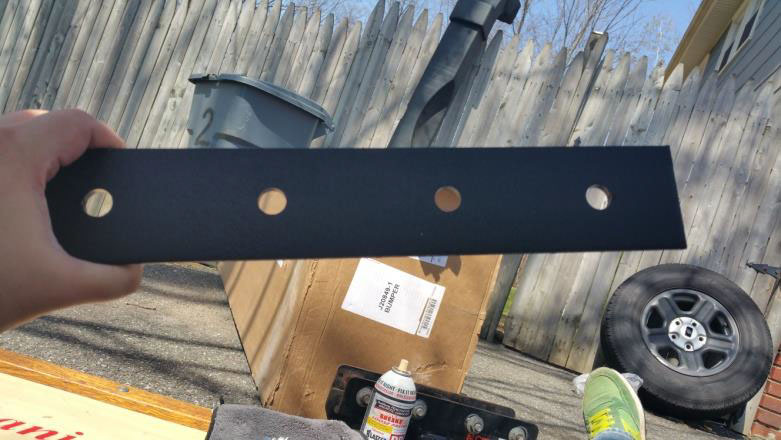
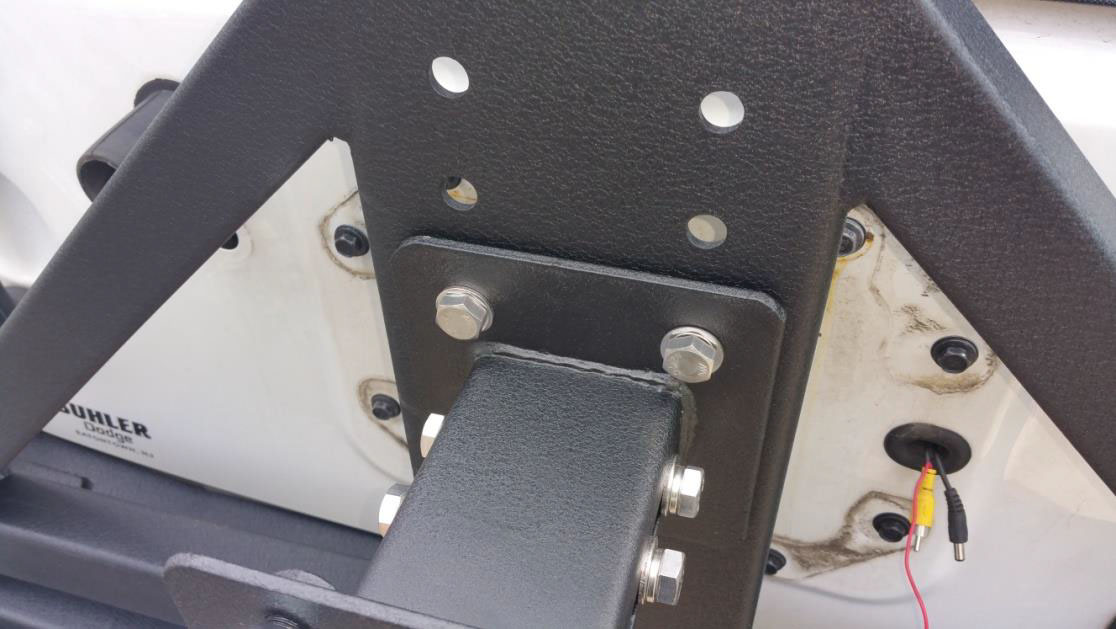
c. Underneath the frame, where the old receiver was (or wasn’t), you have 4 empty bolt holes. You also have a 4 bolt hole reinforcing plate. This plate will be positioned as such:
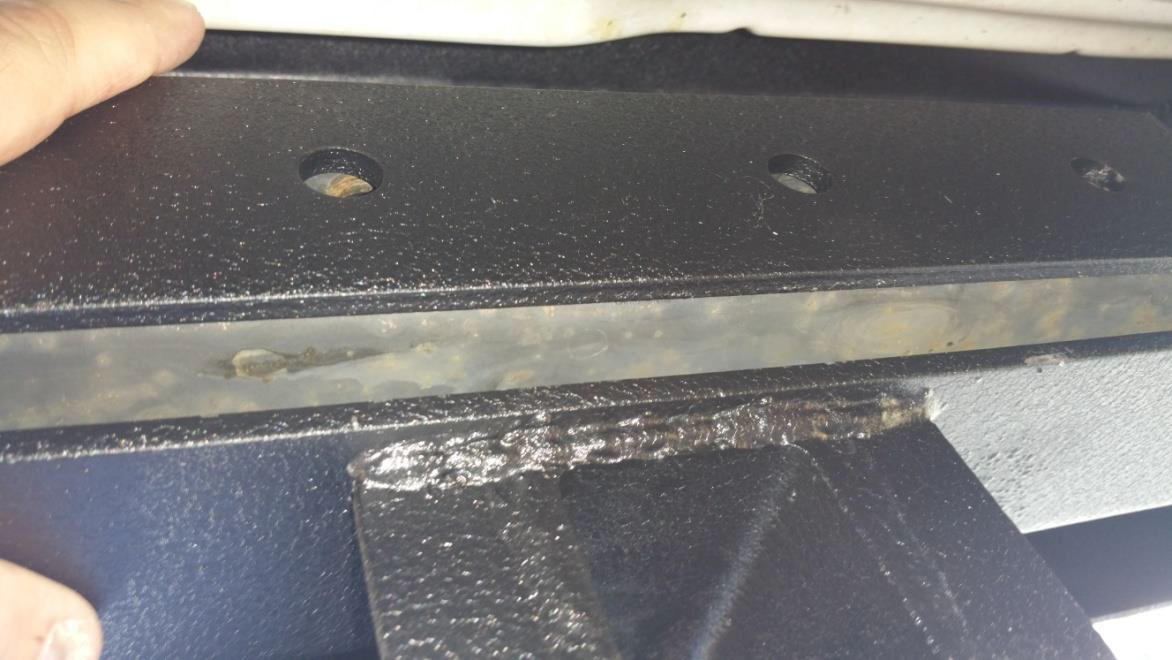
d. Using the long 19mm bolts, we will bolt through the reinforcing plate and frame. The long bolts will have a flat washer first, then thread the bolt through the plate and frame. On the back side of the bolt, add a flat washer and then the capture nut.
(disregard the short bolts we already used)
e. Using your ratchet and open wrench, tighten all 4 of the bolts, and then go back and tighten the 2 bolts on each side of the frame rails. Double check that all of your bolts have been completely tightened. There is no recommended torque spec. Stand up and admire your work thus far
7. Using your 13mm socket or wrench, remove the 8 bolts holding on your stock tire carrier. Be sure to disconnect your 3rd brake light wire. If you don’t want to damage the wire, you can use a T20 Torx bit to unscrew the back of the stalk, and unplug the wire)
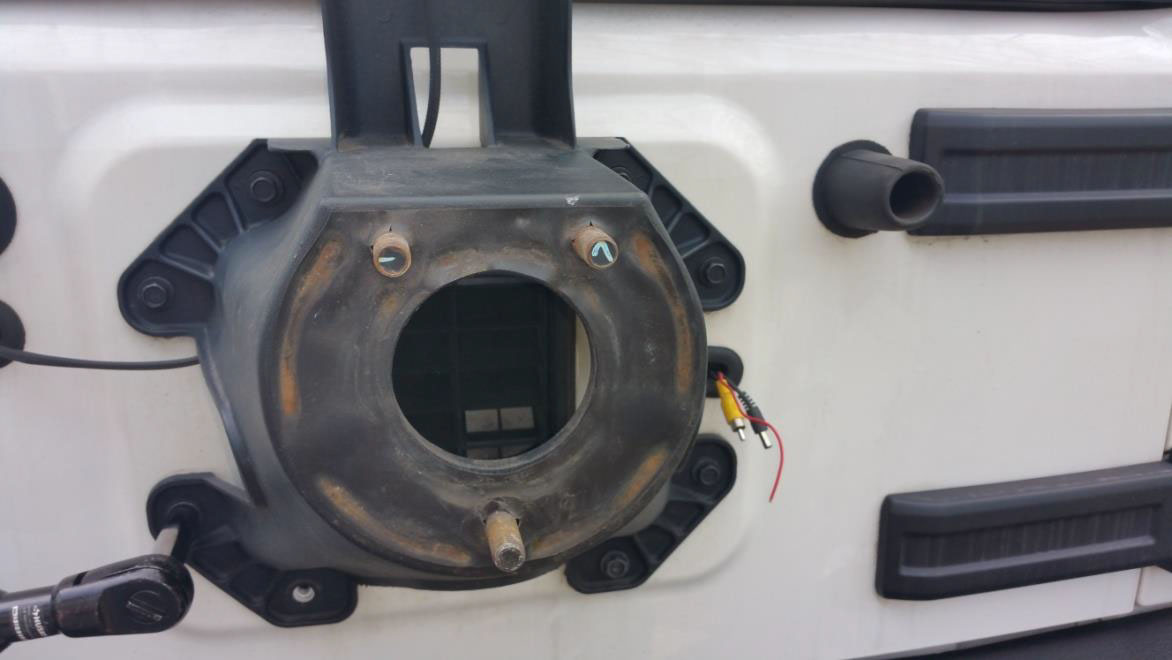
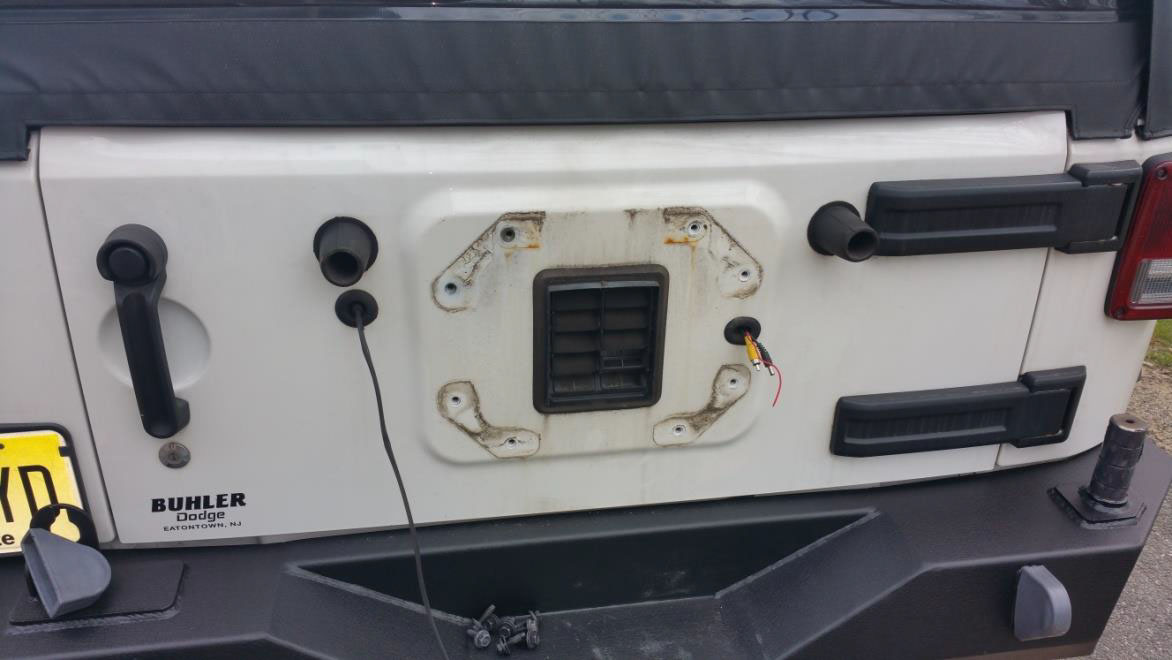
(the black wire hanging down is the brake light wire. You can remove the rubber grommet, stuff the wire into the tailgate, and get the grommet 95% back in to protect everything)
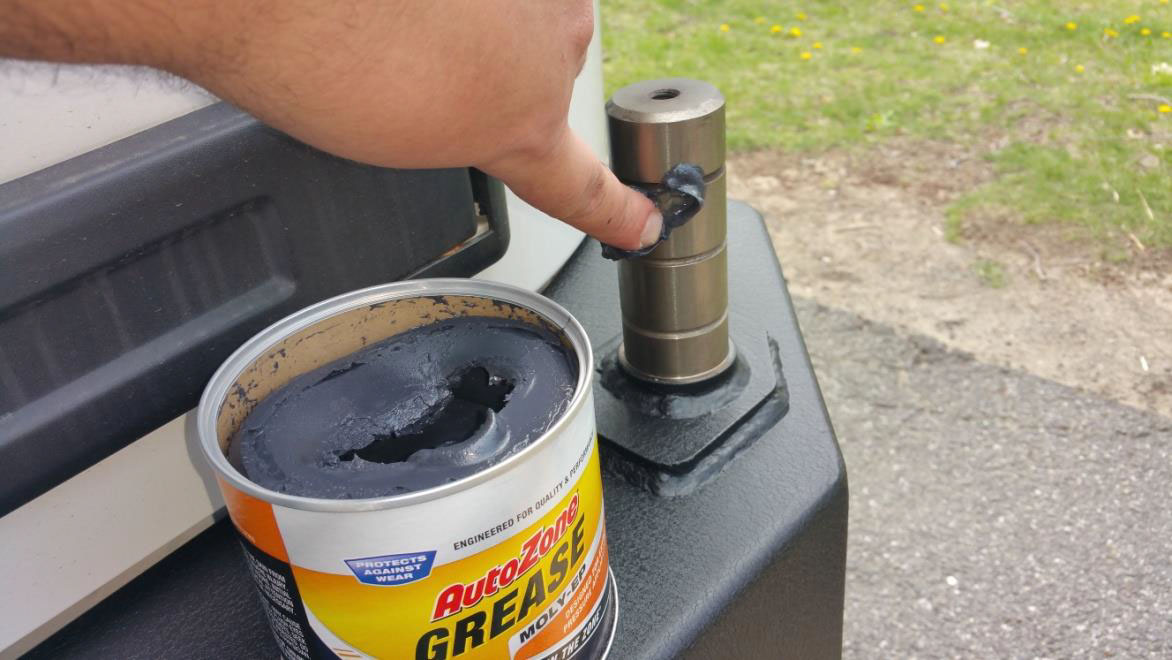
8. Using automotive (or marine) grease, lubricate the tire carrier post liberally (this will make installation easier, if tolerances are very tight), and then slide the tire carrier assembly down onto the post.
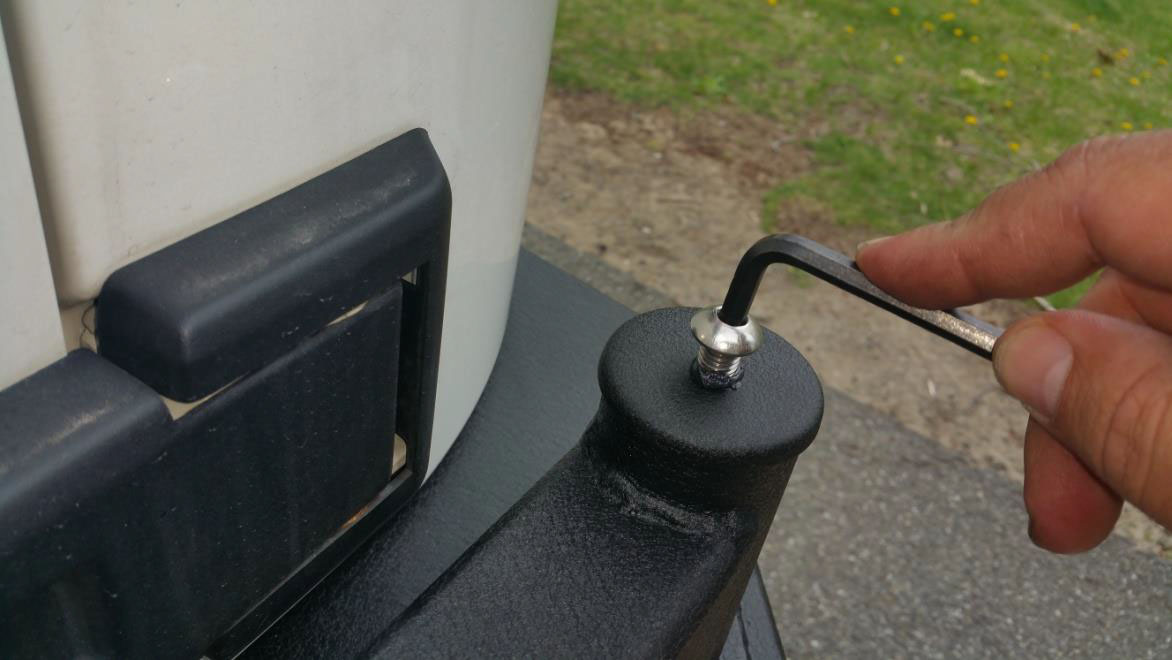
9. Place the tire carrier hinge cap on top of the hinge post, and secure tightly using the provided allen key screw (feel free to smear some grease on the threads of the screw to help keep moisture out of the hinge assembly)
10.
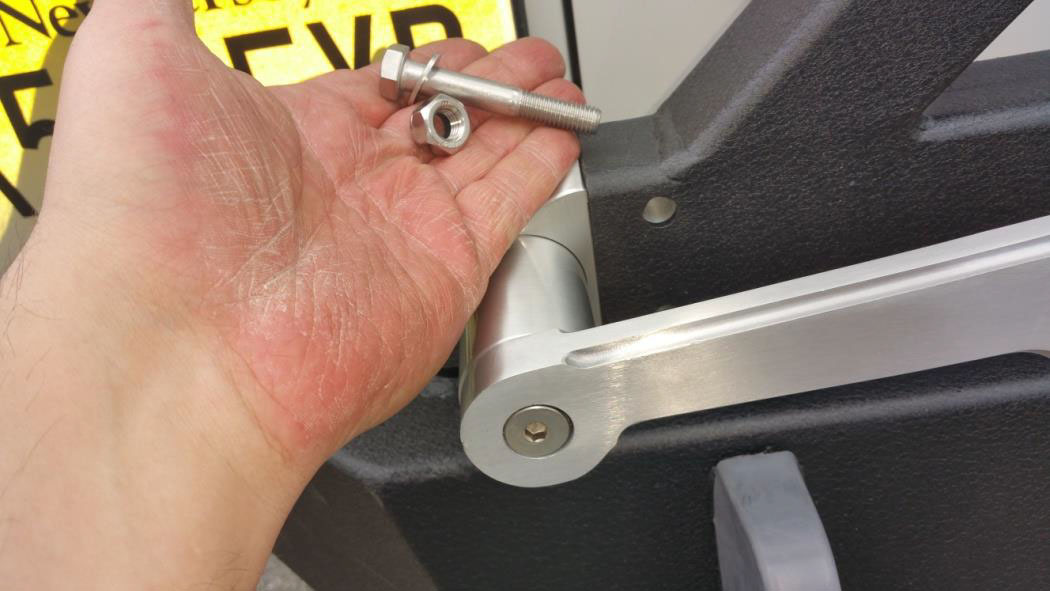
a. Slide the handle mechanism into the slot in the tire carrier
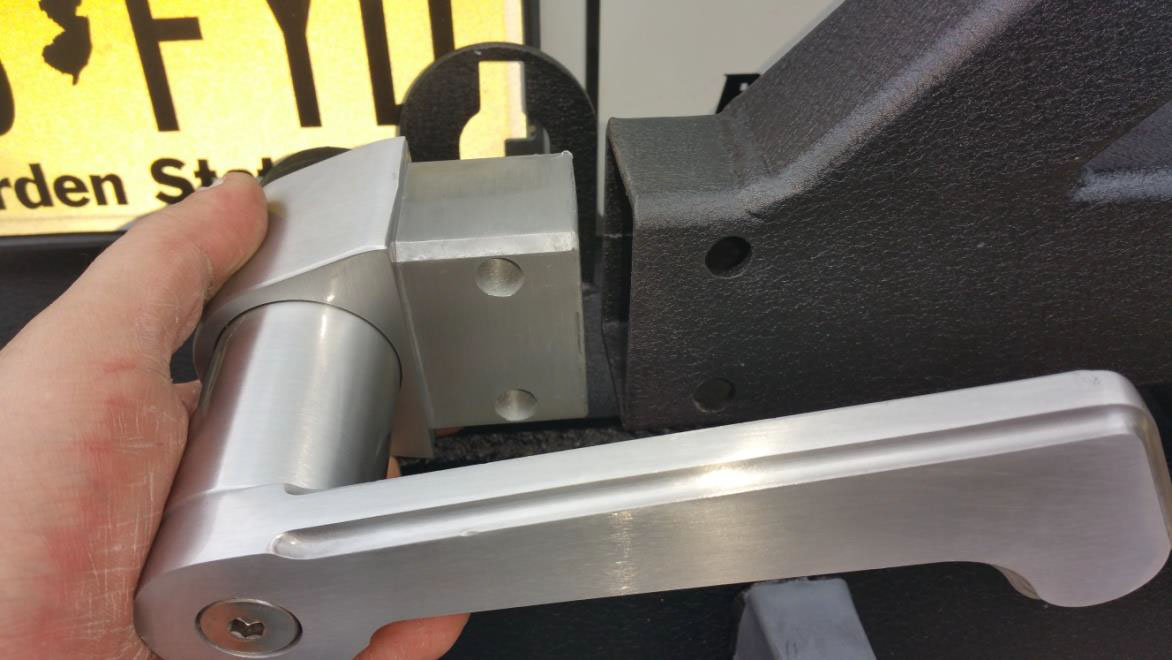
b. And secure using the provided 19mm bolts. The bolt gets one washer, is threaded through, and gets a locknut on the back.
11. Secure the spare tire bracket to the tire carrier using the supplied 19mm hardware. Mounting height is subjective, based on how tall your tire is. I have a 29” tire and I’ve mounted on the lowest set of holes. Please note that the horizontal bolts can be loosened and the tire bracket can slide in and out to decrease or increase the space between the tire, and carrier.

12. Finally, remount your spare tire, and secure down with lugnuts. (The carrier comes with some nuts – these may or may not work depending on what kind of wheels you have – I suggest you reuse your original lugnuts if there’s any question) Job Done!
Installation Instructions Written by ExtremeTerrain Customer Bill Mueller 4/22/2016

