 FREE 1 to 3-Day Delivery on Orders $149+ Details

How To Install a Barricade Extreme HD Stubby Front Bumper on your 07-18 Jeep Wrangler JK; 2018 Jeep Wrangler JL
Installation Time
1.5 hours
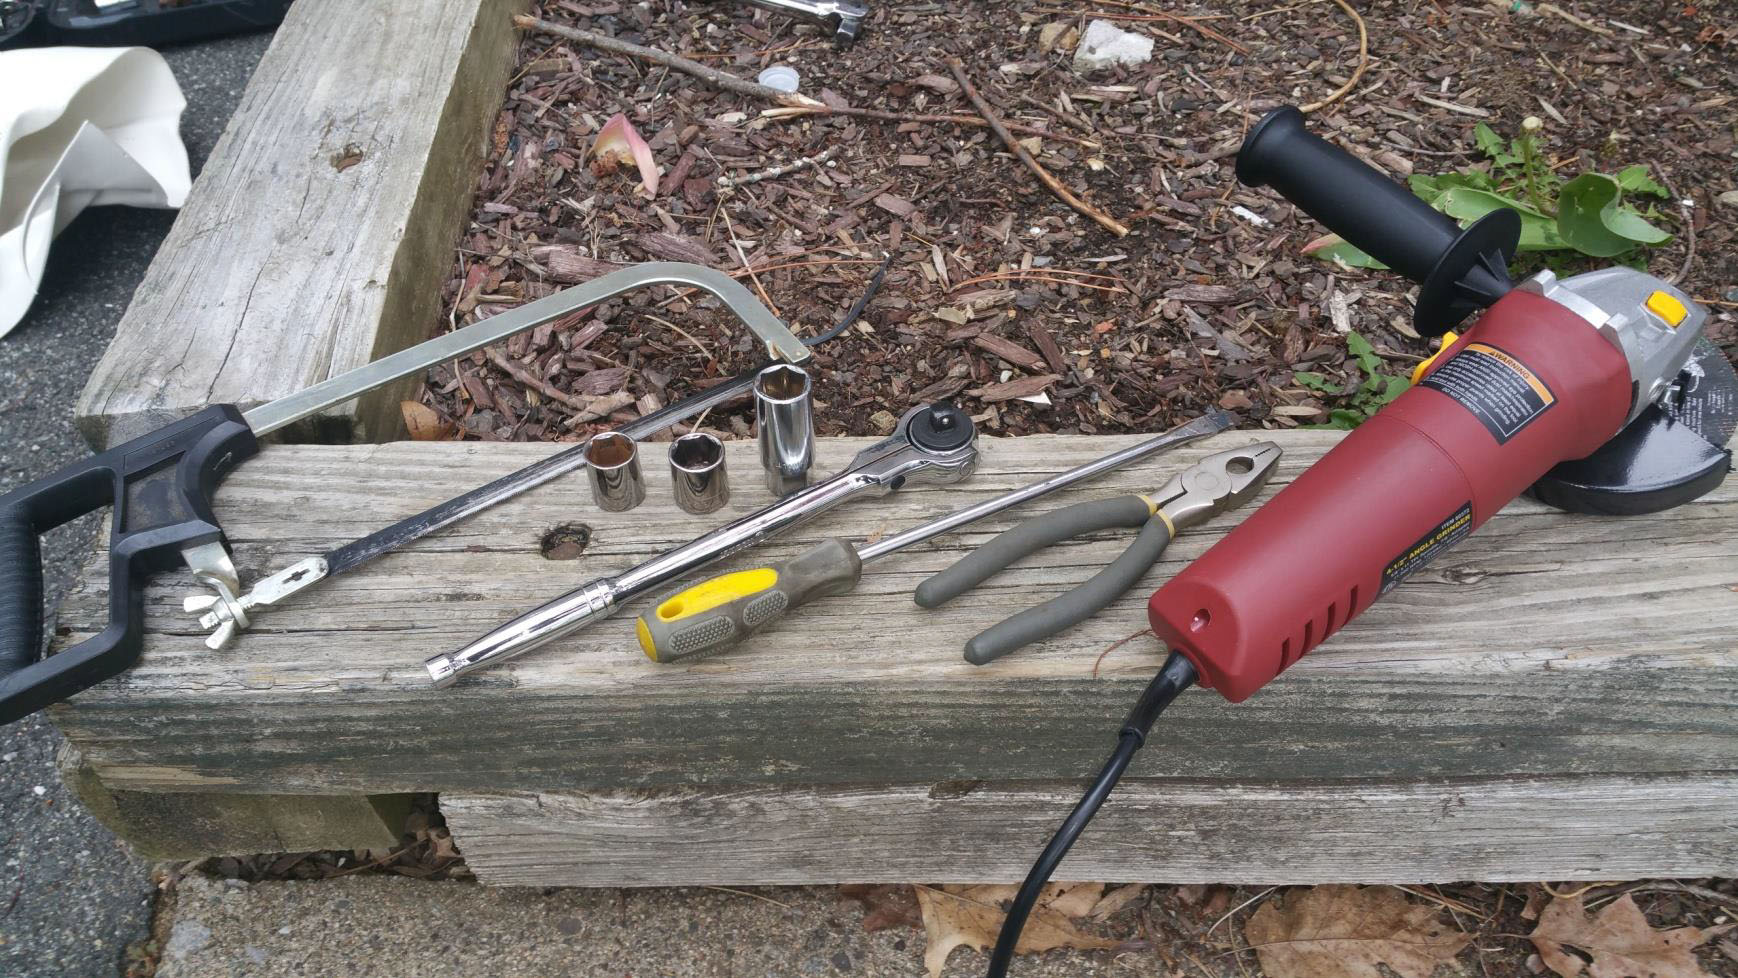
Tools Required
- Flat head screwdriver and a pair of pliers
- Ratcheting socket set (ratchet plus 18 & 19mm sockets, a deep 19mm socket, and a socket extension as well)
- A hacksaw, or angle grinder with a cutoff wheel
- Utility knife
- Safety equipment – gloves, safety glasses, long sleeves, and ear protection (if you use a cutoff wheel)

Shop Parts in this Guide
Optional tools: (to make life easier)
Air compressor and air ratchet
Rust Inhibiting Black spray paint (to cover any raw metal on the chassis)
PB Blaster or equivalent penetrating catalyst (in case any of the existing bolts are seized)
Installation Notes, Pre-Installation notes
1. Be sure to park the jeep on a level surface
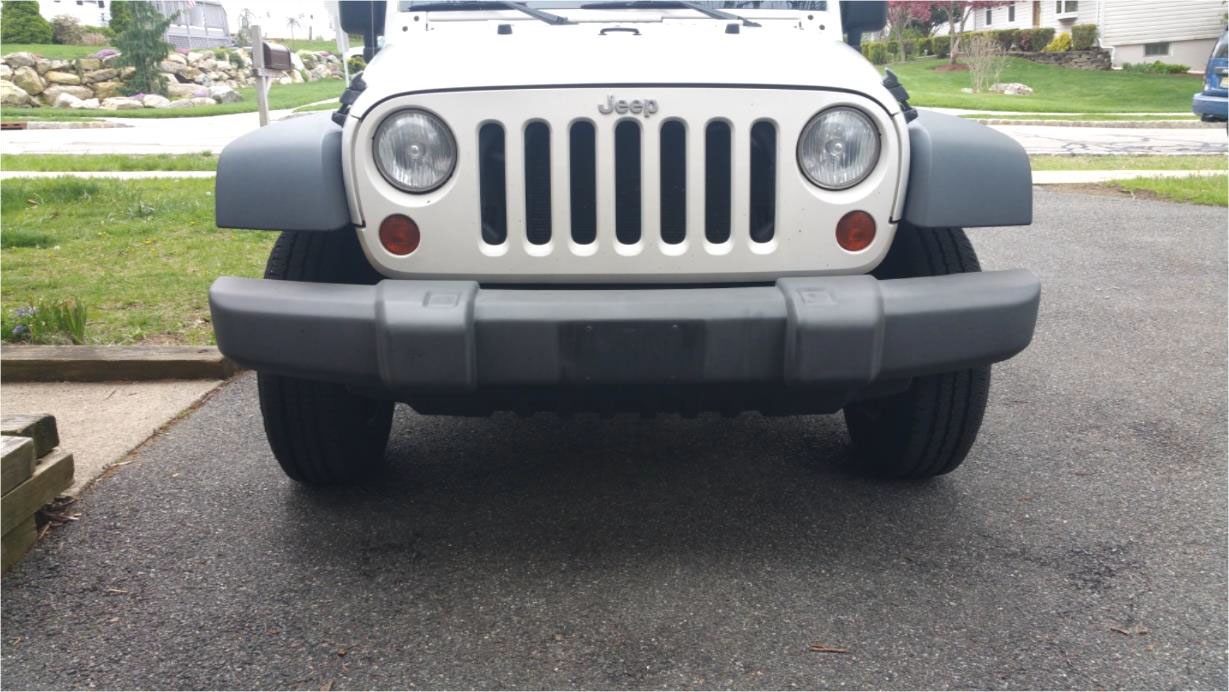
Here’s the 2008 JK X 2 door in its stock configuration before installation of the new bumper
Installation Instructions:
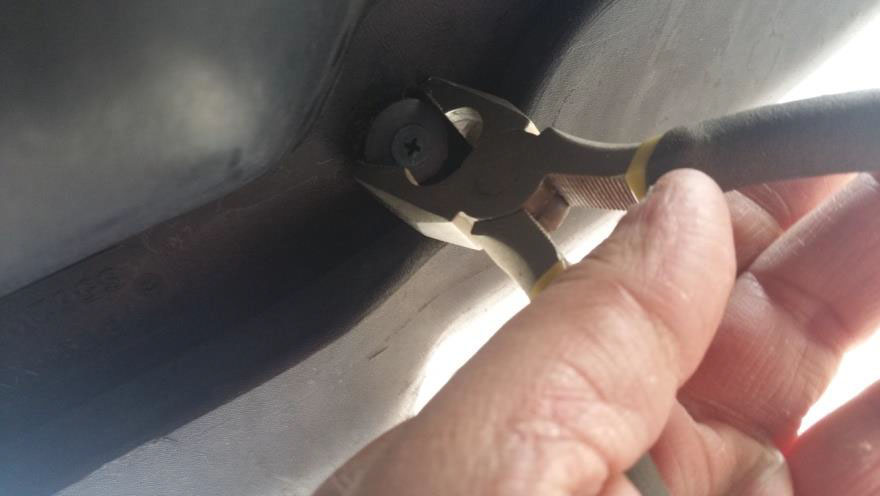
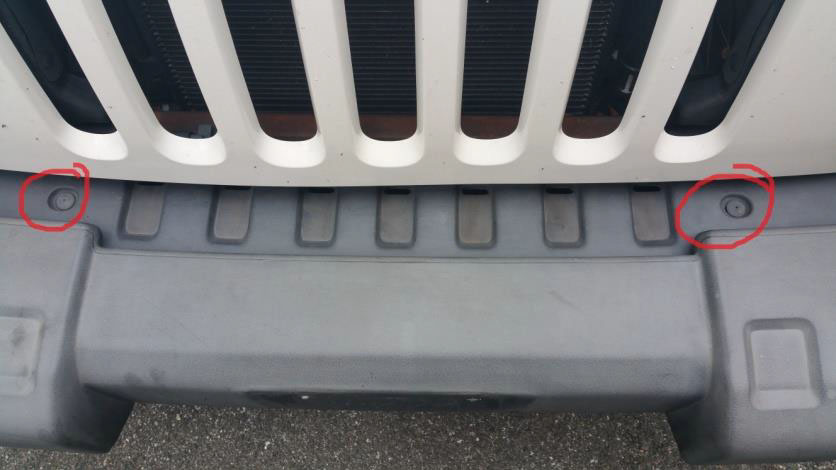
1. Start by locating all of the plastic screw rivet fasteners holding the splash guard on under the front bumper. There are four of them
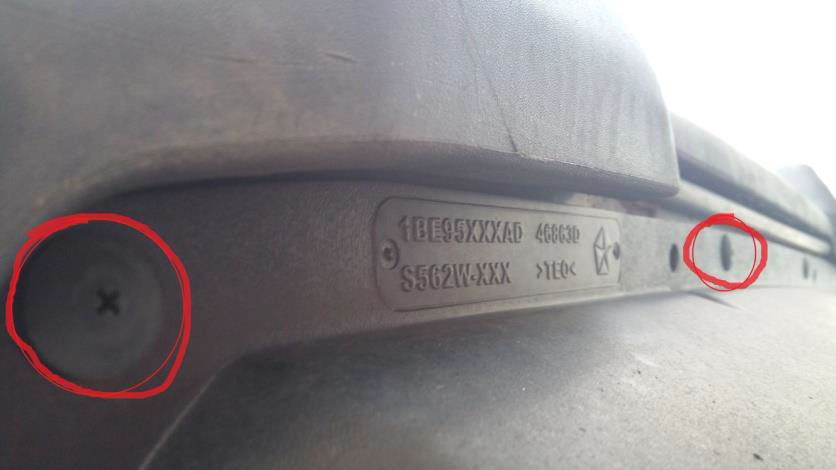
2. Using your flathead screwdriver, pry them out. If you’re planning on reattaching the splash guard after the bumper installation, be gentle and save these for reuse (or purchase new ones at the auto parts store).
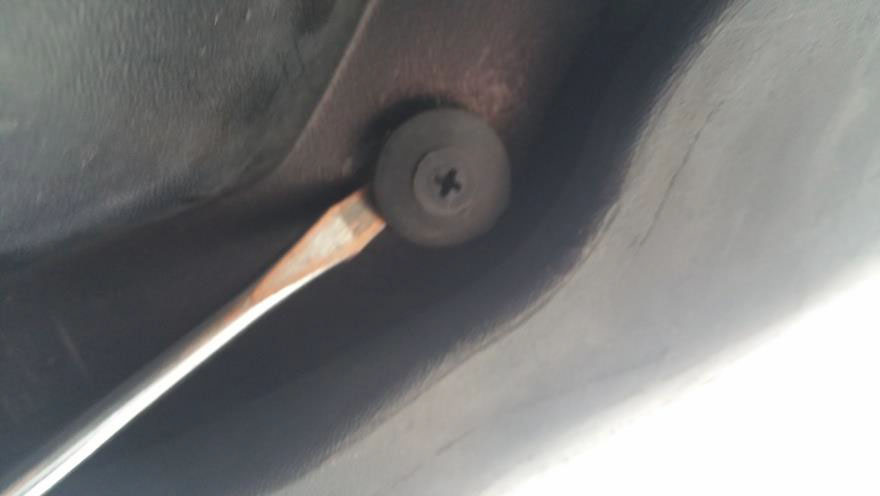
If you’re not planning on reusing these fasteners, and prying with the screwdriver is difficult, feel free to yank them out with pliers, once you get them slightly pried out with the screwdriver
3. Once you get all four of those fasteners out, you’ll see that there are two more attaching the splash guard to the crash bar. Remove these as well, and the splash guard will detach from the car.
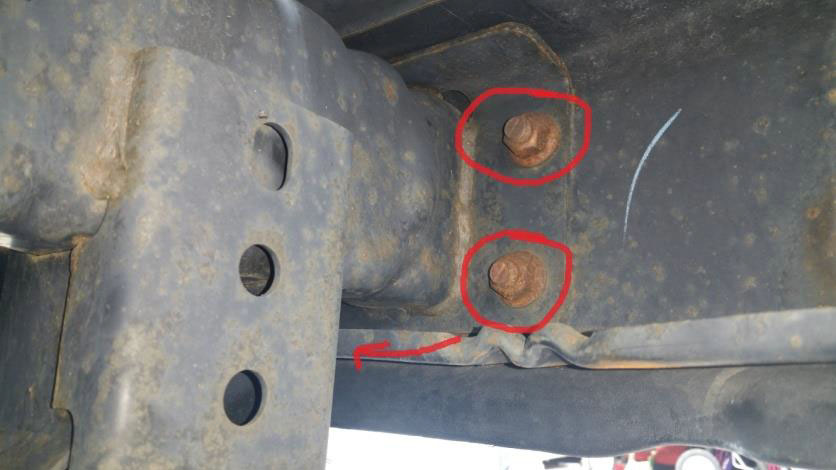
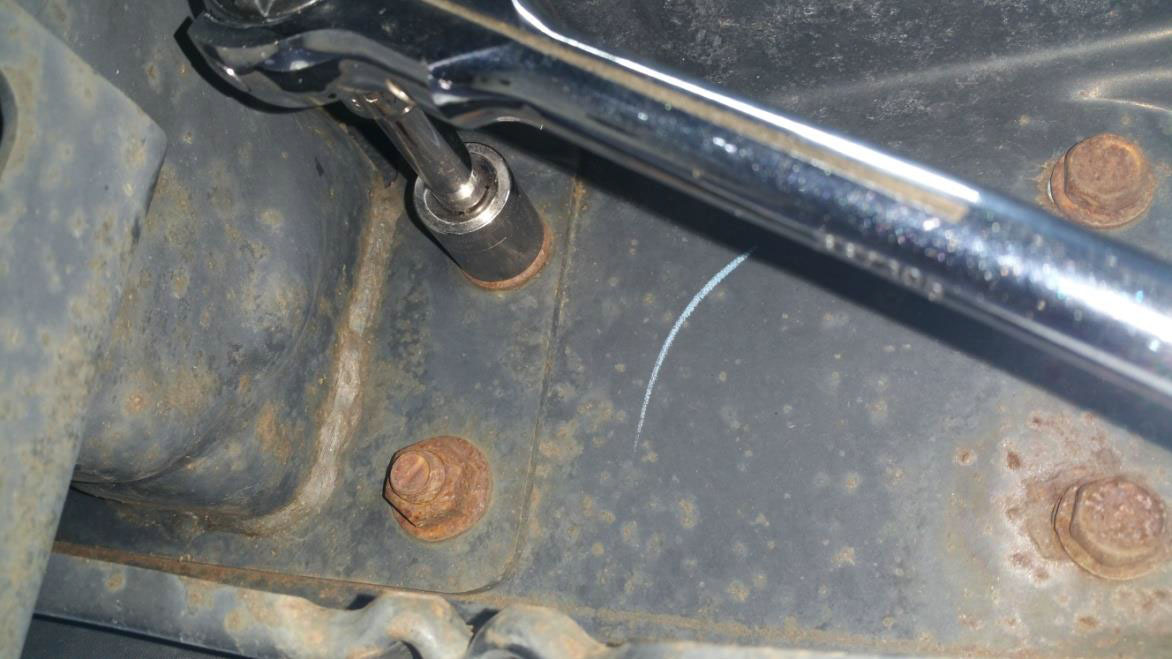
4. Once the splash guard is removed, you’ll need to locate the eight 18mm bolts securing the stock front bumper to the frame. There are two on each side of the two frame rails where the bumper is attached. Please note that these bolts maybe fairly rusty – you may want to give them a spray with a penetrating catalyst first to make removal easier.
a. Drivers side
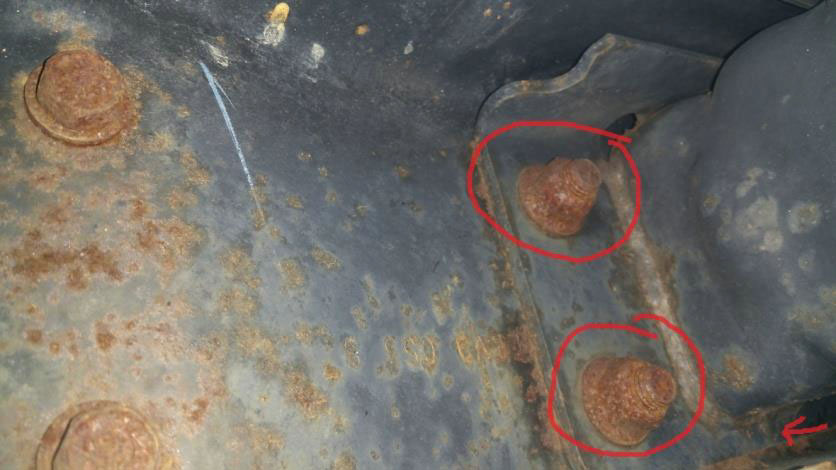
b. The same bolts are located in the same places on the passenger side of the frame.

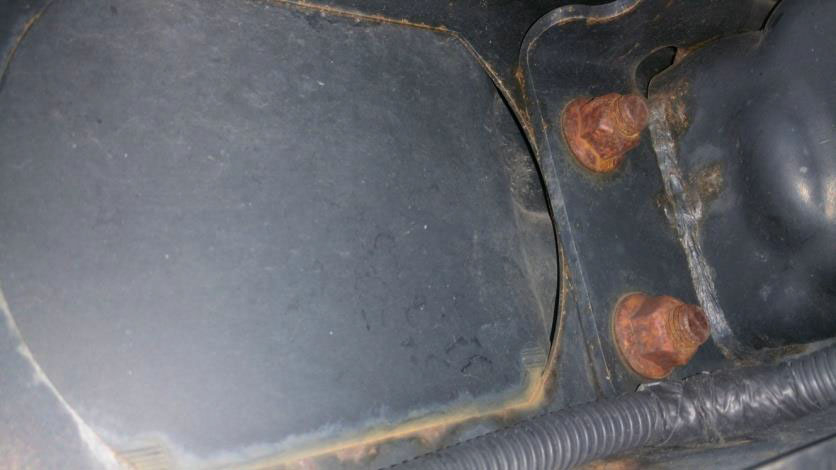
c. Using your 18mm socket (and extension, depending on how you want to position your ratchet), remove 6 bolts. These can be discarded, as they will not be used to install your new bumper, but for now, leave 1 bolt on each side attached loosely.
5. OPTIONAL STEP – If you have factory fog lights in your existing bumper, disconnect them from your wiring harness that runs directly next to the bolts you just removed
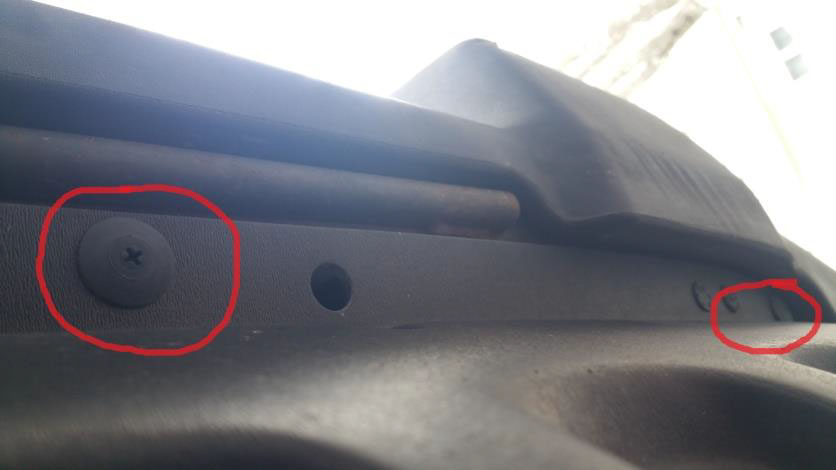
6. Locate and remove the two screw rivet fasteners located on the top splash guard of your bumper. These can be discarded, as this top guard will not be reinstalled after the new bumper goes on.
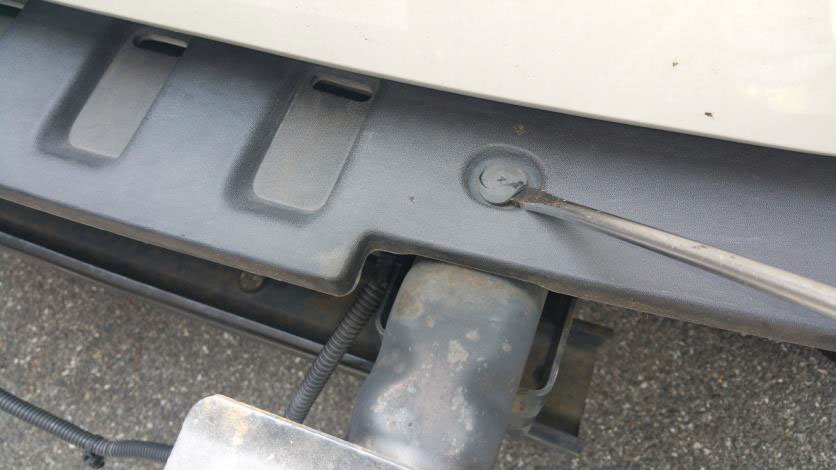
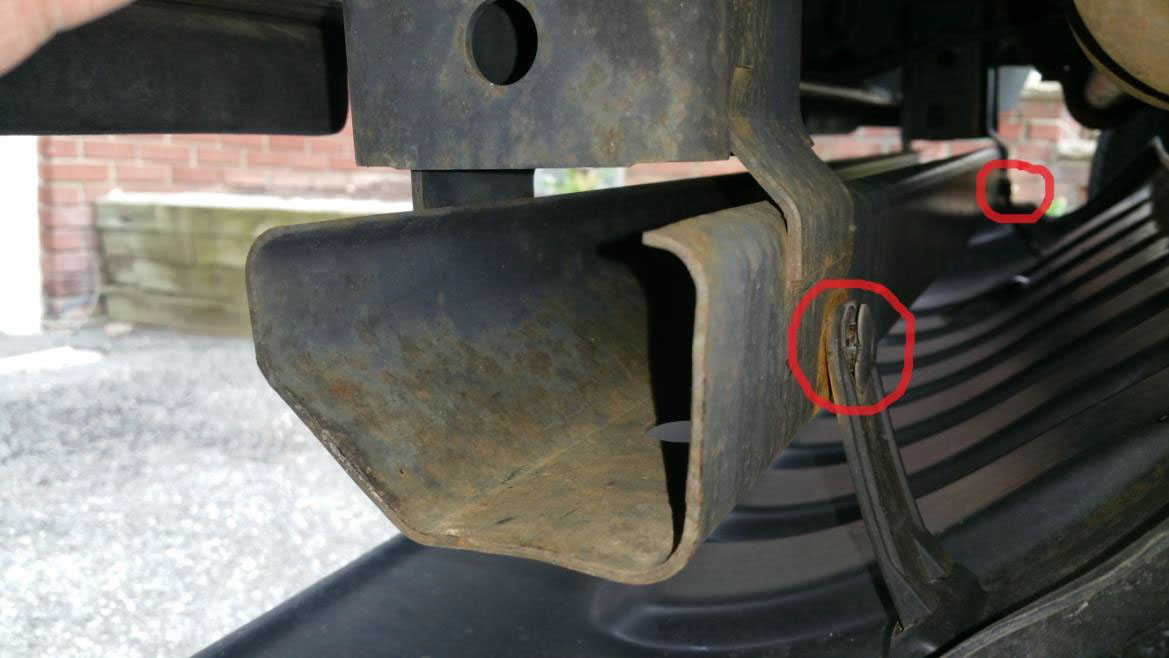
7. Go ahead and remove the last two bolts you left attaching the bumper to the frame and Very gently pull the bumper away from the frame rails to expose the wiring harness. DO NOT DROP THE BUMPER. You will have to support the bumper as you locate the 4 plastic clips securing the wiring harness to the bumper.
8. Use your utility knife to cut the clips holding the wire harness to the bumper, or use your screwdriver to pry them out.

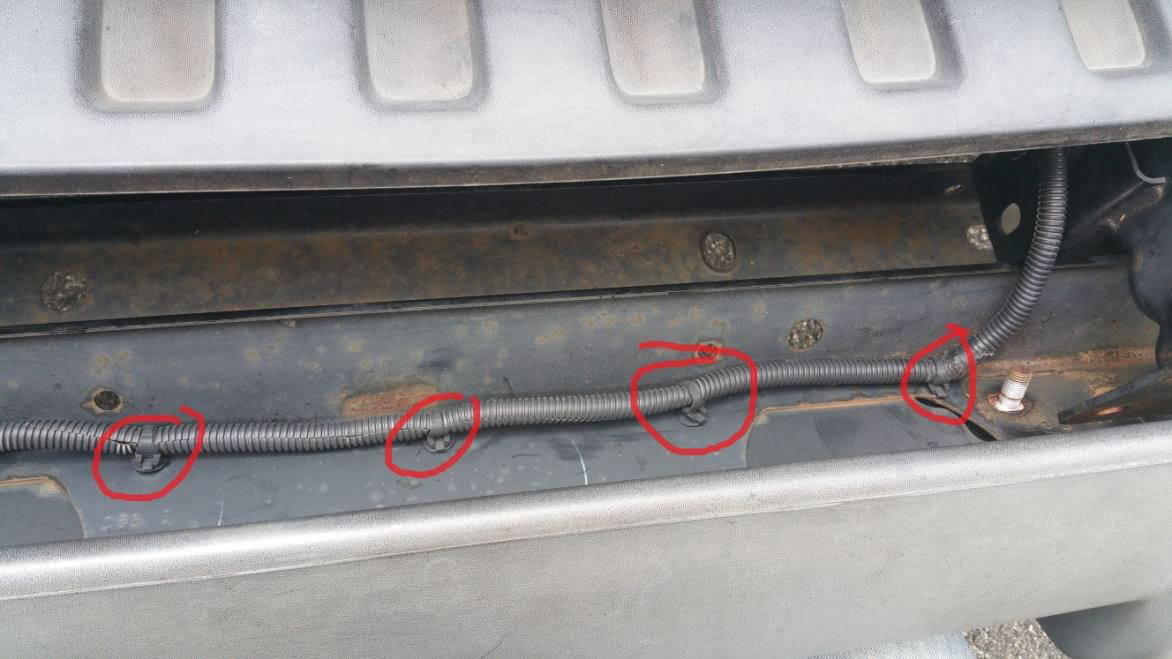
9. Once the wiring harness is disconnected, you can pull the stock bumper away. (wiring harness can be tucked up out of the way for now, either under the grille, or in the middle of the crash bar as shown below)
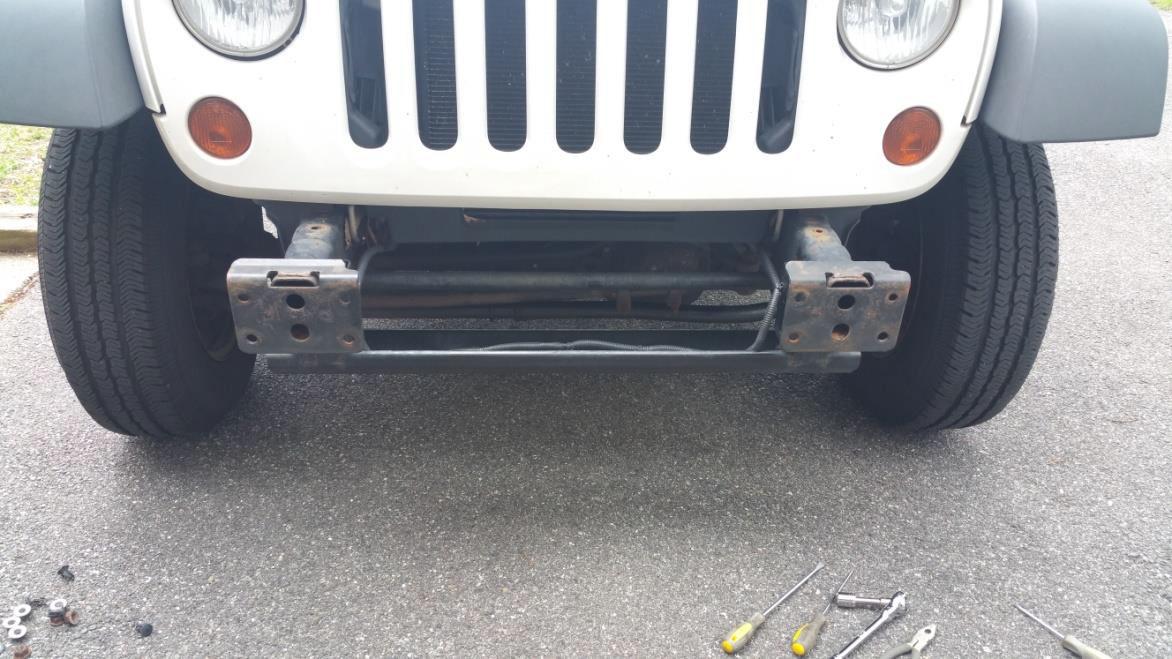
10. The existing crash bar needs to be trimmed, in order to be able to install the new bumper. Locate, and mark 1.5 inches from each of the ends of the existing crash bar.
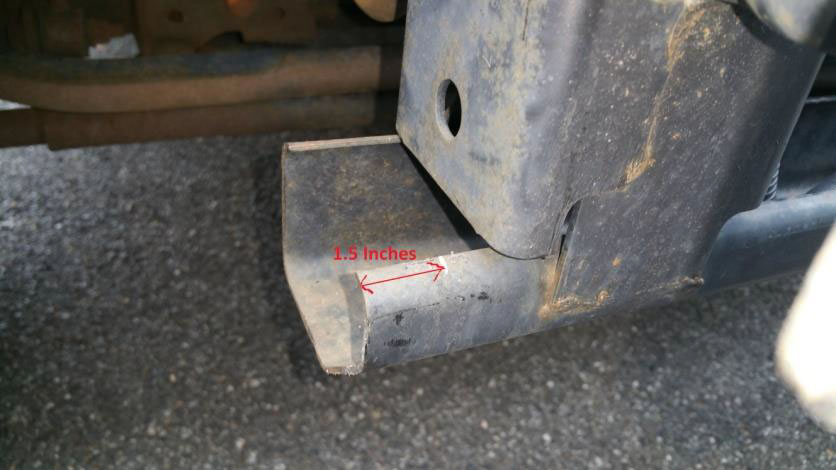
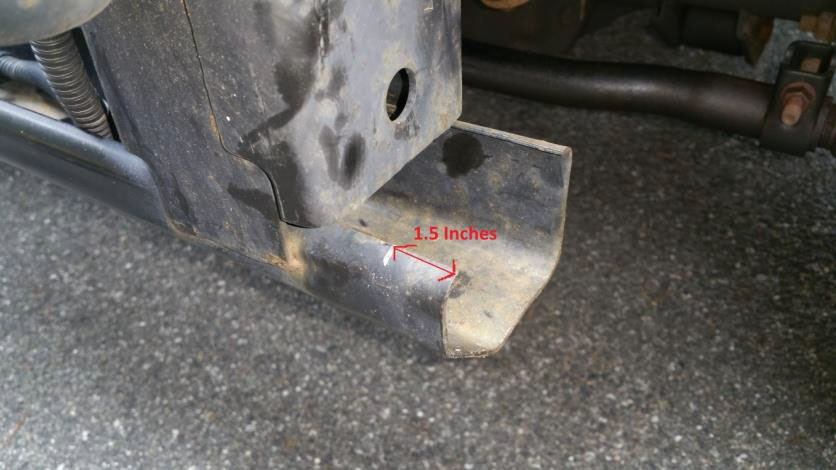
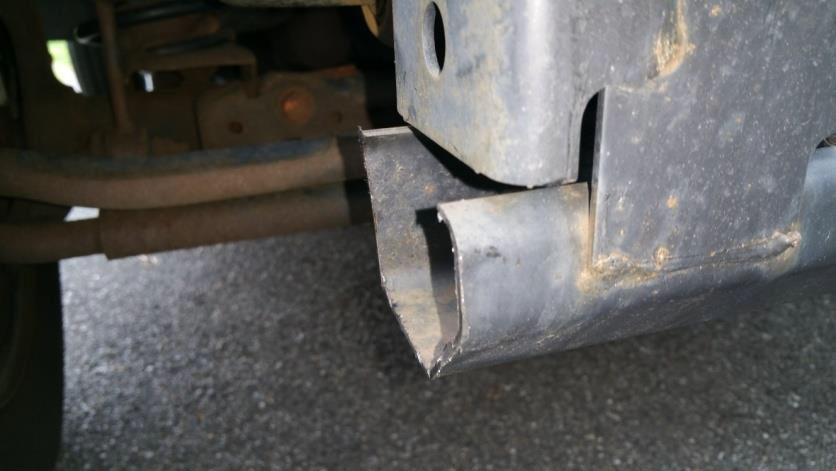
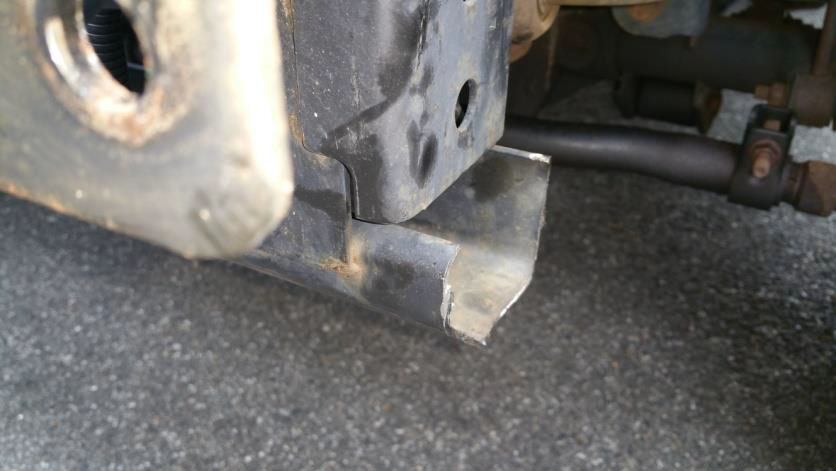
11. Using your hacksaw or cutoff wheel, remove the marked off 1.5” of material from the end of the crash bars (not pictured). Be sure to wear your protective gear as the cutoff wheel WILL create a shower of sparks, and potentially shards of metal. Below are pictures with the material removed.
Now that you’ve cut metal, you’ve exposed raw steel. To prevent rust, spray a rust inhibiting paint on the raw edges.
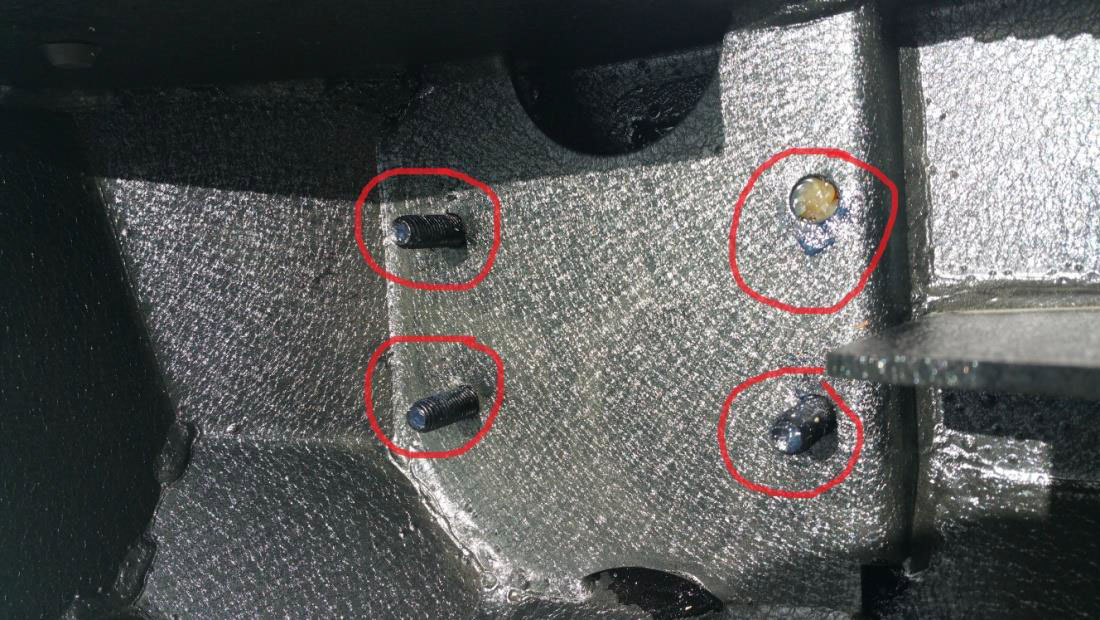
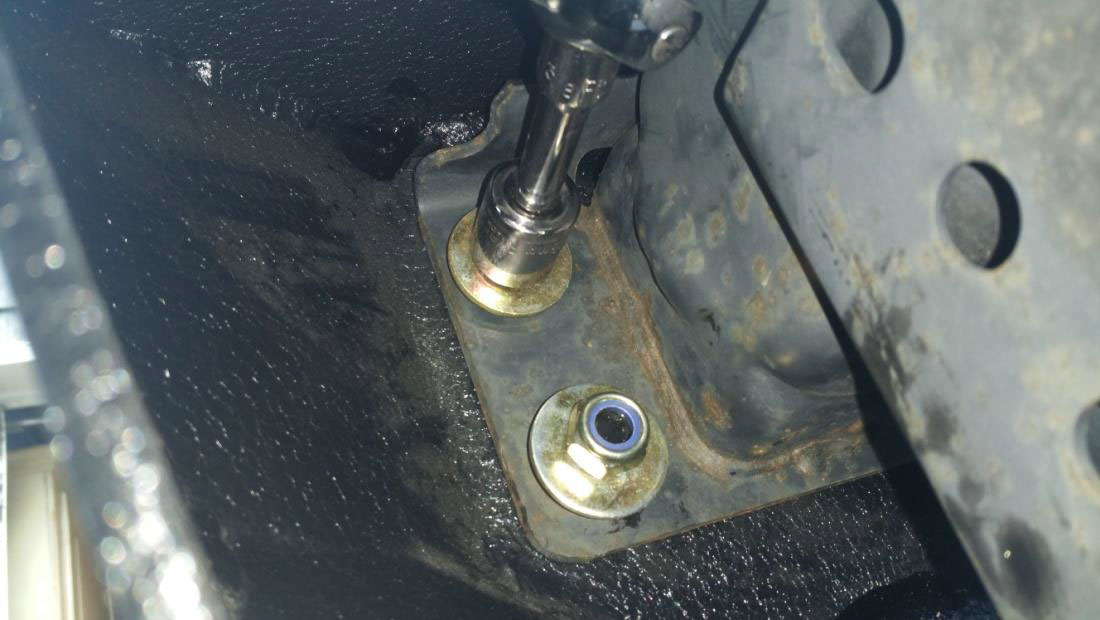
12. Locate the 4 bolt holes at the end of each of the frame rails
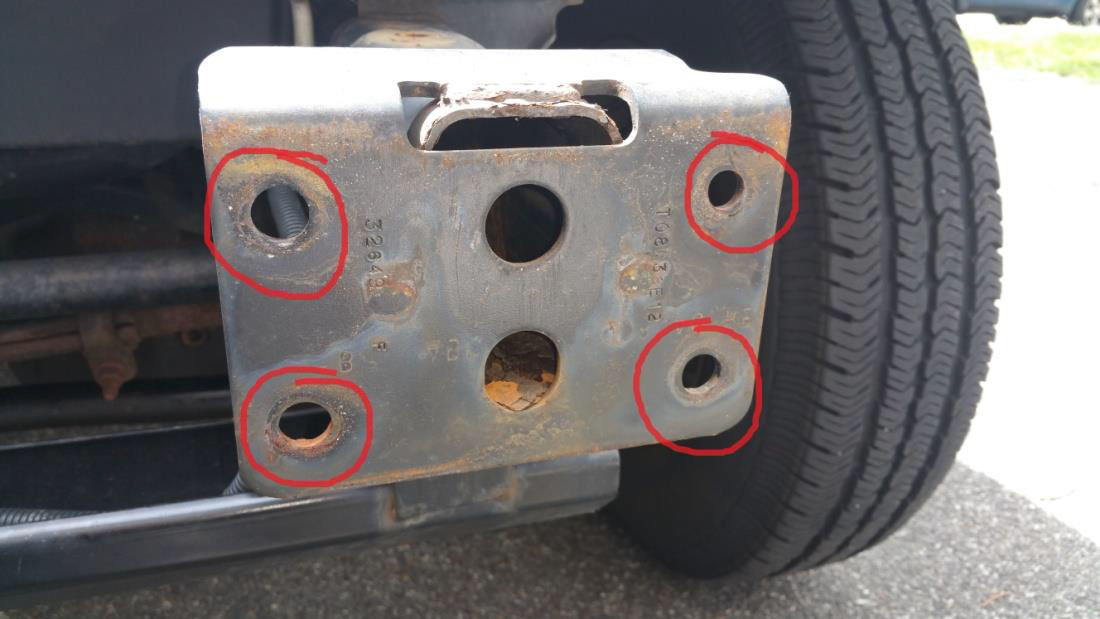
And on the inside of the bumper, find the corresponding bolts (and one empty bolt hole packed with grease – there’s an integral lock nut welded behind the grease)
And slide the 6 integral bolts attached to the bumper through the corresponding bolt holes on the frame rails
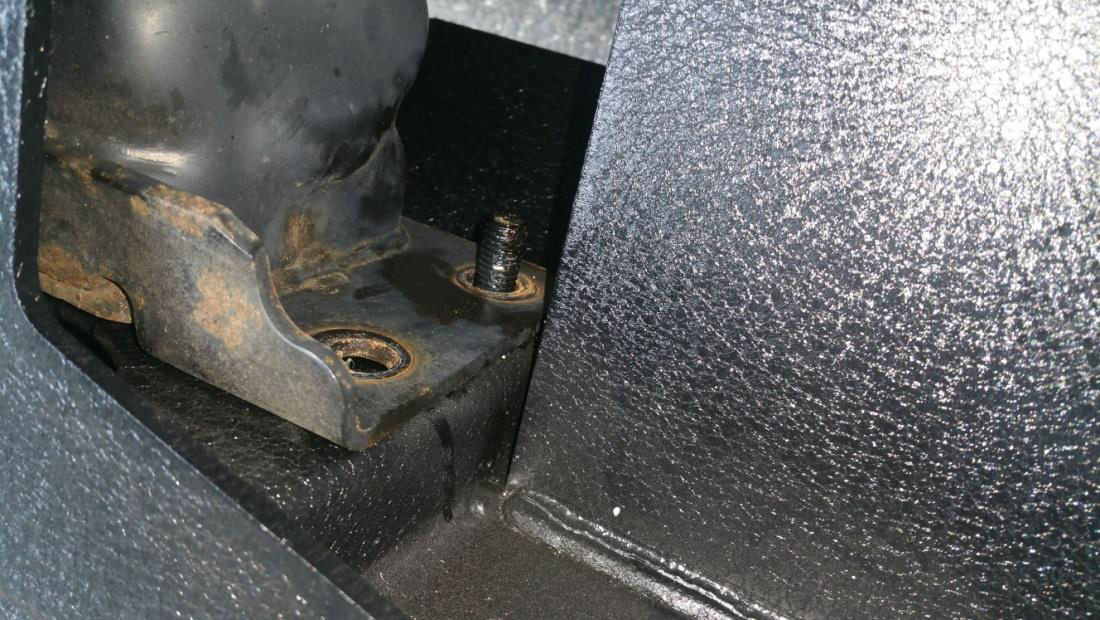
On each of the 6 integral bolts that are now through the plate on the end of the frame rails, slide on one of the flat washers, and one of the lock nuts
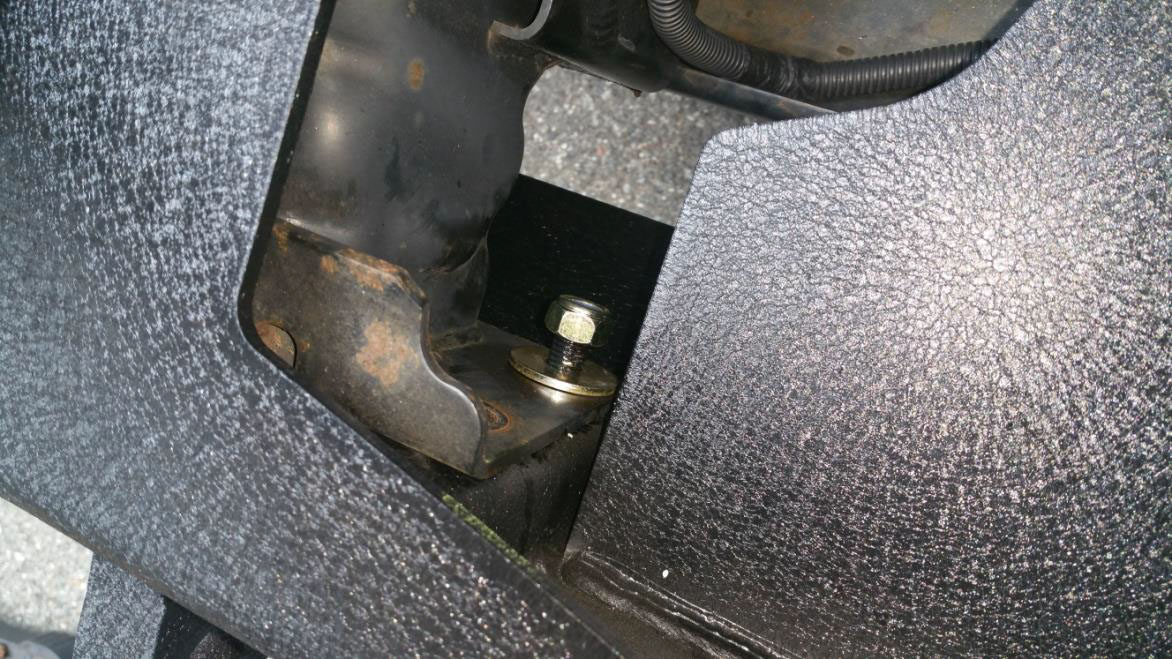
14. The remaining two empty holes in the plates are aligned with the grease packed holes (that have locknuts welded behind them). Take one of the 19mm bolts, thread on one split washer and then a flat washer, slide through the hole in the plate, and thread into the grease packed locknut that’s integral to the bumper
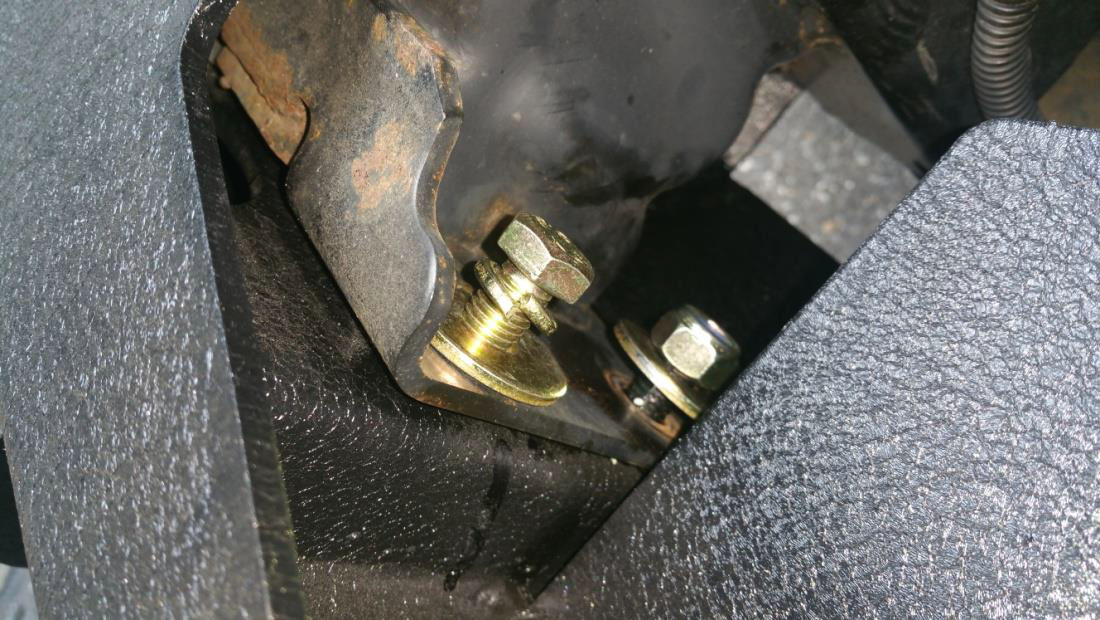
15. Using your ratchet and 19mm sockets (a deep socket is recommended here), tighten down all 6 lock nuts and both bolts. (the outer 4 bolts can be tightened from underneath the bumper and the inner 4 can be tightened down from the top) There is no recommended torque spec, so tighten them down completely.
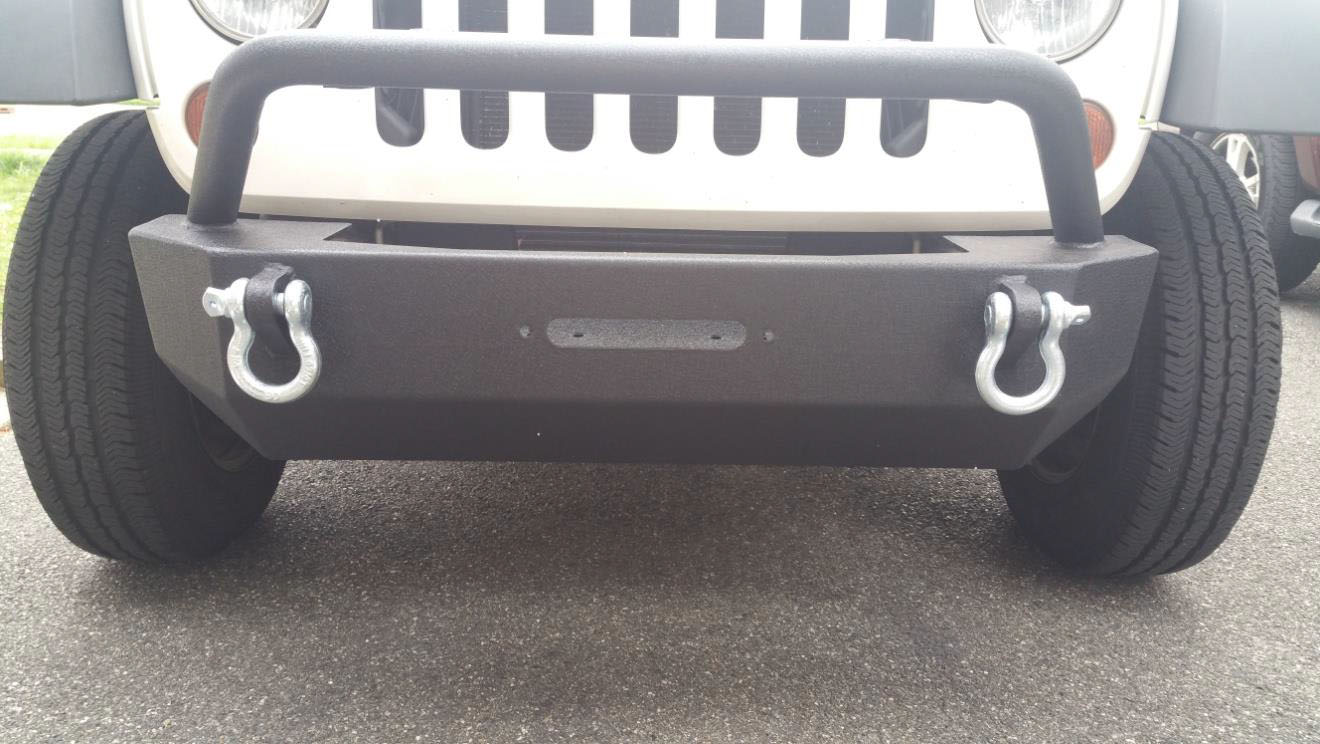
16. Attach your shackles to their mounting points and – you’re done! Congratulations on the successful installation of the Barricade Extreme HD Stubby Front Bumper
Installation Instructions Written by ExtremeTerrain Customer Bill Mueller 05/06/2016
