FREE 1 to 3-Day Delivery on Orders $149+ Details

How to Install TruShield Complete Netting Kit on your Wrangler

Shop Parts in this Guide
Getting started - lay the three nets out onto a flat surface. The label will be on the right side when in place.
Side Panels
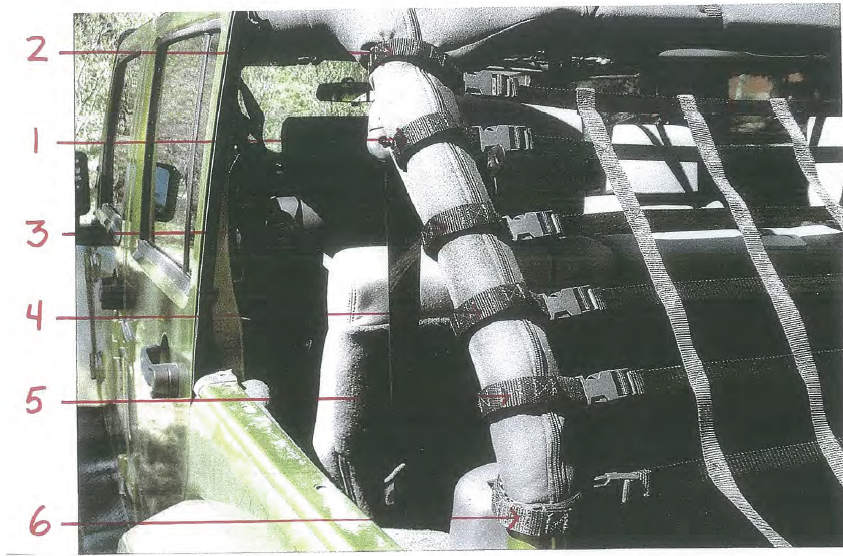
1. Referring to the attached photo of the side panel, connect the first vertical strap just behind the rear edge of the door, as close to the door as possible. Pull snug, but not tight.
2. Connect the next vertical strap and pull snug. Connect the same straps on the opposite side.
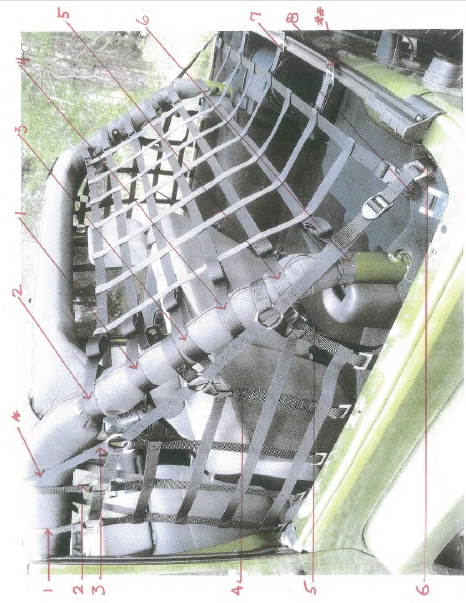
3. Connect this strap with the same strap from the other side where they meet over the middle of the roll bar.
Important: (*) Position these straps as shown in the photo. It goes just in front of the bolt under the padding of the roll bar. This prevents the strap from blowing loose while driving.
4. & 5. Connect these straps as shown and pull snug.
6. The hook of this strap connects to the lip of the metal jeep body.
Adjust as necessary to keep the vertical and horizontal straps perpendicular to each other. Pull straps tight and feed the loose ends back through the plastic connector to conceal them.
Rear Panel
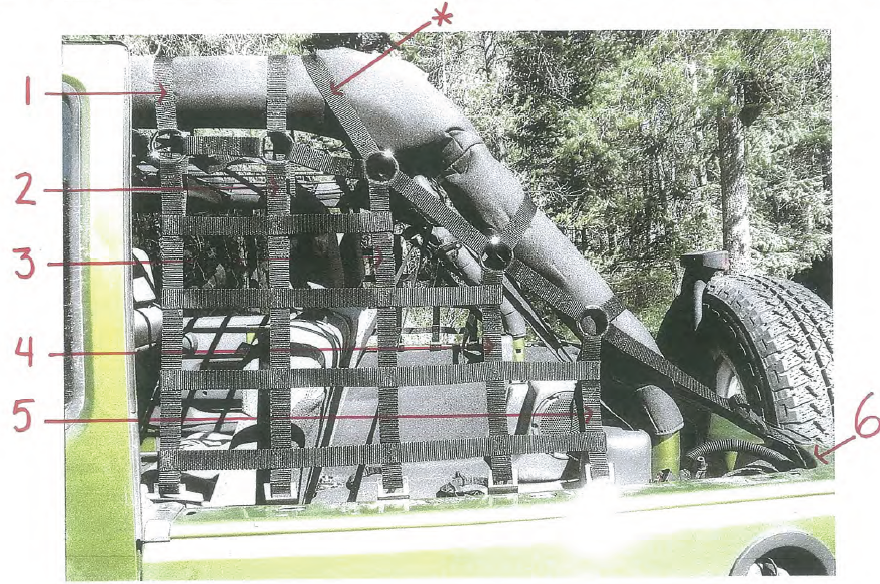
1. Connect this strap to each side just above the soft top strut braces as shown in the photograph.
2. Attach the upper most strap as shown.
3 thru 6. Working downward, attach the remaining straps, same as above.
7. Using the hooks, attach this strap as close to the tailgate as possible.
8. Connect the hooks to the tailgate bar. Adjust and tighten as needed.
Important: (**) This rear panel utilizes the tailgate bar for attachment of the hooks on the lower most horizontal strap. If your jeep came without a tailgate bar, it can be purchased from a Jeep accessory dealer or you may simply decide not to use those lower hooks.
Note: Steel roll cages expand and contract with temperature changes. Occasional tightening will be necessary at first and best done in the morning.
Tip: To get the straps extra tight, use pliers to grip the strap ends.
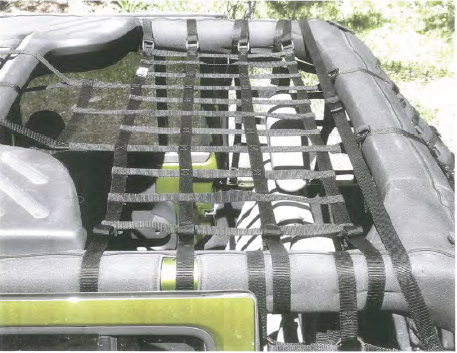
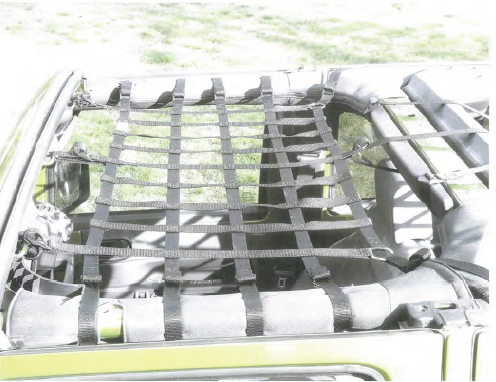
1. Lay the net out on a flat surface with the label at the top right.
2. Attach all 3 front straps to the footman loops above the windshield.
3. Attach the rear straps around the roll bar.
4. Attach the 8 side straps and the 2 corner straps to the roll bar.
5. Adjust as necessary.
6. The excess straps may now be cut off or tucked back inside the connectors and rolled up.
Note: Metal roll cages will expand and contract with temperature changes. Occasional tightening of the straps may be needed the first few days and best done in the morning when it is cool.
Tip: Grabbing the nylon webbing end with a pair of pliers will help get a better grip to pull it tighter.
1. Lay the net on a flat surface with the label at the top right The label will be facing up and just behind the front passenger seat when installed.
2. Connect the long front straps around the front roll bar.
3. Take the other end of those two straps and attach around the rear roll bar.
4. Connect all eight side straps.
5. Adjust as needed.
6. The excess strap ends may now be cut off or pushed back through the connector and rolled up out of sight.
Note: Metal roll cages will expand and contract with temperature changes. Occasional tightening may be needed the first few days and best done in the morning when it is cool.
Tip: Grabbing a hold of the nylon ends with a pair of pliers will give better leverage to pull the straps tighter.