Installation Time
(approx) 45 Minutes
Difficulty Level:
Simple installation for anyone.
FREE 2 or 3-Day Delivery on Orders $119+ Details
$179.99 (pair)
FREE Shipping Market Price $206.99 You Save 13% ($27.00)Open Box from $54.00
Add Local Shop Installation
Saved - View your saved items
We're sorry. We couldn't save this product at this time.
or use
Meredith: If you want an aggressive tail light setup to turn some heads, these Raxiom Axial Series Trident LED tail lights with the black housing and the smoked lens will be a great option for your 2007 to 2018 JK Wrangler. Now, this set will be great for your build if you want to ditch your factory lighting for a stealthier and more dynamic tail light, whether your current set is a bit worse for wear, the housings are damaged, or you just simply don't care for that appearance anymore. Not only will these improve your street appeal when it comes to your Jeep, but the LEDs are going to be incredibly efficient, so you won't have to worry about maintenance over time or worry about that incandescent bulb or continue to swap them out, and they're going to be much more powerful than the incandescent, giving you better lighting performance out of the back end of your JK.Now, these are gonna feature a dramatic and dark appearance with the black housing and that smoked lens on the front in addition to the raised detailing on this lens here. Now, the detailing is going to feature red LEDs underneath of them as your running light. So it's gonna give a very angular and more of that aggressive or angry feel when you're looking at the tail lights head-on. Not only that, but it's also gonna make you a lot more noticeable and, of course, set your Jeep apart from the rest of the builds on the street. Now, on the inside of those running lights on these dead spaces here or the lower spaces, there's gonna be a cluster of red LEDs up at this portion up at the top for the brake light and the turn signal. And then down at the bottom, there's gonna be a cluster of white LEDs for your reverse light. Now, even with the smoked lens, the lighting is going to be incredibly bright, allowing, again, better noticeability but also better visibility when backing up at night. This will also feature a standard red reflector over on the side, some detailing on the housing, and you're getting two red marker lights, both with two LED diodes. That's going to keep up to OE standards and, of course, add a touch of style over on the side of the tail light.Now, these lights will have a solid build with an ABS plastic housing and a polycarbonate lens on the front, which will be able to withstand any lighter hits on or off-road. And the housing is also gonna be weather-sealed to ensure no dirt, dust, water, or really anything else can get inside and potentially harm the LEDs, leaving you at ease that your new lights are gonna be safe outdoors and on the muddiest of trails. Now, the best part of all is that these are gonna be completely plug and play. As you can see, this is a factory-style harness, so it's gonna take no time to get these installed and the install is gonna be completely hassle-free.Now for tail lights, these are gonna be right in the middle of the road when it comes to pricing at around $225. Now compared to other options, again, these are gonna have probably one of the most unique designs compared to some more traditional options thanks to the raised detailing on the lens and the light combo underneath. Now I think if you wanna step outside the box when it comes to lighting with a well-built set of lights, then these are gonna be a great way to go for your JK. Install on these is a one out of three wrenches on the difficulty meter, taking you about 45 minutes to get the job done, but I wouldn't be surprised if you got it done a little bit sooner. Now, speaking of the install, one of our customers here at XT has actually installed this on their JK and is gonna walk you through step-by-step of how to get your factory ones off and get these ones bolted up in place of them. So, that's gonna wrap it up for me. Let's go ahead and get into the install.Male speaker: All right, here's everything we used, what we have left over, my tools I used. I started out with this screwdriver, which the bit is too large to go into recess on the new tail light, so I had to swap to a regular Phillips screwdriver and everything went real smooth. No issues. No worrying problems, everything plugged straight up. Try not to lose your screws. Try to have a clean area to work on stuff that way if you drop it you can find it. With a little pull and a little yank, here we go. We got a clip here that holds the plug to keep it from coming unplugged when you don't want it to. The hard part is to get them through. Just push in on this right here. Wiggle wiggle. There it comes apart.Female speaker: What are you doing there?Male speaker: The bulbs. You would think that there would come apart. There she goes. All right, now there's our housing. All from ready for the new. All right, now that I've got the housing and stuff off, and the units unplugged, the housing's out of the way, we have, now we've got to figure out, this is some aftermarket reverse lights that's in the bumper, and I've got to figure out these two wires, whenever I unwire these, I've got to figure out which ones to wire these back into on the new tail lights. So stay tuned here while I'm trying to sort these out and figure out what's what.This looks to be the reverse lights that's factory. I don't know why they did what they did here when they hooked up the old set. But anyway, I think I can just plug into this right here with my reverse lights here and make it all work. So we have kind of skipped a little bit here. I've got reverse lights in my bumper that I needed to tap into my factory wiring harness. So I took a test light, found my hot wires. Tied my hot wire into my reverse lights, to my reverse output on my factory harness. Grounded it with the ground wire. Put a resistor so I don't have no feedback into my radio. And now these work, no feedback, all's fine. I'm going to install my new tail lights now with the supplied wiring harness that they have already fixed. There's a right, right there, R and an L, to make sure you get it the right direction. So now basically all we've got to do is plug it up. Push it in, hear it snap. Once it's locked in, make sure all your wires are tucked. Get it the right direction. Make sure all your wires are tucked. Make sure you get these clips, these back clips right here, up behind this right here. All right, now we just put the screws back in, tighten everything back down, and this side is done. Make sure top and bottom of this bolt is slid over. I had this one here off this a little bit. I did not lock it in. So now it'll line up. All right. One is done. That is our brake lights, the difference, reverse lights, the difference. Put your parking lights on. Turn signal. They look good.Now we're going to work on the next side. All right. Now we're starting our uninstall of the stock to put our new tail light on. There we go. We have got this little resistor here that we need to snap off. Zip pad on. That is it. Everything's off, ready to reinstall the new wire so basically we follow the same steps we've done on the first install, plug these back up. Now these can only be plugged up one way. All these little grooves are going to line up in certain spots and if you're trying to plug it up wrong, like if I swap that around, there's no way of doing it. See it's almost... No way you're doing it wrong. Everything lines up, push in, push really hard till you hear a snap. So now we just line everything back up. Make sure not to pinch your wire or you'll get everything stuck back in the hole. Pretty much only one way for everything to go. Get it in there, slide it out. I'm just gonna line everything up and then put your screws back in. If you notice I went to a regular screwdriver, the other one I was using the bit wouldn't go back in the recess on it so I couldn't. Couldn't tighten everything all the way down, so now I've got just a regular screwdriver. Works great.Meredith: So that is going to wrap it up for my review and the install of this Raxiom Axial Series Trident LED Tail Light with the black housing and smoked lens, fitting all 2007 to 2018 JK Wranglers. And remember, for all things JK and all things Wrangler, keep it right here at extremeterrain.com.
Subscribe to our YouTube Channel
Features, Description, Reviews, Q&A, Specs & Installation
Brand | Raxiom |
Tail Lights Style | Custom Style |
Tail Lights Type | LED |
Tail Light Lens Color | Smoked |
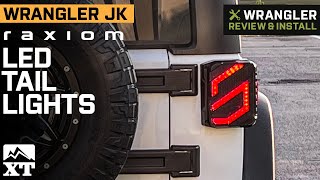
Updated Styling. An excellent way to update the appearance to your Wrangler is with a pair of Raxiom Axial Series Trident LED Tail Lights that feature black housings and smoked lenses. These Tail Lights feature a very unique Trident style running light design that will refresh the look of your Jeep. Whether your Wrangler is your daily driver or your dedicated weekend toy, these Axial Series Trident LED Tail Lights will make an impactful statement that sets your Jeep apart from all the rest.
Quality Construction. Manufactured from OEM grade materials, these Axial Series Trident Tail Lights are assembled to precise standards for long lasting quality. These Tail Lights feature durable black ABS plastic housings with smoked polycarbonate lenses. Employing red LEDs for use as brake, running and turn signal lights, these Tail Lights use white LEDs for the reverse lights. Each housing is weather-sealed to prevent dirt and moisture from harming the state of the art electronics found inside.
Simple Plug and Play Installation. These Raxiom Axial Series Trident LED Tail Lights were designed to be a direct plug and play replacement for your original factory housings. There is no cutting or modifications required for a clean straight forward install. Installation can normally be completed in about 45 minutes with just basic hand tools.
Application. These Raxiom Axial Series Trident LED Tail Lights; Black Housing; Smoked Lens are designed to fit 2007-2018 Jeep Wrangler JK models. Sold as a pair, driver and passenger side lights are included.Fitment:
Raxiom J173718
CA Residents: WARNING: Cancer and Reproductive Harm - www.P65Warnings.ca.gov
Installation Info
Installation Time
(approx) 45 Minutes
Difficulty Level:
Simple installation for anyone.
What's in the Box
10 More Questions