Talk to a Tacoma Sales Tech
1-877-870-8556
M-F 8:30A-11P, Sat-Sun 8:30A-9P
Logo Image
$20K Sweeps! 10 Chances to Win! Enter Daily >

LED Halo Projector Headlights; Chrome Housing; Clear Lens (05-11 Tacoma)

Item TT1110
ExtremeTerrain no longer carries the LED Halo Projector Headlights; Chrome Housing; Clear Lens (05-11 Tacoma). Please check out 2005-2015 Toyota Tacoma Headlights for an updated selection.
Verify parts fit and get product recommendations.
Tacoma Sales Techs: Connect Now M-F 8:30A-11P, Sat-Sun 8:30A-9P
$0.00

    Product Videos

    Hey, guys. So today, we're checking out the LED Halo Projector Headlights with the Chrome Housing and the Clear Lens, fitting all 2005 to 2011 Toyota Tacomas. Now, these will be a great option for the Tacoma owner who is looking for an upgrade when it comes to the visibility out of the front end of their truck, while also getting a big upgrade in styling. Now, a lot of the time with older trucks, you see that the headlight lens itself starts to fog up on the front, which doesn't necessarily look the best and this can also hinder your lighting performance. Now, this new set of headlights will be great for anybody who's looking for an overall refresh to their worn-out headlights on their truck, providing a more modernized look to the front end of the Tacoma, and also helping with the lighting performance. Now, speaking of the lighting performance, the stock headlight will come with those standard halogen bulbs, which are okay when it comes to lighting but don't necessarily cut it especially on dark back roads and if you live in a rural area.Now, in comparison to your stock lights that you're most likely very familiar with, instead of the chrome reflector on the inside, this is going to have a projector lens which will project the light a lot further down the road and also create a more uniform beam pattern that will not only clear up the look but also help out with your visibility while driving at night. These headlights will still incorporate a halogen bulb, but the change in the lens comes with a step up in lighting performance. Now, this will include a new headlight bulb, as well as we're using the factory side marker light, and the factory turns signal bulbs. Now what makes these really stand out is the fact that these will include an LED halo as well as an LED accent light offering a ton of styling when it comes to this specific set. Now, with the LED halo and the accent light being wired right into the running light, this will make you more noticeable, especially while your headlights are off while driving around in the street which is helpful when it comes to safety, but it's also gonna make your truck stand out from the rest.Now, with that being said, and these are also going to be pretty affordable for a set of headlights coming in at roughly $275, making these a great choice for somebody who doesn't want to break the bank. Now, because these are not fully LED and you are reusing a couple bulbs from the factory headlight, these are going to be a little bit less expensive than some of the other options available on the page.Now, other options on the page may include a different setup offering a fully LED headlight and replacing all the bulbs, or they may just have a different appearance when it comes to the overall construction, like a black housing or a smoked lens in comparison to this one where it has a clear lens and a chrome housing on the inside for more of a classic look. Now, styling does come down to your personal preference and design. So, if you're looking for a headlight that's gonna offer better styling a little bit more classic styling I would say with the chrome on the inside and is going to give you some good performance while also not breaking the bank at the same time, then these are gonna be right up your alley.Now, as far as the install is concerned, these are going to be pretty easy to install. I'm gonna give this a one out of three wrenches on the difficulty meter, taking you about an hour to get the job done. Now, you're gonna have to remove the grille and part of the bumper in order to get to all of the bolts on the headlight. But once the lights are out, these are going to be pretty easy to set up. Now, you will have to do a little bit of wiring for the halo and the accent light, but the wiring is pretty easy and the whole process can be done with some pretty basic hand tools like a Phillips head and flathead screwdriver, a 10-millimeter socket, and wire cutting, splicing, and crimping tools, specifically for the wiring that you're gonna have to do. So, I would also recommend picking up some electrical tape if you don't have an off-hand and some wire connectors, and then you'll be all good to go.Now, speaking of the install, one of our customers here at extremeterrain.com has put these headlights on his Tacoma, and he's going to walk you right through the process. So enough for me, let's jump into the install.Man: The tools that you'll need for this install is a Phillips head screwdriver, a large and small flathead screwdriver, one 10-millimeter socket with a ratchet wrench, some wire cutters or dikes. These are wire strippers, we'll need those. And also some wire crimpers for connectors, we'll need a box knife, a light, an impact drill with a Philips head attachment. We'll need a lighter, some electrical tape. We do need some wire, so get about, I don't know, 2 feet of 12-gauge wire. It can be any kind of wire. We need some connectors. These are crimp connectors, they're also shrink crimp connectors. And then lastly, we need quite a few of each of these, but what this is, this is a wire splicing device that we can use to connect two different types of wires to splice them together. You can also use wire caps or any kind of other method that you use to splice two wires together.The first step will be you to remove this pin, these two Phillips head screws, and then also this one. You pop out the middle circle right there with a flathead screwdriver, and then you just remove the pin entirely. And then after which we'll take the grille out. Remember that whatever you do on one side, you do to the other on both wheel wells. We'll next remove this plastic pin, this one, and this one, as well as three underneath, including this one, then underneath the vehicle, there's four last ones. This one, one right here, one right here, and the last one is right here on the crash bar. All right. So we found it easiest to instead of unplugging the fog lights, we just decided to twist them and then pull them out and remove them entirely. They do dangle there and they don't touch anything so just let these rest here. They shouldn't be in the way for the rest of the install. But the bumper, we can now put this to the side.Next, using a 10-millimeter socket, we'll remove this bolt here, this one here, this one right here, as well as this one that is on the side. And then after which the headlight mount should be able to be taken out. Once each of the four bolts are taken out, and then the one on the side, we can now remove the headlight assembly by pulling up slightly on these top brackets and pulling outwards after which you can unplug each of the headlights. There we go. And also just a note, we will be reusing each of the blinker bulbs that he's taking out. The small one for the tracker light on the side and the actual blinker bulb itself. We will hold those off to the side and put them in a careful spot.Okay. Next, we are going to grab the new headlight assembly, the spider headlight assembly. As you can see, there's a lot of wires going on here. These are the high and low beams. This already comes with the adapter, so we are going to set this aside. Next, we can see that there's a variety of red, black, and white wires that we need to wire to be able to turn on the halo lights and also these the daytime running lights as well that come with this model. So, what we are going to do is you can tell the different types of wires for the halos and those side marker lights. That one is a thinner gauge and a thicker gauge. We are going to take both of the black wires and combine them together using one of these shrink connectors. What we're going to do is we're going to hold them together, like so. Use a crimp tool while pushing, making sure the ends are in. We're gonna crimp once, crimp the second time for good measure, and then crimp the other side as well. And then, of course, make sure that you have a good connection.Next, we are going to use the lighter, which we will then shrink around the connector to make sure it is a watertight seal. All right. Okay. And then once we have that done...Just keep recording. We'll set the black one to the side. You might be wondering, okay, what's going on here? We have two black wires running into each other. Hold on momentarily, we have a trick that we are going to use. Next, we rolled the two red wires and the two white wires. We are going to put these together as well, using the same size of connector. Yeah. And then lastly, we will use a lighter to shrink the connector onto this as well.Next, we're going to use these splice connectors that we got just like at ACE Hardware, at your local hardware store. What we're gonna do is we're going to take...I like to do it on the thicker wire. As you can see, there's these thinner wires that run to the halo lights and then there's these thicker wires that run to the daytime running lights. So, how this splice connector works...There's a variety of ways that you can do it. We're gonna put this end into one side and then we will run the other into the other side. And then when we crimp down, it will make a perfect connection with both of these wires. So there we go. We're gonna crimp. Okay. So, once those are crimped, that is in place. The closed-circuit...you can put this cap on now. This closed circuit with the black, with the white and red, this closed circuit is now all connected to this one 12-gauge wire strip that we have used. And this is going to be connected to part of the running lights, which we'll show you later. We are going to do the exact same thing with the black set connecting to this thicker gauge wire with 12-gauge wire and another splice.Okay. So now, this is the connectors for the lights. This goes to the high and low beams, this is the blinker light, and then this is the side tracker light that sits right here in the side of the headlight assembly. What we're going to do is this is a daytime light, so we are going to splice these two wires with the circuits that we have created to this tracker light on the side. As you can see, wires do vary so it may not be the case for every vehicle, but this white with a black stripe line, this white and black line, this is the black wire that will go to the black circuit that we created. The green will go to the red and white circuit that we created. So, what we are going to do is we are going to use the same splice connectors to splice the corresponding circuits with these two wires.Okay. So now on the spider headlight assembly, you can see that there's these two stickers. This is for the tracker light that we can peel off and we are going to then place the tracker light inside of that bulb. Now, just remember it's always good practice just to wipe the bulb off with, like, a clean rag before you place them in. So what we're gonna do is stick it into the headlight assembly and then twist it. And then same with the blinker. I'm locking that one into position as well. Okay. And then lastly, we have this last connector that's just easy plug and play and that then runs the high and low beams. After which we will now put the headlight assembly into position. Now, we wanna make sure that the holes all line up with where they need to go, the four spots. So this one, this one, this one down below, and the one on the side. And then we'll put the four bolts back in and this should be done.All right. Now we are going to test the headlights. Okay. Run daytime. Okay. As you can see, I don't know what to call these lights, but the halos and these strip lights, as well as the tracker light on each side, each bulb is lit up, same with the halos and the tracker light. Okay. Now go to headlights, turn on the normal night lights. Okay, now bright. Perfect. All right. So now that everything is checked, and the headlights are functioning correctly, but other than that, we can just begin doing everything in reverse. Putting the bumper back on, and then the grille on thereafter.So underneath here, this piece needs to slide in between this small section where the screw goes up. Same with this screw, it has to slide in between a little clamp piece so then when you screw that screw up, it will hold on to that plastic flanch piece. After we are done installing the bumper, you can't get ahead of yourselves and put the grille on. We do have these little under flares that go underneath the headlight assembly. This part with a clip, you put that part in first, it'll clip and then you push it forward. And then you use one of the push pins to attach underneath those flares on each side. Okay. As I was saying, this nub right here is where this little, like, point is going to go inside that nub. There are little clips here and here that do need to clip into these, into the two sides. After which, these top points, we'll use the same hardware to put those in.All right. So, this is the finished product. All in all, we are super happy with it. It fits flush right in the cavity where it needs to be. The assembly just popped right in there. It was all perfect. All the bolts lined up. We did replace the grille, so if you do wanna replace the grille, that was perfect. Same with the bumper because you have to take it all off. After that, I mean, Michael, go ahead and turn on the lights. All right. So, as you can see, there's these side marker lights right here. We got the halos going, both of them work. Do hazards. Okay. So you have both of the hazards working. Okay. Now turn on like your normal light, your low beams. Okay. Your low beams. Okay. Now go high beams. Okay. Perfect. So yeah, all in all, they're ridiculously bright. And okay, here, go low beams. Okay. Now that's high beams. Wow. Okay. So, they are already so much brighter than the last ones. The last ones were super foggy, but this is a really, really great upgrade.Merideth: So, that is going to wrap it up for my review and install of the LED Halo Projector Headlights with the Chrome Housing in the Clear Lens, fitting all 2005 to 2011 Toyota Tacomas. And you can find them right here at extremeterrain.com.

    Product Information

    Features, Description, Reviews, Q&A, Specs & Installation

    Features

    • Projector Style Headlights
    • Improved Brightness and Visibility
    • LED Halo and LED Accent Lighting
    • Clear Lenses with Chrome Housings
    • Easy Installation
    • Sold as a Pair
    • Fits 2005-2011 Toyota Tacoma Models

    Description

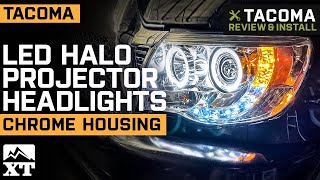
    Increased Lighting. These LED Halo Projector Headlights; Chrome Housing; Clear Lens will provide added brightness and visibility to all your on and off-road adventures. The bright focused beam of light will help illuminate the road ahead for added safety and peace of mind. Not only do these headlights look great, but they are also highly functional and will prove to be very helpful for every trip.

    Durable Construction. These headlights are manufactured from OEM-grade materials to meet all standards and provide longevity. These headlights feature durable, chrome housing with polycarbonate lenses and modern LED/CCFL lighting. Each light is also weather-sealed to prevent dirt and moisture from entering the housing.

    Easy Installation. Manufacturer designed its projector headlights to be a direct plug-and-play replacement for your Tacoma's factory headlights. A detailed instruction guide is included with the lights to help you with the installation process.

    Application. These LED Halo Projector Headlights; Chrome Housing; Clear Lens will fit on all 2005-2011 Toyota Tacoma models.

    CA Residents: WARNING: Cancer and Reproductive Harm - www.P65Warnings.ca.gov

    Installation & What's in the Box

    Installation Info

    What's in the Box

    • (1) Right Hand - Passenger Side Headlight
    • (1) Left Hand - Driver Side Headlight
    4.8

    Customer Reviews (24)

      Questions & Answers

      10 More Questions