FREE 1 to 3-Day Delivery on Orders $149+ Details

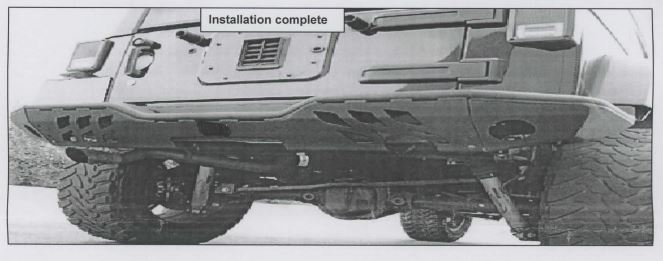
How to Install Wild Boar Complete Rear Bumper - Black on your Wrangler
Procedure
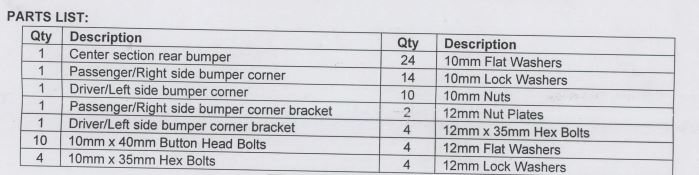
1. Remove contents from box. Verify all parts are present. Read instructions carefully before starting installation.
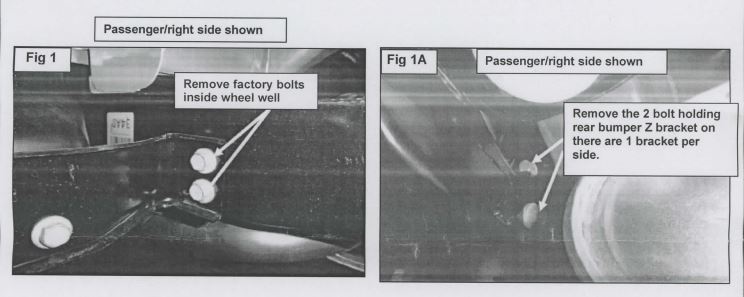
2. Start by removing (2) 10mm fasteners holding the corners of the bumper support bracket to the frame, they are located on the inner rear of wheel wells (Fig 1) shows passenger right side bolts. Repeat for driver/left side with these bolts removed begin to remove the center bumper bolts holding the Z brackets located just up & behind the cross bars, 2 bolts per Z brackets as seen in (Fig 1a) shows passenger side Z bracket. (Fig 1b) shows zoomed in view of passenger side Z bracket. Repeat for driver/left side.
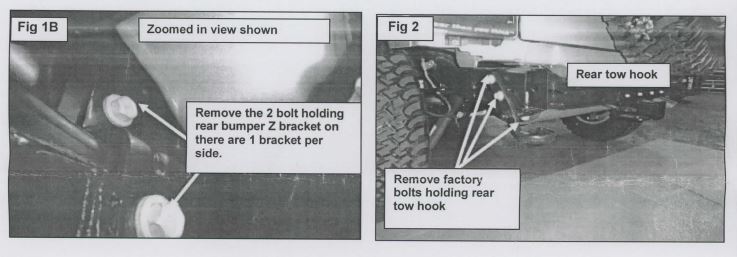
3. With the brackets removed you can now remove the rear bumper. Once the bumper is removed begin to remove the rear tow hook, this will not be reinstalled. (Fig 2) shows tow hook removal.
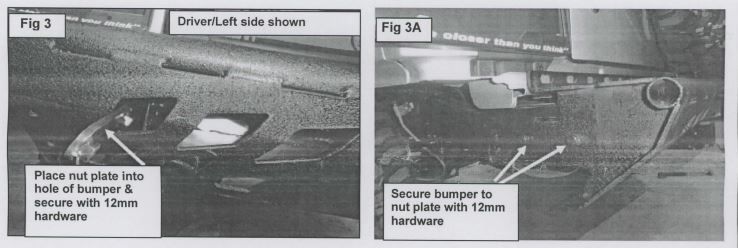
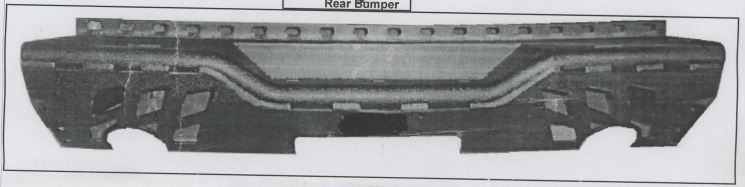
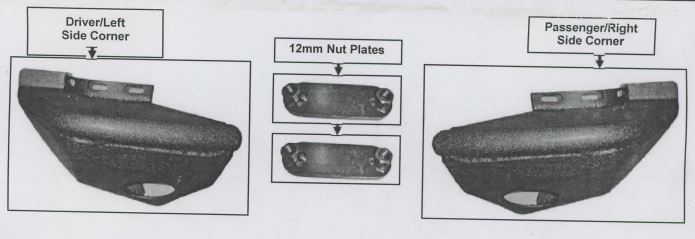
4. With help, select the new Center Bumper section and place it up and into place securing it to the vehicles frame by placing the 12mm nut plate through the opening of the Aries bumper up and into palce securing them with (2) 12mm hex bolts, (2) 12mm flat washers and (2) 12mm lock (Fig 3) shows driver side nut plate inserted into frame rails. Repeat for passenger/right side. Snug but do not tighten hardware. (Fig 3a) shows driver/left side bumper secture to nut plate with 12mm hardware.
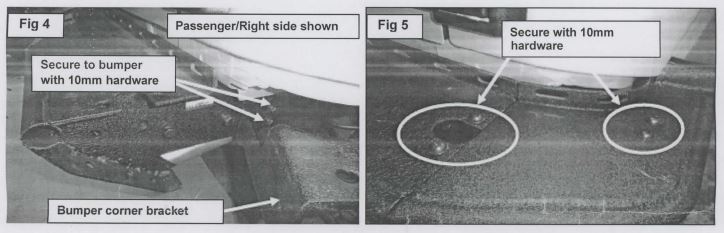
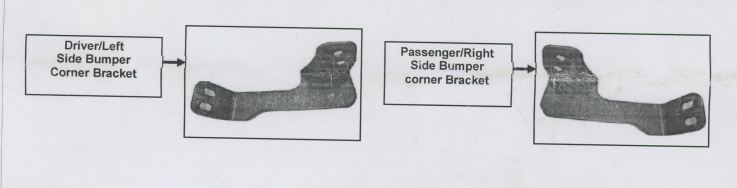
5. Next select the bumper corner brackets from the list of parts above and secure with (2) 10mm x 35mm hex bolts (2) 10mm flat washers and (2) 10mm lock washers. Snug but do not tighten hardware.
6. With the corner brackets attached begin to install the bumper corners with the 10mm button head bolts and 10mm fasteners. (Fig 5) shows passenger side installed top view shown (Fig 5a & 5b) shows passenger side installed bottom view shown, repeat for driver/left side. Snug but do not tighten hardware.
7. Level and adjust the bumper and tighten all hardware.
8. Do periodic inspections to the installation to make sure that all hardware is secure and tight.
To protect your investment: wax this product after installing. Regular waxing is recommended to add a protective layer over the finish. Do not use any type of polish or wax that may contain abrasives that could damage the finish.
For stainless steel: aluminum polish may be used to polish small scratches and scuffs on the finish. Mild soap may be used also to clean the product.
For gloss black finishes: mild soap may be used to clean the product.