FREE 1 to 3-Day Delivery on Orders $149+ Details

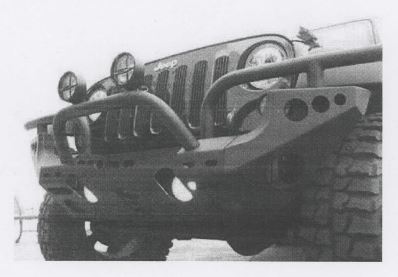
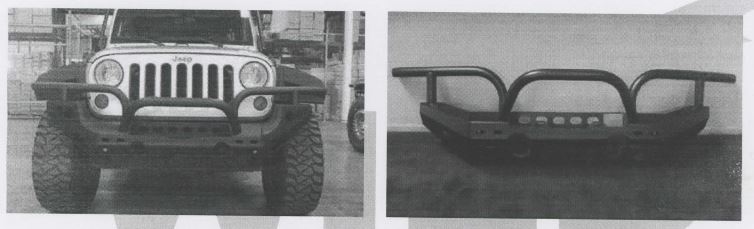
How to Install Wild Boar Complete Front Bumper - Black on your Wrangler

Shop Parts in this Guide
Caution
This accessory is designed and manufactured primarily to augment the vehicles appearance and to protect the occupants from non-severe accidents. This product is not designed to protect occupants from injury or death in the evet of a major accident. Please always wear your seatbelt at all times.

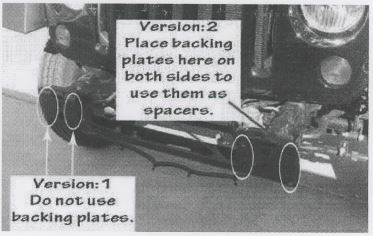
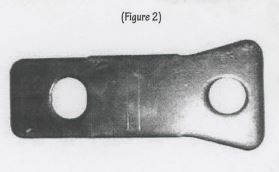
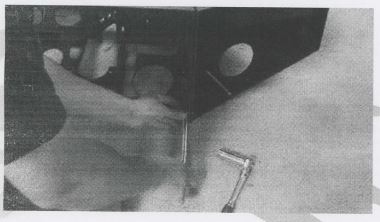
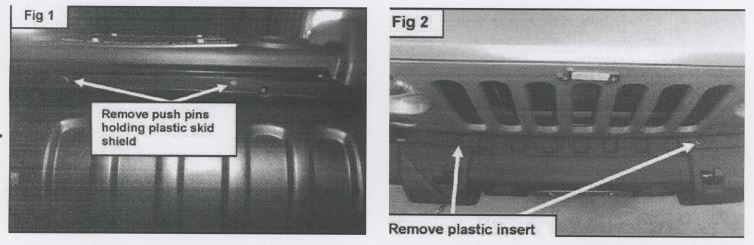
When uninstalling your stock bumper make sure to keep the backing plates that your stock bumper provides. You will be needing these in order to provide the same spacing as the original bumper. As shown in figure 2.
Before installing your new bumper it is best to assemble the bumper first. This is to ensure that you do not have any complications when tightening down any of the nuts and bolts on the bumper, end caps, and/or bull bar and brush guard system.
Lay out all the pieces to determine if you have all the required hardware. As well as to ensure that your item arrived in pristine condition. Depending on what you may have ordered you should receive the following in accordance with each product listed in the next page.
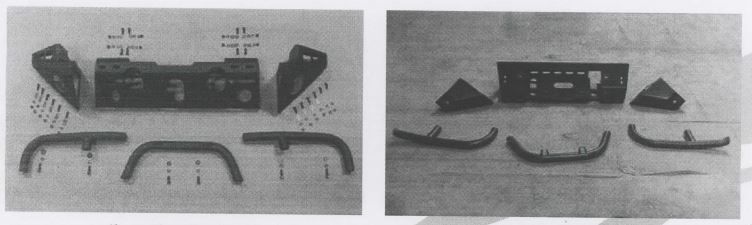
Once you have confirmed that you have all the required hardware for your version of the bumper, begin the assembly. It is preferred to assemble the bumper on a carpet or mat in order not to damage it.
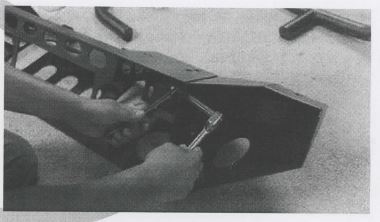
We'll begin by assembling the end caps, or corners, of the bumper.
Version 1:
Acquire six 10mm hex bolts, twelve flat washers, two for each bolt, six lock washers and six 10mm hex nuts, one for each bolt and place them in the appropriate holes located around the rim of the corners.
Version 2:
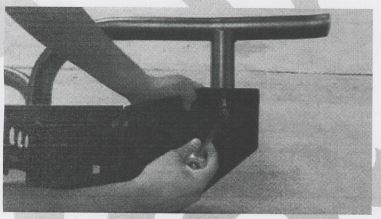
Using one of the 1/2-13x34 short bolts, screw it in to the bottom of end cap. The end cap has a 1/2 hex nut welded on to it for your convenience. Using a 3/4 inch socket or a 19mm socket, tighten the bolt down until it's snug.
Version 1:
Using a number 16 socket and wrench, begin to tighten the bolts.
Version 2:
Using the same socket and a same size wrench, tighten down the next two bolts. These would be the two 7/16-14 hex lock nuts. Placin gone bolt, with one washer on one side and the other washer on the other, on the very corner and one in the deepest part of the corner.
Version 1:
Using a number 19 (3/4") socket or wrench, tighten down the brush guards and bull bar using two 12mm hext bolt, two 12mm lock washers and two 12mm flat washers for each brush guard and bull bar.
Version 2:
Using a number 19 (3/4") socket or wrench, tighten the brush guards and bull bar using two 1/2-13x3/4 short bolt and two 1/2 flat washers for each brush guard and bull bar. It is best and easier when using a universal socket.
To secure the road lights on your new bumper use the small nuts and bolts provided. Place the road lights behind the plate so that the bulb is the onnly thing visible from the front.
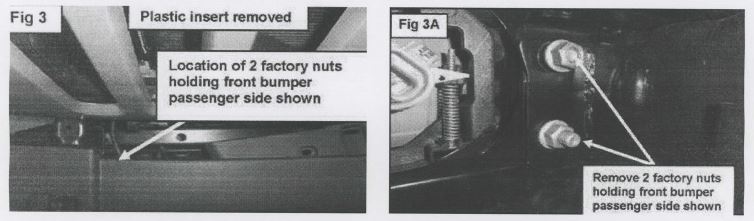
If you have not removed your stock bumper follow the instructions on the next page.
Version 1:
With the help of a friend place the bumper on the chassis and using a minimum of three 12mm hext bolts on each side with two 12mm flat washers and one lock washer and 12mm hext nut tighten your bumper down to the frame.
Version 2:
Placing the backing plates on the chassis frame and with the help of a friend, place the bumper on the chassis and using a minimum of three 1/2-3x2 shoulder bolts on each side with two 1/2 flat washers and one 1/2 hext lock nut, tighten your bumper down to the frame.