FREE 1 to 3-Day Delivery on Orders $149+ Details

How to Install a Tuffy Mounting Kit on your 2003-2006 Wrangler TJ
Installation Time
30 minutes
Tools Required
- (2) 5/8” WRENCHES OR WRENCH, SOCKET, RATCHET, AND EXTENSION
- 9/16 WRENCH OR SOCKET, RATCHET, AND EXTENSION
- 13 MM SOCKET, RATCHET, AND EXTENSION
- ½” WRENCH OR SOCKET AND RATCHET
- T-50 TORX WRENCH OR SOCKET

Shop Parts in this Guide
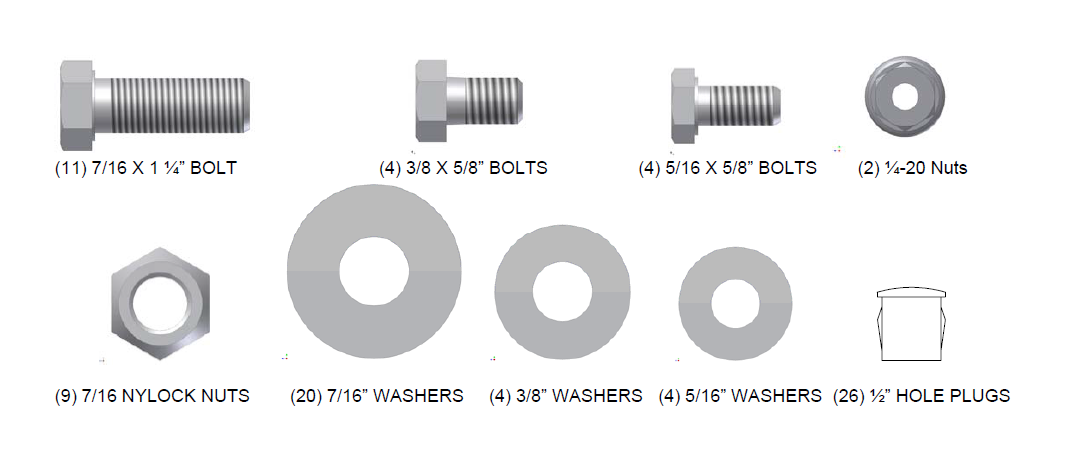
PARTS LIST
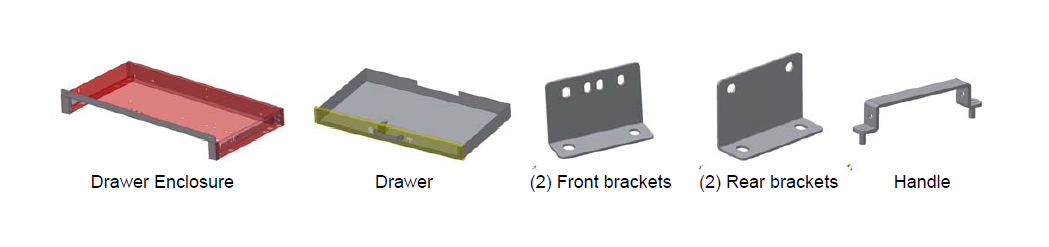
SHIPPING PACKAGE
MOUNTING INSTRUCTIONS
NOTE: BE SURE TO KEEP ALL THE REMOVED HARDWARE YOU WILL REUSE MOST OF IT
1. Please read the entire assembly instructions and check all included parts before beginning the installation.
2. Remove the back seat from the mounting brackets.
3. Install the drawer handle using (2) ¼-20 nuts.
4. Remove the (4) original seat mounting brackets, there are (8) bolts. BE SURE TO NOTE THE DIRECTION THE SEAT BRACKETS ARE FACING BEFORE REMOVING THEM.
5. Remove the seat belt harness located in the center of the floor.
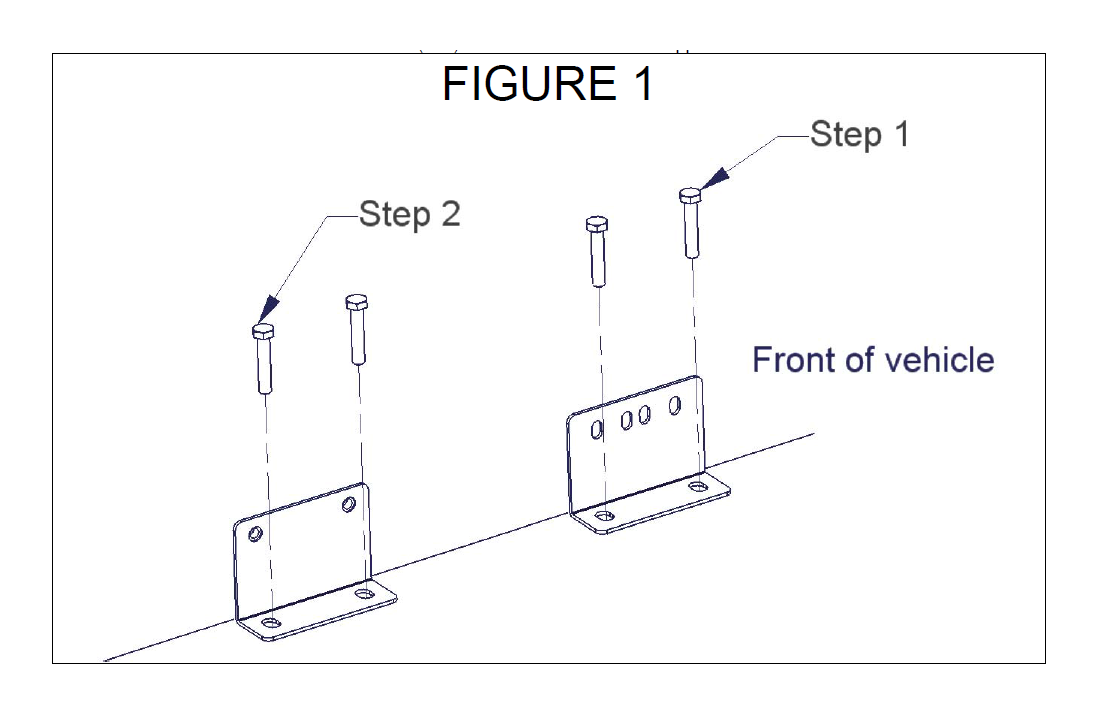
6. Mount the (2) provided Front mounting brackets to the floor on the right and left side with the original seat bracket mounting bolts. (See Figure 1, Step 1)
7. Mount the (2) provided Rear mounting brackets to the floor on the right and left side with the original seat mounting bolts. (See Figure 1, Step 2)
8. Remove the drawer from the drawer enclosure. Press the black tab on the right drawer slide down and pull the black tab on the left drawer slide up to remove the drawer.
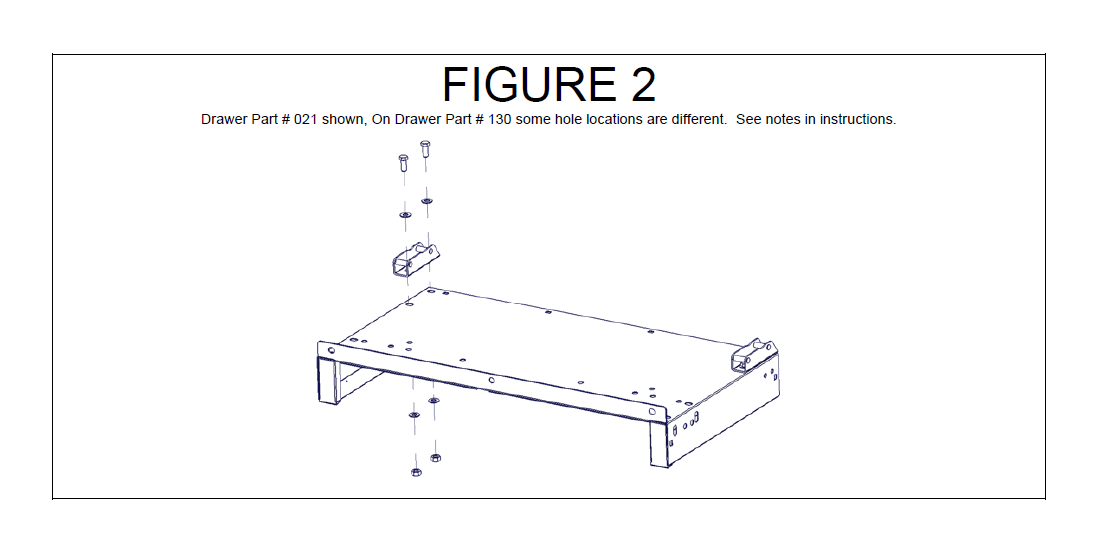
9. Mount the original front (2) seat brackets to the top of the drawer using (4) 7/16 x 1 ¼” Bolts, (4) 7/16 Nylock Nuts, and (8) 7/16” Washers. (See Figure 2)
10. Place the drawer enclosure into the vehicle opening toward the rear of the vehicle. (On some vehicles the seat belt mounting bolts may stick out preventing the drawer enclosure from fitting between them. In this situation replace the original seat belt mounting bolts with the (2) included 7/16 x 1 ¼” bolts and 7/16” Washers)
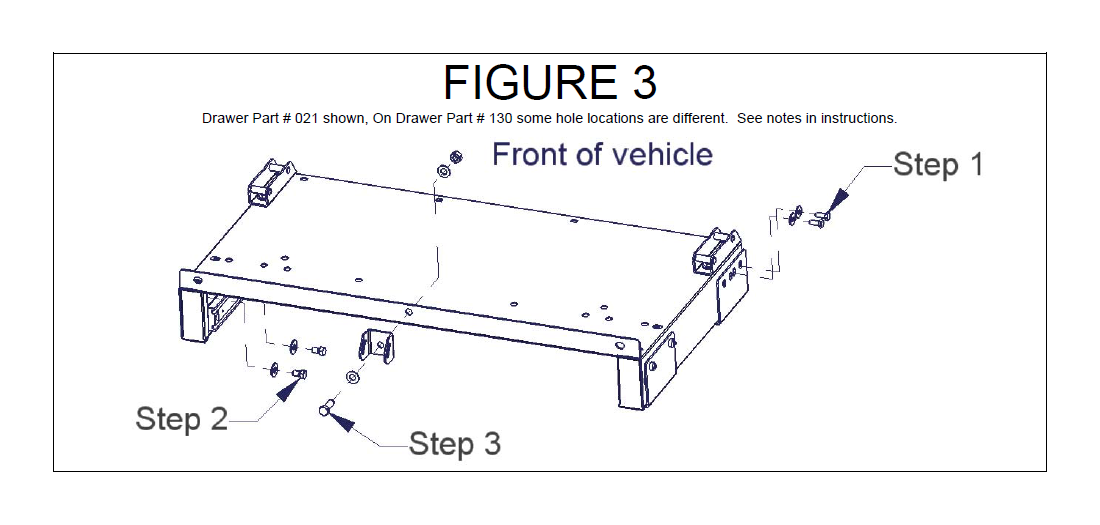
11. Bolt the drawer enclosure to the Left and Right front mounting brackets using (4) 5/16 x 5/8” Bolts and (4) 5/16” Washers. (See Figure 3, Step 1)
12. Bolt the drawer enclosure to the Left and Right Rear mounting brackets using (4) 3/8 x 5/8” Bolts and (4) 3/8” Washers. (See Figure 3, Step 2)
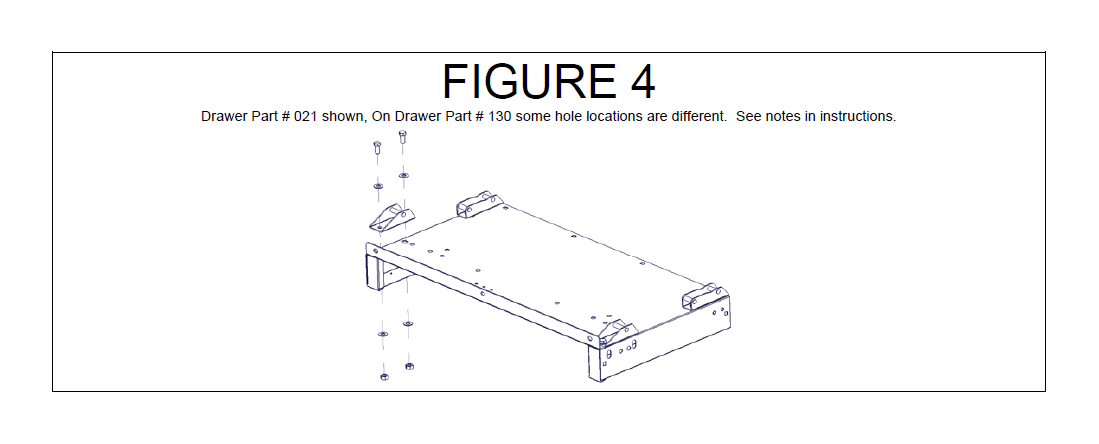
13. Install (2) of the ½” holes plugs in the holes which will be partly covered by the (2) original rear seat brackets. Mount the original rear (2) seat brackets to the top of the drawer using (4) 7/16 x 1 ¼” Bolts, (4) 7/16 Nylock Nuts, and (8) 7/16” Washers. (See Figure 4)
14. Fasten the original seat belt harness assembly to the drawer enclosure angle bracket with (1) 7/16 x 1 1/4” Bolt, (1) 7/16 Nylock Nut, and (2) 7/16” Washers. (See Figure 3, Step 3) NOTE: Drawer Part # 021 is shown in illustration; in drawer Part # 130 this hole is located toward the center of the enclosure.
15. Install the ½” hole plugs into all the ½” round holes not used.
16. Insert the drawer into the drawer enclosure and check the slide operation and lock operation.