FREE 1 to 3-Day Delivery on Orders $149+ Details

How to Install Tuffy Laptop Computer Security Lockbox on your 87-18 Jeep Wrangler YJ, TJ, JK & JL
Tools Required
- Electric drill
- 3/8" Drill bit
- Marker or pencil
- Knife
- 1/2" Socket and ratchet
- 1/2" Wrench
- Silicone sealant (Recommended)

Shop Parts in this Guide
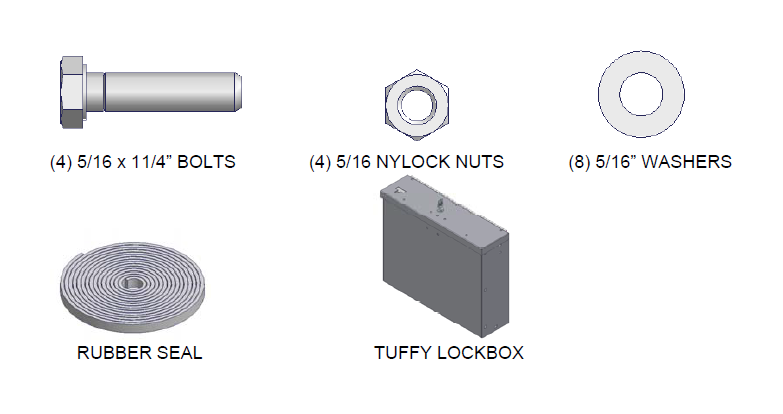
PARTS CHECKLIST
PLEASE READ ALL INSTRUCTIONS THOROUGHLY BEFORE STARTING INSTALLATION.
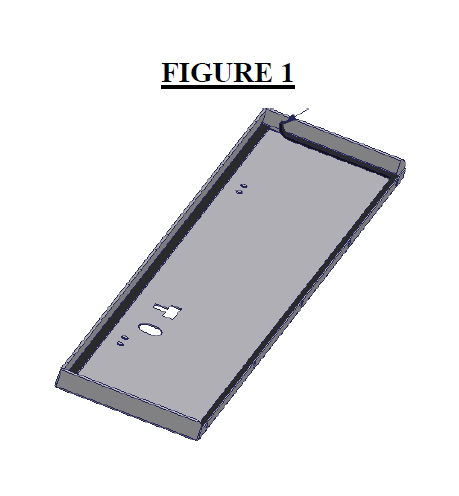
1. Install the rubber seal on the underside of the lid and between the hinge leaves. (See Figure 1) Check the lock operation.
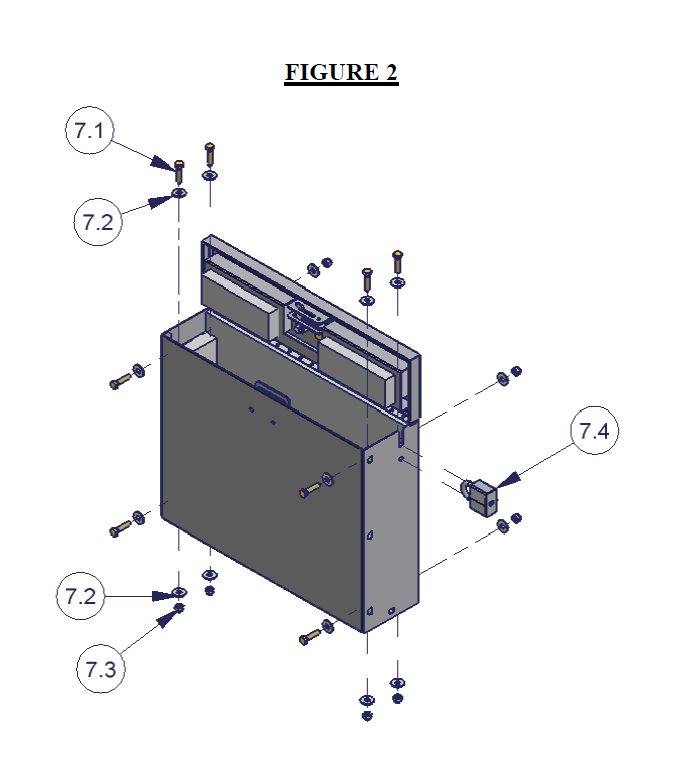
2. Place the lockbox in the vehicle at the desired mounting location. The box can be mounted to the mounting surface through holes in the bottom, in the backside, a combination of both, or padlocked (#7.4, Not Included) to a cable. (See Figure 2)
ATTENTION: The foam panels are partially glued in.
• To access the rear mounting holes pull the left and right edges of the large rear foam panel out exposing the rear mounting holes; this foam panel is glued in at the center bottom.
• To access the bottom mounting holes pull the bottom of both small side panels out exposing the holes at the bottom; these side panels are glued in at the top.
3. Using a marker or pencil, mark (4) spots through the 3/8” mounting holes in the box.
WARNING!
Make sure that there is nothing under the vehicle that will be damaged by the drill bit when drilling.
4. Remove the box. Cut the carpet at the (4) marked holes if required. Using a 3/8” drill bit, drill out the (4) marked spots in the floor. (See Figure 2)
5. It is recommended to use silicone sealant in any holes drilled in the vehicle to prevent rusting.
6. Fasten down the box using the hardware provided. (See Figure 2)