 FREE 1 to 3-Day Delivery on Orders $149+ Details

How to Install Tuffy Conceal Carry Underseat Drawer - Passenger Side on your Wrangler
Installation Time
2 hours
Tools Required
- 3/8” drive ratchet
- 3/8” drive extension
- ½” drive ratchet (or breaker bar)
- T-30 Torx bit (3/8” drive)
- 18mm socket (1/2” drive )

Shop Parts in this Guide
Installation Instructions:
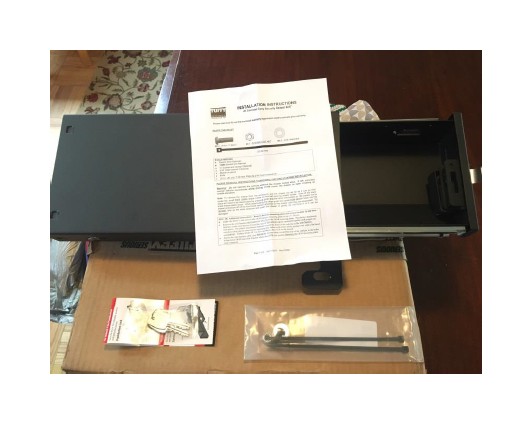
1. Inspect contents. Everything will ship inside the drawer. The drawer will be locked with the keys in a bag on the outside. When you unlock it the drawer will pop open. You should have:
• Underseat box
• 2x keys
• Instruction sheet
• Hardware bag
o 2x zip ties
o 1x lock nut
o 1x bolt
o 1x flat washer
2. Slide the passenger’s seat all the way back.
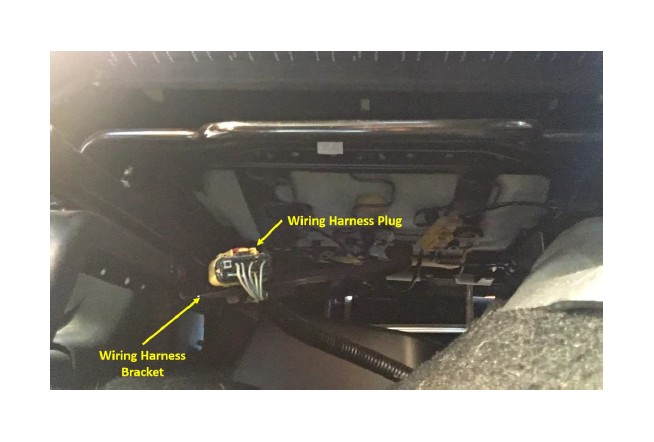
3. Relocate the underseat wiring harness (2011 and later models).
• There is a metal wiring harness bracket mounted under the passenger’s seat on the left (toward the door) side.
• From in front of the seat, reach underneath and detach the wiring harness plug from the top of the bracket. It is held on by a plastic fastener. Squeezing the sides of the fastener inward from underneath the bracket (it’s most easily reached from under the side of the seat frame) while rocking and pulling the plug upward will let it come loose.
• Further toward the rear of the bracket, there is a second fastener like this securing the harness to the bracket. Use the same method to pull this one loose.
• Push the harness to the other side of the seat frame to get it away from the mounting bracket.
2. Slide the passenger’s seat all the way back.
3. Relocate the underseat wiring harness (2011 and later models).
• There is a metal wiring harness bracket mounted under the passenger’s seat on the left (toward the door) side.
• From in front of the seat, reach underneath and detach the wiring harness plug from the top of the bracket. It is held on by a plastic fastener. Squeezing the sides of the fastener inward from underneath the bracket (it’s most easily reached from under the side of the seat frame) while rocking and pulling the plug upward will let it come loose.
• Further toward the rear of the bracket, there is a second fastener like this securing the harness to the bracket. Use the same method to pull this one loose.
• Push the harness to the other side of the seat frame to get it away from the mounting bracket.
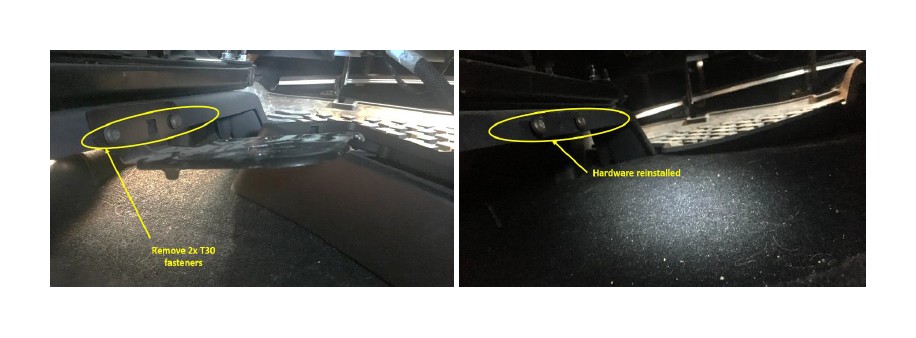
• Remove the wiring harness mounting bracket. The bracket is held on by two T-30 Torx bolts.
• Remove these bolts (using an extension will make it easier) and the bracket.
• While not required, it may be a good idea to replace the T-30 hardware so that it is available if you need to put the bracket back later.
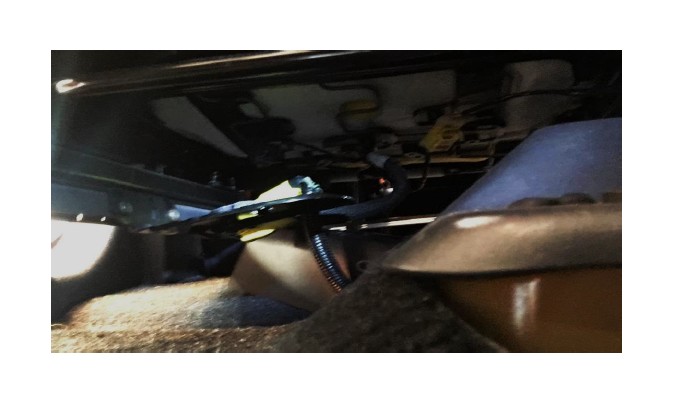
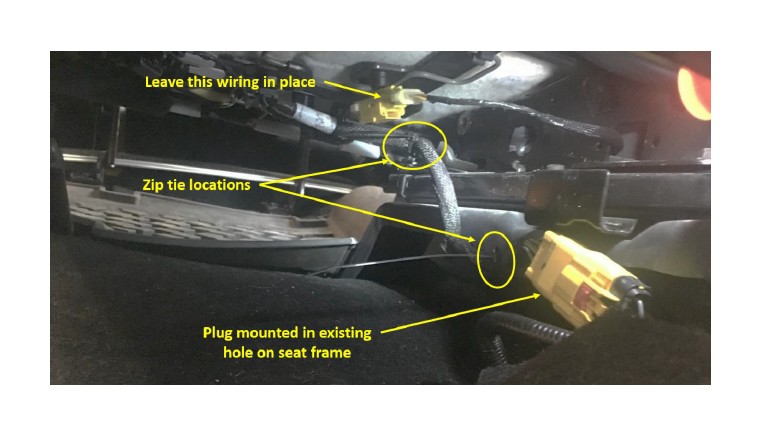
4. Secure the wiring harness.
• The included instructions recommend using the provided zip ties to secure the wiring harness to the seat frame where the bracket was removed. Securing the wiring harness to the opposite side (farthest from the door) does a better job of getting it out of the way and clear of where you’ll install the underseat box. There are holes in the seat frame that you can use.
• There is a hole near to front of the seat frame where the plug ca be resecured using the original plastic push-in fastener.
• Use one zip tie to secure the harness to the seat frame behind the plug and the other to secure the harness farther back along the seat frame. Trim the excess length from the zip ties.
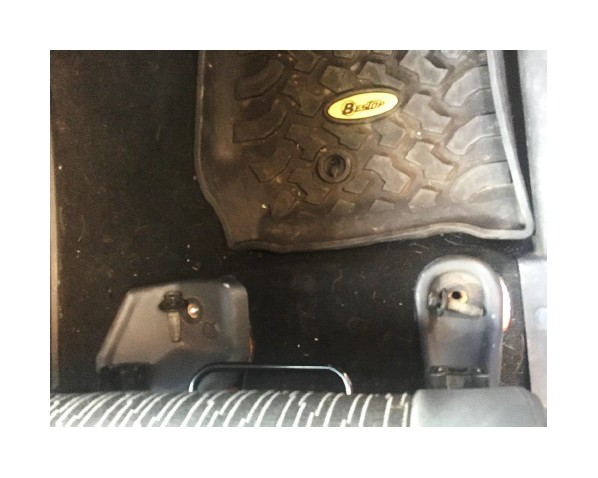
5. Remove seat anchor bolts.
• There are two seat anchor bolts visible on the floor in front of the passenger’s seat. Remove both of these.
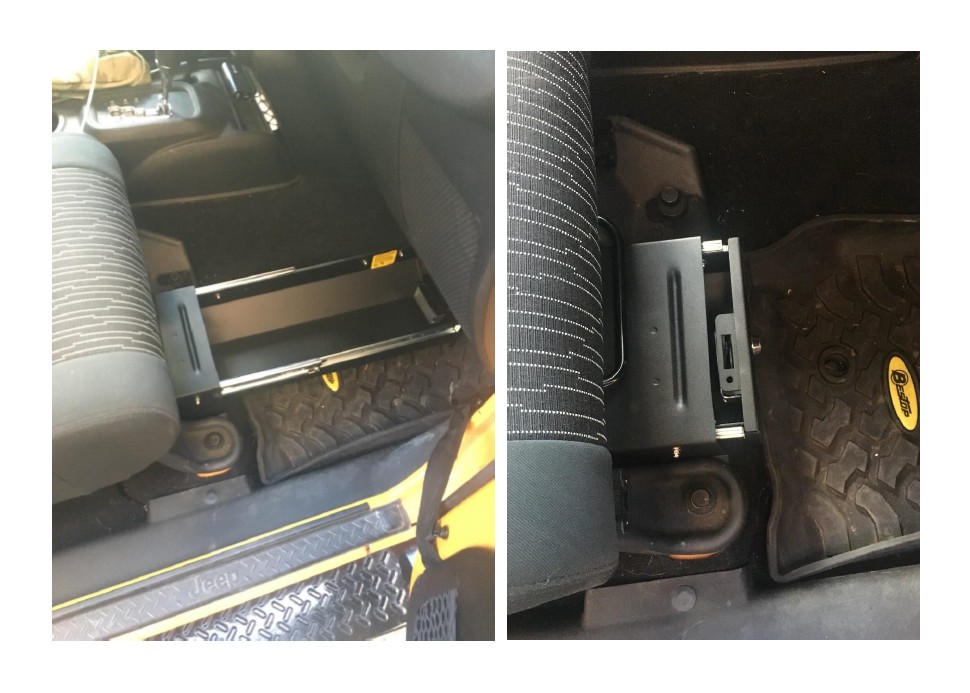
6. Install the underseat box.
• Position the underseat box beneath the passenger’s seat so that the mounting tabs are aligned with the mounting holes.
• Push back on the passenger’s seat and slide the right mounting tab UNDERNEATH the seat base and slide the left mounting tab ON TOP of the seat base, aligning the bolt holes.

• Reinstall the anchor bolts removed in step 5.

Installation instructions written by Clark Adams 05/12/2017

