FREE 1 to 3-Day Delivery on Orders $149+ Details

How to Install XT Graphics Side Stripe, White on your Wrangler
Installation Time
15 minutes
Tools Required
- Spray bottle with soap & water mixture
- Plastic Squeegee
- Pair of scissors
- X-Acto knife or razor blade

Prep:
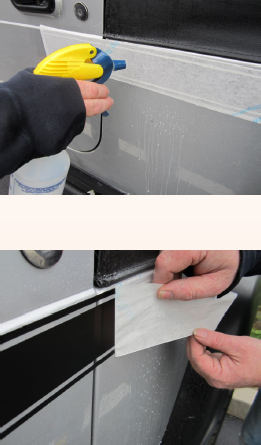
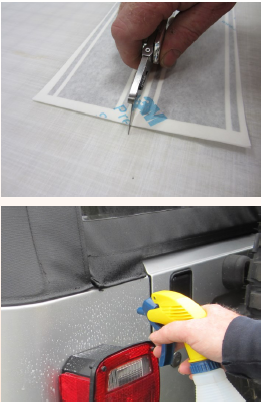
Clean car well to ensure good adhesion of the decal. Fill a spray bottle with a mixture of water and soap (we use baby shampoo), about 4 large drops per 32 oz. spray bottle of water. Be sure to install decal out of direct sunlight. Also having someone to assist you if you can is very helpful. It may be necessary to separate multiple decals on one sheet by cutting with scissors. You may wish to remove any hood decals that the stripe may cover . You can use the included hood section that has a cut out that may accommodate some hood decals.
Step 1:
Using a razor blade or scissors, cut down the sheet dividing the sections of stripes.
Step 2:
Spray side with a generous amount of the soap and water mixture.
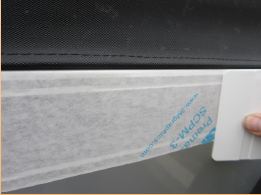
Step 3:
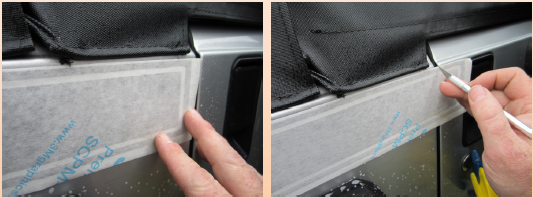
Apply stripes to side area. You will be able to maneuver the strips into their final positions once on the car because of the soap and water mixture you sprayed earlier. The long section is for the back starting on the body next to the rear door. The end of the decal has the pinstripe wrap around the end this is for near the door. You may start the decal with that pin-stripe almost up against the door gap or let it go pass the gap and trim it off.
Step 4:
Once you have the stripes in their final po-sition, use the plastic squeegee to push any air bubbles out to the edges of the stripes. It is easier to remove bubbles by squeegeeing from the center out to the edges.
Step 5:
Once the stripes are squeegeed and flat spray the transfer tape with the soap and water gener-ously, the tape then becomes a little bit more transparent. Re squeegee to ensure the stripes are flat. Let the tape soak a while this will sof-ten the adhesive of the tape and give the stripes a chance to dry and adhere underneath.
Step 6:
Once you have all of the air bubbles out and stripes have dried underneath, slowly peel the transfer tape from the stripes. Pull the tape as flat on the car as possible this will help prevent the tape from pulling up the vinyl. One trick that may be helpful is to place a squeegee on the transfer tape and peel it back against the squeegee while holding the squeegee down on the decal keeping it tight on the tape that’s being pulled.
Step 7:
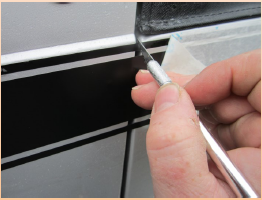
Use a sharp razor blade to cut any excess vinyl at the body seams and either cut it flush or tuck it inside as shown. Also cut the stripes between the door gaps and wrap the ends around the door and body.
Leave several hours, depending on climate, of dry time before cleaning car. Use a quick detailer in a spray bottle for the initial clean-ing then hand wash car waiting at least several days for the first time after drying. Do not power wash vinyl or wax vinyl.