 FREE 1 to 3-Day Delivery on Orders $149+ Details

How to Install Teraflex Rear Disc Brake Kit - Late Model Bearing Pocket on your Wrangler
Tools Required
- This installation guide
- Basic mechanics tool set
- Mallet or dead blow hammer
- Press (Non-C Clip Only)
- RTV Gasket Maker

Shop Parts in this Guide
Important Notes:
Prior to beginning this or any installation read these instructions to familiarize yourself with the required steps and evaluate if you are experienced and capable to personally perform these modifications. A factory service manual should be used in conjunction with these installation instructions.
Some factory rims will not fit with this kit, including factory steel wheels. Some aftermarket wheels require a longer stud to compensate for new rotor thickness. NAPA Auto Parts Belkamp #641-3204
This kit does not work with ABS sensors. You will not be able to install the ABS sensors into the disk brake mount backing plate.
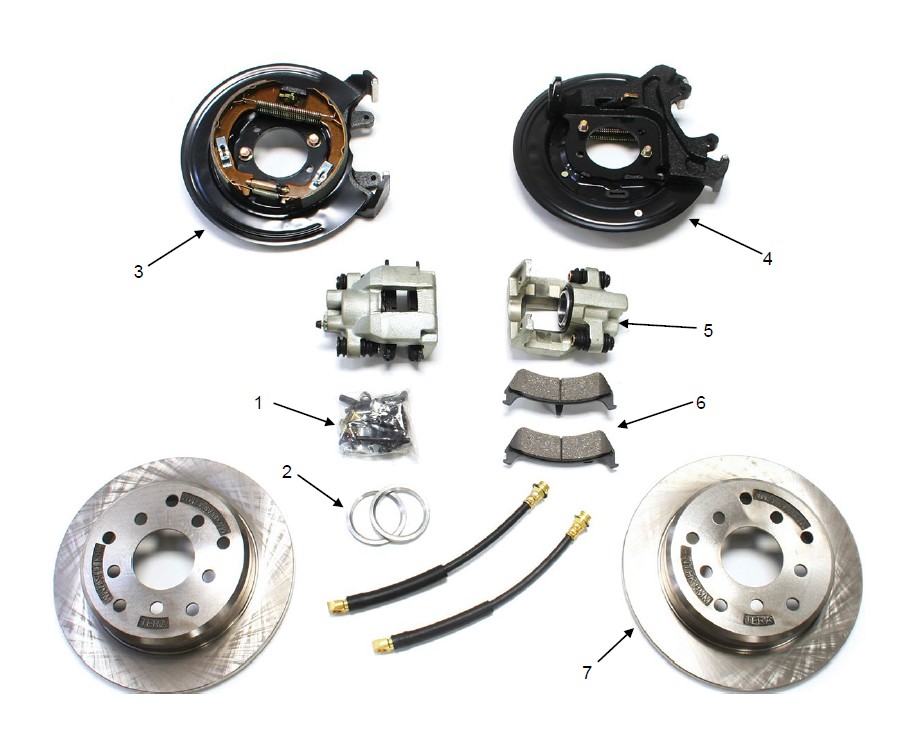
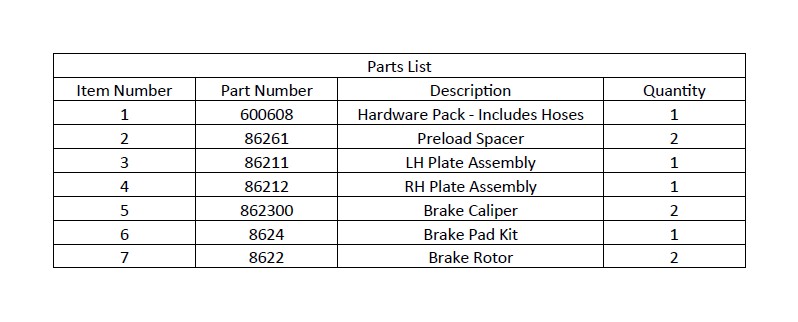
Refer to the parts list to ensure that all necessary components and hardware has been included. If any parts are missing please contact your local TeraFlex dealer for assistance.
The enclosed “Warning to Driver” sticker must be installed in the vehicle in driver’s view in order to act as constant reminder when operating the vehicle. It is your responsibility to install the sticker. If it is missing from your kit, free replacements are available upon request.
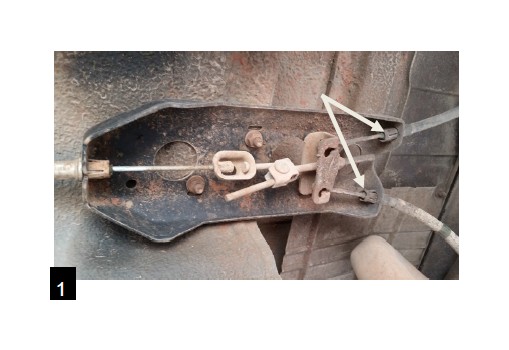
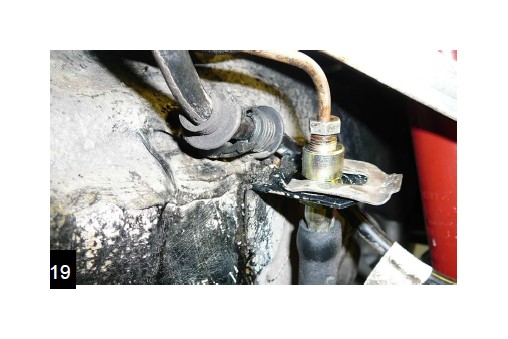
With the vehicle on the ground, remove the emergency brake cable from the bracket on the underside of the body tub.
Raise the vehicle off the ground and support with jack stands. Remove brake drums and unhook the hard brake lines from the wheel cylinder attached to the backing plate.
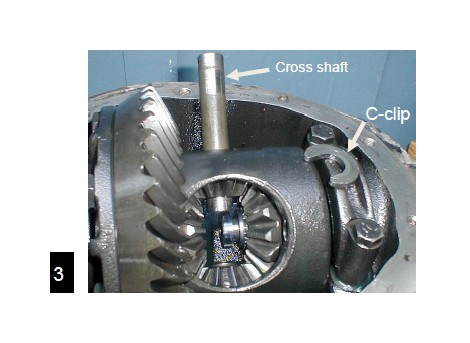
C-clip axle removal- Remove differential cover, unbolt the cross pin with an 8mm or 1/4” wrench and remove it from the carrier. Push the axles in about 1/2 inch to remove the C-clips. Remove C-clips and pull the axles from the housing.
Semi-float applications- Remove the 4 nuts holding the axle shaft into the housing and pull the axle shaft from the housing. Leakage is possible.
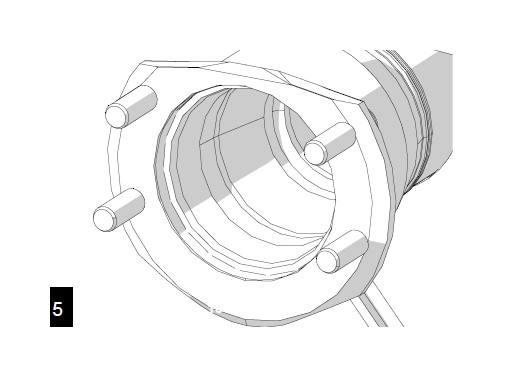
Remove the backing plate and wipe the bearing pocket surface clean of grease and contaminants.
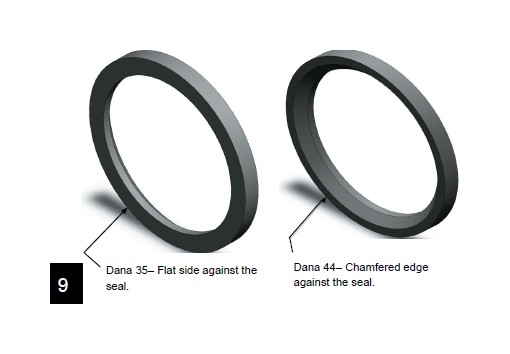
For semi-float applications- Press the old bearings and seals from the axle shafts. Do NOT remove bearings and seals for c-clip axles.

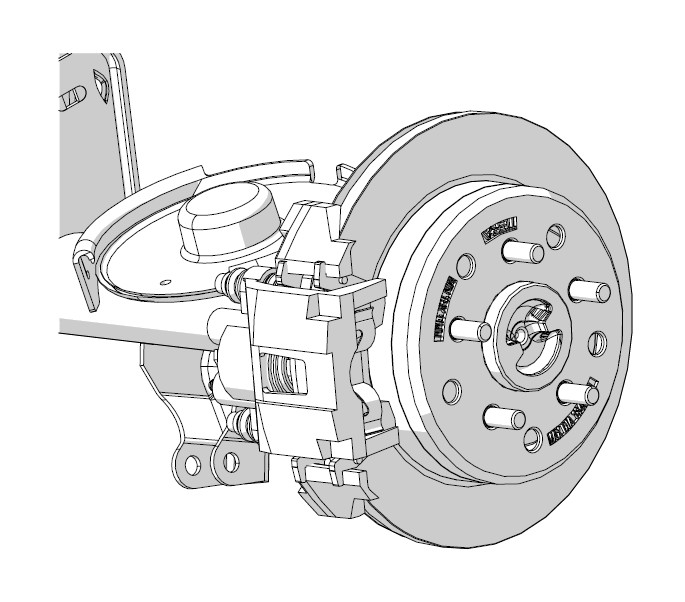
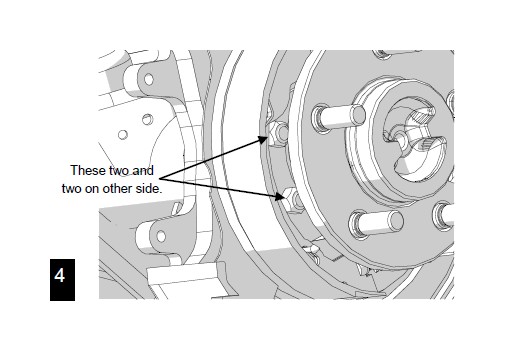
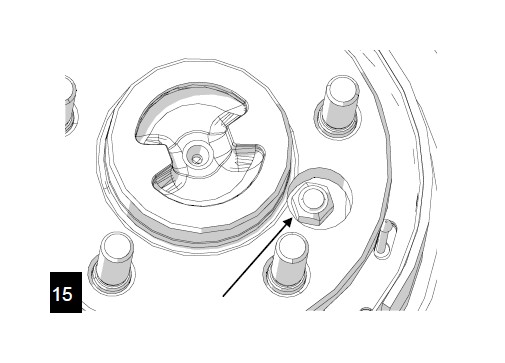
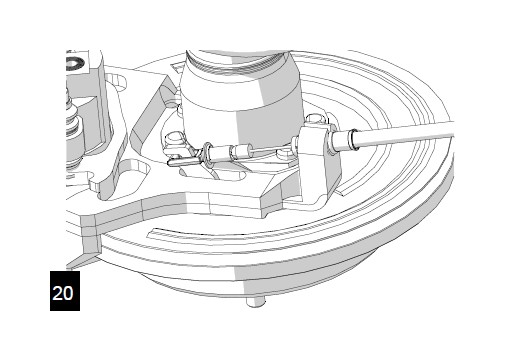
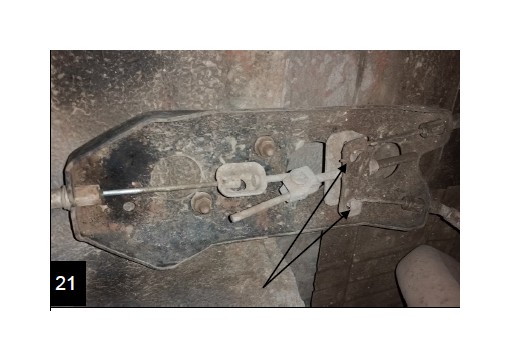
Installation. Install the disk brake mounting plate onto the axle flange with new supplied retaining bolts. Backing plates are identified as Left and Right side (C-clip applications reuse existing bolts)
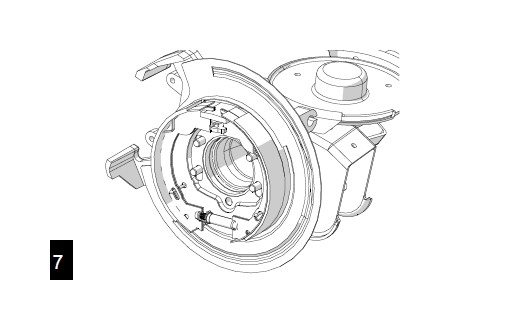
Adjust the internal drum brake with the adjuster until there is just enough room for the rotor to slide over the shoes. This will set your parking brake tension.
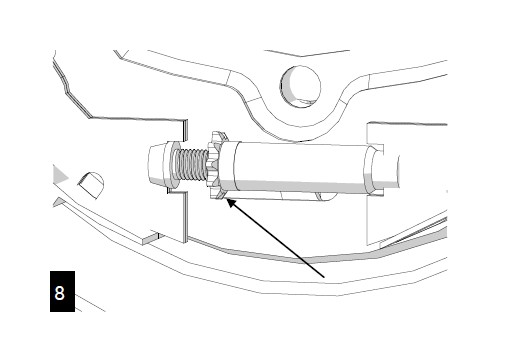
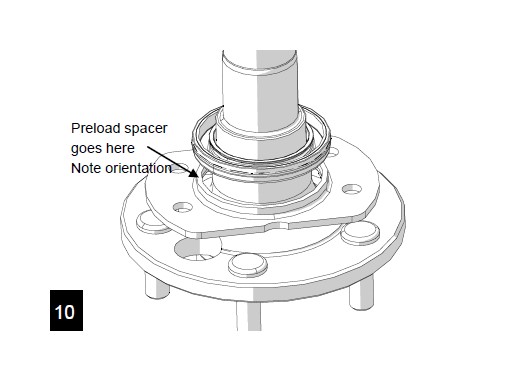
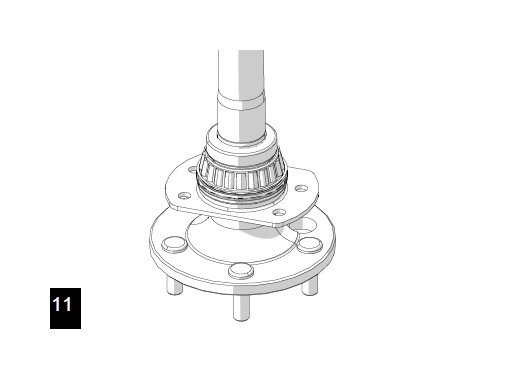
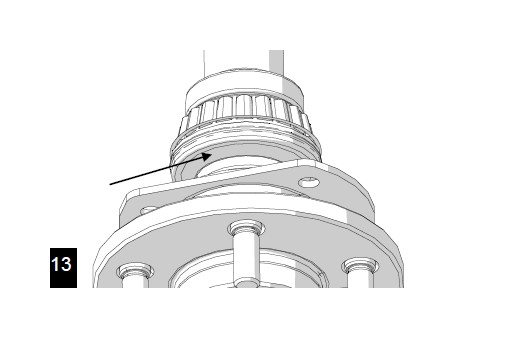
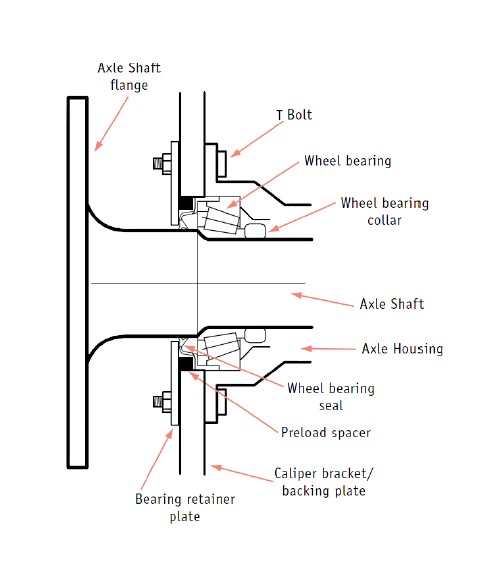
Non- C-clip applications- Install the new retaining plate and preload spacer on the axle shaft. Note: the orientation of the preload spacer is axle dependent.
Grease the shaft where the seal will be installed and install the seal onto the shaft.
Press the new bearing and retaining collar onto the axle shaft.
C-clip Axles- Slide the axles all the way into the housing careful not to damage the splines or bearing surface, install c-clips and cross shaft, clean old silicone from the housing and reinstall the differential cover with new gasket or silicone. Refill housing with new oil. C-clips applications proceed to step 16
Non-clip axles- Slide the shafts 3/4 of the way into the hous-ing, apply grease to the outside of the bearing seal and slide the preload spacer onto the seal. The grease will help hold the spacer.
Carefully slide the axle in the rest of the way into the housing. Push the axle in by hand, DO NOT force the axle, seal, splines and/or bearing damage may result.
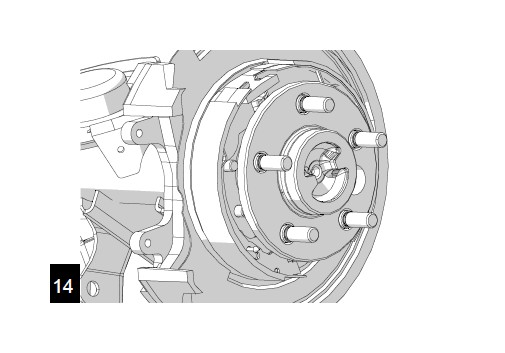
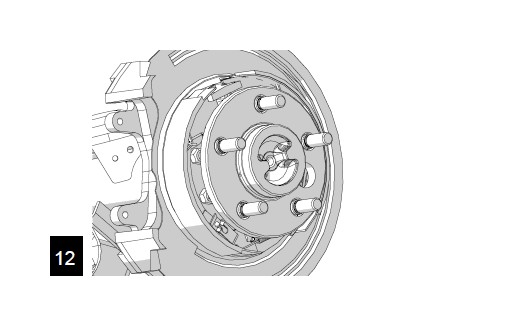
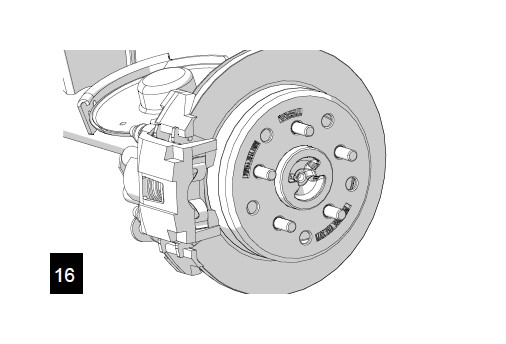
Install and tighten the nuts onto the retainer bolts through the access holes in the axle shaft and install the brake rotor. Torque to 45 ft-lbs.
Install the rotor then install the brake pads into the caliper with the bleeder in the highest position. Note: install the inside pad first. Use the two supplied 8mm bolts, install the caliper onto the mounting plate. Torque to 11 ft-lbs.
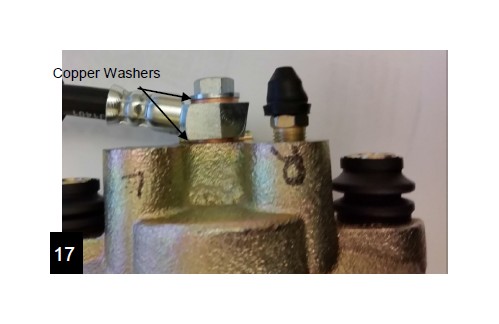
Install new brake hoses using new copper washers on the supplied banjo bolt. Install one copper washer onto the banjo bolt, slide the female end of the brake line onto the bolt, install another copper washer and install onto the caliper. Torque to 23 ft-lbs
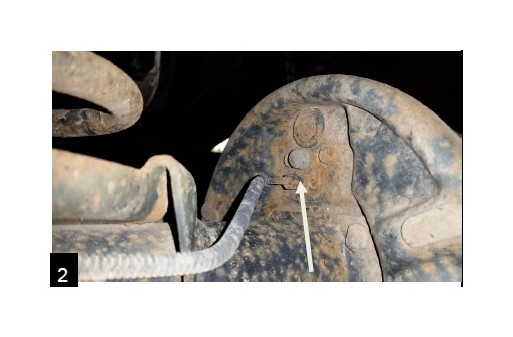
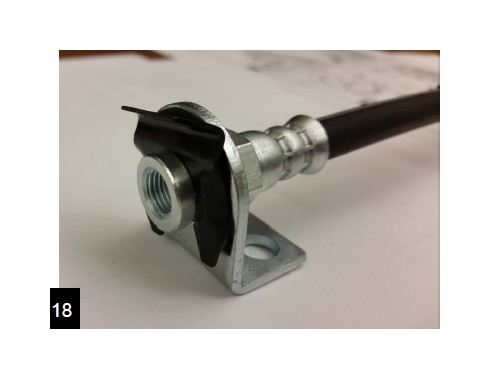
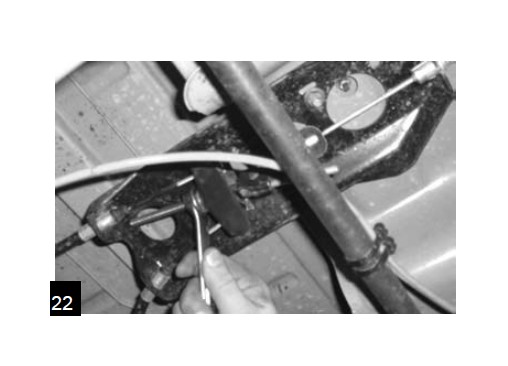
Weld the brake line mounting tab onto the axle tube. Then install the brake line through the tab and install C clip.
Connect the hard brake lines to the new soft lines and bleed the brakes starting with the passenger side then the drivers side. Note: You will need to purchase shorter metal lines from an auto parts supplier.
Install the emergency cable onto the lever at the mounting plate. TJ Wranglers order Tera part #TL869 for proper ca-bles.
Reinstall tires torqueing lug nuts to 110 ft-lbs. Set the vehicle on the ground. Attach the emergency brake cables to the bracket under the body.
Adjust the parking/emergency brake until it holds the vehicle from moving while in gear.
Maintenance Information
It’s the buyers responsibility to have all suspension, drivetrain, steering and other components checked for proper tightness and torque after the first 100 miles and every 3000 miles after that.


