 FREE 1 to 3-Day Delivery on Orders $149+ Details

How to Install Teraflex Rear Cargo Rack Side Panel Kit - Black on your Wrangler

Shop Parts in this Guide
JK CARGO STORAGE RACK PANELS

Important Notes:
Prior to beginning this or any installation read these instructions to familiarize yourself with the required steps and evaluate if you are experienced and capable to personally perform these modifications. A factory service manual should be used in conjunction with these installation instructions.

1. Park the vehicle on a level surface and set the parking brake. Thread locking compound has been provided in this kit. Apply to all fasteners. If your rack has been installed you will need to remove it from the vehicle and remove the mounting brackets in order to install the panel kit.
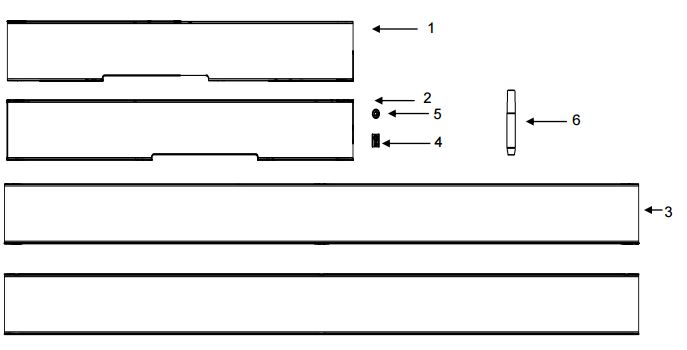
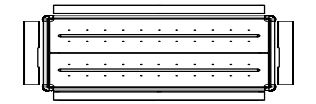
2. Start by laying the panels in their corresponding location. The short and long panels are not side specific. The notch in the short panels will be installed facing the bottom of the rack assembly.
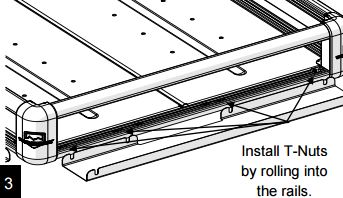
3. Note the location of the slotted holes in each panel. For every slot you will install a corresponding #651380 Roll-In T-Nut into the aluminum rails top and bottom. Remove the rubber peg from the T-Nut before installation.
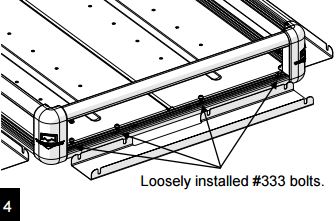
4. Next loosely thread in (24) #333 bolts into the just installed. (24) #651380 T-Nuts.
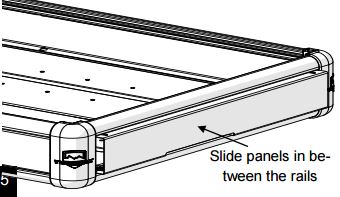
5. Now simply lift the panels and position in between the rails making sure to line the bolts up with the slotted holes. Once all the panels have been installed tighten the (24) #333 bolts and Torque to 5 FT-LBS (7 Nm).
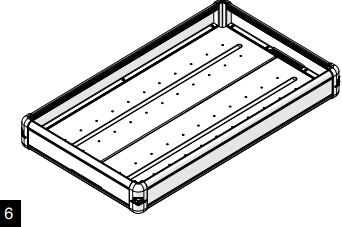
6. This concludes the installation of the panels. Return to step 14 in the rack assembly instructions.
MAINTENANCE INFORMATION:
It is the buyer’s responsibility to have all suspension, drivetrain, steering, and other components checked for proper tightness and torque after the first 100 miles and every 3000 miles after that.
NOTICE TO INSTALLER:
The enclosed “Warning to Driver” sticker must be installed in the vehicle in driver’s view. This sticker is to act as a constant safety reminder when operating the vehicle. It is your responsibility as the equipment installer to install the provided sticker and to forward the product instructions to the vehicle’s owner for review. If a “Warning to Driver” sticker or product installation guide were not included in the kit, FREE replacement stickers and instructions are available by request. It is the installer’s duty to ensure a safe and controllable vehicle after the modifications have been performed.
