 FREE 1 to 3-Day Delivery on Orders $149+ Details

How to Install Teraflex Long Arm Upgrade Kit on your 1997-2006 Wrangler

Shop Parts in this Guide
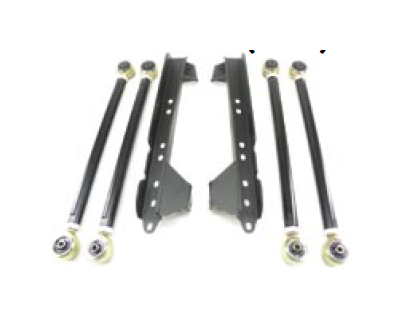
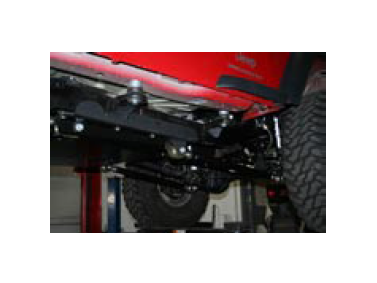
This kit is designed specifically for use with TeraFlex lifts and suspensions. It replaces standard-length control arms with new, longer control arms. The upgrade will improve on-road driving comfort as well as off-road performance.
There have been some in-line changes made to the Long Arm kit that will require the modification of the factory skid plate, or the purchase of the Teraflex’s new Belly Up skid plate (Part # BUT-03). Please be sure that you understand what is required before you begin the installation of this kit.
INSTALLATION WARNING:
We recommend that certified technicians perform this installation. Attempts to install this product without proper training or experience may jeopardize the safety of you and the vehicle. These instructions are meant only as a guideline for the installation procedure and are not meant as the definitive source. The Factory Service Manual should be used in conjunction with this instruction guide when installing the components. Read this instruction guide thoroughly before beginning the installation process.
Be sure you have all needed parts and know where they will be installed. Read each step completely as you go. If any parts are missing from the kit please call 801-288-2585 for replacement. Take every precaution to make this installation a safe procedure. Make safety the number one priority with any suspension or lift installation. Read all safety, warranty, and maintenance information included at the end of the instruction guide.
CHANGES:
The main bracket in Teraflex’s Long Arm Kit has had some changes to the rear lower control arm mount that improves the overall geometry of the suspension, and allows the use of Teraflex’s popular modular control arms. Another advantage is that this new bracket design makes it possible to upgrade to the triangulated four link LCG suspension without changing and discarding your long arm bracket. In the future the rear suspension can be upgraded to the triangulated 4 link, while the front suspension can be done either at the same time as the rear, or at a later date.
PASSENGER SIDE INSTALLATION:
1. Jack up the vehicle off ground and secure with jack stands.
2. If the TJ is equipped with factory side steps, remove them.
3. Starting on the passenger side first, remove the front and rear lower control arms.
Note: It is important to remove the control arms from only the passenger side at this time. This helps to keep the axle positioned correctly. The driver’s side will follow later.
4. Remove the lower control arm mounts from the vehicle. Grind the welds away and use a chisel to separate the bracket from the frame.
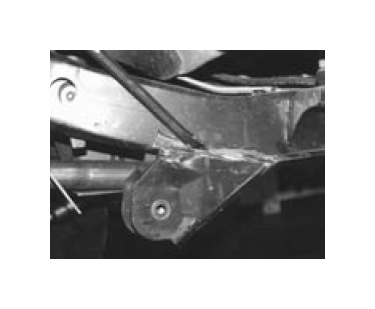
5. Buffing and painting the bracket area will improve appearance and minimize rust.
6. Support the transmission and transfer case with a jack.
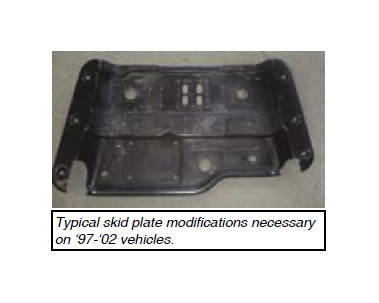
7. Remove the transfer-case skid plate or belly pan. It will be necessary to either use TeraFlex’s BellyUp skid plate (part #BUT-03) or modify the stock skid plate.
8. Teraflex’s new BellyUp Skid Plate (Part # BUT-03) is recommended to complement the Long Arm kit. We recommend this because of the time and effort required to make the stock skid plate fit with the long arm bracketry. The BellyUp Skid Plate is laser cut from 3/16” thick steel for superior protection, and its low profile provides up to an additional 1-5/8” of ground clearance. If the new BellyUp skid plate is not purchased, the factory skid plate must be modified to allow enough clearance for the bracket and rear lower control arms.
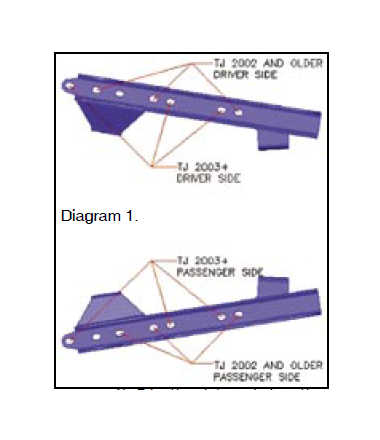
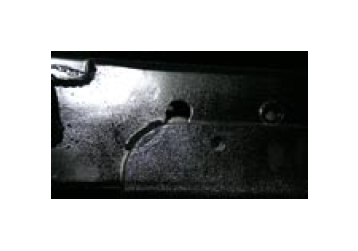
9. 1997-2002 TJs: To trim the factory skid plate, lay the long arm bracket on top of the factory skid plate using the correct holes for your TJ (see diadiagram 1). Trim the plate and place the brackets and arms on top to be sure there is enough clearance, cycle the arms through it’s full range of movement to make sure that enough material is removed from the skid plate.
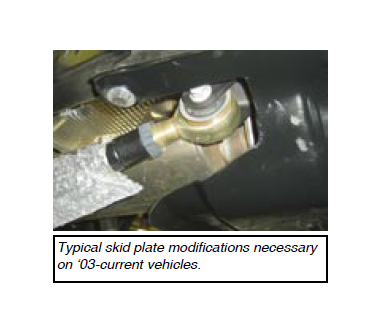
10. 2003-current TJs: The 2003 and newer TJ skid plate’s sit closer to the rear of the TJ than previous models, this requires more extensive trimming of the factory skid plate than 97-02 models.
11. Position the control arm bracket assembly to the underside of the frame rail. Temporarily attach the control arm bracket to the frame using the bolts from the skid plate. Use Diagram 1 to properly locate the holes that will be used with the vehicle’s model year.
12. Make sure that the bracket aligns properly with the holes in the underside of the frame.
13. Secure the bracket by tack welding both sides of the bracket to the frame.
NOTE: Make the tack welds about 1 1/2 inches long.
14. Connect the front lower long FlexArm to the new bracket, then connect the FlexArm to the axle, and connect with the stock bolts.
15. Connect the new rear lower FlexArm to the bracket and to the axle. Lengthen or shorten the control arm to adjust for proper pinion angle. Secure with the stock bolts.
Note: With a TeraFlex four-inch suspension, the front control arms should be about 32.5” center to center, and rear about 32”. Adjust as necessary for the specific vehicle. Secure with stock bolts.
DRIVER’S SIDE INSTALLATION
16. Begin installation on the driver’s side by removing the lower control arms from the driver’s side of the vehicle.
17. Grind control arm brackets from the vehicle and touch up as necessary.
18. Connect the driver’s side control arm bracket to the underside of the frame. Make sure the bracket is properly aligned with the holes in the underside of the frame before temporarily securing with the bolts from the skid plate. Use Diagram 1 as reference.
19. Secure the bracket by tack welding both sides of the bracket to the frame.
20. Connect the front lower long FlexArm to the new bracket, then connect the FlexArm to the axle, and connect with the stock bolts.
21. Connect the new rear lower FlexArm to the bracket and to the axle. Lengthen or shorten the control arm to adjust for proper pinion angle. Secure with the stock bolts.
22. Make sure all bolts are securely fastened.
Note: With a TeraFlex four-inch suspension, the front control arms should be about 32.5” center to center, and rear about 32”. Adjust as necessary for the specific vehicle. Secure with stock bolts.
22. Remove the three skid plate bolts from the underside of each control arm bracket.
Note: The bracket will stay in position because it is attached to the frame by the tack welds performed previously.
23. Replace skid plate and secure with bolts. Tighten securely.

24. Check to make sure all bolts are properly tightened.
NOTE: It is highly recommended that you apply 1/2” stitch welds to permanently secure the bracketry to the frame.
ALIGNMENT NOTES:
After installation of the TeraFlex Long-Arm suspension kit, it is imperative that the front end alignment angles be checked. It is recommended that your TJ be taken to a reputable alignment shop that understands 4WD vehicles and has experience with their alignment parameters.
Caster might be changed with the installation of our suspension kit. It is recommended that the factory specifications be maintained.
Toe-in is also important for tire wear. Toe-in may be affected on a three-inch kit, and will be affected on a four-inch kit. It has been recommended that the toe-in be set to minimum factory specifications if you go to the larger tire and wheel set up.

