 FREE 1 to 3-Day Delivery on Orders $149+ Details

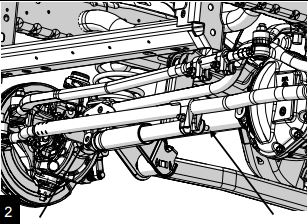
How to Install Teraflex HD Tie Rod & Flipped Drag Link Kit on your Wrangler
Installation Time
2 hours
Tools Required
- jack
- jack stands
- basic mechanics tool set
- 2.5mm Allen wrench
- 1-1/2" open end wrench
- 1-11/16" open end wrench
- hammer
- Blue LocTite
- tape measure

Shop Parts in this Guide
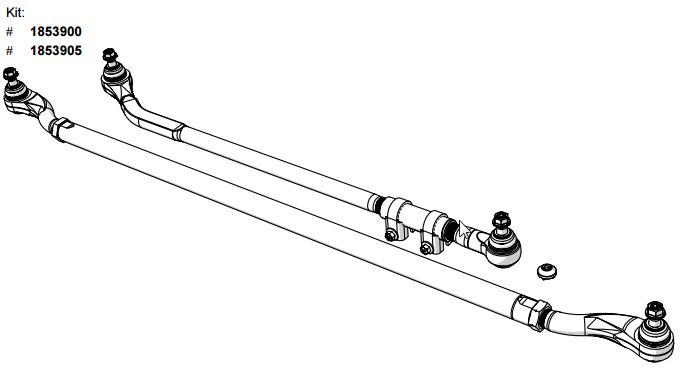
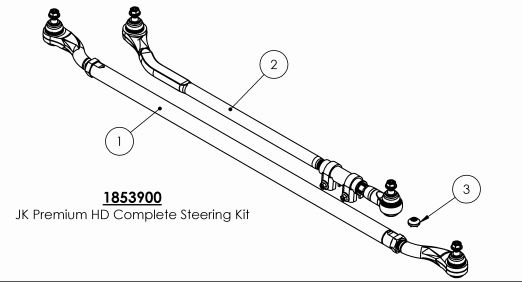
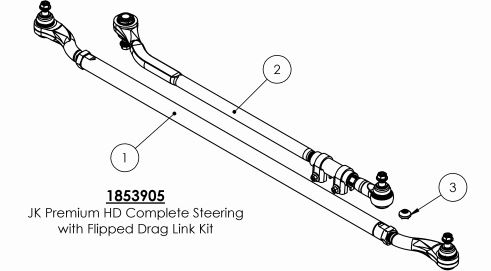
TeraFlex JK Complete HD Steering Kit
Important Notes:
Prior to beginning this or any installation read these instructions to familiarize yourself with the required steps and evaluate if you are experienced and capable to personally perform these modifications. A factory service manual should be used in conjunction with these installation instructions.
Refer to the parts list to ensure that all necessary components and hardware has been included. If any parts are missing please contact your local TeraFlex dealer for assistance.
An alignment by a professional shop after this installation is highly recommended and will result in the best performance from your jeep and your new parts.
The factory steering stabilizer clamp will not fit on your new HD tie rod. Any aftermarket 1-5/8” steering stabilizer clamp will fit.


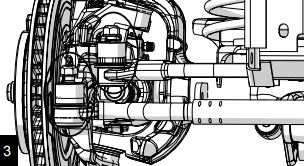
1. Start your install with safety in mind. Begin by chocking your rear tires. Raise and support the front of the Jeep so that the tires are off the ground. Remove the front tire and wheel assemblies.
2. Remove steering stabilizer.
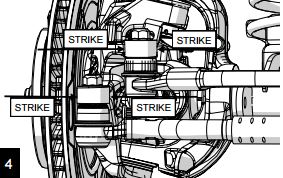
3. Using a 21mm socket (a wrench will be needed on the pitman arm side), loosen the drag link and tie rod nuts, but do not completely remove. Leave the nuts threaded on a few threads to prevent the drag link and tie rod from dropping when broken loose.
4. Use a large hammer to strike around the knuckle castings, perpendicular to the tie rod end and drag link studs, until the drag link and tie rod fall and are free from the knuckles on both passenger and driver sides.
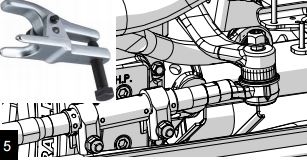
5. A “Tie Rod End Puller” is suggested to remove the pitman arm side drag link end. Using a hammer can cause damage to your steering box if not done carefully and correctly. Finish unthreading the nuts and remove the factory drag link and tie rod.
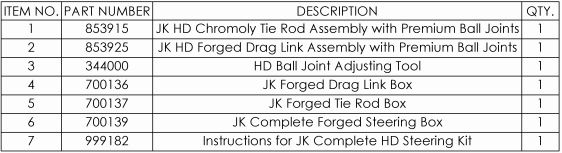
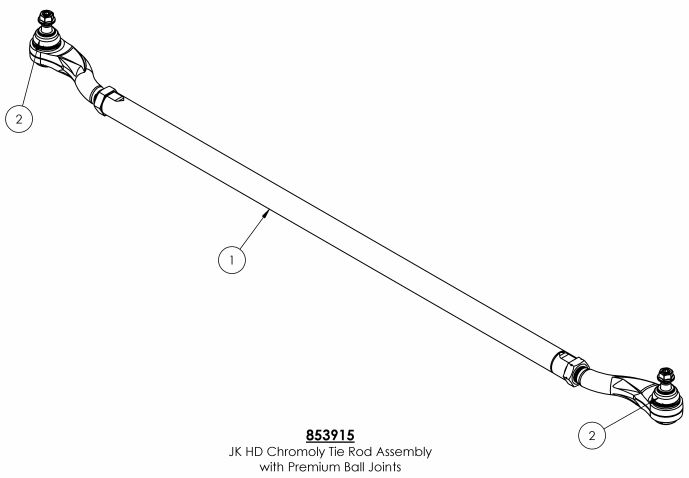
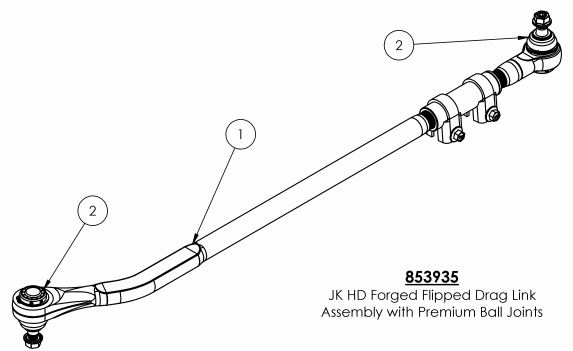
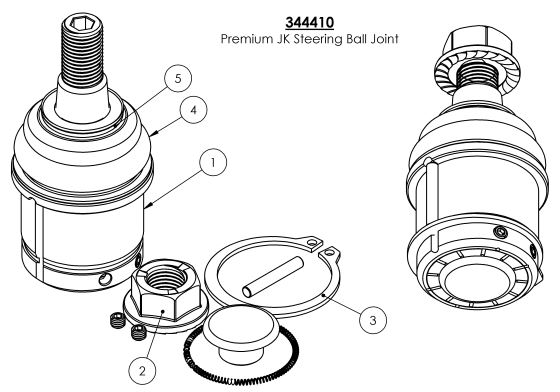
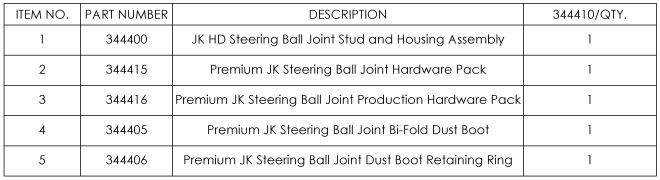
6. Prep your new TeraFlex Premium HD Forged Drag Link and Chromoly Tie Rod for installation by installing the following:
#344407 Dust Boot Retaining Spring (1 Qty. per end)
#304 Set Screw Plug. Use blue Loctite. (2 Qty. per end)
Refer to the parts list on page 5 and 6 for part identification and location. (NOTE: Extra O-Rings are included for future maintenance and do not need to be installed in initial setup)
7. Measure your factory drag link and tie rod from the center of joint to the center of the joint on the other side. Adjust your new drag link and tie rod to match as closely as possible. Install and torque the nuts to 63 ft. lbs.
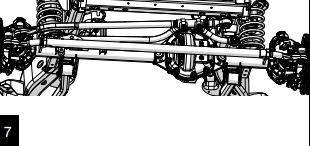
8. Reinstall your tire and wheel assemblies. Tighten the tie rod jam nuts. With your tires pointed straight, adjust your steering wheel by rotating the adjusting collar on your new drag link until the wheel is centered, then tighten the pinch clamps. It is important to make sure that while tightening the pinch bolts and jam nuts, the joints on both sides are in a neutral position and are not bound up (rotated opposite directions).
(NOTE: The drag link and tie rod assembly should be able to rotate up and down a few degrees. This is normal and allows for a degree change in the knuckles when turning, without steering binding.)
9. Finish your installation by greasing the premium joints of your new TeraFlex Drag Link with a quality grease and install #344408 Grease Zerk Dust Covers.
10. A professional alignment is highly recommended and suggested to completely finish this installation. Enjoy your new TeraFlex Premium HD Steering!

