FREE 1 to 3-Day Delivery on Orders $149+ Details

How to Install Teraflex 2WD Low Range Kit on your 1987-2006 Wrangler
Shop Parts in this Guide
Installing this kit is identical to replacing the stock range shift fork and sector. We recommend you have a service manual for reference when removing and replacing the transfer case assembly. The service manual should also be used for disassembly and assembly of the transfer case assembly.
These instructions begin with the transfer case on the bench and the front and rear housings separated. Also remove the mainshaft and drive chain.
1. Remove the indicator switch from the front case (if so equipped).
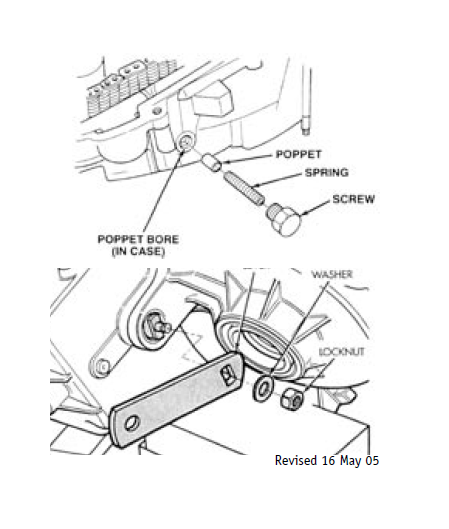
2. Remove shift detent screw, spring, and poppet. (Fig. 1).
3. Remove range lever, nut and washer. (Fig.2).
4. Remove mode fork and shift rail. (Fig. 3).

5. Remove range fork. (Fig. 4).

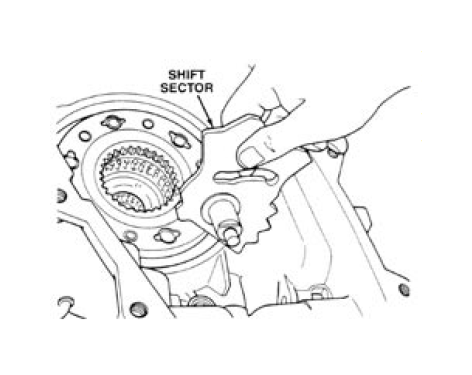
6. Remove sector. (Fig. 5).
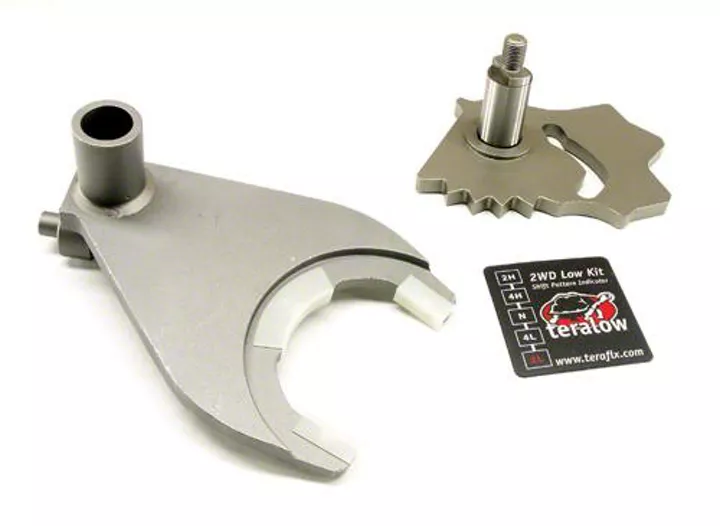
7. Make sure the new wear pads are firmly pushed on to the new shift fork.
8. Install the new parts in reverse order of steps 1-6.
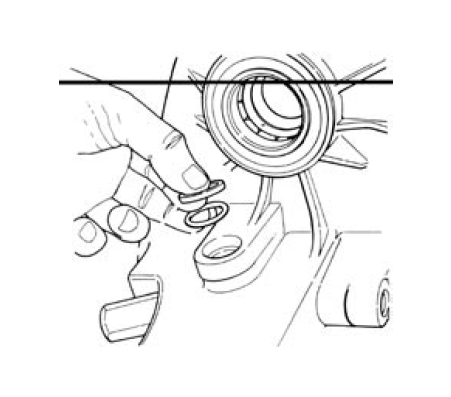
Make sure you do not lose the O-ring and bushing. (Fig. 6).
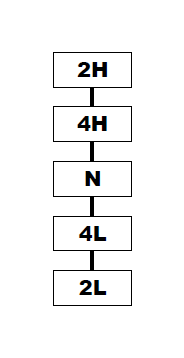
9. This diagram indicates the new shift pattern with the 2Low231 installed.
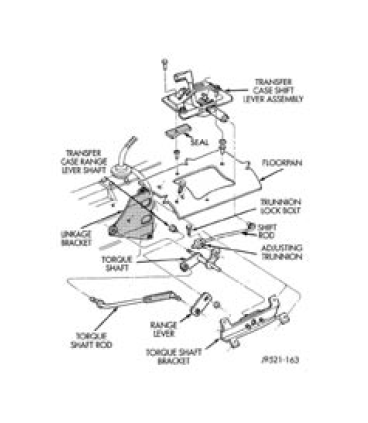
Shift Linkage Adjustment Shift Transfer Case into 2H. Raise vehicle. Loosen lock bolt on adjusting trunnion. Be sure linkage rod slides freely in trunnion. Clean rod and apply spray lube if necessary. Verify that transfer case range lever is fully engaged in 2Hposition. Tighten adjusting trunnion lock bolt. Lower vehicle. Test drive vehicle to confirm all shift positions
(Fig. 7). Typical shift linkage. Some compenents vary by vehicle year and model.