FREE 1 to 3-Day Delivery on Orders $149+ Details

How to Install TeraFlex 2.5" Lift Kit on your 2007-2013 Wrangler

Shop Parts in this Guide
Read the entire installation guide before beginning installation. These instructions apply to the following kit part numbers
1351000 2.5” Inch JK Lift Kit
1352000 2.5” Inch JK Lift Kit & Adapters
1251000 2.5” Inch JK Lift Kit & Shocks
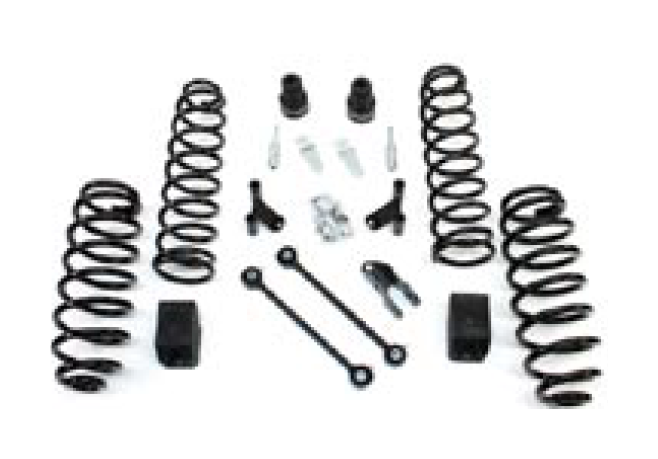
Kit includes:
New coil springs
Rear sway bar links
Front and rear shock adapters (kit 1352000)
Front upper bump stop extensions
Rear lower bump stop spacers
Rear track bar bracket
Rear brake line extension brackets
Rear coil spring retainers
Hardware pack
REAR INSTALLATION:
1. Lift the vehicle and support under the frame so that the axles will be able to drop far enough to remove and replace the coil springs.
2. Remove the tires.
3. Support the rear axle and remove the rear shocks.
4. Remove the rear sway bar links.
NOTE: Save rear sway bar links for reuse on the front end.
5. Remove the clips that secure the ABS wiring harness to the upper control arm mount.
6. Disconnect the brake line bracket at the frame but do not disconnect the brake lines from the calipers.
7. Remove the bracket that holds the park brake cables to the body.
Keep this a safe operation by properly supporting the vehicle during installation of the TeraFlex suspension lift kit.
8. Unbolt the frame end of the track bar.
9. Loosen all rear control arm bolts do not remove arms or bolts!
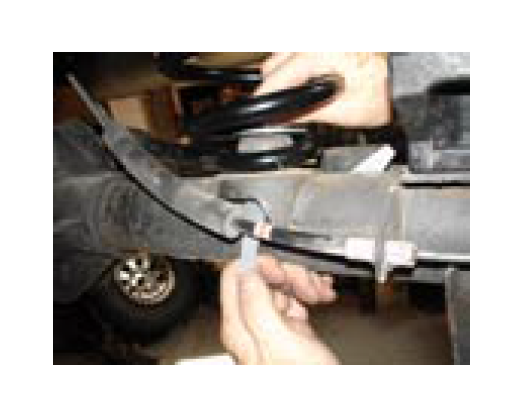
10. Carefully lower the rear axle far enough to remove the rear springs. Be careful not to let the coils fall out as you lower the axle. You will want to lower the axle enough to get your new 2.5” coil springs in place. While lowering the axle, watch the brake lines, ABS wires and the breather hose to make sure they do not stretch as this could cause damage to these vital parts.
11. Install the new 2.5” rear coil springs and raise the axle just enough to hold the rear coils in place.
NOTE: Don’t forget to reuse the factory spring isolator. If the isolator is left out your ride height will be about a 1/2” lower in the rear. The isolator also helps dampen noise.
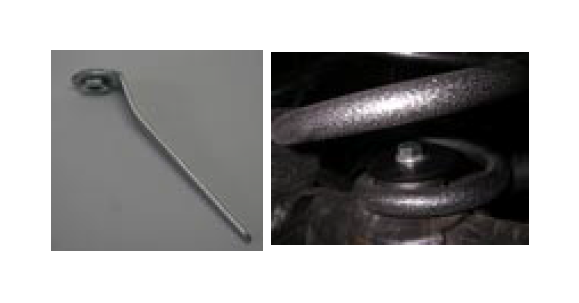
12. To install the rear coil spring retainers on the bottom end of the coil springs first insert the flanged nut into the provided wrench tool, as shown on the next page, and put the nut under the spring pad.
Insert the bolt, with the lockwasher on top of the flat plate, into the rear lower spring retainer, holding the flanged nut in place using the provided wrench tool and begin tightening the bolt. Remove the tool when finished.
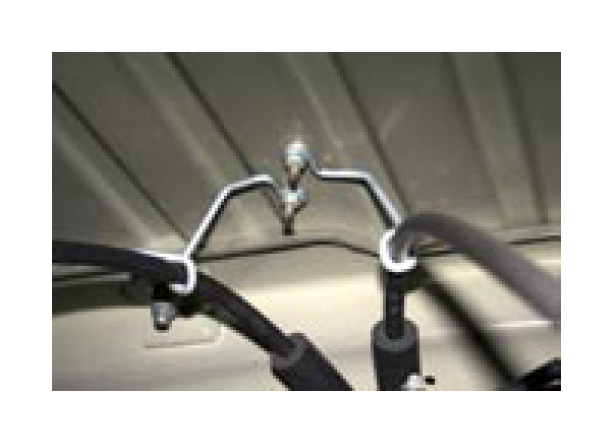
13. Install new rear sway bar links on the inside of the sway bar and the inside of the axle bracket. Use the factory bolt on the axle with the nut on the outside so excess threads will not interfere with the shock. Use the provided 12mm bolt and washer for the top side with the 12mm nut and washer on the inside to give the most possible room for tire clearance.
14. Install new rear bump stop spacer by placing the spacer on the axle pad lining up both holes with the upper pad on the spacer forward then install provided 5/16” X 1 1/4” bolts with 5/16” washers and 5/16” nuts. tighten with 1/2” wrenches.
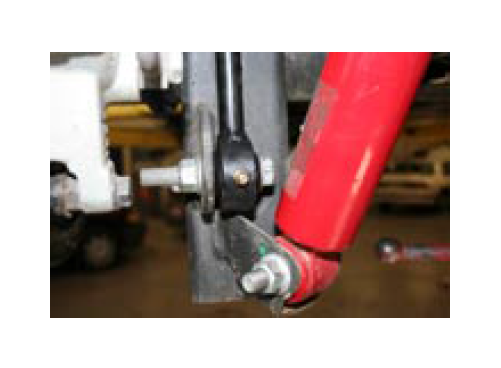
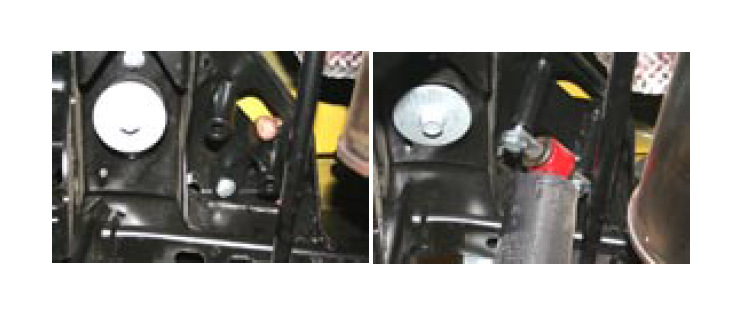
15. If shock adapters are included in your kit, install shock adapters and shocks.
NOTE: the adapters are different from left to right.
Make sure you are installing the correct one; there are two 10mm X 90mm bolts on each side and a 5/16” X 1”. The long bolts go in the factory location through the adapter and the shock bar pin. The 5/16” bolt goes through the support tab on the adapter and through a hole in the frame.
Get all the bolts started before tightening any all the way to make it easier. After getting the bolts started, tighten the longer bolts first with a 17mm socket then tighten the 5/16” bolt with a 1/2” socket and a 1/2” wrench for the nut on top of the frame. Once the upper part is done use the factory bolt for the bottom of the shock.
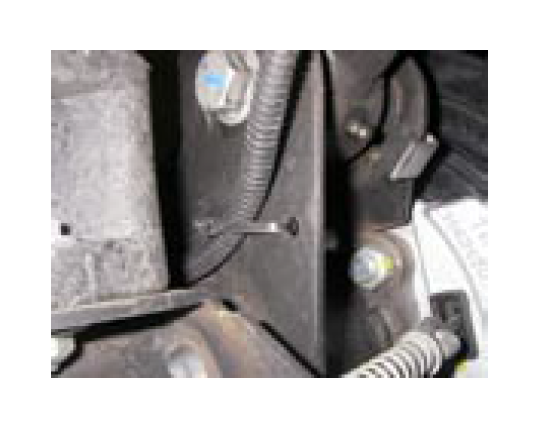
16. Install rear brake line extensions provided in the kit. Bolt the bracket to the factory brake line bracket so the lower brake line will be below the frame and tucked slightly under so it will clear the rear sway bar. Use the factory bolt to fasten the extension bracket to the frame. You will also need to bend the upper factory hard line up out of the way so it will clear the rear sway bar link upper bolt. Make the bend directly above the link to get the best clearance.

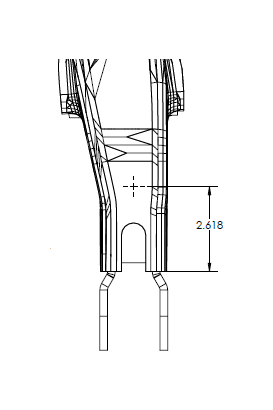
17. Install rear track bar drop bracket. Use the template in the instructions to mark and drill the 3/8” hole needed for proper installation.
Install your new track bar drop bracket using the sleeve provided to prevent crushing the bracket. Place your 14mm bolt and washer through the original track bar mounting hole, apply the 14mm washer and nut, then install the 3/8” bolt with washer from the outside of the frame in. Before tightening, put the track bar in its new location and fasten with factory hardware then tighten all three bolts.
FRONT INSTALLATION:
18. Remove front shocks and sway bar links.
19. Remove front springs. You will want to loosen all control arm bolts and track bar bolts but do not remove them.
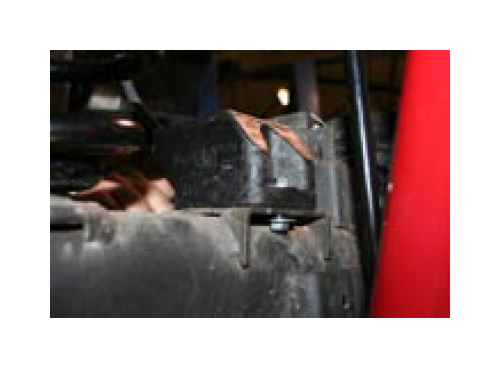
20. Remove front factory bump stop (yellow).
21. Install factory bump stop into the TeraFlex bump stop extension.
22. Install front bump stop extension into the factory location.

23. Install front 2.5” coil springs.

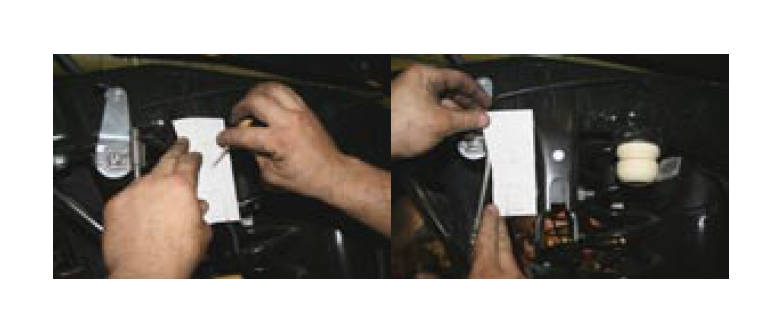
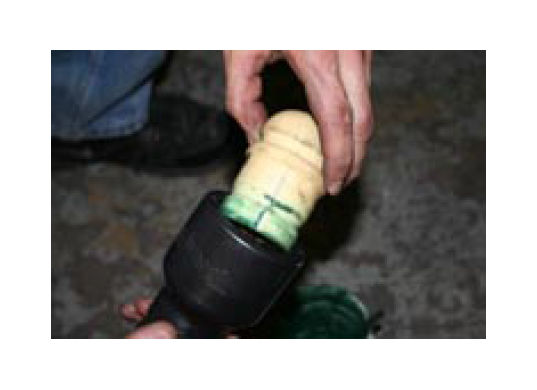
24. Install front upper shock adapter by spinning it onto the factory shock then install the provided washer. Add the original rubber bushing with the big hole in it and use the other one on the upper side of the frame and install in the same order it was removed.
25. Install factory rear sway bar links in the front.
26. Reinstall tires and wheels, lower the vehicle onto its own weight, and tighten all control arm bolts and track bar bolts.
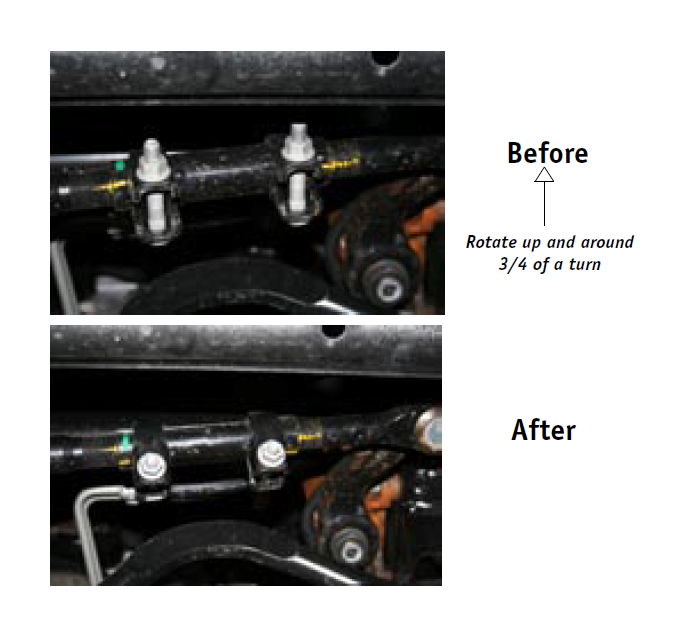
27.Loosen the adjuster sleeve on the drag link. Mark the position by making a line across the sleeve and the threads this line will indicate the original position. Looking up from the bottom rotate the adjuster sleeve toward the back of the vehicle 3/4 of a turn. This should get the steering wheel close to center.
NOTE: An alignment is recommended at the completion of the installation.
Helpful Hints
Headlights: You may want to aim your headlights down after installing a TeraFlex Spring lift. The tool you need is a T15 Torx driver. This is done from the front of the Jeep and the adjuster screw is set between the headlamp and the bezel. Look for a clearance detent in the bezel. On a flat surface with a wall or garage door about 15-20 feet in front of the Jeep turn the head lights on and adjust the light pattern down as needed.
Note on tire and wheel selection:
The JK Wrangler uses a larger brake system than on the previous TJ Wrangler so the minimum wheel size is 16 inches. Aftermarket wheels should be selected that are at least 16 inches in diameter with a 5 on 5-inch lug bolt pattern and 4.5 inch backspacing. The factory wheels use a 6 inch backspacing, but when installing larger tires on the factory wheels some rubbing of the tire on the sway bar and control arms may occur.
TeraFlex offers both wheel offset adapters and wheel lug pattern adapters that are 1.250 inches thick. The offset adapters are for running factory wheels with aftermarket tires. The adapters allow use of a wheel with either a 5 on 4.5 lug pattern or 5 on 5.5 lug pattern on the JK Wrangler bolt pattern of 5 on 5 inches. Contact your local TeraFlex distributor for more information.
Tires from various manufacturers vary in actual dimension, but as a general guideline TeraFlex recommends a maximum tire diamter of 35 inches mounted on a 8 inch wide rim for use after installing the JK 2.5 inch spring lift kit. Other tire and wheel combinations may also work, but the installer takes responsibility for ensuring a proper selection of tire and wheel.
The 2007 JK Wrangler uses 1/2- inch by 20 (UNF) wheel studs.
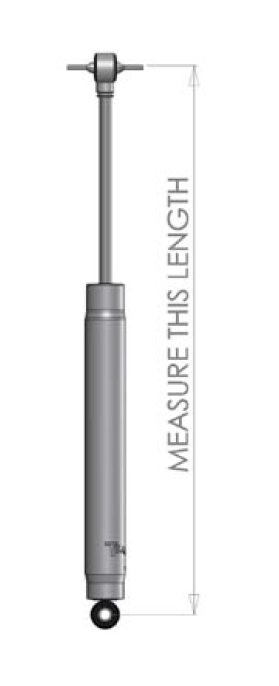
CAUTION: If you did not purchase the 2.5” spring kit that includes the TeraFlex shocks and rear spring guides (Part #1251000), or if you purchased the kit with the shock adapters and are not using the factory shocks, you may need to purchase 2 of the 1/2” rear spring guides and spacers, (Part #1954105), to keep the springs aligned with the spring buckets under full extnsion.
To determine if you need the rear spring guides, measure your shock from the top of the bar pin (or shock adapters if you are using the adapters) to the center of the eyelet when it is fully extended. If the fully extended shock length is longer than 25”, you will need the TeraFlex rear spring guides (Part #1954105).