 FREE 1 to 3-Day Delivery on Orders $149+ Details

How to Install Synergy Front Lower Shock Mount Bracket (07-17 Wrangler JK) on your Jeep Wrangler
Installation Time
20 minutes
Tools Required
- Basic simple hand tools
- Drill with 3/8” and 7/16” metal cutting bit. Or a step drill
- Floor jack and jack stands

Shop Parts in this Guide
GENERAL NOTES:
These instructions are also available on our website; www.synergymfg.com. Check the website before you begin for any updated instructions and additional photos for your reference.
The installation of this product can be done with the vehicle on the ground, sitting under its own weight. However, installation is much easier to do with the wheels off and suspension hanging free at full droop.
Drilling of stock axle bracketry will be required.
PARTS LIST:
PART NUMBER – PART DECRIPTION
(2) 8073-01 JK FRONT LOWER SHOCK BRACKET
(2) 3/8-24 UNF x 1” long hex head bolt
(4) 3/8-24 UNF x 3/4” long flat head socket cap screw
(6) 3/8-24 UNF Stover lock nut
(8) 3/8” flat washer
(2) ½-20 UNF x 4.5” long hex head bolt
(2) ½-20 UNF Stover lock nut
(4) ½” flat washer
(2) 1.50” shock spacer.
INSTALLATION:
1) Begin by jacking the front of the vehicle up and removing the front tires. Safely support the vehicle using a quality floor jack and jack stands in a manner to allow the front suspension to hang free.
2) Support the front axle at full droop and remove the front lower shock bolt.
Note, although not necessary, it is much easier to install the front shock relocation brackets with the shocks completely removed from the vehicle. We suggest unbolting the top of the shock at this time and removing from vehicle.
3) With front shocks removed, and front suspension hanging at full extension, we can begin installing the 8073 mounts.
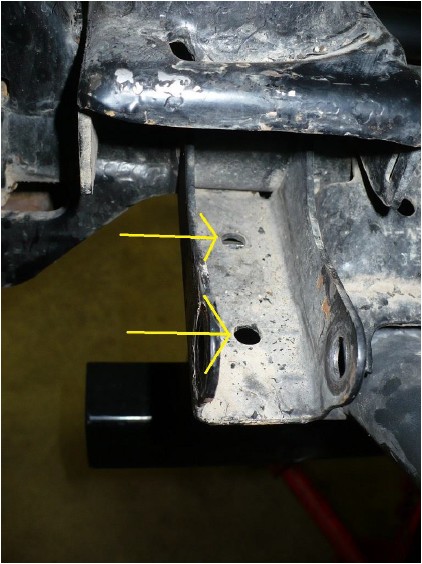
4) Start by opening up the 2 bottom holes of the factory shock mount to 7/16”. As referenced in the image below.
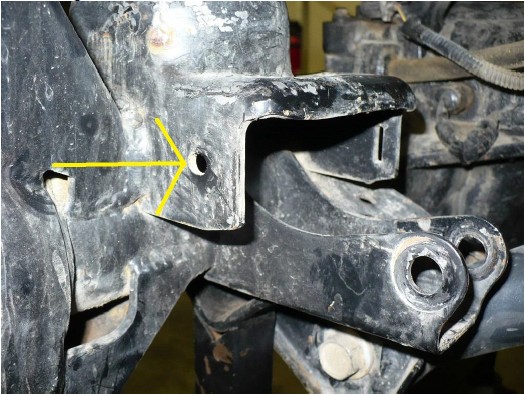
5) Next, drill out the small outer hole on the coil spring perch to 3/8” as shown.
Note; it is easier to get a drill on this by removing the brake caliper and rotor.
See image below.
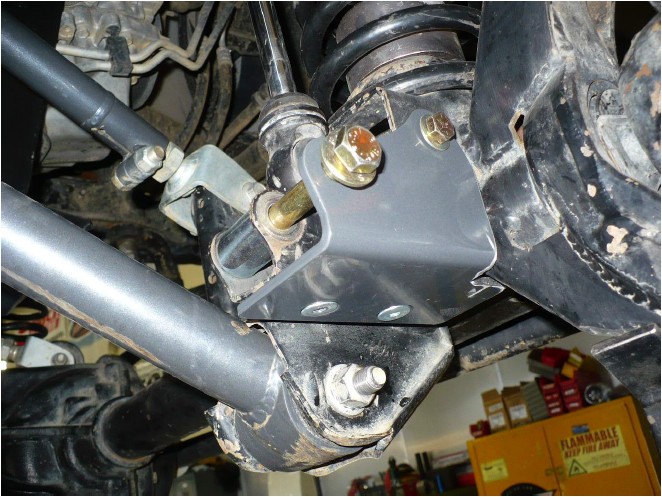
6) Once holes are opened up to correct size, bolt in the new mount. Do not fully tighten until all hardware has been installed. Use the 3/8-24 UNF x 3/4” long flat head socket cap screw on the bottom of the bracket. And bolt in as shown using a washer and stover nut.
7) Use the 3/8-24 UNF x 1” long hex head bolt to bolt the 8073 bracket to the coil perch. Use a washer under both the head of the bolt and the stover nut.
8) Tighten all 3/8” hardware installed up to this step. Torque to 35 ft-lbs
9) Reinstall the shock onto the vehicle. Begin by installing the upper mount. Follow the OEM or manufacturer’s specifications.
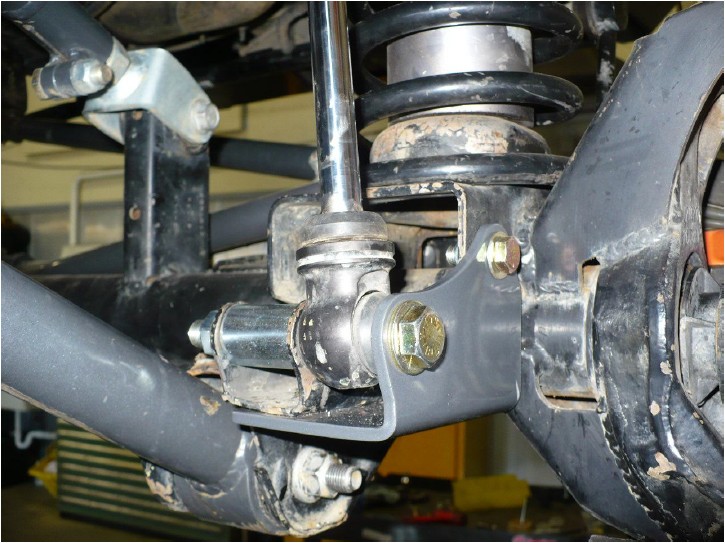
10) Install the shock into the lower bracket as pictured below. Be sure to use the spacer in the stock mount and a washer under both the head of the bolt and the stover nut. Completed install should appear as pictured below.
11) Reinstall brake caliper and rotor if removed in step 5. Reinstall wheels / tires and any other components removed during installation.
Installation is Complete
