 FREE 1 to 3-Day Delivery on Orders $149+ Details

How to Install Synergy Front Axle Truss for Dana 44 Front Axles on your Wrangler
Tools Required
- Basic hand tools (wrenches, sockets, hammer, etc.)
- Bushing/Ball joint press or similar tool for bushing removal/install
- Metal cutting tool (Sawzall, die grinder, angle grinder, etc.)
- Metal cleaning tool (sandpaper, die grinder, angle grinder, etc.)
- Welder with capability of welding 3/16” steel
- Spray paint
Shop Parts in this Guide
INSTALLATION
The minimum disassembly required to install the Truss is as follows. Additional disassembly will potentially make installation easier.
Make sure vehicle is in Park and Emergency Brake is set. Lift front of vehicle and support frame with jack stands.
Remove both front upper control arms.
Removing the Track Bar, Drag Link, Tie Rod and Steering Stabilizer will make installation easier but it is possible to install the Truss without removing these components.
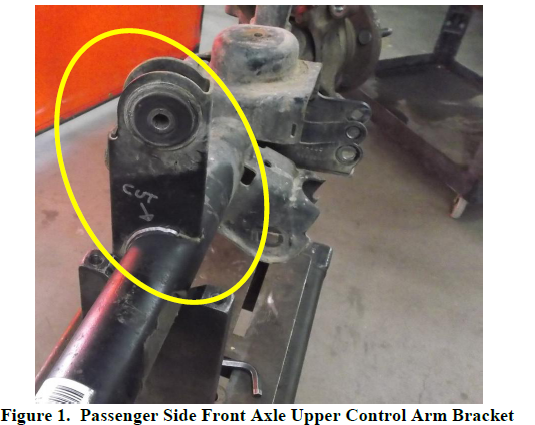
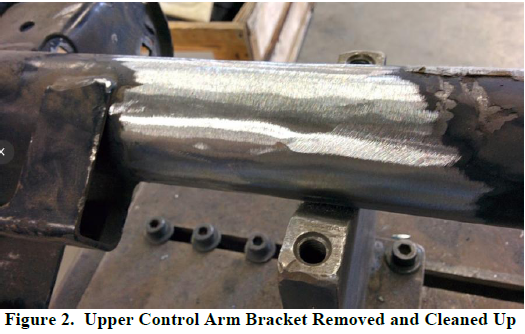
Remove stock passenger side front axle upper control arm bracket from Axle Housing. Using a Sawzall or cutoff wheel to remove the bracket works well. After the bracket is removed, clean up the area using a grinding disk, flapper wheel, or sander. See Figures 1 and 2.
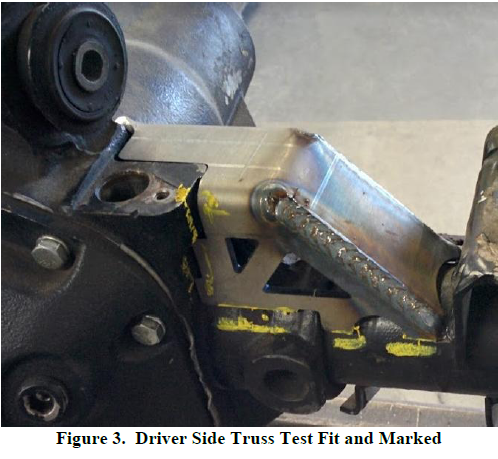
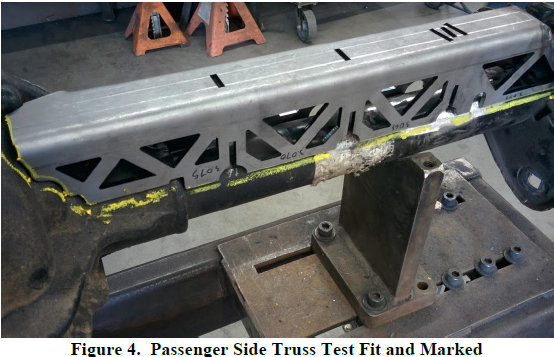
Test fit both sides of the Truss, with the braces included, to make sure no additional material removal is required. If Truss fits well, then mark the areas to be welded on the housing. See Figures 3 and 4.
After marking the areas where the Truss meets the Axle Housing, remove the Truss and clean marked areas down to bare metal. See Figures 5 and 6.
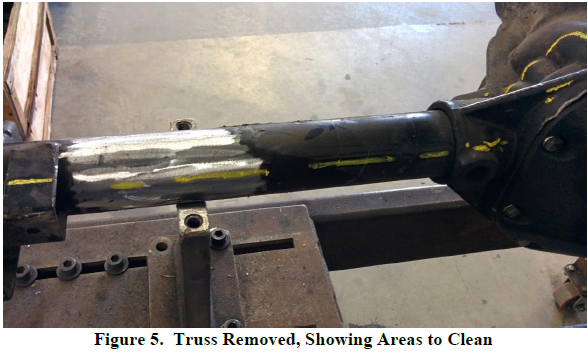
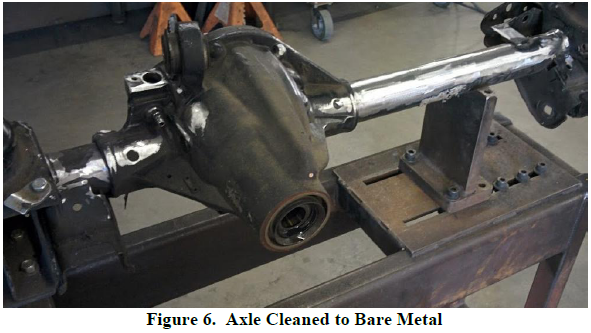
· After marking the areas where the Truss meets the Axle Housing, remove the Truss and clean marked areas down to bare metal. See Figures 5 and 6.

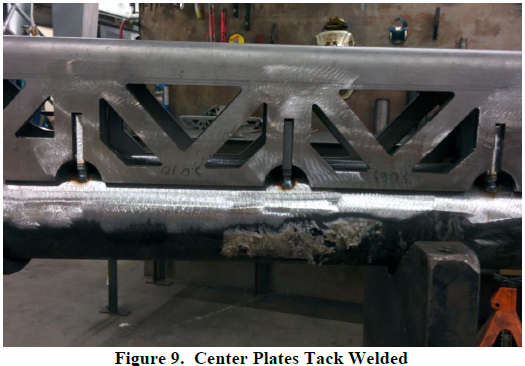
Once the Axle Housing has been cleaned to bare metal, install the passenger side of the Truss WITH the 3 Center Plates. Make sure the Truss is in the correct location. The easiest way to ensure that the Truss is in the correct location is to make sure it is pushed all the way towards the Center Section in the middle of the axle and then rotated forward on the axle tube until the Truss contacts the Center Section and cannot rotate on the axle tube any farther. At this point the Truss should be parallel to the Axle Housing and meet the cast Center Section correctly. Tack weld the three Center Plates, one tack on each side. See Figure 9.
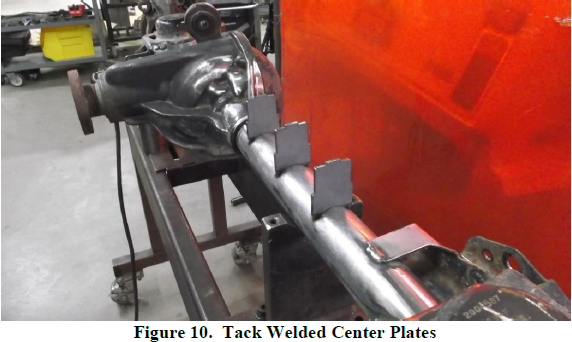
Next, carefully remove the Truss by lifting it straight up. The three Center Plates should not move. See Figure 10.
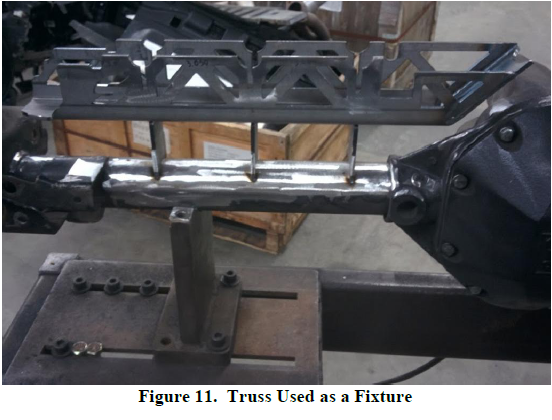
Next, carefully fully weld the Center Plates. The Truss can be used as a fixture to maintain the alignment of the plates during welding. See Figure 11.
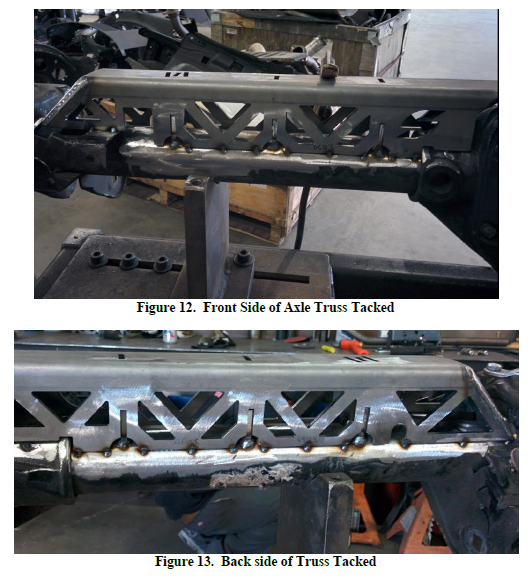
Once the Center Plates have been fully welded, place both sides (passenger and driver) of the Truss back on the axle tube. Tack the Truss in several places on each side, alternating sides that are tacked. See Figures 12 and 13.
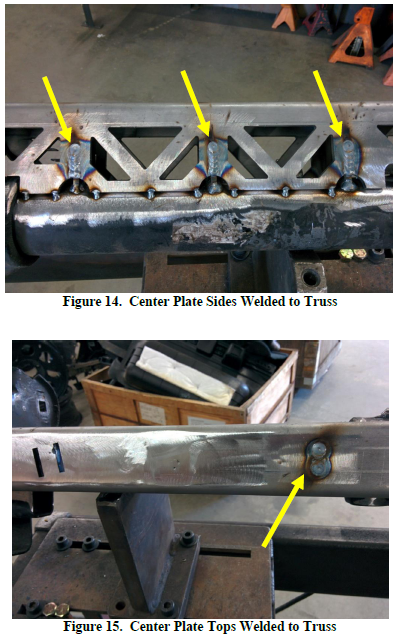
Once both sides are tacked, you may begin finish welding the Center Plates to the Truss. See Figures 14 and 15.
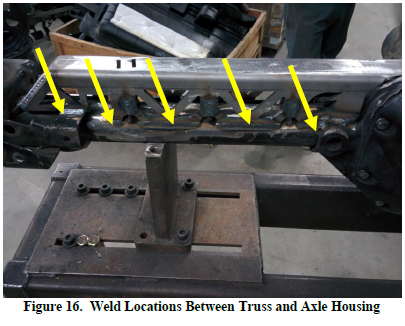
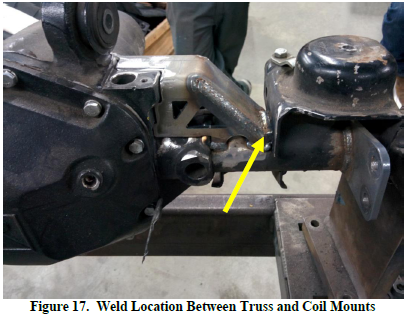
Next finish weld the Truss to the Axle Housing. It is recommended to go slowly and do small sections at a time to let the housing cool down between passes and alternate sides. It is very important not to get one section of the Axle Housing much hotter than the rest - this can result in a bent Axle Housing. See Figures 16 and 17.
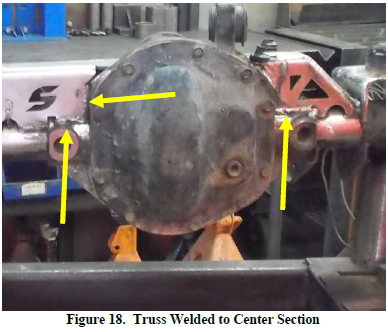
Next is welding the Truss to the axle Center Section. This is considered optional. The Center Section is made of cast iron and can be difficult to weld. Ideally the casting should be heated prior to welding and TIG welded with a high nickel content filler rod. It is possible to MIG or stick weld the truss to the center section, but welds will tend to be porous and of low quality. It is important not to get the Center Section too hot, and very important to let it cool slowly. It is best to wrap the area immediately after welding in a welding blanket to help retain heat. See Figure 18.
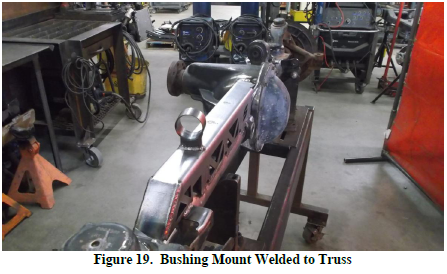
Once the Truss is fully welded to the Axle Housing, place the Bushing Mount into its holes on the Passenger Side Truss. It is symmetrical and not directional. Fully weld to the Truss. See Figure 19.
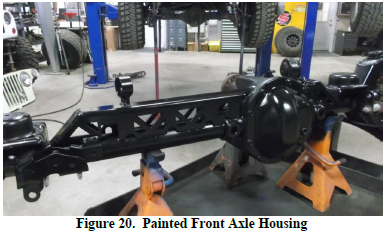
Next, paint the entire Axle making sure to cover any bare metal to prevent rust. Several coats of paint are recommended. See Figure 20.
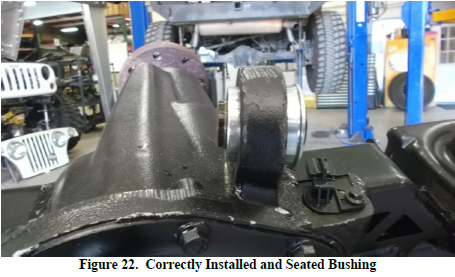
Next press the two Upper Control Arm bushings into the Axle. The bushings are pressed in from the Driver side to the Passenger side. The bushings will go into the housings until they hit the taper approximately 1/3 of the way along the outer shell. This is normal. The bushings are an OEM style replacement and have the same dimensions as stock. See Figures 21 and 22.

Reinstall any parts removed from vehicle in order to install Truss. It is recommended that you cycle the front suspension (remove the springs and move the axle all the way up and down) in order to verify that there are no clearance issues.
Installation is Complete!
