 FREE 1 to 3-Day Delivery on Orders $149+ Details

How to Install Steinjager Fixed Length Front Upper Control Arms for 0-2.5 in. Lift - Black (07-18 Jeep Wrangler JK) on your Jeep Wrangler
Installation Time
4 hours
Tools Required
- Socket Wrench with 18 mm and 19mm mm sockets
- Open Ended Wrench: 18mm (Ratcheting Wrench recommended)
- Breaker Bar
- Torque Wrench
- Safety Glasses
- Wheel chocks
- Floor Jac
- Jack Stands
- Grease Gun with Grease to grease Zerk fittings
- Telescopic 8 Pound Magnet (Optional)
- PB Blaster or other rust penetrating spray (Optional)
Component List:
• 2 – Upper Control Arms
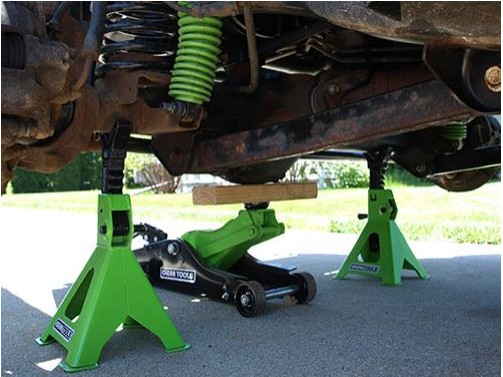
Installation Notes: This install was done on a 2009 Jeep Wrangler JKU. If installation is being done without a lift its recommended to use four (4) jack stands to help support the Jeep® and the axle. Four (4) 3-Ton jack stands were used during this install.
You may need to spray a rust penetrating spray like PB Blaster based on how rusted the control arm bolts are. It’s strongly recommended to take your Jeep® to get an alignment once you’ve completed the install.
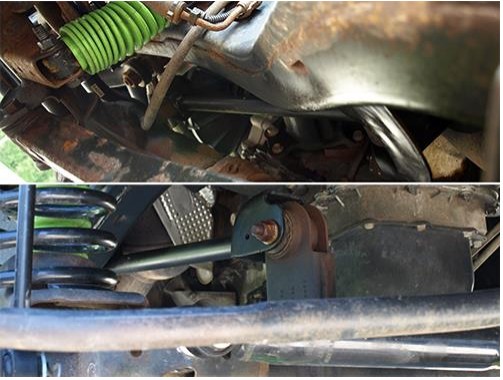
Before Install
Installation Instructions:
1. Place wheel chocks behind the rear tires and loosen the lugs nuts on the front tires using a breaker bar with a 19mm socket. Lift the Jeep® with a floor jack on a flat surface and support it by the frame using jack stands on the driver and passenger side.
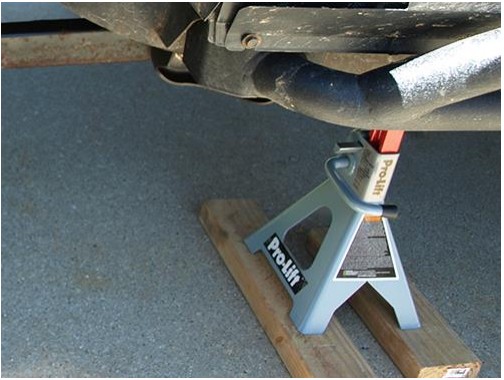
2. Support the front axle with jacks stands and remove the front tires
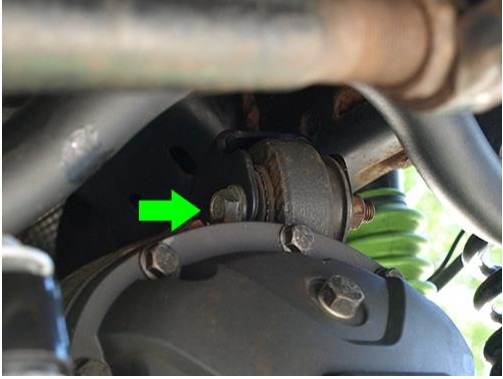
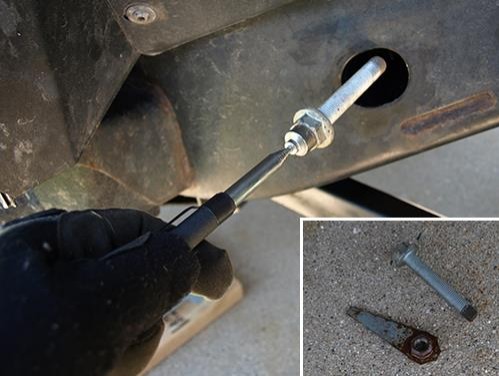
3. Using a 18mm open ended wrench and a socket wrench with a 18mm socket. Break free the front upper control arm bolt and nut on the passenger and driver side. Remove the 18mm bolt from the hole.
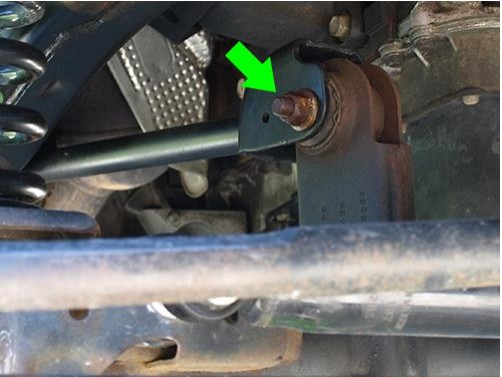
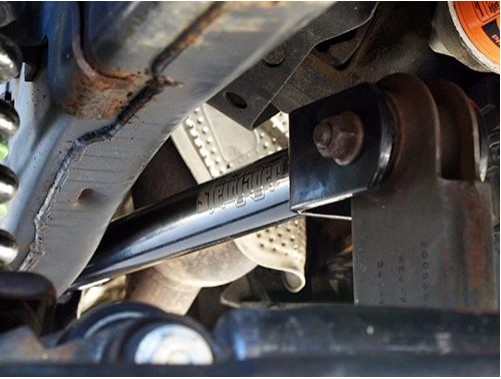
The driver side upper control arm is bolted to the mount that is right above the pumpkin.
4. Break free the 18mm rear upper control arm bolt using an open ended 18mm wrench. (A ratcheting wrench is recommended. Depending on your make and model. The rear bolt may be very close to the exhaust and a socket wrench will not fit.) There is a flag nut on the opposite end.
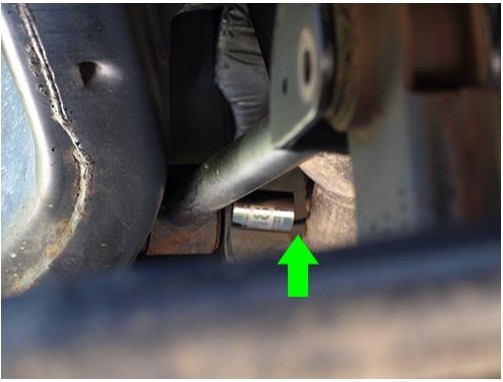
5. Slowly twist the factory passenger side upper control arm if the factory bolt comes into contact with the exhaust when trying to remove it.
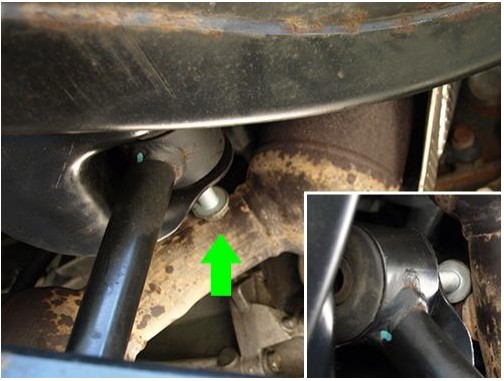
6. Place the factory 18mm bolt through the axle front mount and upper Steinjager upper control arm. Loosely place the nut on the bolt. Do not tighten.
Important Note: You may need to move the axle around a bit to get the holes to align. Be extremely careful when doing this.
7. Place the passenger side rear factory upper control arm factory bolt on a telescopic 8-pound magnet and slide the factory bolt from the outside through the factory hole and place the flag nut on the back.
Important Note: You may need to move the axle around a bit to get the holes to align. Be extremely careful when doing this.
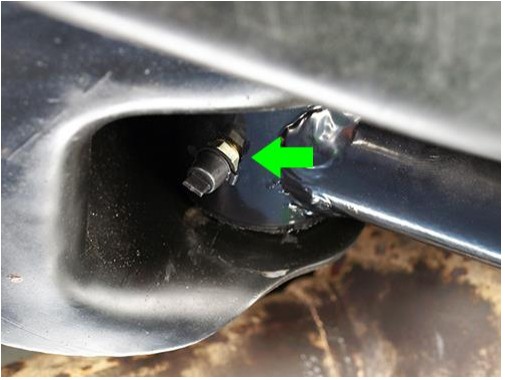
8. Place the tires back on the Jeep® and remove jack stands. With the Jeep® on its own weight. Torque the lug nuts to 95-foot pounds and the upper control arm bolts to 75-foot pounds. You will need to grease the rear Zerk fitting. Remove the Zerk cap off and grease the upper control arm using a grease gun.
After Install
Installation Instructions Written by ExtremeTerrain Customer Brian Voelzke 06/06/2019

