FREE 1 to 3-Day Delivery on Orders $149+ Details

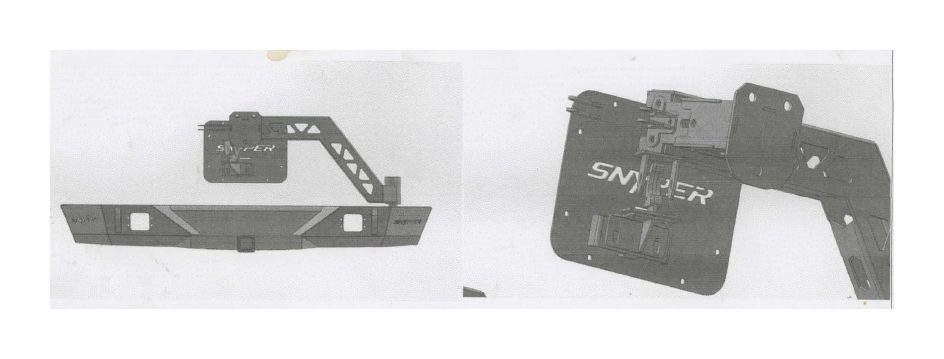
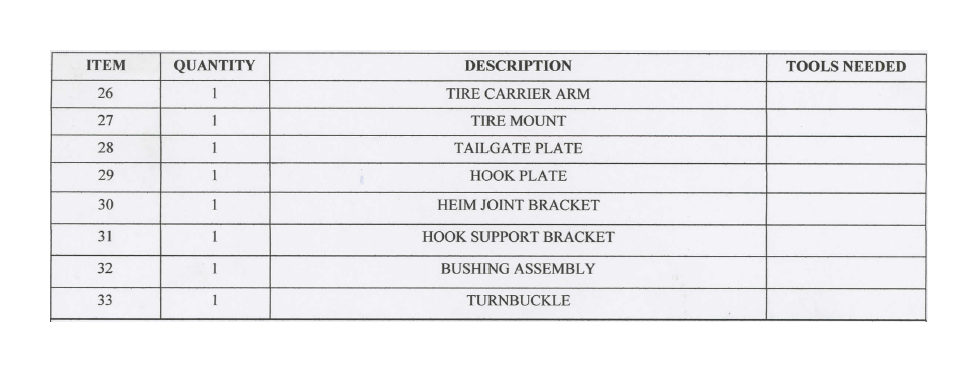
How to Install Snyper Recoil Rear Bumper w/ Tire Carrier on your Wrangler
REMOVAL
1) Remove the bolts from the frame horn and the center of the bumper.
2) Remove the factory bumper from the vehicle.
3) Remove the spare tire.
4) Remove the spare tire carrier from the tailgate.
INSTALLATION
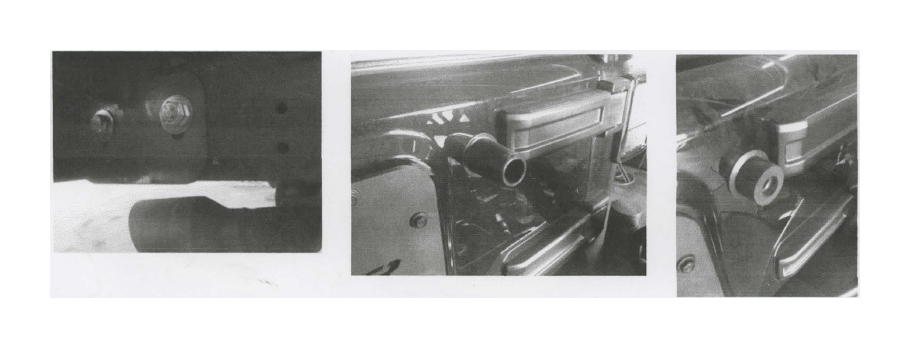
1) Place the nut plates inside the frame and line the nuts up with the holes on the outside of the frame.
2) Two of the four hole in the cross member may need to be drilled out to 1/2" in order to install the 1/2-13 x 4 inch bolts.
3) Align the bumper with the frame and cross member and install the four 1/2-13 x 1 1/2 inch flange bolts in the side of the frame and into the frame plates. Tighten the bolts just enough to hold the bumper in place while adjusting the alignment.
4) Install the four 1/2-13 x 4 inch bolts and nuts in the cross member.
5) The factory rubber tire bumper on the passenger side will either need to have 1 1/2 inch trimmed off of it, or it will need to be removed. This can be accomplished with a razor blade.
7) Using the factory hardware, attach the tailgate plate to the tailgate.
8) Attach the helm-joint bracket to the end of the tire carrier arm using two 1/2-13 x 1 inch bolts with nuts, and one 3/8-14 socket head cap screw and nut.
9) Install tire carrier arm onto the spindle with the bearing, large washer, castle nut, and cotter pin. Rotate arm back and fourth while tightening the castle nut to keep the bearing from binding. Tighten the castle nut until the arm is snug, and then line up the castle nut with the hole in the spindle.
10) Center the helm-joint bracket on the tire carrier arm with the helm joint bracket on the tailgate, and tighten the hardware. With the arm pulled away from the tailgate, fully open the tailgate and check the helm-joint bracket. If it is highly mis-aligned, rotate the bumper to adjust the alignment. Once it is aligned, tighten the frame hardware.
11) Install the jam nuts on the helm-joints and install them in the turnbuckle evenly. There are left and right hand thread helm joints, and the turnbuckle is left and right hand threaded. Install the turnbuckle and helm joints into each of the brackets.
12) Attach the hook support to the slots in the raised plate on the tailgate plate with the gusset facing down using the two 1/2-13 x 1 inch bolts with nuts.
13) Using the two 1/4-20 x 1-1/4" socket head cap screws, attach a half hook on either side of the anti-vibration hook as pictured.
14) Attach the anti-vibration hook to the hook support using two 1/2-13 x 1 inch bolts and nuts.
15) Adjust the hook so that it is centered on the anti-vibration roller. Adjust the turnbuckle so that It pulls the tire carri-er arm securely into the hook.
16) Install the tire mount onto the tire carrier arm and adjust it based on the depth of your spare. It is a good idea to use a straight edge across the back of your spare and measure from the straight edge to the wheel face and use that measurement to set the depth of the tire mount.
17) Slowly open the tailgate to check the operation, and make any adjustments as necessary.
18) Tighten all hardware and install the spindle cap and spare tire.