FREE 1 to 3-Day Delivery on Orders $149+ Details

How to Install Smittybilt XRC Front Fenders - Black Textured on your 2007-2013 Wrangler

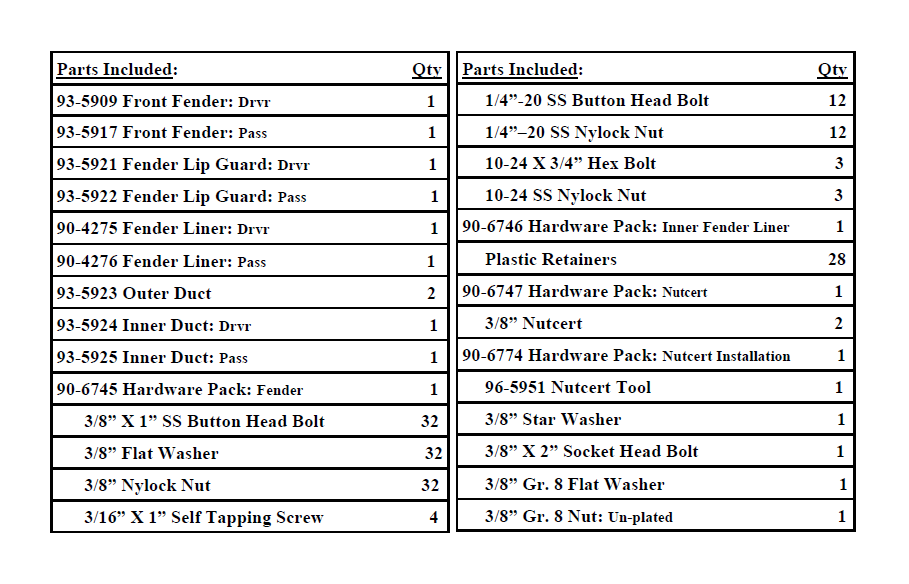
Shop Parts in this Guide
IMPORTANT!: In order to install these fenders the wiper cowl panel and the side cowl panels must be removed from the vehicle.
INSTALLATION:
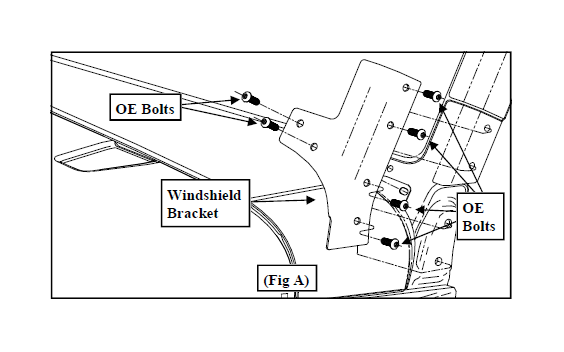
Step 1: Working on one side of the vehicle at a time, unbolt and remove the windshield
brackets from the vehicle. Save hardware for reinstallation. (Fig. A)
Step 2: Remove the windshield wipers from the wiper cowl panel.
Step 3: Remove the wiper cowl panel to expose the fender bolts.
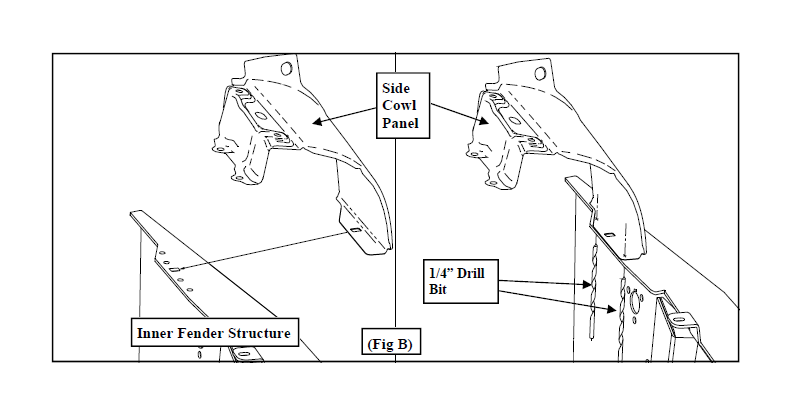
Step 4: Fold back the side cowl panel, as if it were hinged on the spot weld seam, to expose the spot welds. Drill out the spot welds on the side cowl panel to fender seam using a 1/4” drill bit. Remove the side cowl panel from the vehicle. (Fig. B)
NOTE: Once removed, clamp the cowl panel to a work surface and bend the panel
back to it’s original shape. Save for reinstallation.
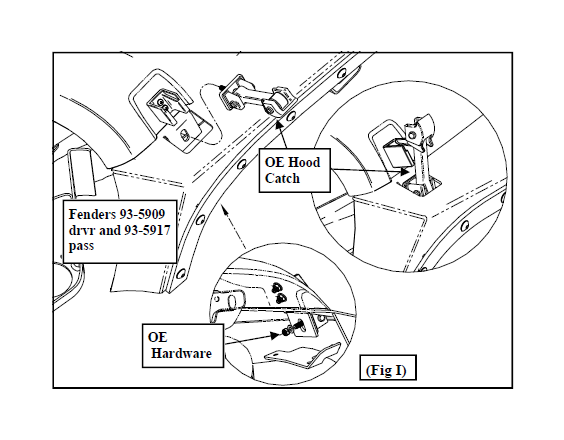
Step 5: Unbolt the OE hood catch from the OE fender. Save catch and hardware for reuse.
NOTE: Steps 6 and 7 are for the passenger side fender Only!:
Step 6: Unplug the antenna wiring. Loosen and remove the antenna mast. (Fig. I)
Step 7: Pry the plastic cap off the base and unfasten the antenna base from the fender. Save for reinstallation. (Fig. I)
Step 8: Remove the OE inner fender liners from the vehicle. Save The OE Hardware for
reinstallation.
Step 9: Unbolt the OE fender bolts and remove the fender from the vehicle. Save the hardware for reinstallation.
NOTE: The fenders are spot glued and will require some persistence to remove them.
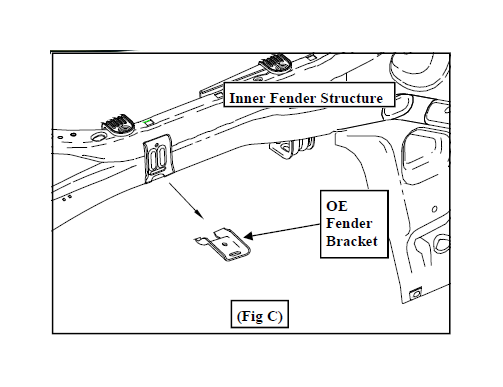
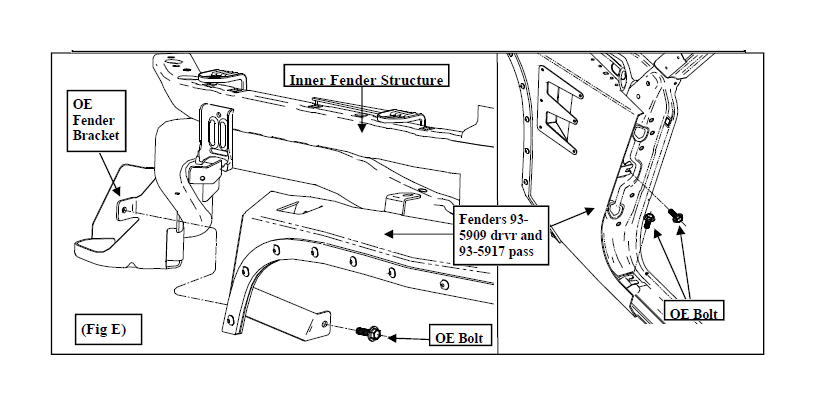
Step 10: Cut the OE fender bracket off the inner fender structure. It will no longer be
needed. (Fig. C)
Step 11: Test fit the new fenders (93-5909 drvr and 93-5917 pass) by hanging them in
place and installing a few OE bolts.
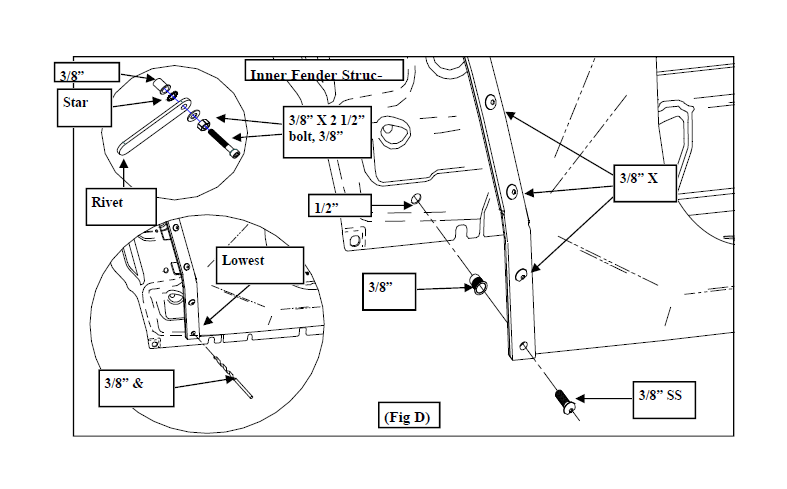
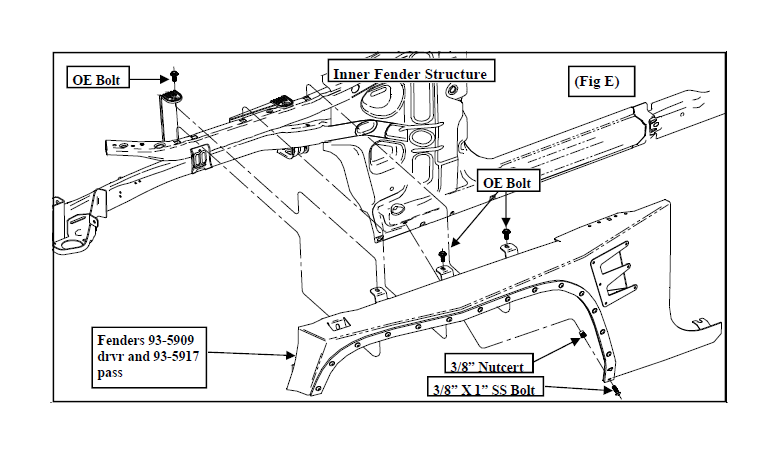
Step 12: With the fender in it’s appropriate position, Use the lowest 3/8” wheel well hole as a guide and drill a hole through the inner fender structure. (Fig. D)
Step 13: Remove the fender from the vehicle.
Step 14: Drill out the previously drilled hole in the inner fender structure from 3/8” to 1/2.” Install the 3/8” nutcert into the 1/2” hole. (Fig. D)
NOTE: If you do not have a professional nutcert installation tool, use the 2 1/2” X 3/8” socket head bolt, 3/8” nut and washer. Install the nutcert into the 1/2” hole on the vehicle. Thread the nut up as far on the 3/8” bolt as it will go and then follow that with the washer. Thread the bolt, nut, washer, nutcert tool (96-5951) and star washer assembly into the nutcert. (Fig. D) While holding the 3/8” bolt with an Allen wrench, tighten the nut and washer down against the nutcert. Use the nutcert tool and star washer to keep the nutcert body from spinning while tightening the 3/8” bolt. Once the nutcert is properly installed into the vehicle remove the 3/8” bolt, nut, washer, nutcert tool (96-5951) and star washer .
Step 15: Reinstall the fenders (93-5909 drvr and 93-5917 pass) and secure using the previously removed OE hardware. (Fig. E)
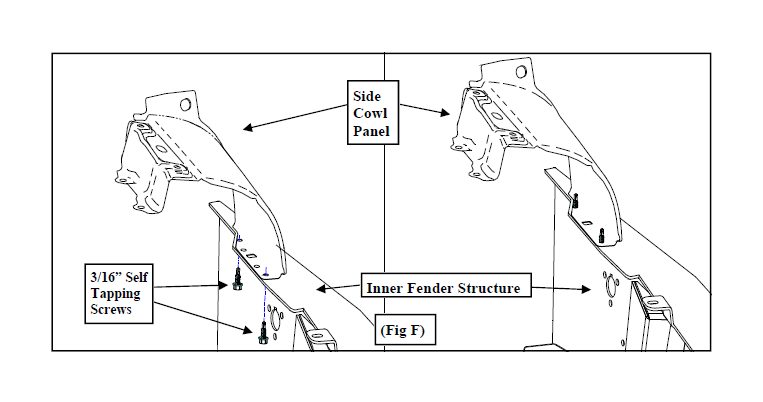
Step 16: Reinstall the previously removed side cowl panel to the inner fender structure using the supplied 3/16” X 1” self tapping screws. (Fig. F)
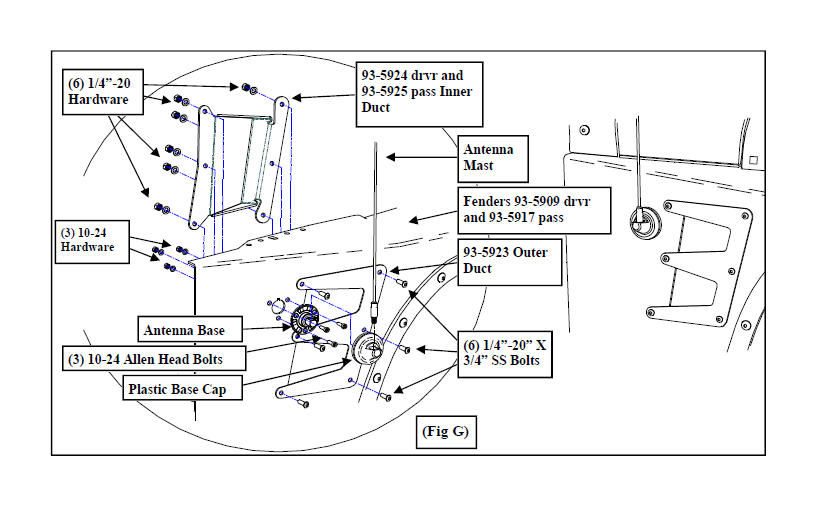
Step 17: Install the outer duct (93-5923) and the inner duct (93-5924 drvr and 93-5925
pass) to the fender using the 1/4”-20 X 3/4” stainless button head bolts. (Fig. G)
Step 18: Install the fender lip guard (93-5921 drvr and 93-5922 pass) to the outside of the wheel well using the supplied 3/8” X 1” stainless button head bolts. (Fig. D)
NOTE: The bottom fender lip guard bolt will align and install into the previously installed
nutcert.
NOTE: Step 19 is for the passenger side fender Only!:
Step 19: Bolt the antenna base to the passenger side fender using the supplied (3) 10-24 X 1” socket head bolts. Reinstall the plastic base cap, reattach the antenna mast and reconnect the antenna wiring. (Fig. G)
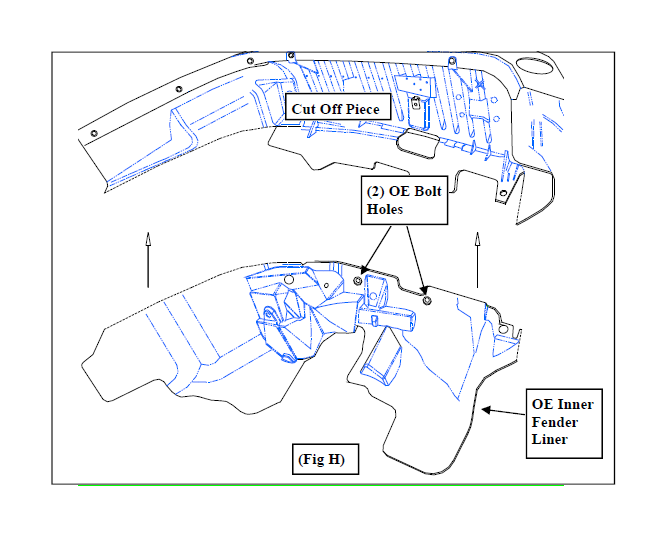
Step 20: The factory inner fender liners will need to be trimmed in order for the Smittybilt inner fender liners (90-4275 drvr and 90-4276 pass) to provide complete coverage. Trim the inner fender liner so it has approximately 1” of material sticking out past the front inner fender structure. This is only a starting point and further trimming may be necessary for a perfect fit. (Fig. H)
Step 21: Align the (2) large bolt holes in the OE inner fender liner and the supplied inner fender liner (90-4275 drvr and 90-4276 pass) and install into the inner fender structure using the (2) previously removed OE bolts. Install the plastic retainers into the outer edge of the inner fender liner starting from the middle of the fender working outward. (Fig. H)
Step 22: While holding the inner fender liner into place install the rest of the plastic retainers.
NOTE: The bottom portion of the inner fender liner will be sandwiched between the
body and fender.
Step 23: Reinstall the hood catch to the new fenders using the previously removed OE hardware. (Fig. I)
Step 24: Reinstall the windshield braces to the vehicle using the previously removed OE hardware. (Fig. A)
Step 25: Repeat the previous steps on the remaining side of the vehicle.
Step 26: reinstall the factory wiper cowl panel using the previously removed OE hardware.
Step 27: Reinstall the windshield wipers.
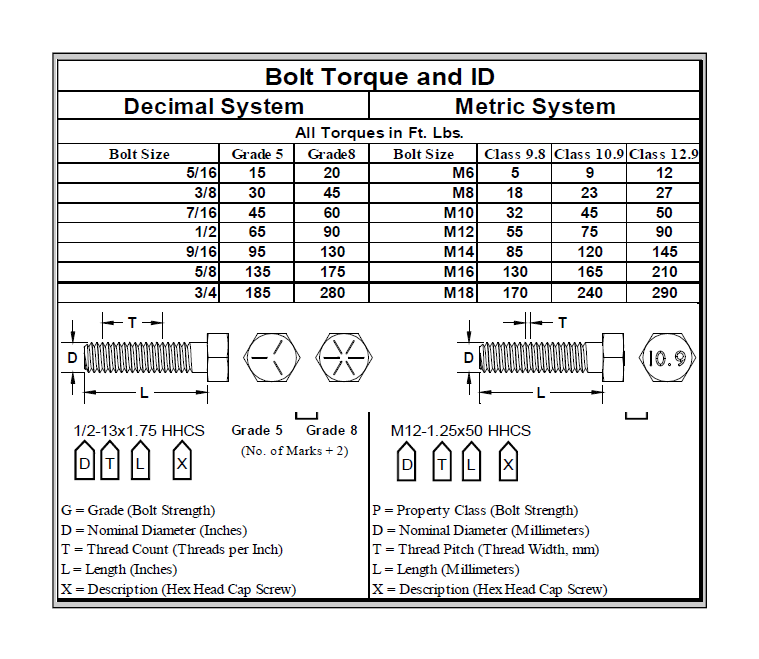
Step 28: Torque all OE hardware according to manufacturers specifications or the supplied hardware according to the torque chart below. Installation is now complete.