 FREE 1 to 3-Day Delivery on Orders $149+ Details

How to Install Smittybilt Sure Steps - 3 In. Side Bar - Textured Black on your 2007-2013 Wrangler

Shop Parts in this Guide
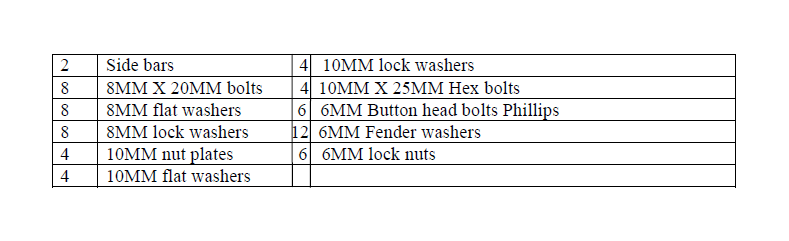
PARTS LIST
PROCEDURE:
1. REMOVE CONTENTS FROM BOX. VERIFY ALL PARTS ARE PRESENT. READ
INSTRUCTIONS CAREFULLY.
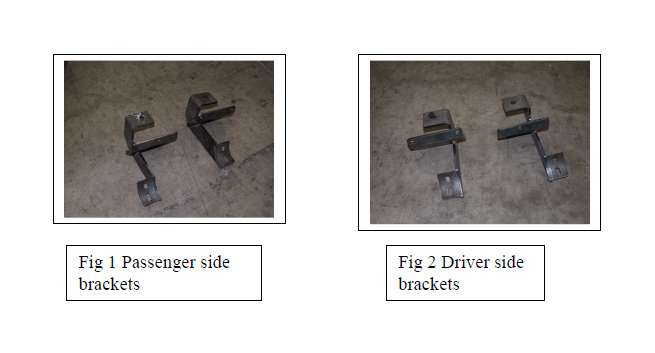
2. Locate, remove and set aside the four support brackets. Each is marked to identify their relative location on the car. (Fig 1 and 2)
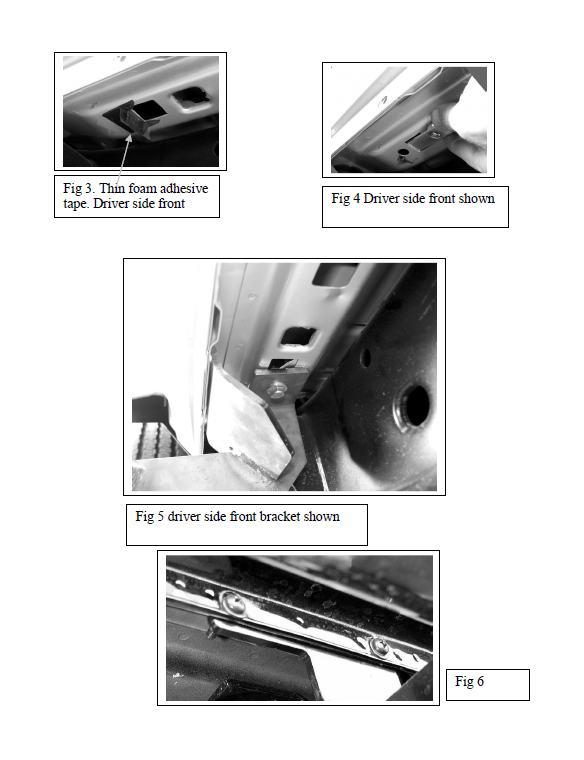
3. Locate and peel back the thin foam adhesive tape glued over the openings in the sub-frame openings dedicated by the factory for the side bar installation. (Fig 3)
4. Install the nut plate with the nut facing upwards. (Fig 4)
5. Attach the bracket with one of the 10MM bolts furnished in the hardware kit and leave loose to allow for adjustment. (Fig 5)
6. Attach the second bracket with one of the 10MM bolts furnished in the hardware kit and leave loose to allow for adjustment.
7. Install the Phillips head screws, washers and locking nuts into the sides of the brackets and leave loose. Note that the front brackets have 2 holes dedicated to these bolts, and the rear ones have only one. (Fig 6)
8. Position the appropriate bar onto the two brackets and install the four 8MM bolts, flat washers and lock washers. Adjust the bars before tightening.
9. Repeat the process on the other side of the car and tighten all the fasteners.
Cleaning and Maintenance
To protect your investment, wax this product after installing. Regular waxing is recommended to add a protective layer over the finish. Do not use any type of polish or wax that may contain abrasives that could damage the finish.
For stainless steel: Aluminum polish may be used to polish small scratches and scuffs on the finish. Mild soap, window or glass cleaner may be used also.
For gloss black finishes: Mild soap, window and glass cleaner may be used.
