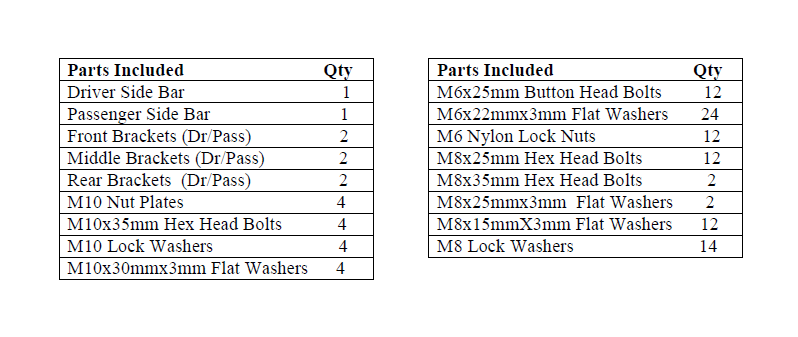
 FREE 1 to 3-Day Delivery on Orders $149+ Details

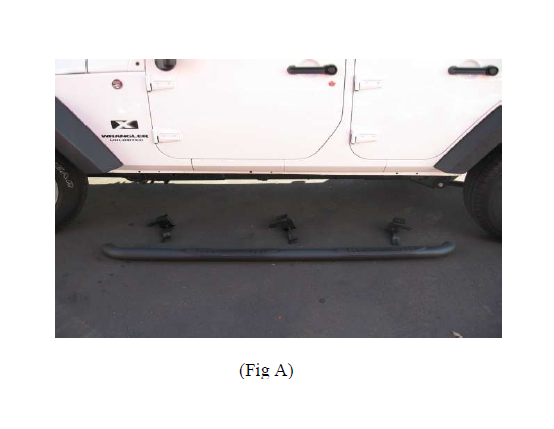
How to Install Smittybilt Sure Step 3 In. Side Bars on your 2007-2013 Wrangler

Shop Parts in this Guide
STEP 1: Remove the factory steps or rocker guards if equipped with. Locate and set aside the front, center and rear brackets for the driver side.. (FR-L, CTR-L, RR-L) Identify the driver and passenger side bars. The long end of the bar goes towards the front of the vehicle.
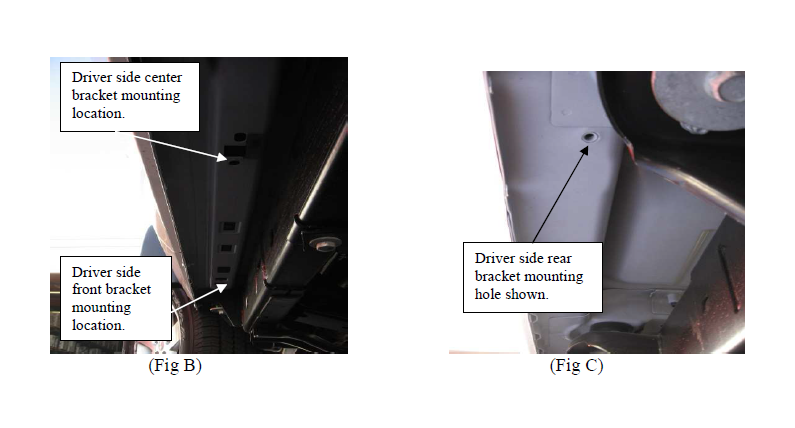
Step 2: Identify mounting points for each bracket. (Fig B, C)
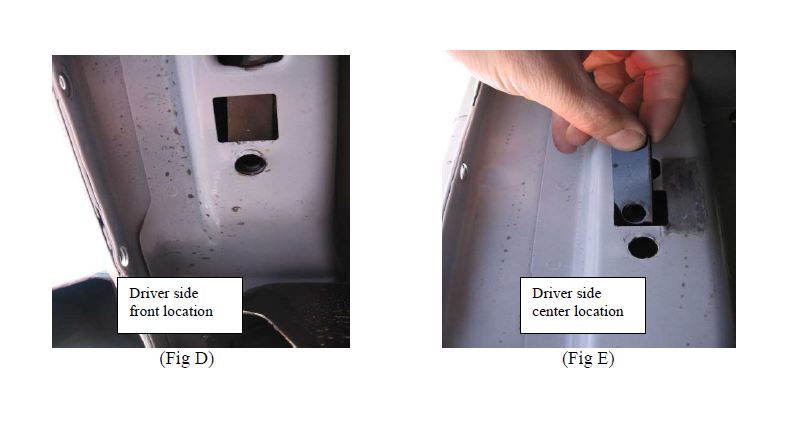
Step 3: Insert nut plates into the body for the front and center brackets. (Fig D, E)
Step 4: Attach the front and center brackets using the supplied 10mm hardware. Use one bolt, one flat washer and one lock washer for each bracket. (Fig F) Do not tighten completely at this time.
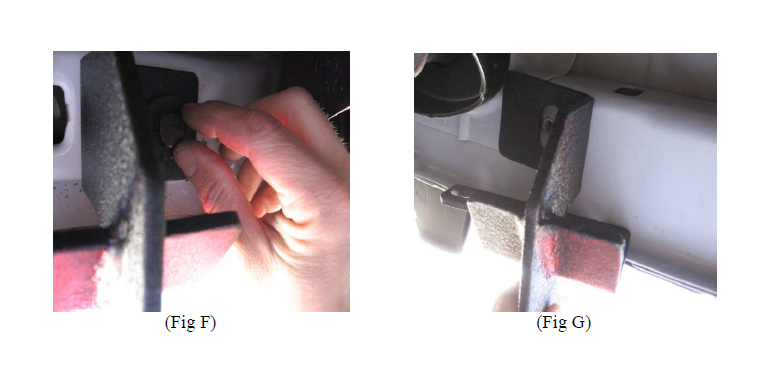
Step 5: Line the rear bracket up with the hole in the body and attach using the supplied 8x35mm hardware. (Fig G)
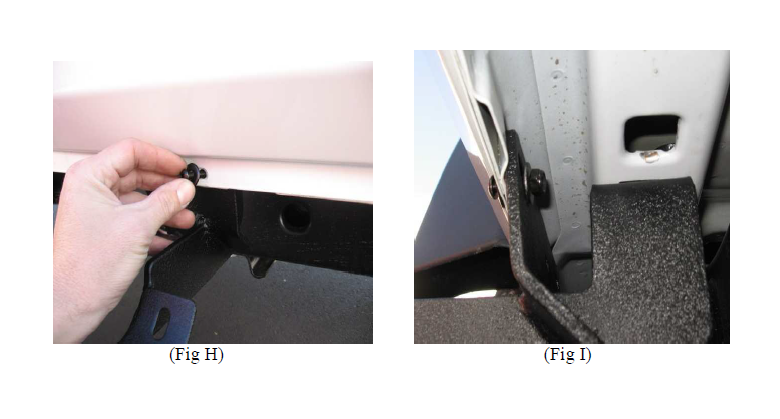
Step 6: Attach the front of the brackets to the existing holes in the pinch-weld area on the body by using the supplied 6 mm hardware. (Fig H, I ) Do not tighten completely at this time.
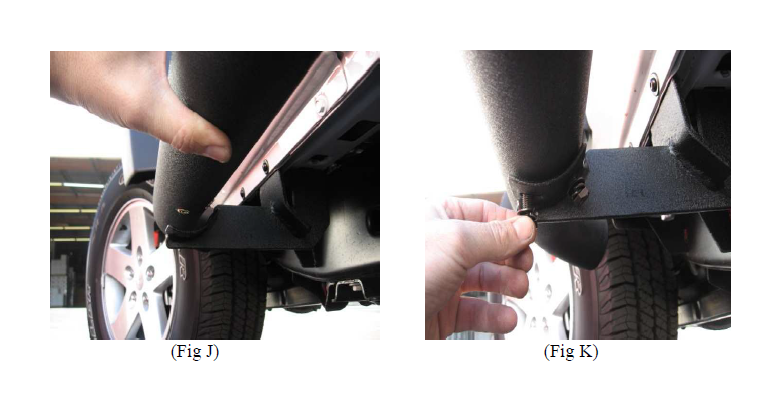
Step 7: Position the bar on the brackets. Line up the threaded inserts in the bar with the holes in the brackets. Attach the bar to the brackets using the supplied 8 x 25mm hardware. (Fig J,K) Do not tighten completely at this time.
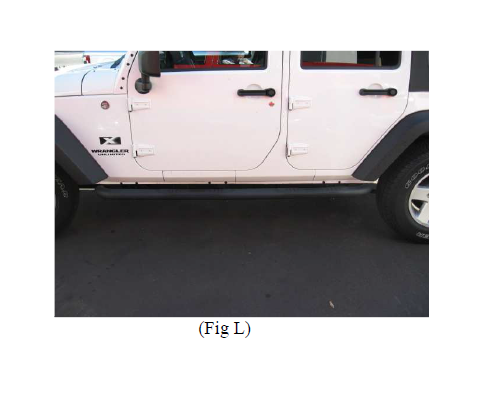
Step 8: Once all the bolts are in place in the bar you may go back and tighten all of the bracket hardware. Be sure to tighten both the top and side bolts. Once all of the bracket hardware is tight make sure the bar is level and then tighten the bolts holding the bar to the brackets. (Fig L)
Step 9: Installation is now complete. Follow steps 1 thru 8 for the other side of the vehicle.
