FREE 1 to 3-Day Delivery on Orders $149+ Details

How to Install Smittybilt SRC Oversize Tire Carrier on your 2007-2013 Wrangler

Shop Parts in this Guide
Step 1: Remove your spare tire. Now take off your 3rd brake light from its housing by removing the four screws on the back of it. Follow the wiring and disconnect at plug. Set the light and screws to the side for use later.
Step 2: Remove the factory tire carrier by removing the 8 bolts that secure it to the tail gate. Set bolts to the side for use later.
Step 3: Place the tire that you are going to be using flat on the ground, with the outside of the tire facing down. Set your new tire carrier base on tire with the tube portion going through the center of the wheel. While pushing the tire carrier down (making it even the tire) lay the brake light bracket on the tire carrier between the two flanges. Put the light bracket so the top of it where the light lens will be placed is just above the tire. Align the bracket holes to the best hole locations on the tire carrier. Secure tightly using the two supplied pan head screws, lock washers and nuts. (Fig A)
Step 4: Measure the distance form the bottom set of holes on the tailgate where the factory tire carrier was mounted on; to a point on your bumper that will be below the spare tire. Set your new tire carrier back on your spare tire like you had done in Step 3.
Measure from the bottom of the tire upwards the same distance that you just measured. Find the holes on the tire carrier that are the lowest close to that measurement. (Commonly 31” and smaller tires will use the top set of holes, 35” tires will use the middle set of holes and 37” tires will use the bottom set of holes) Now mount your new tire carrier on the tailgate using 4 of the factory bolts you previously removed in the inner set of holes. (Fig B)
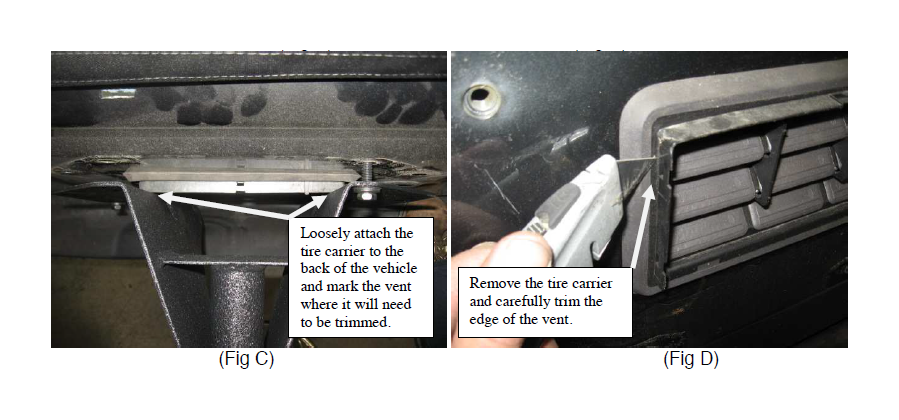
Note: If your vehicle is equipped with a 9” x 5” exhaust vent minor trimming will be necessary. Loosely attach the tire carrier to the back of the jeep and mark where the vent will need to be trimmed. (Fig C) Remove tire carrier and then proceed to carefully trim the edge of the vent. This can easily be done with a sharp utility knife. (Fig D)

Step 5: Now plug the light wire back into the brake light. Attach the brake light to the brake light bracket with the two supplied tapping screws in the top two hole locations and use two of the original screws you removed in step 1 for the bottom tow hole
locations. (Fig E, F)

Step 6: Mount the tire stop bars on the outside holes on the tire carrier. The long end of the bars go toward the top. Mount each bar using the included 8x70mm bolts, flat washers and spacers and secure tightly. (Use two spacers for each bolt, they go between the tire stop bar and the tire carrier.) Fig G, H
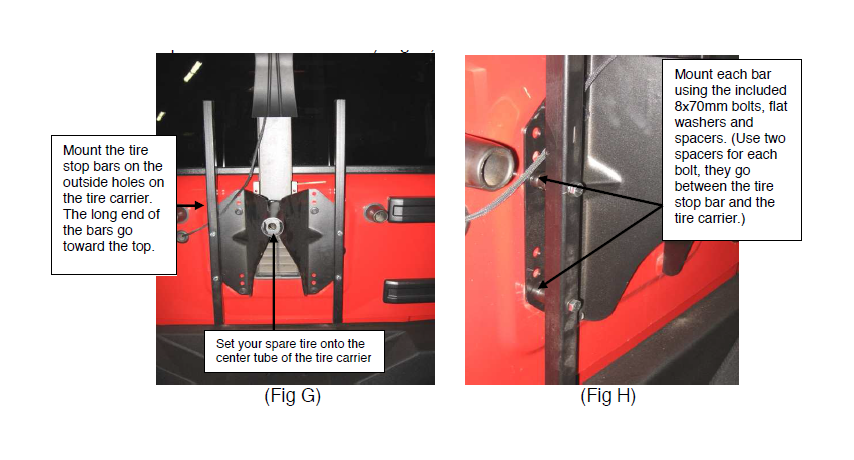
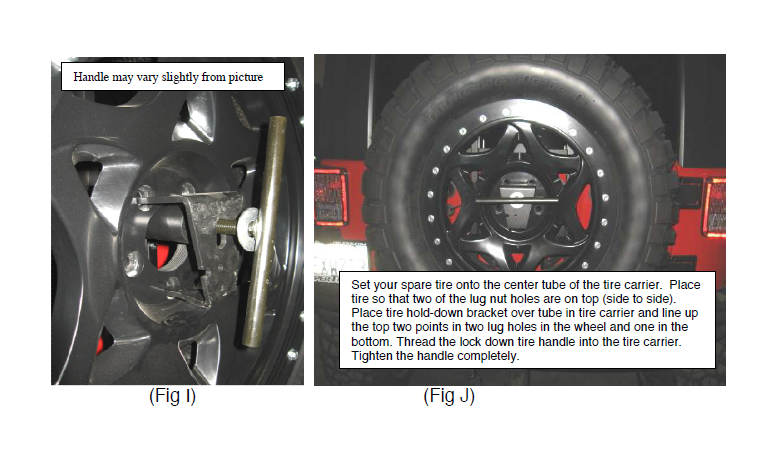
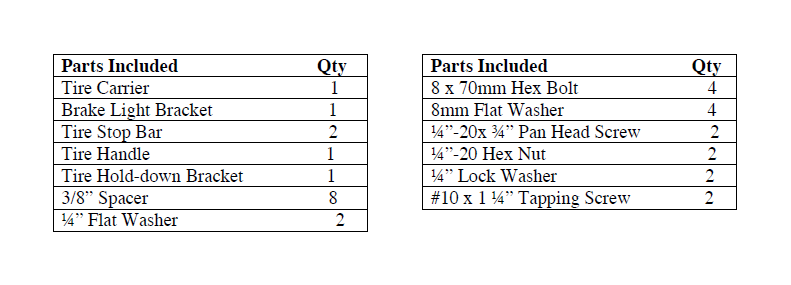
Step 7: Set your spare tire onto the center tube of the tire carrier. (Fig G) Place tire so that two of the lug nut holes are on top (side to side). Place tire hold-down bracket over
tube in tire carrier and line up the top two points in two lug holes in the wheel and one in the bottom. Thread the lock down tire handle into the tire carrier. Tighten the handle completely. The tire should be snug against the tire stop bars. (Fig I, J) Installation is now complete. Make sure all hardware is tight and the brake light is operational.
Step 8: There is a slot and a hole located on the hold down bracket. This is in order to place a pad-lock on carrier. The body/bottom of the lock would be on the outside. Make sure its long enough in order to prevent the tire carrier handle from being turned.