Last Day! Guaranteed Free Delivery 12/24. Order by 3pm EST available on most items - Details

How to Install a Smittybilt SRC Classic Front Bumper with Winch Plate, Textured Black on your 07-18 Jeep Wrangler JK; 2018 Jeep Wrangler JL

Shop Parts in this Guide

Step 1: Remove your front factory bumper. On certain bumpers you may need to remove your factory front plastic frame cover. (Before taking bumper off, make sure you have disconnected the fog lights)
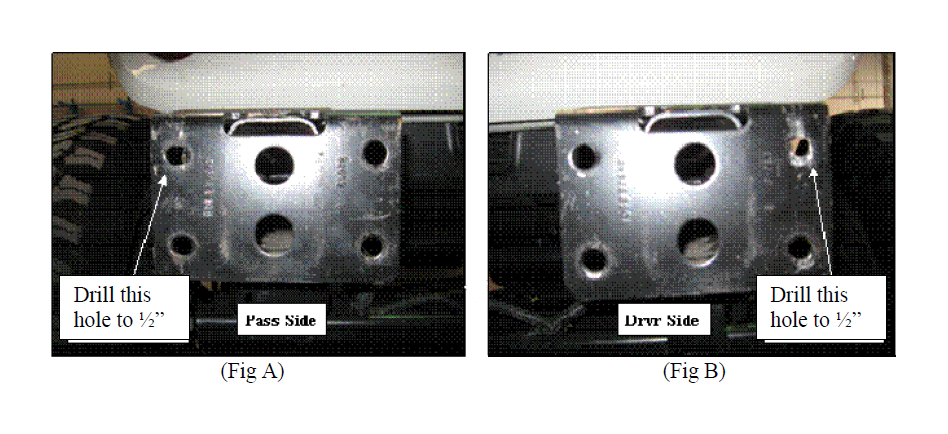
Step 2: Drill out the top outer hole in the front frame mounting plates to ½’ (Fig A, B)

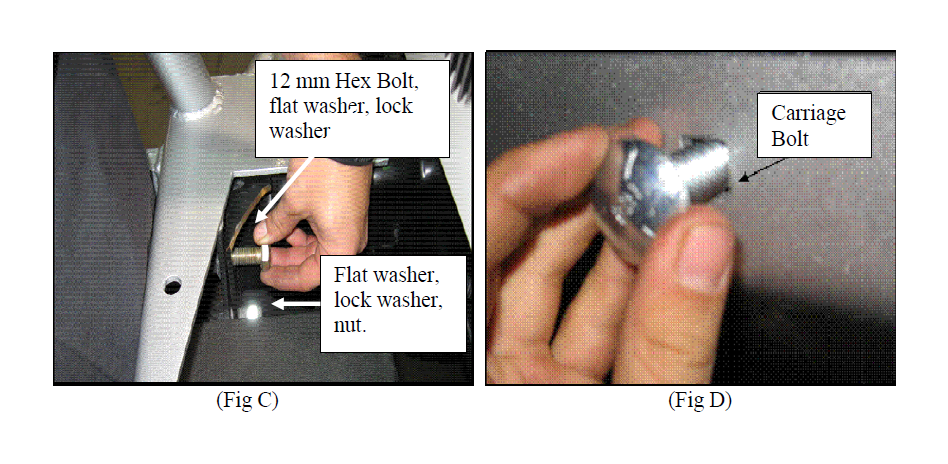
Step 3: Position the bumper up on the front of your jeep by aligning the welded studs on the bumper into the holes on the front frame mounting plates. Secure studs using 1 ea flat washer, lock washer and nut. Insert 12 x 35 mm hex bolt with 1 ea flat washer and lock washer in the reaming two holes. (Fig B) Level the bumper and then proceed to tighten all bolts to 60 ft.lbs

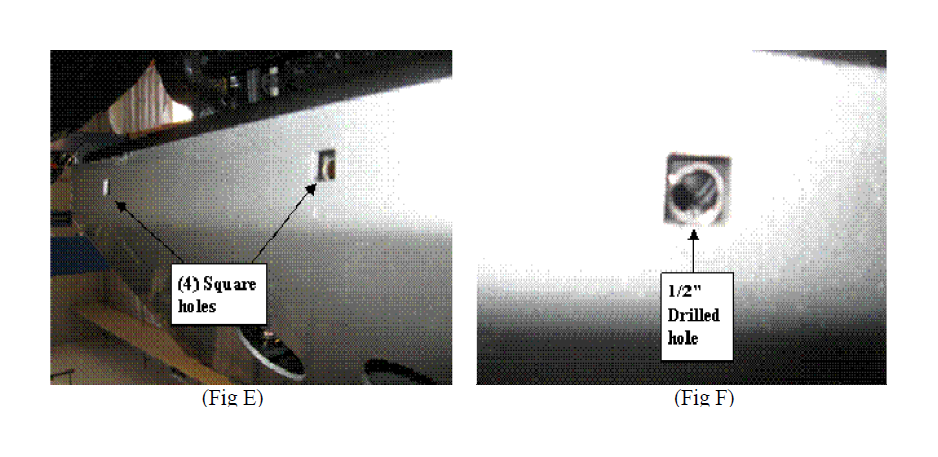
Step 4: Using the four square holes on the bottom of the front bumper as a guide, center punch and drill through the factory cross member using a ½” drill bit. (Fig E, F) Make sure there are no wires or other obstructions in the way before drilling.

Step 5: Attach the bottom of the bumper using 4 ea carriage bolt, flat washer, lock washer and nut. (Fig D) Torque bolts to 45 ft.lbs. Due to the variances in manufacturing there may be a small gap between the bottom of the front bumper and frame cross member.
Step 6: Installation is no complete.
CARE AND MAINTENANCE
To protect your investment it is recommended to regularly wash and wax this part. Do not use any type of cleaners that contain abrasives that may damage the finish of your part.
