 FREE 1 to 3-Day Delivery on Orders $149+ Details

How to Install Smittybilt Security Floor Console, Black Denim on your 1987-1995 Wrangler

Shop Parts in this Guide
IMPORTANT NOTICE:
This Security Floor Console installation requires drilling. Carefully read the instructions before attempting to install this product. Smittybilt is in no way responsible for any damage to the vehicle or personal injury that may occur during the installation or use of this product.
INCLUDED COMPONENTS
1 – Security Floor Console
3 – Large Bolts (3/8”-16 X 7”)
2 – Small Bolts (3/8-16 X ¾”)
5 – Nuts
5 – Lock Washers
1 – Mounting Bracket
2 - Keys
INSTALLATION INSTRUCTIONS
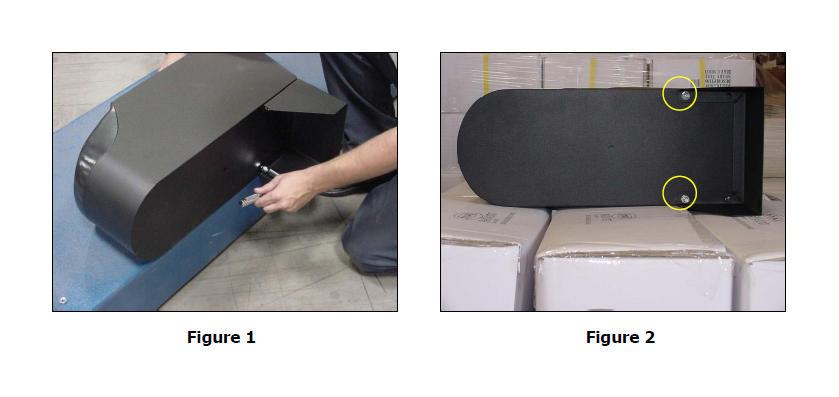
1) Attach the Mounting Bracket to the two center holes on the bottom of the console by using the 2-Small Bolts, 2- Lock Washers and 2-Nuts included (Figure 1 & 2).
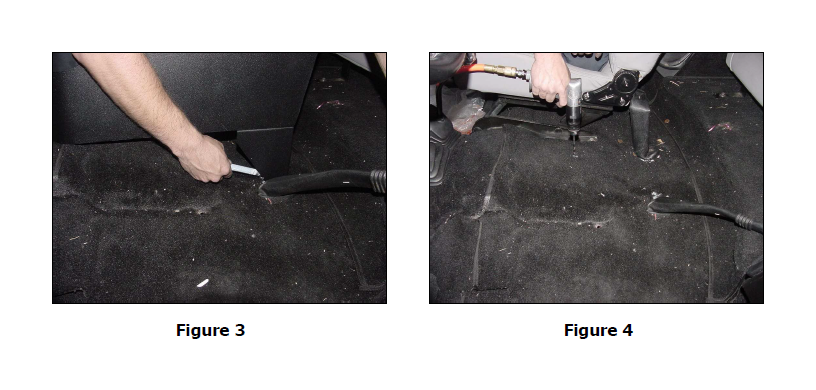
2) Position the Security Floor Console between the seats and mark the floor directly under the mounting holes in the bottom of the console (Figure 3). NOTE: Position the Security Floor Console directly behind the shift boot, check to make sure that the shift lever will not interfere with the cup holder.
3) Remove the Security Floor Console, cut holes in the carpet where the marks are and drill a 3/8” hole in each marked spot (Figure 4). WARNING! Make sure that there is nothing under the vehicle that will be damaged by the drill bit when drilling.
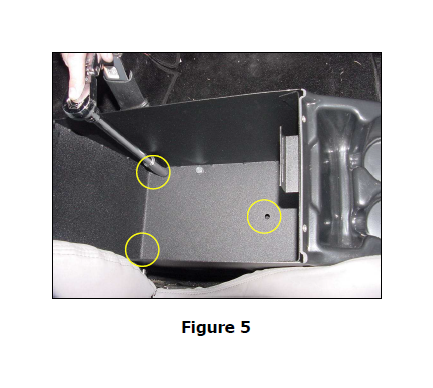
4) Re-position the Security Floor Console between the seats and fasten down the rear and front of the console by using 3-Long Bolts, 3-Lock Washers and 3-Nuts included (Figure 5). NOTE: Do not over tighten bolts, may damage the floor of the vehicle.
To lock and unlock Security Floor Console; insert key, push down and turn.

