FREE 1 to 3-Day Delivery on Orders $149+ Details

How to Install Smittybilt Front XRC Body Armor Skins - Textured Matte Black on your Wrangler

Shop Parts in this Guide
IMPORTANT!: In order to install this front armor kit you will have to drill holes in the body.
Product cleaning and maintenance instructions
Stainless Steel Finish – Aluminum polish may be used to polish small scratches and scuffs on the finish. Mild soap, window or glass cleaner may be used to clean the finish. Dual state powder coat finish – Mild soap, window or glass cleaner may be used to clean the finish. In order to protect the finish, you may wax your product on a regular basis with pure carnauba automotive wax. Do not use any types of soap, polish or was that contains abrasive that could damage the finish. Textured coated finishes should be cleaned with a mild soap on a damp sponge. Do not apply polish or was that requires to be removed by means of buffing. This type of wax is commonly used at car wash facilities. Chrome Finish – Mild soap, window or glass cleaner may be used to clean the finish. In order to protect the finish you should wax your product on a regular basis with pure carnauba automotive wax. Do not use any types of soap, polish or was that contains abrasive that could damage the finish.
INSTALLATION:
Step 1: Remove any previously installed armor or front fender accessories.
Step 2: Thoroughly clean and dry the front fenders using compressed air or clean cloths.
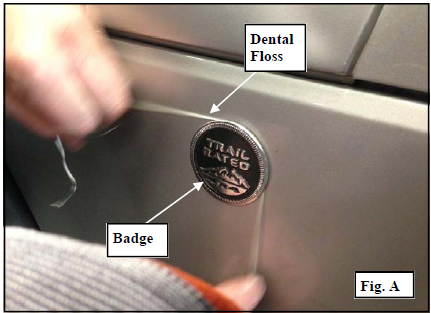
Step 3: Working the drivers side of the vehicle, saw through the adhesive backing of the “Trail Rated” fender badge using dental floss. Remove any leftover adhesive from the fender using adhesive remover. (Fig. A)
NOTE: Take special care not to damage the paint.
NOTE: Steps 4 and 5 are for the passenger side fender Only!:
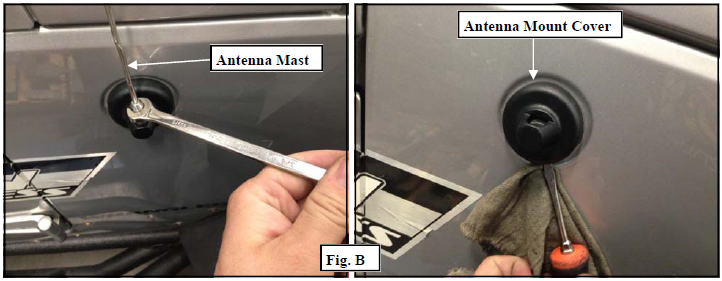
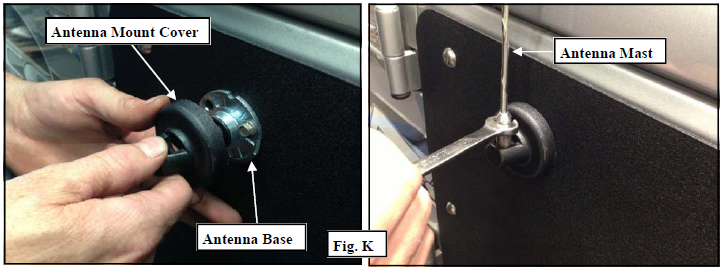
Step 4: Remove the antenna mast and antenna mount cover. (Fig. B)
NOTE: Be careful not to damage the paint.
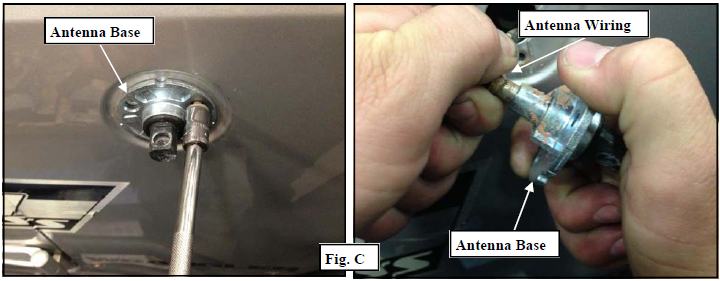
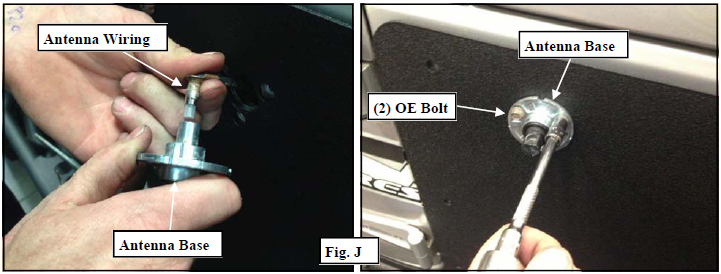
Step 5: Unbolt the antenna base from passenger side fender. Save the OE hardware for reinstallation. Unplug the antenna wiring. (Fig. C)
IMPORTANT!: DO NOT let the wiring fall back inside the fender. You may wish to tie or tape it up or just bend the cable so it is unlikely to fall back inside the fender.
Step 6: Apply painters masking tape to outer edges of the front fender, door and any other area that may be contacted during armor installation. This will prevent any possible damage to the paint.
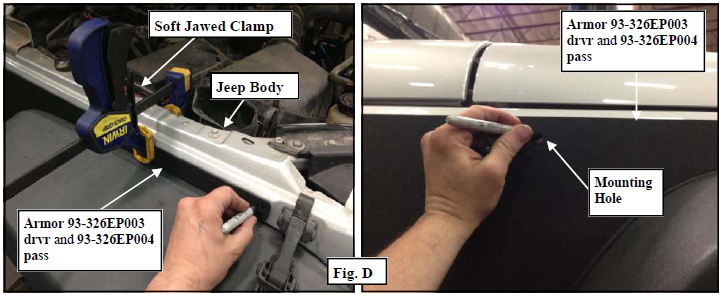
Step 7: Carefully raise the front fender armor (93-326EP003 drvr and 93-326EP004 pass) into position on the front fender. Once in place temporarily clamp it to the fender using soft jawed clamps. Mark the location of the armor mounting holes using a permanent marker. (Fig. D)
NOTE: Applying painters masking tape to the marked drill locations may help to protect the paint.
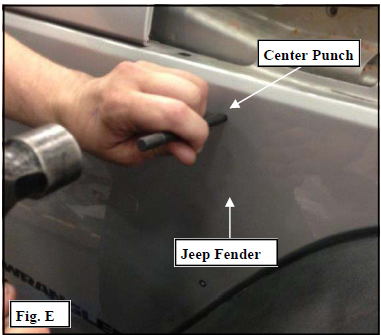
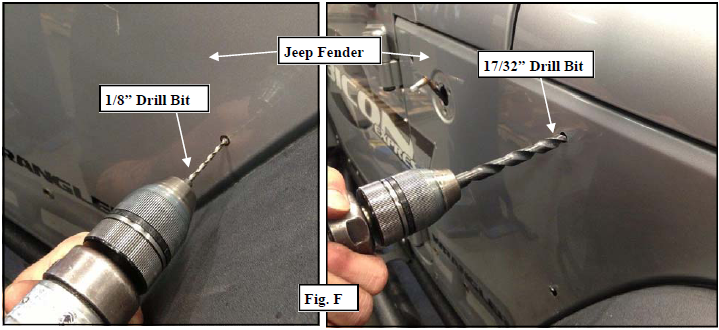
Step 8: Center punch the previously applied drill marks and drill each hole to 17/32”. (Fig. E)
Step 9: Unclamp and remove the armor (93-326EP003 drvr and 93-326EP004 pass) from the front fender.
Step 10: It is recommended starting out with an 1/8” bit working up to 17/32”. This method will help reduce the chances of paint chipping. A Unibit or similar tool is recommended. (Fig. F)
NOTE: Areas around the door jamb will need to penetrate both layers of sheet metal when drilling.
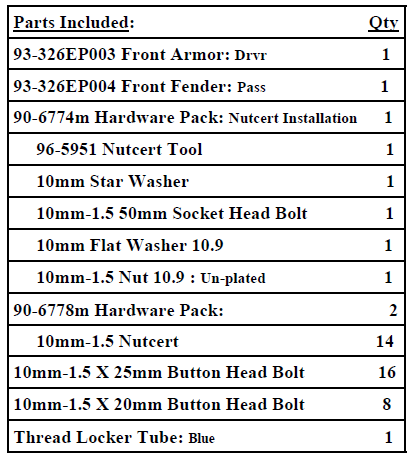
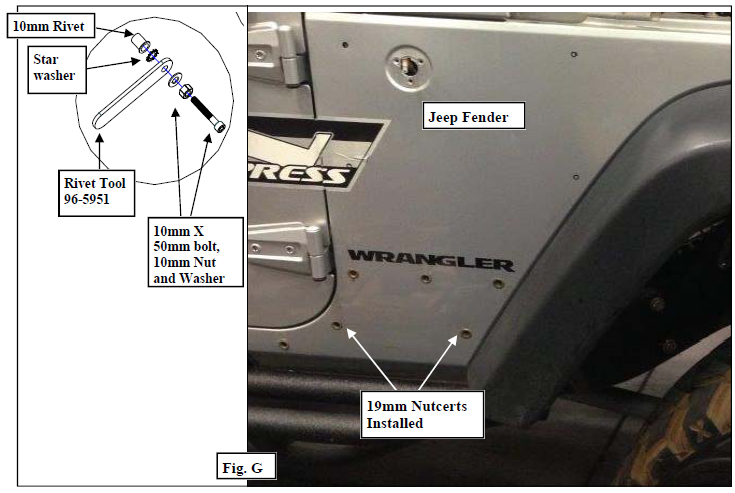
Step 11: Install the 10mm nutcerts into the previously drilled 17/32” holes. (Fig. G)
NOTE: If you do not have a professional nutcert installation tool, use the 10mm X 50mm socket head bolt, 10mm nut and washer. Install the nutcert into the 1/2” hole on the vehicle. Thread the nut up as far on the 10mm bolt as it will go and then follow that with the washer. Thread the bolt, nut, washer, nutcert tool (96-5951) and star washer assembly into the nutcert. (Fig. G) While holding the 10mm bolt with an Allen wrench, tighten the nut and washer down against the nutcert. Use the nutcert tool and star washer to keep the nutcert body from spinning while tightening the 10mm bolt. Once the nutcert is properly installed into the vehicle remove the 10mm bolt, nut, washer, nutcert tool (96- 5951) and star washer.
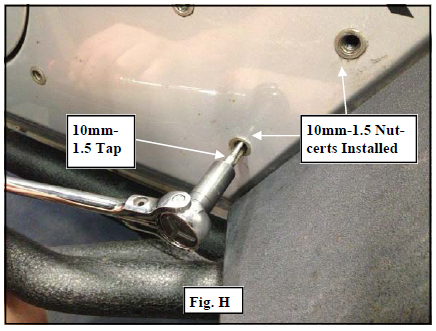
Step 12: After installing the nutcerts, run a 10mm-1.5 tap through the threads. Installation can often warp the nutcert threads. (Fig. H)
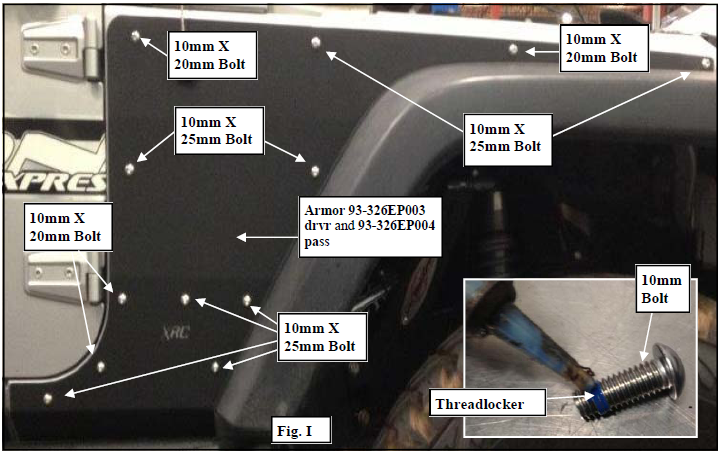
Step 13: Reinstall the armor (93-326EP003 drvr and 93-326EP004 pass) and secure using the supplied (8 per side) 10mm X 25mm bolts and (4 per side) 10mm X 20mm bolts. Be sure to apply threadlocker to the 10mm bolts. (Fig. I)
NOTE: The nutcerts are prone to spinning if not installed properly or cross threaded. Be sure to start the bolts by hand in the nutcerts.
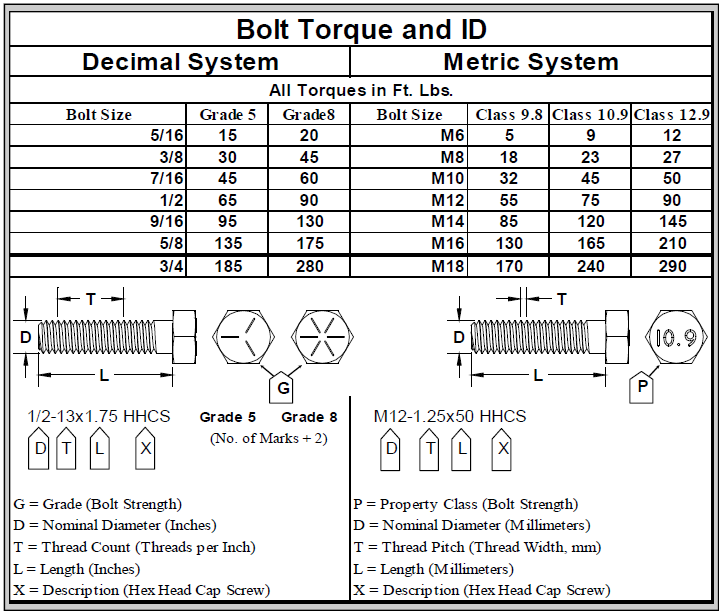
Step 14: Torque all OE hardware according to manufacturers specifications or the supplied hardware according to the torque chart below.
Step 15: Repeat steps 3 through 14 on the passenger side of the vehicle.
NOTE: Steps 16 and 17 are for the passenger side fender Only!:
Step 16: Reconnect the antenna wiring and bolt the antenna base to the passenger side armor using the previously removed OE hardware. Reinstall the plastic base cap, reattach the antenna mast. (Fig. J)
Step 17: Reinstall the plastic base cap, reattach the antenna mast. (Fig. K)
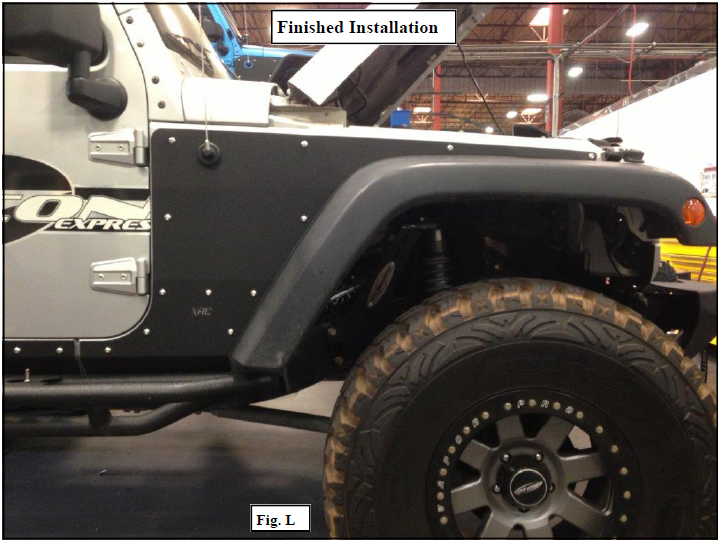
Step 18: Installation is now complete. (Fig. L)