FREE 1 to 3-Day Delivery on Orders $149+ Details

How to Install SkyJacker Tailgate Saver Spare Tire Support Kit (07-17 Wrangler JK) on your Jeep Wrangler
Installation Time
1 hours
Tools Required
- Safety Glasses
- Metric & Standard Sockets / Wrenches
- 7/32" Hex Key Socket / Wrench
- Torque Wrench

Shop Parts in this Guide
Before beginning the installation, thoroughly & completely read these instructions & the enclosed driver’s WARNING NOTICE. Affix the WARNING decal in the passenger compartment in clear view of all occupants. Please refer to the Parts List to insure that all parts & hardware are received prior to the disassembly of the vehicle. If any parts are found to be missing, contact SKYJACKER® Customer Service at 318-388-0816 to obtain the needed items. If you have any questions or reservations about installing this product, contact SKYJACKER® Technical Assistance at 318-388- 0816.
Important Notes:
• This product is designed to be used with the OEM tailgate & an aftermarket offset spare tire adapter / spacer.
• This product is designed to be used with 33" - 37" diameter tires & wheels with 4" - 5.5" backspacing.
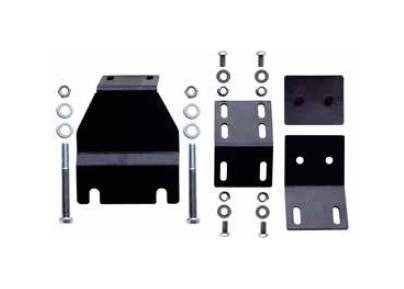
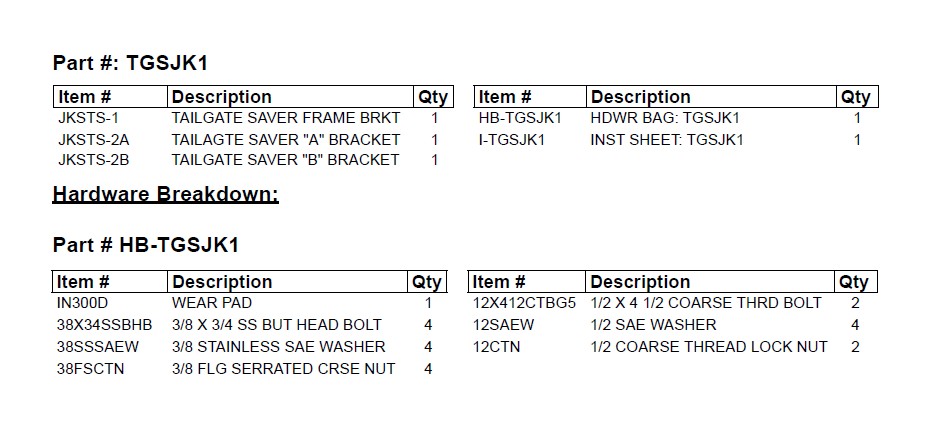
Component Box Breakdown:
Installation:
1. With the vehicle on flat level ground, set the emergency brake, & block the rear tires / wheels.
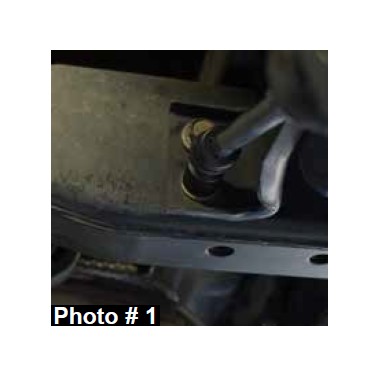
2. Disconnect the OEM rear bumper from the frame (two bolts on both sides of the frame & the two tabs on the back of the rear bumper connecting it to the rear cross member) using a 16mm socket / wrench. (See Photo # 1) Note: Do not remove the OEM rear bumper, but allow it to carefully rest in place.
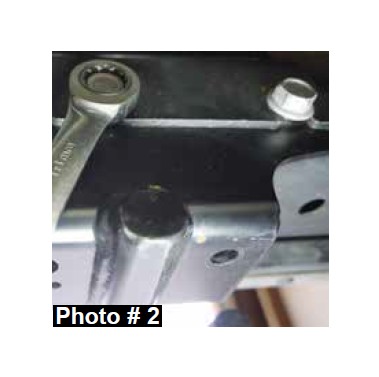
3. If equipped with an OEM center receiver hitch or tow hook, loosen the OEM bolts about a 1/2" using a 18mm socket / wrench. (See Photo # 2)
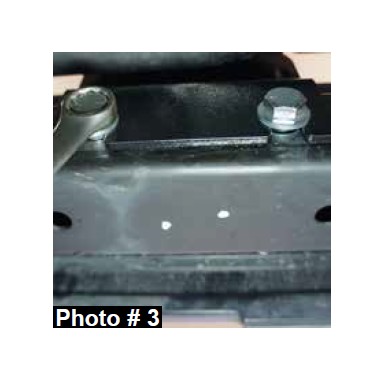
4. Install the new Skyjacker frame bracket (Part # JKSTS-1) to the frame using the supplied 1/2" x 4 1/2" coarse thread bolts, washers, & nuts using a 3/4" socket / wrench. Do not fully tighten at this time. (See Photo # 3) Note: If the vehicle is equipped with the OEM receiver hitch or tow hook, reuse the OEM 12mm bolts loosened in Step # 3 to install the new frame bracket (Part # JKSTS-1).
5. Connect the OEM rear bumper to the frame using the OEM hardware & a 16mm socket / wrench. (See Photo # 1)
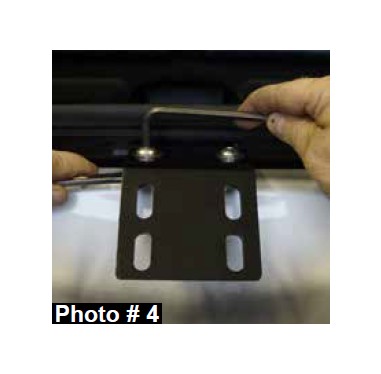
6. Install the new Skyjacker bracket "A" (Part # JKSTS-2A) to the new Skyjacker frame bracket (Part # JKSTS-1) using the supplied 3/8" x 3/4" button head bolts, washers, nuts, & a 7/32 hex key socket / wrench, & a 9/16" socket / wrench. (See Photo # 4) The end of the new bracket "A" (Part # JKSTS-2A) with two slots connects to the new frame bracket (Part # JKSTS-1) & the end of the new bracket "A" (Part # JKSTS-2A) with four slots should point toward the ground. Do not fully tighten at this time. Note: Depending on tire size & wheel backspacing, this new bracket "A" can be installed above or below the new frame bracket. (See Photos # 7, # 8, # 9, & # 10)
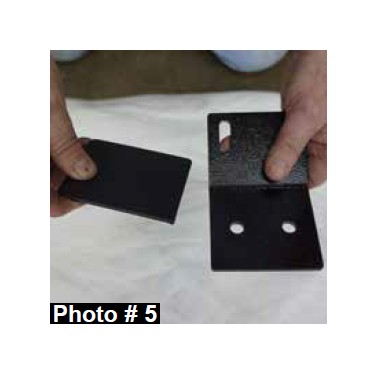
7. Install the supplied wear pad to the new Skyjacker bracket "B" (Part # JKSTS-2B). (See Photo # 5)
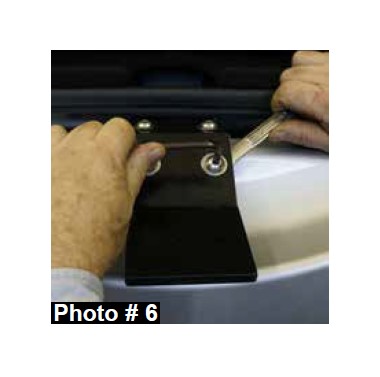
8. Install the new Skyjacker bracket "B" (Part # JKSTS-2B) to the new bracket "A" (Part # JKSTS-2A) using the supplied 3/8" x 3/4" button head bolts, washers, nuts, & a 7/32 hex key socket / wrench, & a 9/16" socket / wrench. (See Photo # 6) Do not fully tighten at this time. Note: Depending on tire size & wheel backspacing, this new bracket "B" can be installed above or below the new bracket "A". (See Photos # 7, # 8, # 9, & # 10)
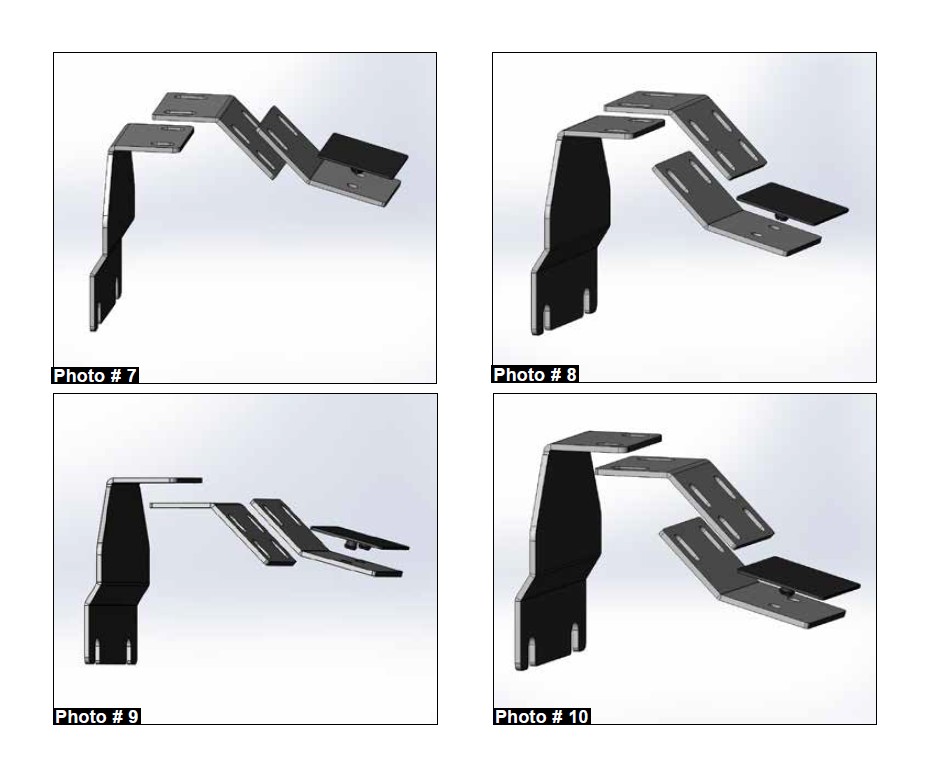
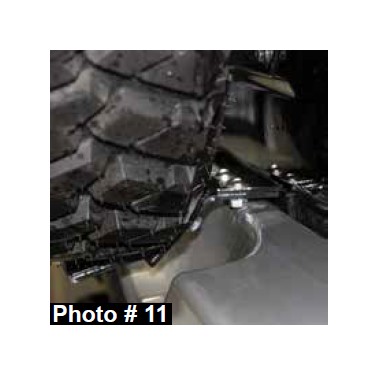
9. Slowly rotate the OEM tailgate to the newly assembled tailgate support bracket until the tire makes contact with the wear pad on the new bracket "B" (Part # JKSTS-2B) just before completely closing. (See Photo # 11) Note: Adjust the slots & / or move the new brackets "A" (Part # JKSTS-2A) & "B" (Part # JKSTS-2B) above or below one another to achieve the proper fitment. (See Photos # 7, # 8, # 9, & # 10) Also, be sure the 3/8" bolts on the new frame bracket (Part # JKSTS-1) clear between the OEM tailgate & OEM bumper The new frame bracket (Part # JKSTS-1) can be adjusted slightly upward if needed.
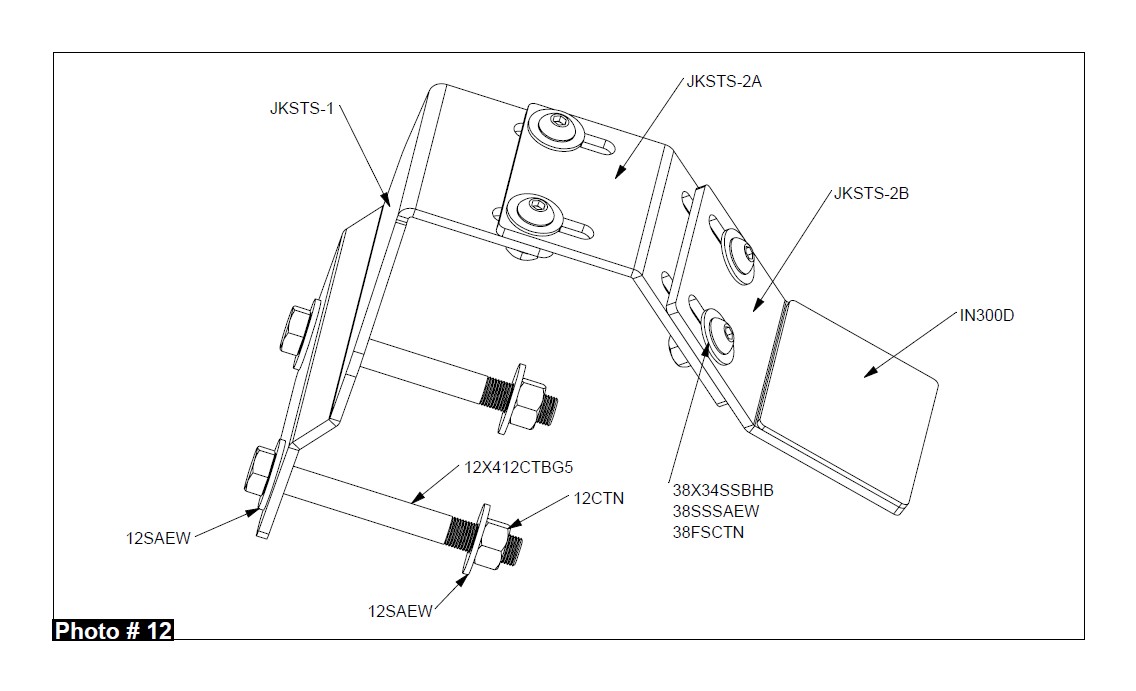
10. Fully tighten all hardware of the new Skyjacker tailgate saver spare tire support bracket using a 7/32" hex key socket / wrench, 9/16" socket / wrench, & 3/4" socket / wrench. (See Photo # 12)
Final Notes:
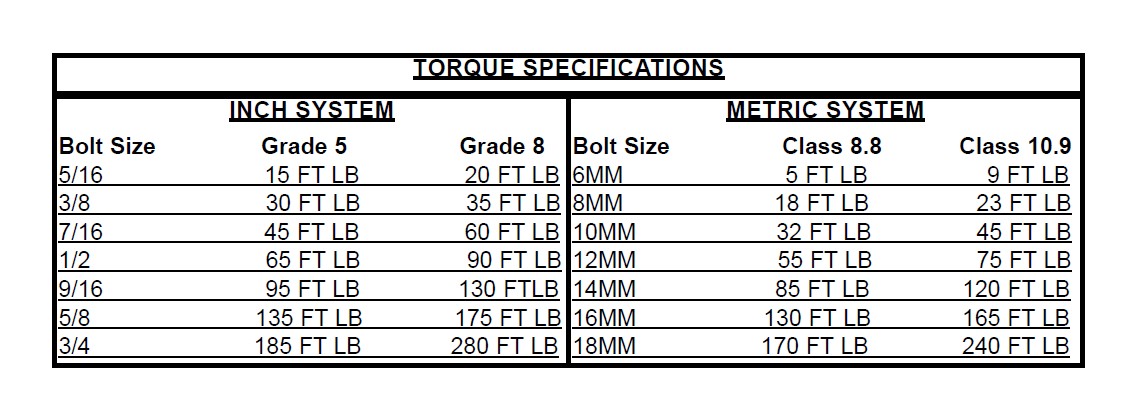
• After the installation is complete, double check that all nuts & bolts are tight. Refer to the following chart for the proper torque specifications. (Do not retighten any nuts & bolts where thread lock compound was used.)
• After the first 100 miles, check all hardware for the proper torque & periodically thereafter.