 FREE 1 to 3-Day Delivery on Orders $149+ Details

How to Install SkyJacker Softride Hydro Front Shock for 2.5 in. Lift (07-18 Jeep Wrangler JK) on your Jeep Wrangler
Installation Time
2 hours
Tools Required
- Ratchet
- Jack and Jack stands
- 19mm Socket
- 18mm Socket
- Dish Soap
- Wire Cutters
- 7/16 Open End Wrench
- 2 16mm Open End Wrenches (a 5/8 will do in a pinch)
- 18mm Open End Wrench
- Torque Wrench
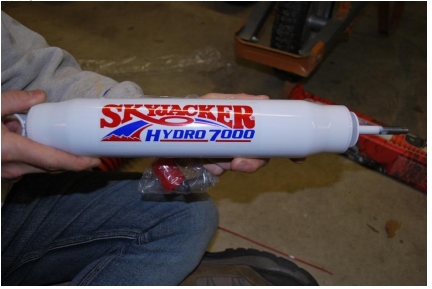
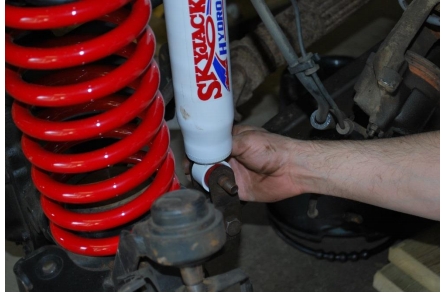
Skyjacker Softride Hydro Front Shock for 2.5 in. Lift
Manufacturer Part Number H7035
Model Number J15014
This guide is for installing the Skyjacker Softride Hydro Front Shock for 2.5 in. Lift (H7035) on a 4 door 2007- 2017 Jeep Wrangler. Read all instructions carefully before starting.
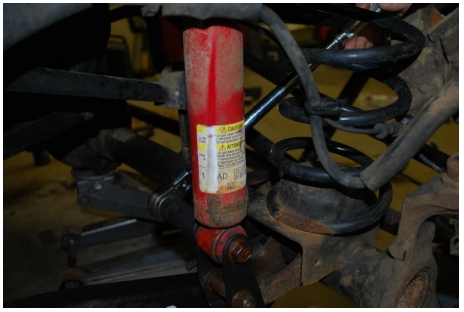
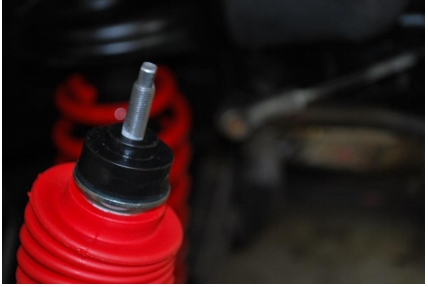
Before
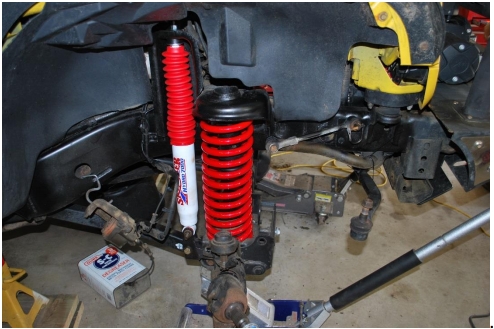
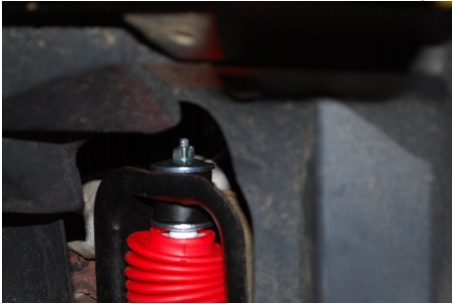
After (note that the springs were also replaced at this time)
Installation Instructions:
1. If possible, pre-soak all of the fasteners below with penetrating oil prior to starting the work. It will make removing them easier.
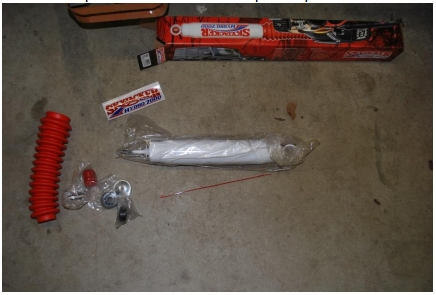
2. Remove the parts from the box and inspect all parts.
3. Apply the sticker on the shock (optional).
4. Apply a liberal amount of dish soap in the shock mount and press the bushing into the mount with your hand.
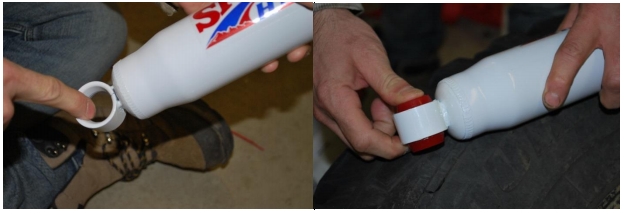
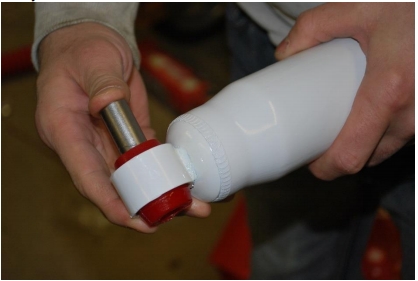
5. Apply a liberal amount of dish soap in the bushing and press the inner bushing into the rubber bushing with your hand.
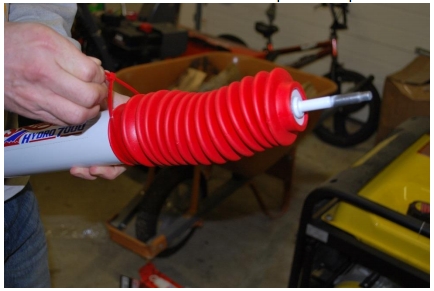
6. Install the shock boot and secure with the provided zip tie. Trim the excess zip tie with wire cutters.
7. Park the vehicle on level ground and apply the parking brake.
8. Jack the front of the vehicle off the ground and support it on jack stands.
9. Using an 19mm socket and ratchet, remove both front wheels.
10. Support the front differential with a jack.
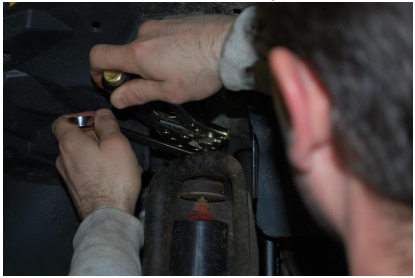
11. Using an 18mm socket and ratchet and 18mm Open End Wrench, remove the lower shock bolt.

12. Using 2 16mm Open End Wrenches (or a 16mm and a 5/8), remove the upper shock mounting nut. This can be tedious. In the pictures, vice grips were used, this can also substitute one of the wrenches.
13. Remove the shock making sure you remove both of the rubber grommets from the upper shock mount.
14. Place upper shock mount grommet on the new shock and install the upper shock through the mount.
15. Place the other grommet on the upper shock bolt and tighten the upper shock nut until the upper mounts expand to about the same diameter as the washers using a 7/16 Open End Wrench.
16. Extend the shock by hand and line up the bottom of the shock with the lower shock mount.
17. Reinstall the original lower shock mount bolt and tighten with an 18mm Socket and Torque to 90 lb/ft.
18. Reinstall the wheels and tighten lug nuts to 90 lb/ft.
19. Check all bolts after driving 50 miles.
Installation Instructions Written by ExtremeTerrain Customer Michael E. 5/1/2019
