FREE 1 to 3-Day Delivery on Orders $149+ Details

How to Install SkyJacker LOWjacker 2-2.5 in. Lowering Sports Coil Springs (07-17 Wrangler JK) on your Jeep Wrangler
Tools Required
- Safety Glasses
- Metric / Standard Sockets & Wrenches
- Floor Jack
- Jack Stands
- Measuring Tape
- Torque Wrench

Shop Parts in this Guide

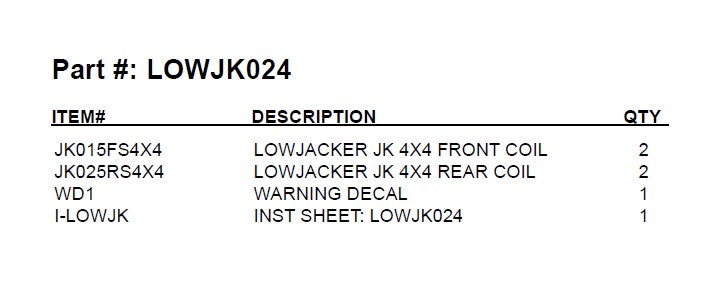
Before beginning the installation, thoroughly & completely read these instructions & the enclosed driver’s WARNING NOTICE. Affix the WARNING decal in the passenger compartment in clear view of all occupants. Please refer to the Parts List to insure that all parts & hardware are received prior to the disassembly of the vehicle. If any parts are found to be missing, contact SKYJACKER® Customer Service at 318-388-0816 to obtain the needed items. If you have any questions or reservations about installing this lift kit, call SKYJACKER® Technical Assistance at 318-388-0816.
Make sure you park the vehicle on a level concrete or asphalt surface. Many times a vehicle is not level (side-to-side) from the factory & is usually not noticed until a lowering kit has been installed, which makes the difference more visible. Using a measuring tape, measure the front & rear (both sides) from the ground up to the center of the fender opening above the axle. Record this information below for future reference.

IMPORTANT NOTES:
• After installation a qualified alignment facility is required to align the vehicle to OEM specifications.
Kit Box Breakdown:
Front Installation:
1. Park the vehicle on flat, level ground, set the emergency brake, & block the rear tires / wheels.
2. Raise the front of the vehicle & support the frame rails & differential using jack stands.
3. Remove the front tires / wheels & disconnect the front sway bar end links using a 18mm socket.
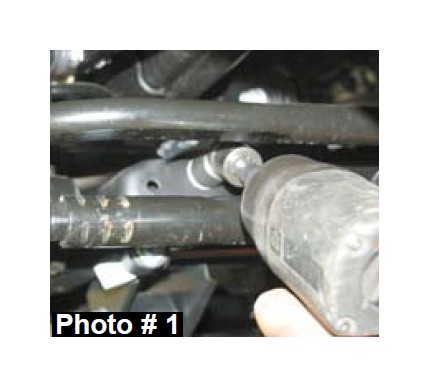
4. Disconnect the front track bar using a 21mm socket. (See Photo # 1)
5. Disconnect the front shocks using a 18mm socket.
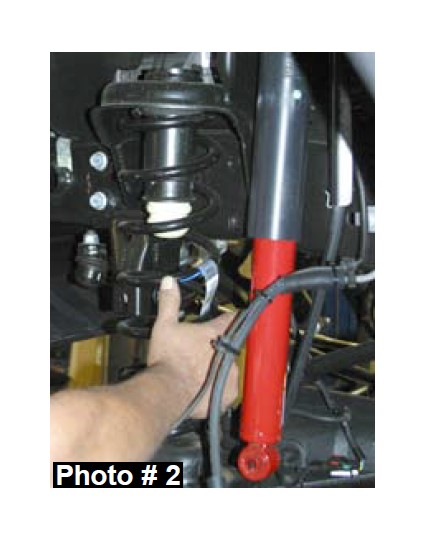
6. Lower the differential & remove the front coil springs. (See Photo # 2)
7. Install the new Skyjacker front coil springs & let the weight of the frame down on to the new coil springs.
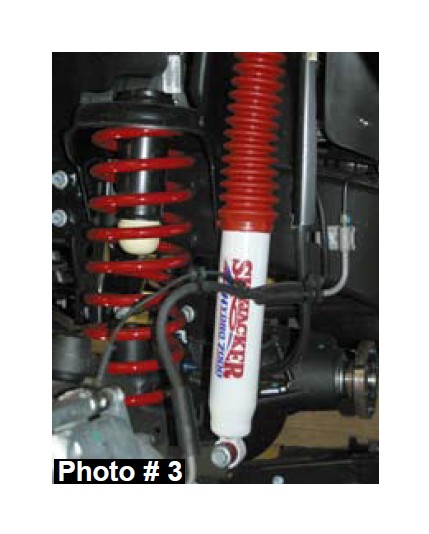
8. Reconnect the front sway bar end links, front track bar, & install the new Skyjacker front shocks using the supplied & OEM hardware. (See Photo # 3)
9. Install the front tires / wheels & lower the vehicle to the ground.
Rear Installation:
1. Block the front tires / wheels.
2. Raise the rear of the vehicle & support the frame rails & differential using jack stands.
3. Remove the rear tires / wheels & disconnect the rear sway bar end links using a 18mm socket.
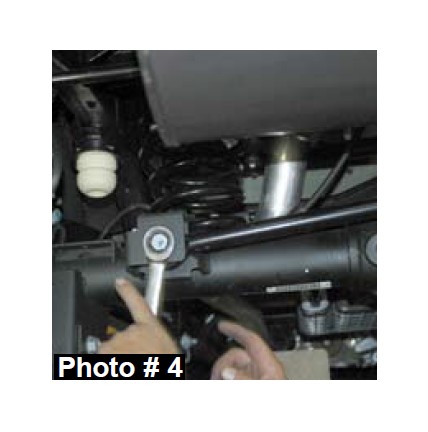
4. Disconnect the rear track bar using a 21mm socket. (See Photo # 4)
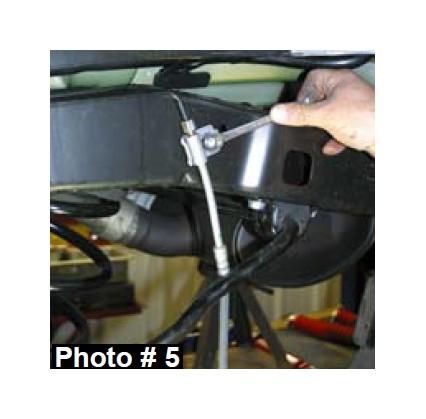
5. Disconnect the rear shocks using a 16mm socket & disconnect the ABS line & brake line from the frame. (See Photo # 5)
6. Lower the differential & remove the rear coil springs.
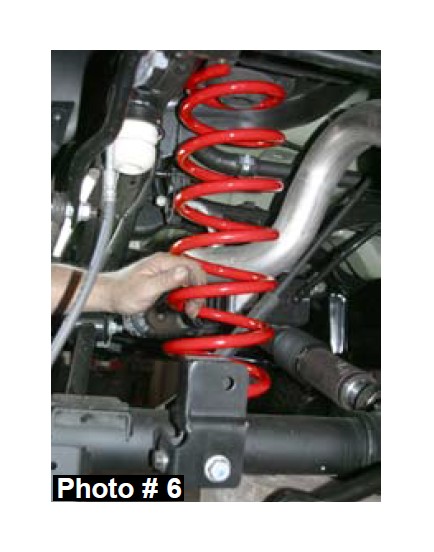
7. Install the new Skyjacker rear coil springs & let the weight of the frame down on to the new coil springs. (See Photo # 6)
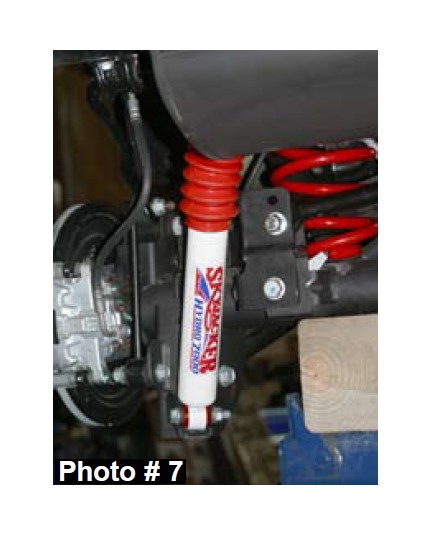
8. Reconnect the rear sway bar end links, rear track bar, & install the new Skyjacker rear shocks using the supplied & OEM hardware. (See Photo # 7)
9. Install the rear tires / wheels & lower the vehicle to the ground.
FINAL NOTES:
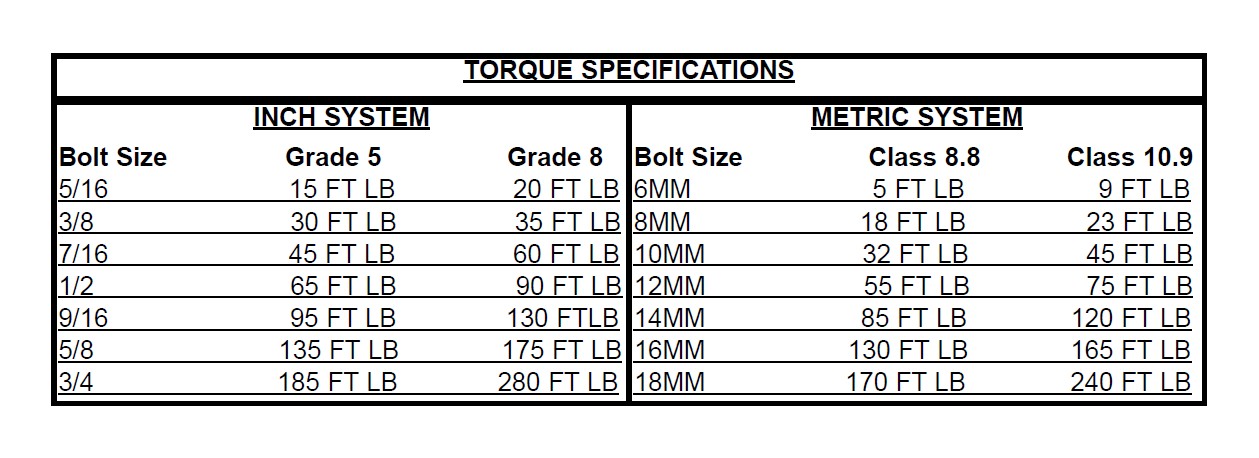
• After the installation is complete, double check that all nuts & bolts are tight. Refer to the following chart below for the proper torque specifications. (Do not retighten the nuts & bolts where thread lock compound was used.)
• With the vehicle placed on the ground, cycle the steering lock to lock & inspect the steering, suspension, brake lines, front & rear drivelines, fuel lines, & wiring harnesses for proper operation, tightness, & adequate clearance.
• Have the headlights readjusted to the proper settings.
• Have a qualified alignment center realign the vehicle to the OEM specifications.
• Retorque all the bolts after the first 100 miles.