FREE 1 to 3-Day Delivery on Orders $149+ Details

How to Install Rugged Ridge Front Bumper Winch Plate on your 13-18 Jeep Wrangler JK; 2018 Jeep Wrangler JL
Installation Time
2 hours
Tools Required
- Deep Well Sockets: 10mm, 16mm, 18mm deep well
- 10mm Wrench
- Socket Wrench
- Torque Wrench
- Phillips Screwdriver
- T30 Star Bit
- Utility Knife
- Sawzall or Grinder with metal cutoff wheel
- Black spray paint (Optional but Recommended)

Shop Parts in this Guide
Installation Instructions:
1. With a philips screwdriver, remove the 2 plastic screws on top of the front bumper cover. Be very gentle as these can strip easily. If they do strip, you can drill through the center to remove them. Then you can remove this cover by sliding it out the side.

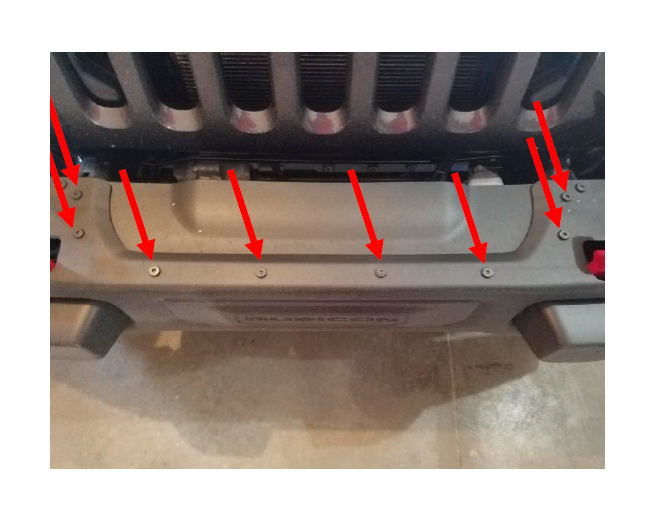
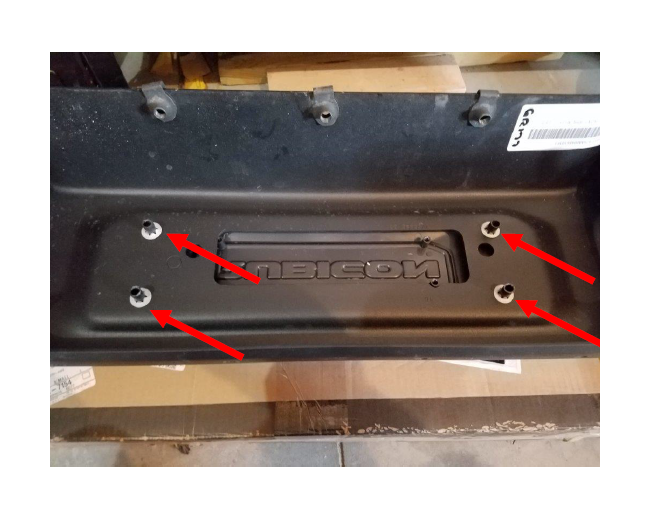
2. Next, using a wrench with a T30 star bit, remove the 8 bolts holding the winch cover plate. Then remove the plate.
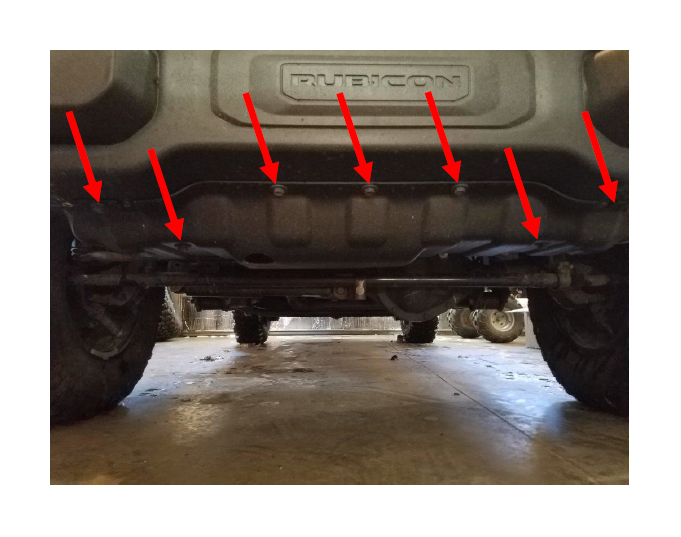
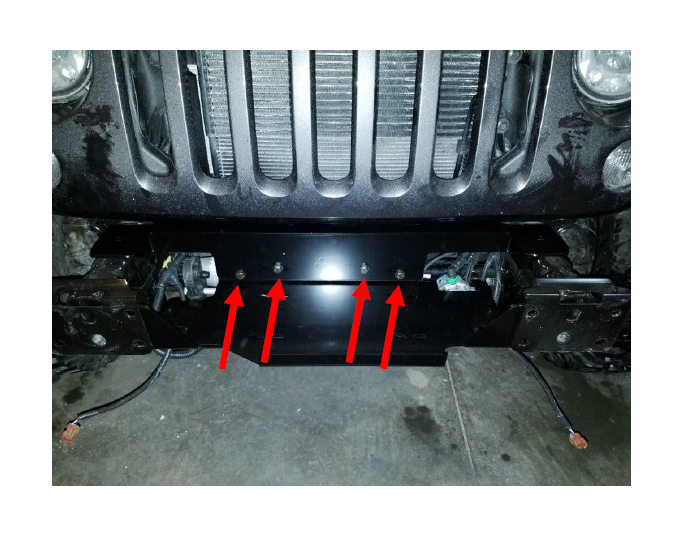
3. Using a 16mm socket, remove the 7 bolts holding on the front skid plate, and remove the skid plate.
4. Disconnect the fog light by pressing in on the sides of the wire harness until it slides off easily. Do this for both fog lights.
5. With a deep well 18mm socket remove the 4 bolts holding the bumper to the frame horn on both the passenger side and the driver side. 2 of the bolts are on the inside of the frame horn, and 2 are on the outside.
6. Then remove the backer plates under the nuts.
7. At this point you should have removed 8 nuts, and 4 backer plates that hold on the bumper. Now you can remove the bumper. Lift the bumper by holding the stock tow hooks. Make sure you have a soft place to put the bumper so it doesn’t get damaged.
8. Now from the inside of the bumper remove the 4 metal clips holding the plastic cover on. You can use a flathead to pry them off or you can cut them with tin snips. Note: If you are not installing a winch at this time you can leave this cover on. This cover is removed to install the fairlead.
Note: Steps 9-15 may or may not be required depending on the size of your winch. I recommend you test fit the winch plate and winch before proceeding. If the winch plate and winch fit then skip to step 16.
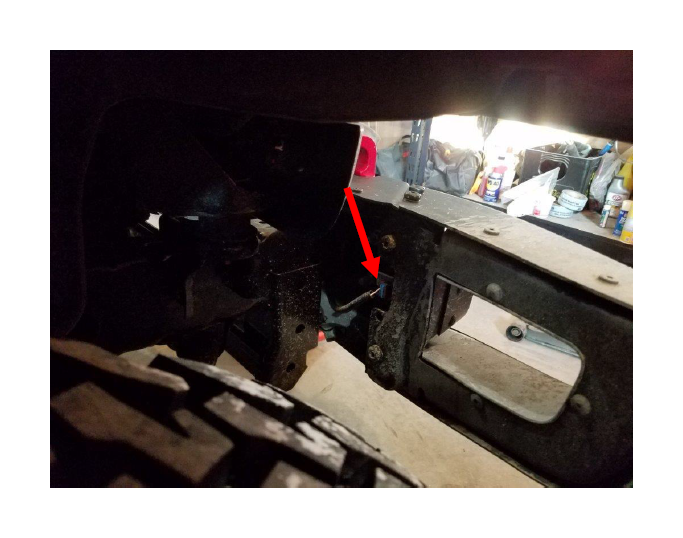
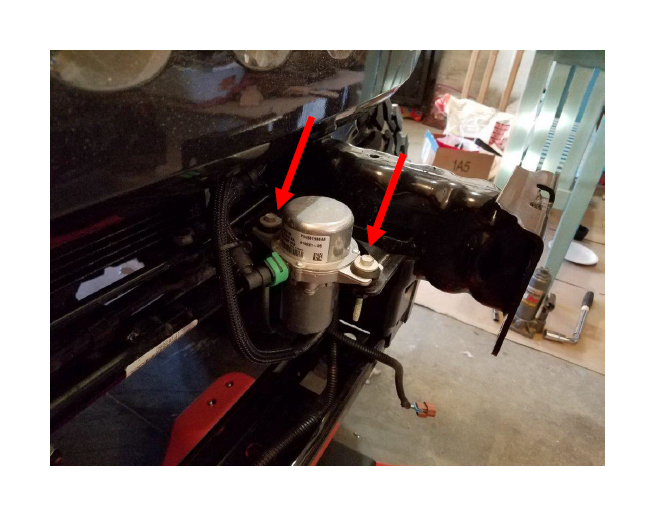
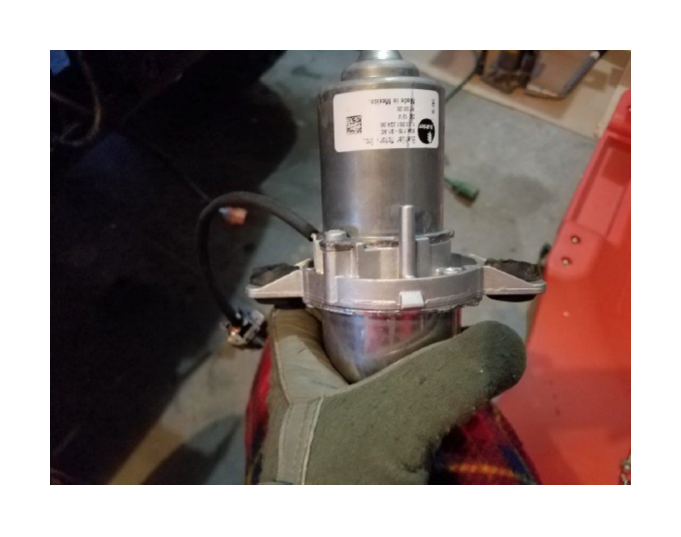
9. Remove the vacuum pump from the frame using a 10mm socket.
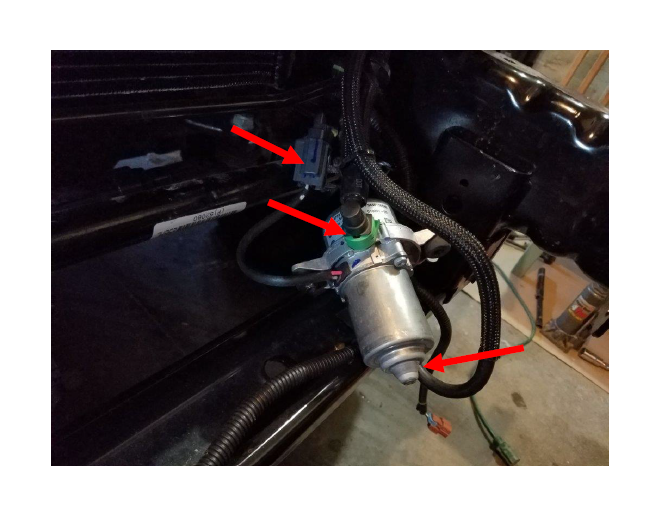
10. Disconnect the wire harness, the drain tube, and the vacuum tube. The vacuum tube can be removed by lifting the 4 tabs on the green connector shown below. Then place the vacuum pump aside.
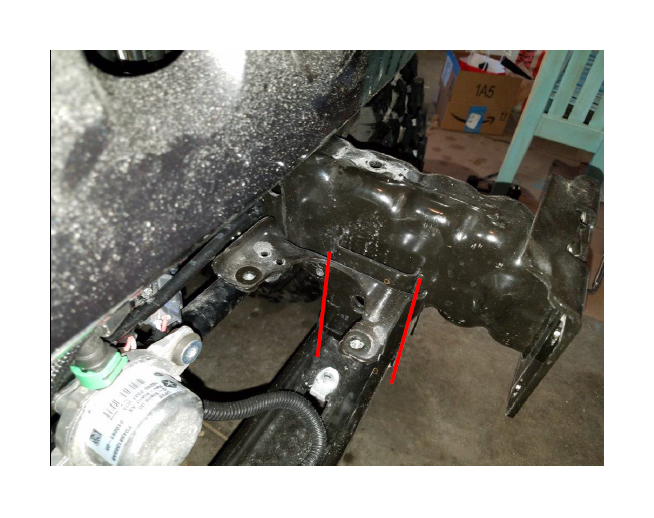
11. Using a grinder or sawzall cut along the lines shown. Be careful not to cut too deep, you are only trying to remove the outer bracket without damaging the frame. Once you cut through the majority of the way through the bracket you can use a screwdriver or pry bar to finish removing it without cutting into the frame.
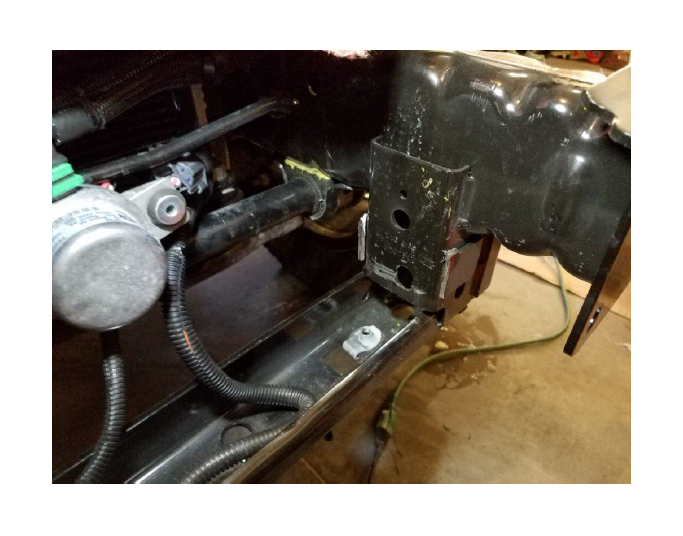
12. Once you have removed the bracket it should look about like this. I recommend using the grinder to smooth out the sharp metal edges. Then use black spray paint to cover the bare metal. This will help prevent rust.
13. I found that the supplied bolts are not long enough to hold the pump if you use the stock bushings. I recommend you remove the metal sleeve from inside this bushing, then use a utility knife to trim about ½” off the thick side of the bushing.
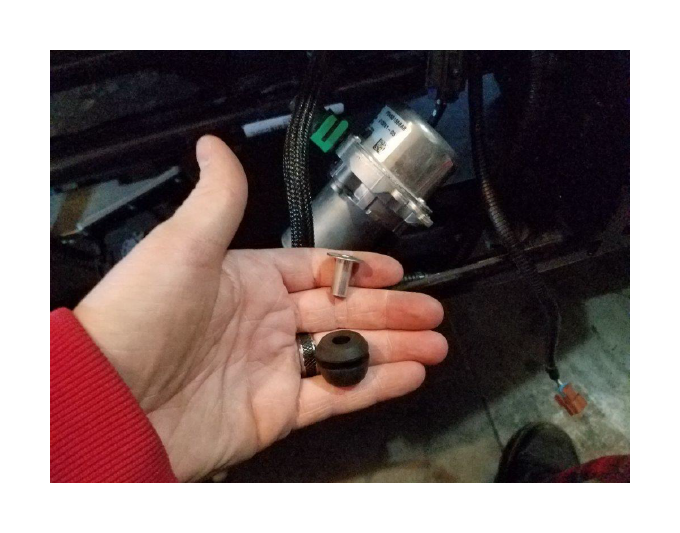
14. This is what the bushings look like trimmed. They aren’t pretty but that is ok.
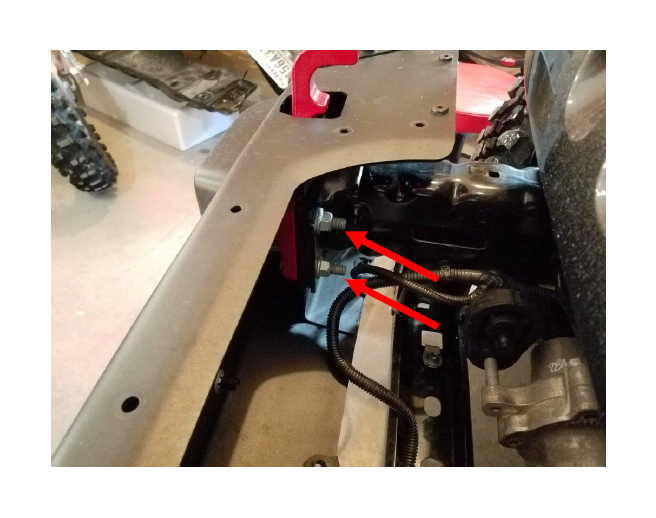
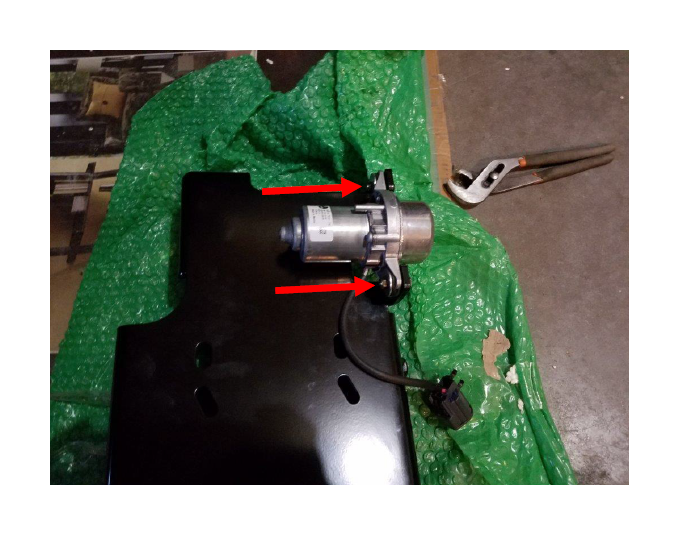
15. Using the supplied hardware, 10mm socket, and 10mm wrench, attach the vacuum pump to the underside of the winch plate as shown. I recommend adding a large washer so the nut doesn’t sink into the bushing.
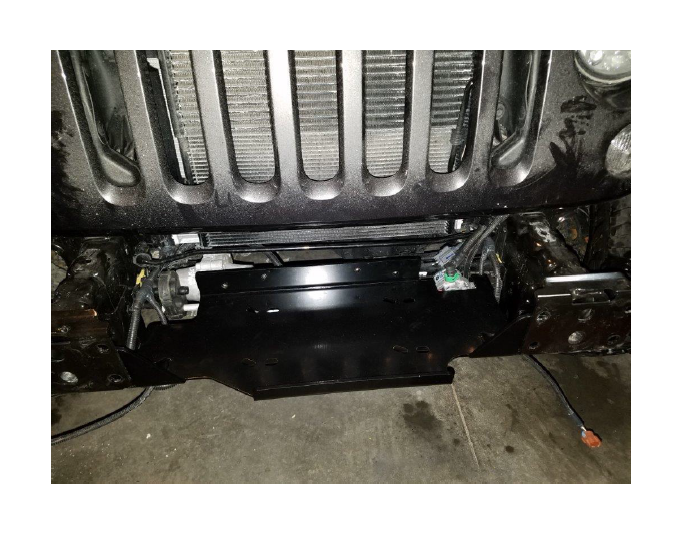
16. Insert the winch plate between the frame horns as shown below. Then reconnect the 2 hoses and wire harness removed from the vacuum pump. Note: You can see below there are 2 sets of winch mount holes. The straight holes are for offset mount, and the diagonal holes are for centered mount. You will need to choose the holes that work for your specific setup.
17. Insert the upper winch bracket as shown below. Install the 4 supplied bolts and washers. Just hand tighten for now.
18. Place a bolt and washer through the hole as shown to the right. Then insert the supplied flag nut as shown. Once inserted, hold the flag nut in place and hand tighten the bolt to the right. Now you can use a 16mm socket to fully tighten the 4 bolts from step 17.

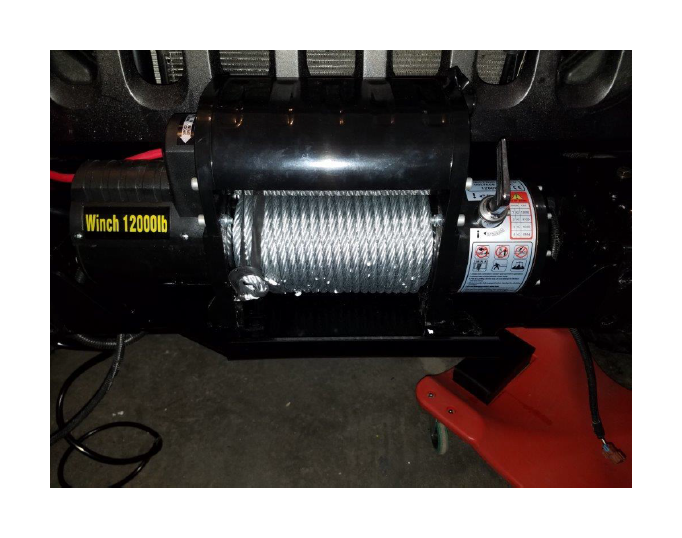
19. Next, attach the winch to the winch plate using the winch hardware, and following your winch install instructions. Note: If your winch is small enough you may be able to install it after installing the bumper.
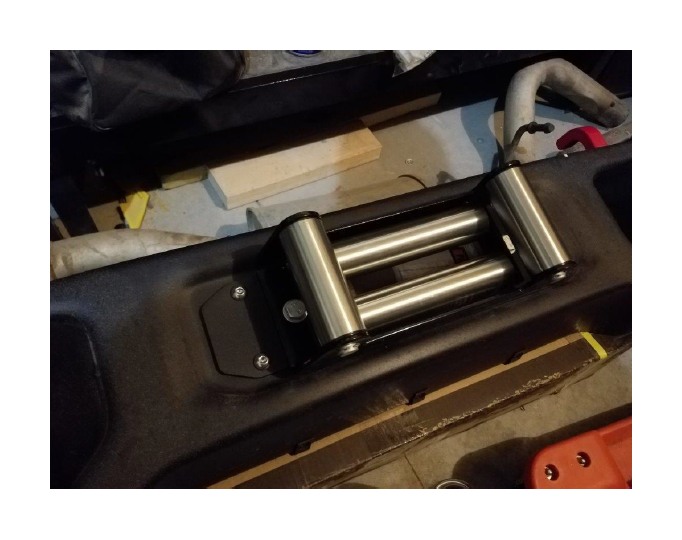
20. At this time you can also attach the fairlead to your bumper. Note: The stock Hardrock bumper is designed for offset winch mount. For center mount, you will require a centering plate as shown below. Make sure both the fairlead and winch are mounted the same, either both are centered or both are offset.
21. Disengage the winch clutch and pull out a foot or so of cable, then reengage the clutch. With the weight of the winch these 4 bolt holes may not line up perfect. Be prepared to lift up on the winch as you are installing the bumper.
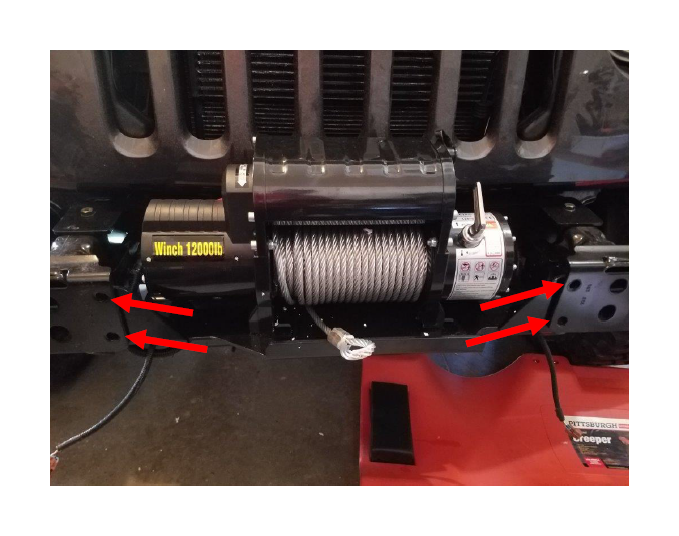
22. Lift the bumper by the tow hooks and place it back on the Jeep. Making sure to pull the winch cable through the fairlead as shown below. As stated above if you have trouble lining up the bolt holes on the winch plate, you can pull upward on the winch until the bumper slides into place.
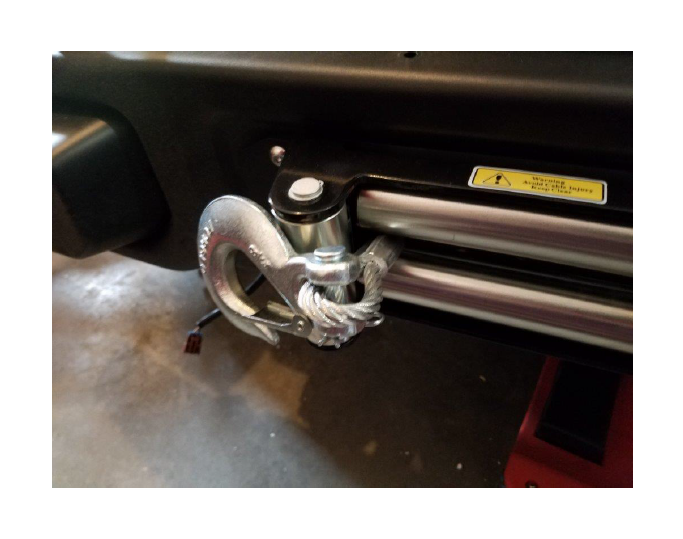
23. Install the winch hook with the supplied cotter pin to keep the cable from pulling back through.
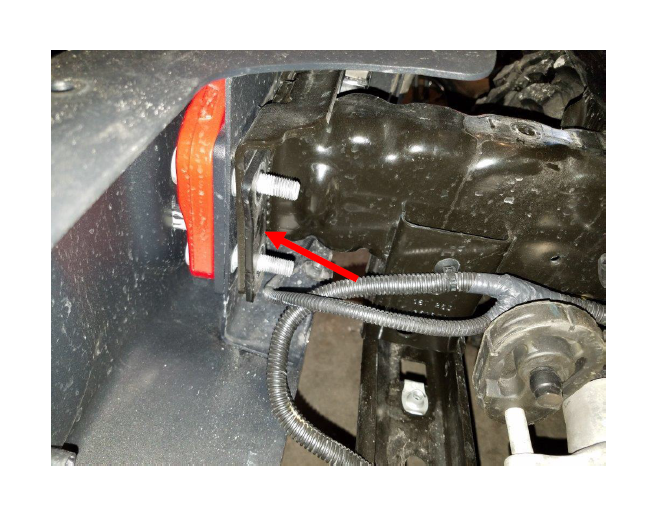
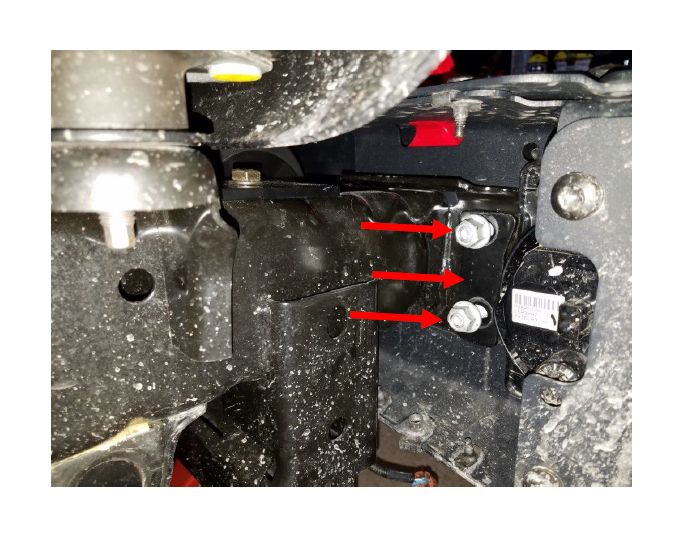
24. Now reinstall the factory bumper nuts. Install the backer plate and nuts as shown below for outside the frame horn. For inside the frame horn you will only be able to install the nuts. Tighten all 8 nuts using an 18mm deep well socket. Once they are all tight, torque them to 67ft/lbs.
25. Reconnect both fog light wires.

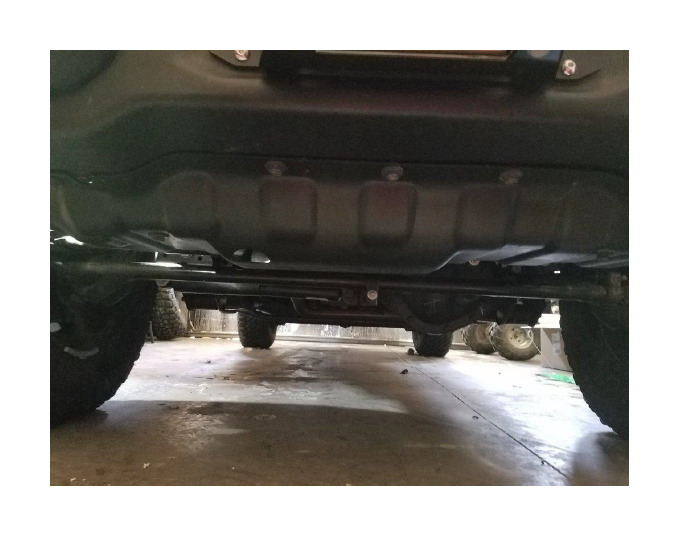
26. Reinstall the skid plate using the factory hardware.
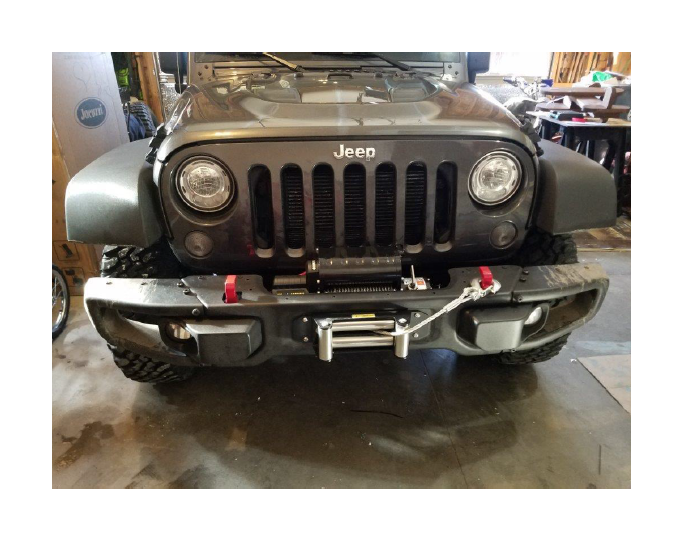
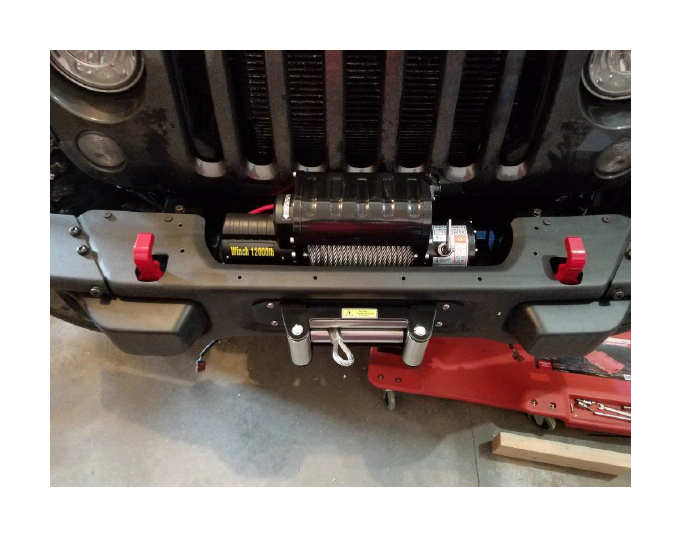
After Picture: