FREE 1 to 3-Day Delivery on Orders $149+ Details

How to Install Rugged Ridge Steel Body Armor Cladding - Textured Black (07-17 Wrangler JK 4 Door) on your Jeep Wrangler

Shop Parts in this Guide
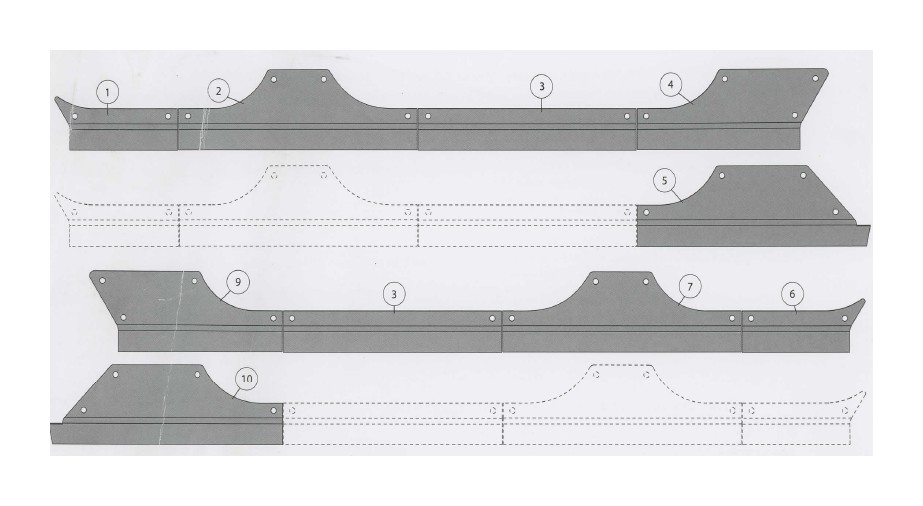
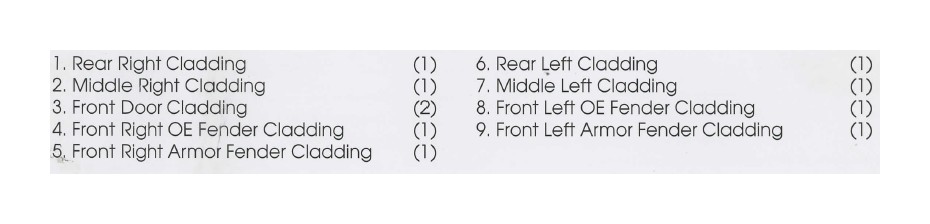
Components
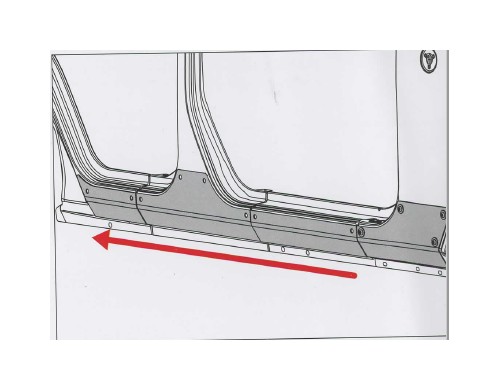
1. Remove any side steps. Clean around mounting area of XHD Armor Cladding.
NOTICE: Painter's tape can be used to protect vehicle paint from scratches during installation.

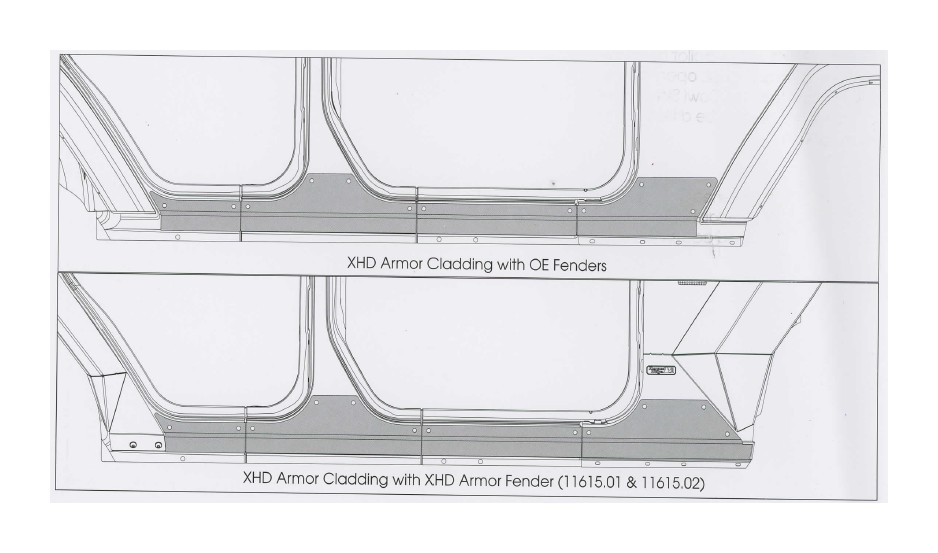
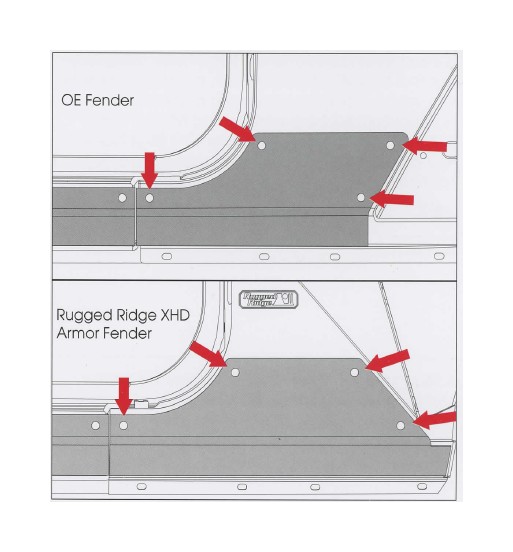
2. Using painter's tape, place driver side cladding pieces on vehicle. Align with vehicle door opening and fenders.
3. Mark mounting holes on Front Cladding. Remove Front Cladding.
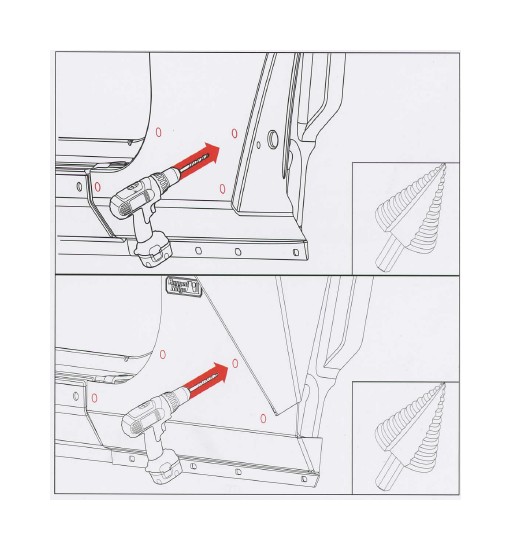
4. Using 1 /8" drill, make a pilot hole at four marked locations. Using a step bit, open hole to 13.5mm. For some locations the Cowl Side Panel behind the fender will also need to be drilled out too allow fitment of Rivet Nut.
Thin sheet metal can cause standard drill bits to grab. This could cause injury.
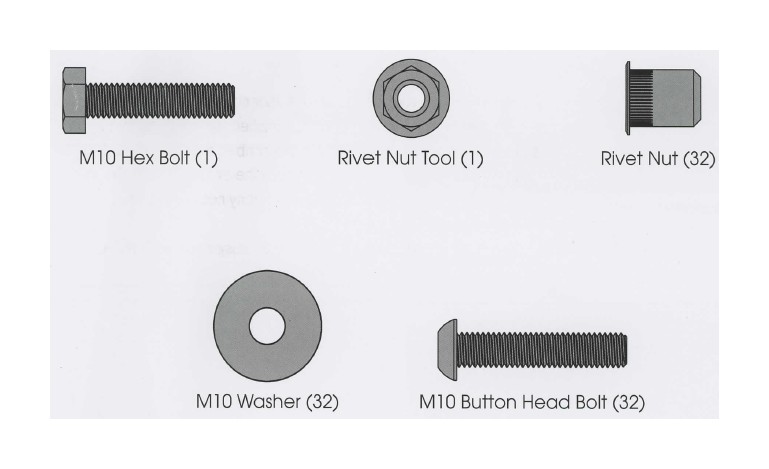
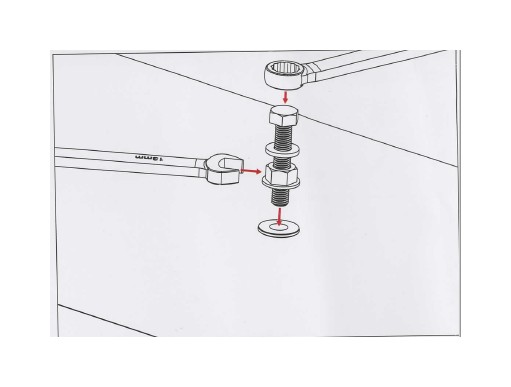
5. Insert Rivet Nut into newly drilled holes. Using Rivet Nut Tool and M10 Hex Head Bolt, collapse Rivet Nuts into vehicle panel. Use a wrench to prevent Rivet Nut Tool from spinning while turning M8 Hex Head Bolt. There will be slight resistance until Rivet Nut is fully collapsed. Rivet Nut can be damaged if over tightened.
NOTICE: If the Rivet Nut is spinning, apply more force to Rivet Nut Tool.
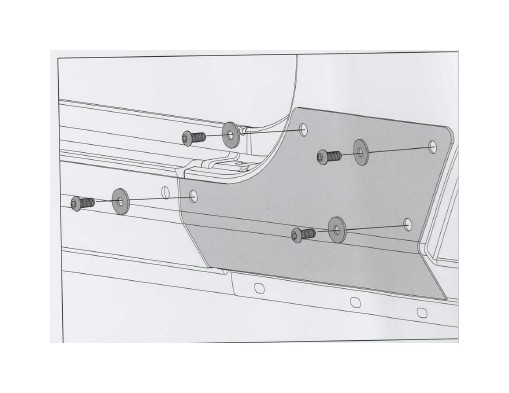
6. Mount Front Cladding using colapsed Rivet Nut and supplied M10 hardware.
7. Repeat steps 3-6 for remaining cladding pieces on driver side while working from front to back of vehicle.