FREE 1 to 3-Day Delivery on Orders $149+ Details

How to Install Rugged Ridge Skid Plate Front, Black on your 2007-2013 Wrangler

Shop Parts in this Guide
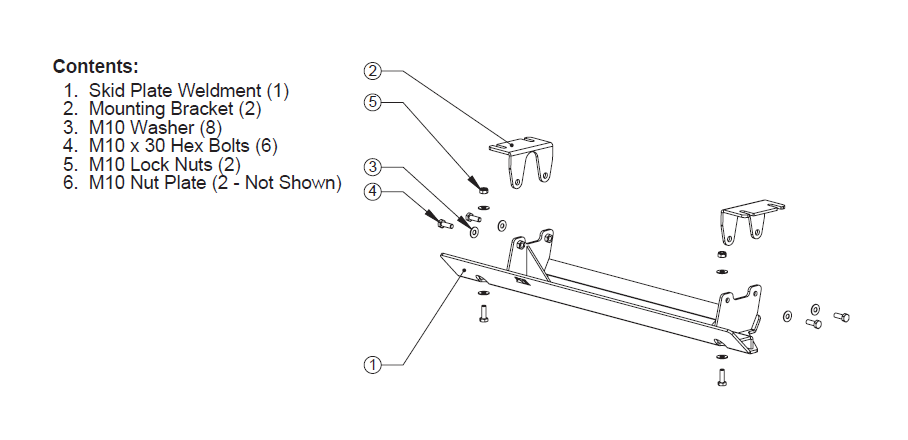
1. Loosen Swaybar Mounts (4 bolts). On Non-Rubicon models these need to be loosened approximately 1/2". On Rubicon Models, the bolts will need to be removed and the swaybar allowed to drop away from the frame.
2. Slide the Mounting Brackets in between the Swaybar Mounts and the Frame. On Rubicon Models, position the Mounting Bracket in the proper place and lift the swaybar back into place, re-installing original bolts but leaving them loose.
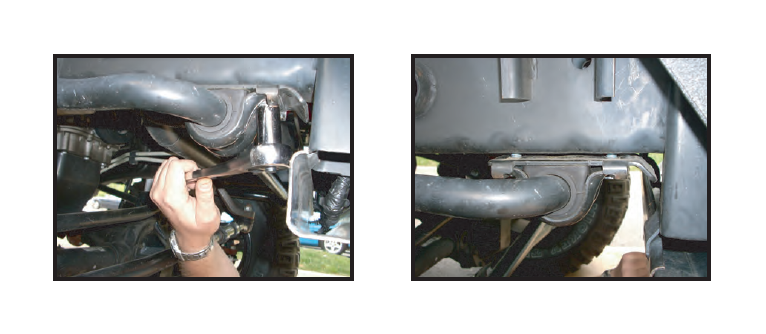
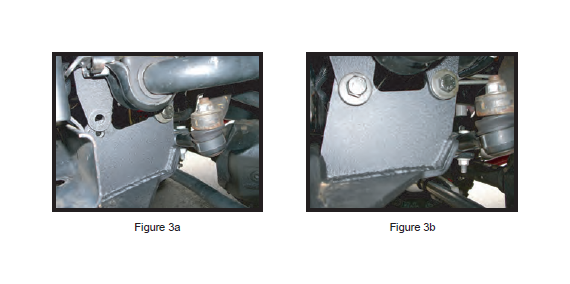
3. Position Skid Plate Weldment under vehicle and lift. Align and install rearmost Bolt on both sides (Figure 3a) but leave loose. Then, install front Bolts (Figure 3b) and leave loose. Note - Washers to be installed under bolt heads as illustrated in diagram on page 1.
4. Install bolts, washers, and locknuts that fasten Skid Plate to front crossmember. Do not tighten.
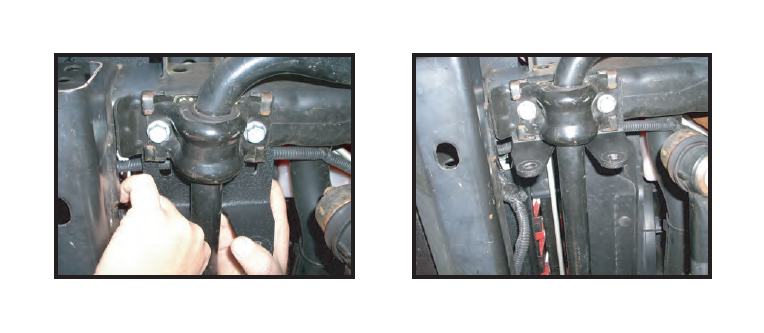
5. Tighten the Skid Plate Mounting Brackets to the Skid Plate Weldment (Figure 5a). Then tighten the factory Swaybar Brackets (Figure 5b). Finally, Tighten the Crossmember Bolts (Figure 5c).

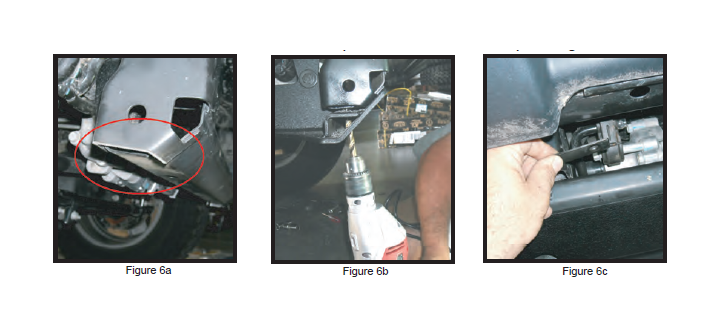
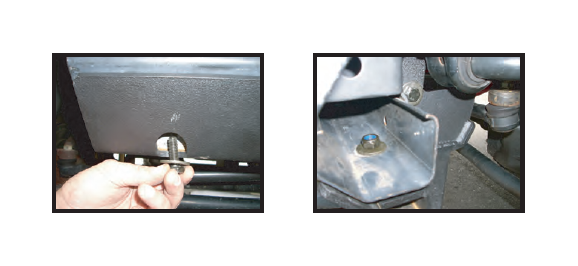
6. 2010 revisions to front cross member may require additional drilling and cutting to allow skid plate to fit correctly. Frame side supports may need to be cut flush with bottom of cross member (Fig.6A). Grind smooth and apply black paint. Install Skid plate as noted in step 3. If needed drill front mounting holes using 23/64" drill bit (Fig. 6B). Insert M10 nut plate from front side of skid plate (Fig.6C). NOTE: Aftermarket bumper may need to be removed to allow access to inside of cross member. Insert bolts, washer to front of skid plate as shown in step 4. Tighten all bolts.