FREE 1 to 3-Day Delivery on Orders $149+ Details

How to Install a Rugged Ridge Black Sailcloth Bowless XHD Soft Top w/ Tinted Windows & Surrounds

Shop Parts in this Guide
Contents:
1. XHD Bowless Top
2. Rear Roll Bar Cross Bar
3. Left Side Window
4. Right Side Window
5. Right Side Metal Surround w/ Padding
6. Left Side Metal Surround w/ Padding
7. (4) M8 Caps Head Bolts
8. (8) M8 Flat Washers
9. (4) M8 Plastic Knob
Caution - This product is designed to enhance the appearance of the vehicle and to shield the occupants from ordinary weather conditions, DO NOT rely on product to contain occupants within the vehicle, or to protect against injury or death in the event of an accident. This top will not protect the occupants from falling objects. Never operate vehicle in excess of manufacture’s specification. SEAT BELTS ARE TO BE WORN AT ALL TIMES.
Note: An aftermarket (no drill) windshield header will need to be purchased before top can be installed (Rugged Ridge p/n: 13308.04).
Before installing XHD Bowless top confirm contents and read installation instructions. Failure to do so may result in a poor fitting top and could place occupants in a potentially dangerous situation. The bowless top is designed to use new metal door surrounds. The XHD Bowless top (p/n: 13751.01 , .35, and .37 ) cannot be used with factory door surrounds. These tops cannot be installed if parts listed above are missing. Before driving reread instructions to confirm that the XHD Bowless top has been installed properly.
PLEASE NOTE: XHD Bowless top should be installed at a temperature above 72F. Below this temperature, the fabric may contract an inch or more, making it very hard to fit to the vehicle.
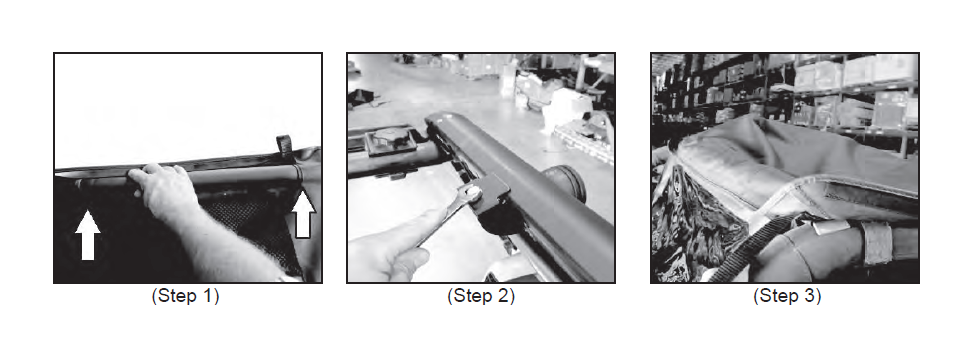
(Step 1) - With top on the ground make sure surround foam supports are slid into retaining pockets.
(Step 2) - Install new header to windshield frame. Follow manufactures installation instructions for header. Rugged Ridge part number (13308.04).
(Step 3) - With the help of a second person place XHD bowless top (without side windows installed) over roll bar. Make sure cross bar is resting on rear roll bar.
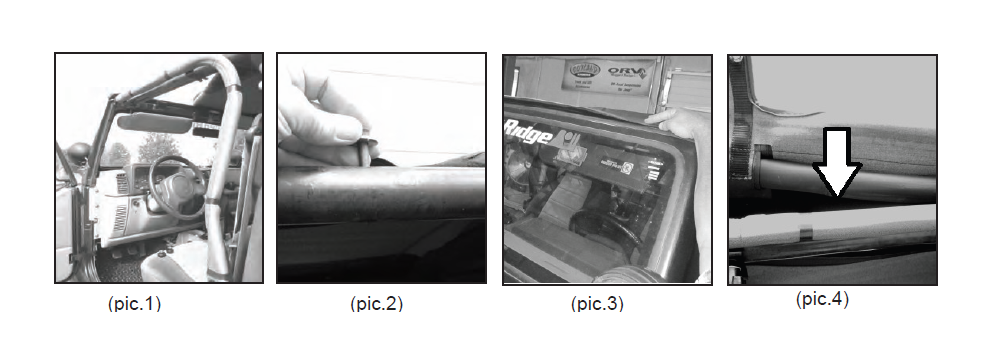
(Step 4) - Place metal door surrounds onto roll bar and tub as shown. Roll bar mounting tabs are to be placed to the underside of roll bar (pic.1). NOTE: new surrounds can be installed with or without rubber seal mounted to body tub at door opening.
(Step 5) - Place (2) M8 caps head bolts and flat washer through roll bar as shown. Do not install M8 plastic knob yet. Repeat for other side (pic.2).
(Step 6) - Pull top forward and lock front plastic retainer into windshield header. Make sure retainer is held in the full length of header (pic.3).
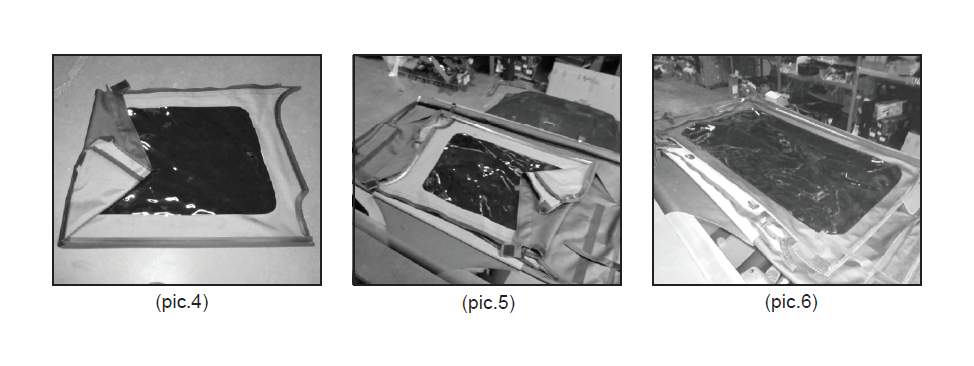
(Step 7) - Place sides of top over metal surrounds. Make sure foam pads rest between metal surround and roll bar (pic.4).
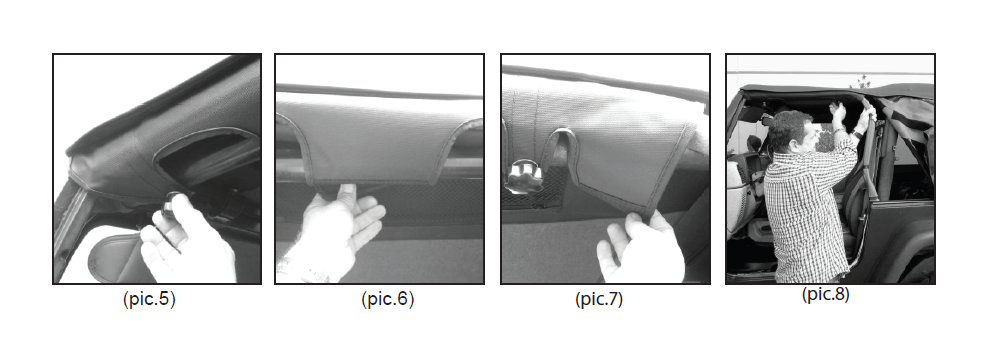
(Step 8) - Pull front and rear eyelet flap over roll bar and around door surround. Slip eyelets over M8 caps head bolt threads. Install M8 plastic knobs over eyelet flap. (Do Not Tighten) at this time. Repeat steps (7) and (8) for other side (pic.5).
(Step 9) - Pull center flaps tightly around door surround and secure hook side of Velcro to loop side sewn to underside of soft top.(pic.6).
(Step10) - Pull rear flaps tightly around door surround and secure hook side of Velcro to loop side sewn to underside of soft top(pic.7).
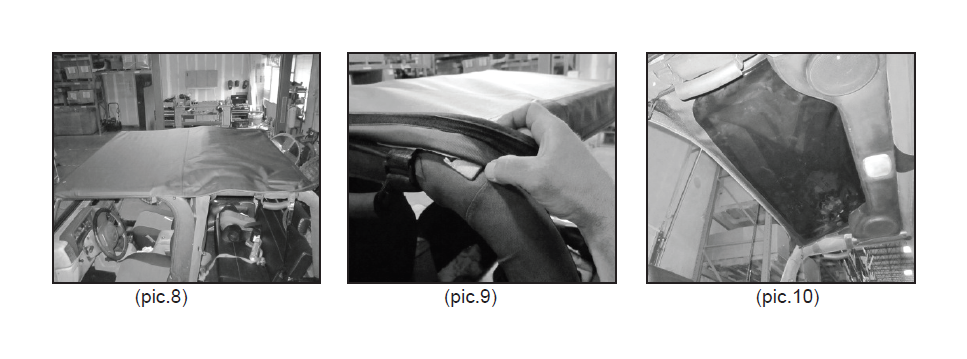
(Step11) - With both sides secured to door surround and soft top pull metal door surround away from roll bar to tighten top (pic.8). While holding surround in place tighten plastic knobs.
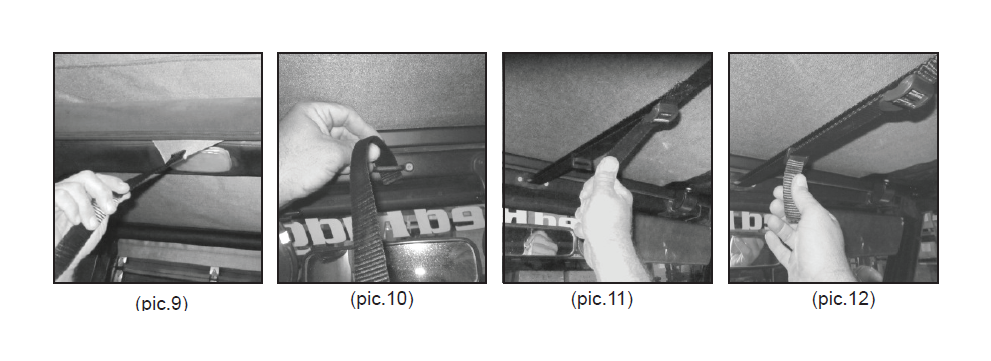
(Step12) - Slide center strap between roll bar and sound bar (pic.9). Pull strap forward and through windshield footman loop (pic.10). Loop strap through buckle and pull tight (pic.11).
(Step13) - Pull extra strap forward and slide through plastic loop as shown (pic.12).
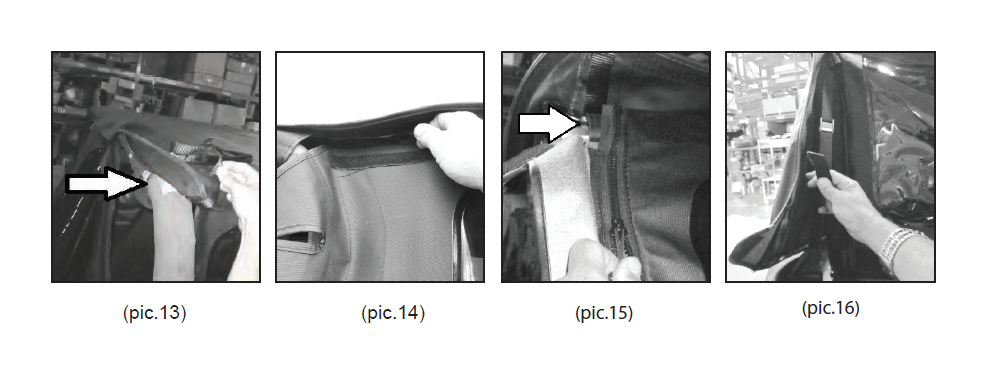
(Step14) - Pull rear of top into place over roll bar. Rear cross bar should rest at the start of the roll bar turn down. Top should be centered to cross bar and the roll bar (See arrow in pic.13).
(Step 15) - Attach side window zipper to bowless top. Pull zipper 1/3 back. DO NOT pull all the way back at this time. Repeat for other side (pic.14)
(Step 16) - Attach rear side window zipper to bowless top rear window. Pull zipper down about 3 inches (pic). DO NOT pull all the way down at this time. Make sure that rear tub strap and metal buckle are positioned under zipper of side window and rear window (See arrow in pic.15). Repeat for other side.
(Step 17) - Fish rear buckle strap behind side window and rear window zipper. Strap should run parallel to roll bar. Repeat for other side (pic.16). Do not pull tight at this time.
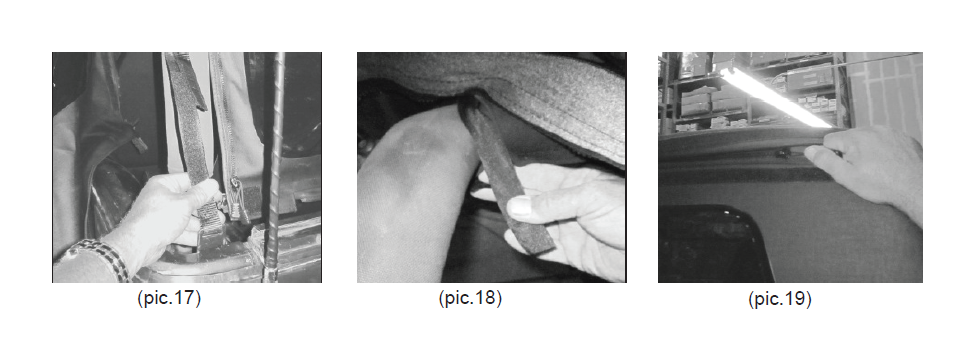
(Step 18) - Pull buckle strap down to body tub. Hook strap to the INSIDE of the tub and pull tight. Secure Velcro straps and repeat on other side (pic.17).
(Step 19) - Secure inner Velcro straps to roll bar. Straps should be looped to front bar as shown. Repeat for other side (pic.18).
(Step 20) - Pull side window zippers all the way back to rear window (pic.19). (Note: DO NOT OVER PULL ZIPPER).
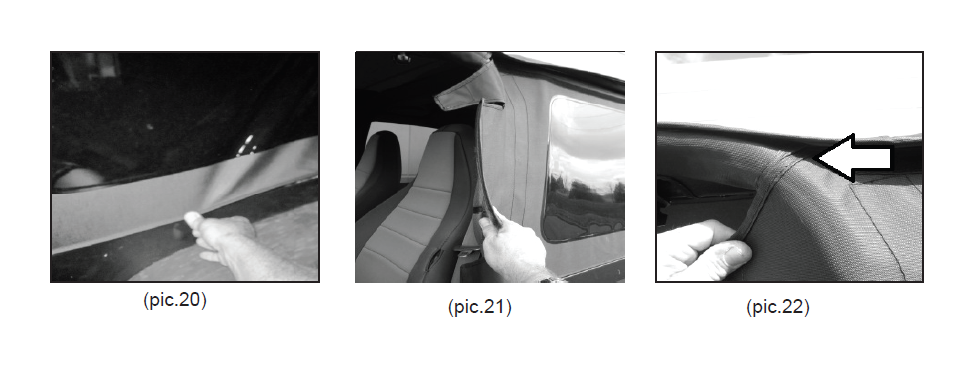
(Step 21) - Pull side window plastic tub retainer down and onto body tub. Start from the front of the vehicle and work you way to the back (pic.20). Repeat for other side.
(Step 22) - Pull side window front Velcro flaps tightly around door surrounds and secure Velcro to loop Velcro sewn to inside of soft top (pic.21). Repeat for other side.
(Step 23) - Pull all flaps tight around door surrounds. Inspect top flap to make sure it rest next to or just over the soft top rear surround flap (pic.22). There should be no gap between the two flaps. Repeat for other side.
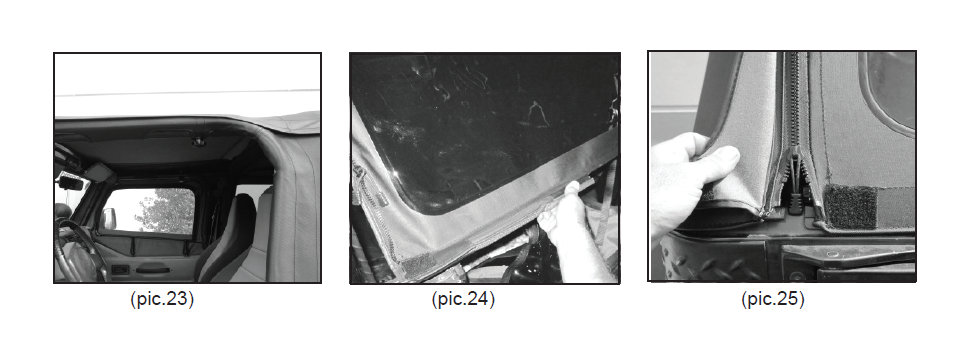
(step 24) - Check side Velcro flaps to insure they are tight around door surround (pic.23).
(Step 25) - Slide rear window tailgate bar onto top (pic.24). Please note that rear tailgate bar is not supplied with the bowless top. The rear bar is to be reused from factory hardware. If rear bar is needed please order Rugged Ridge part number (13550.01).
(step 26) - Pull rear window zippers down (pic.25). Check rear tub straps to insure they are still tight.
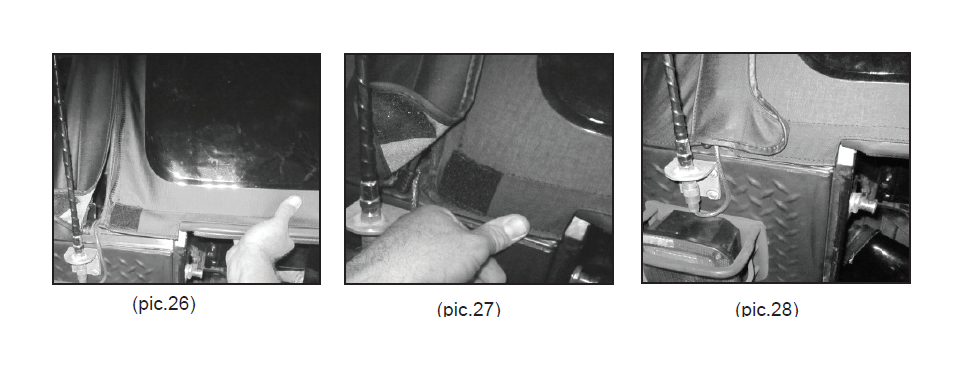
(Step 27) - Pull rear window down and lock rear tailgate bar into body tub retainer bracket (pic.26).
(Step 28) - Pull and lock plastic retainer flaps into body tub (pic.27).
(Step 29) - Pull rear window zippers down and seal with Velcro flaps (pic.28).
The XHD Bowless Top can be converted to a full length summer island top with the removal of side windows. Side windows are stored above roll bar for protection. No special storage flap or extra buckles are required.
(Step 1) - Remove side windows from vehicle. Removal will be the reversal of steps (15 - 25) from instruction sheets (3 - 6). Remove side Velcro straps from center roll bar.
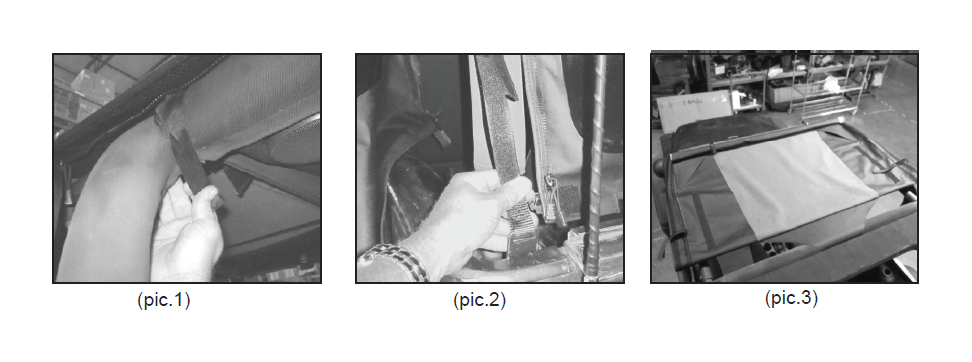
(Step 2) - Undo Velcro strap around roll bar (pic.1). Loosen rear buckle strap and remove from vehicle (pic.2).
(Step 3) - Remove rear tailgate bar from top (bar to be secured back to body tub after removal). Fold top over roll bar with rear window draped over front windshield (pic.3).
(Step 4) - Fold side windows as shown (pic.4).
(Step 5) - Place side windows onto front section of bowless top making sure windows are positioned between Velcro strips (pic.5).
(Step 6) - Fold rear window back over top making sure side windows stay centered. Pull Velcro loose from top of rear window and bowless top. Pull rear window tight and secure to Velcro on either side of bowless top (pic.6).
(Step 7) - Straps attached to rear window are to be used on vehicles not equipped with a full rear sound bar. Secure straps around roll bar and through plastic buckles. Pull straps tight. DO NOT use straps on vehicles equipped with full roll bar sound bar.
(Step 8) - Fold top over back of vehicle making sure rear window remains secured to Velcro strips. Rear window should be sandwiched between the bowless top and roll bar and sound bar if equipped (pic.8).
(Step 9) - Position rear cross bar onto vehicle making sure it is properly centered. Pull rear buckle straps back down over roll bar and secure hook to INSIDE of body tub. Pull strap tight and secure Velcro (pic.9).
(Step 10) - Rear window should be tight. Repeat steps (6 - 9) if glass in not tight (pic.10).
Washing: Fabric should be washed often using soap, warm water and a soft bristle brush. Rinse with clear water to remove all traces of soap.
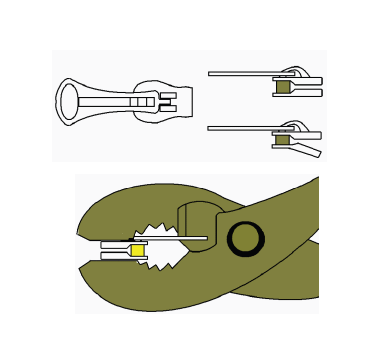
Zippers: Keep Zippers clean and lubricated with a silicone lubricant. If a zipper opens behind the slider, it can be repaired by using pliers to squeeze sides back parallel. Return Zipper back to normal open position. Squeeze until zipper operates correctly.
Windows: Keep windows clean to avoid scratches. DO NOT use a brush on windows! Wash with soaked cloth or sponge and mild dish washing detergent. NEVER WIPE WINDOWS WHEN DRY. Be care full when removing snow or ice. Windows will scratch and crack at low temperatures.